|
 Home |
What's New
| Features
| Gallery
| Reviews
|
Reference |
Forum
|
Search
Home |
What's New
| Features
| Gallery
| Reviews
|
Reference |
Forum
|
Search
Hasegawa's 1/72
scale
FM-1 Wildcat
by
Thomas Pedersen
|
 |
|
Eastern
Aircraft FM-1 Wildcat |

HyperScale is proudly supported by
Squadron.com
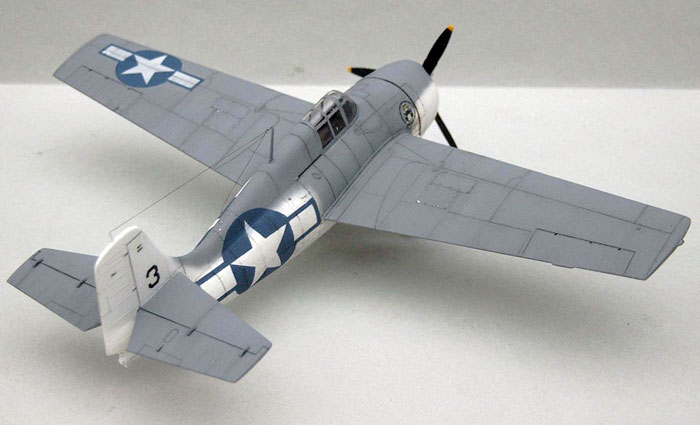
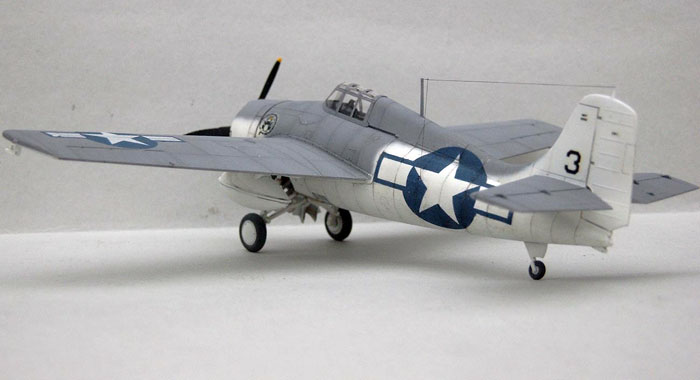
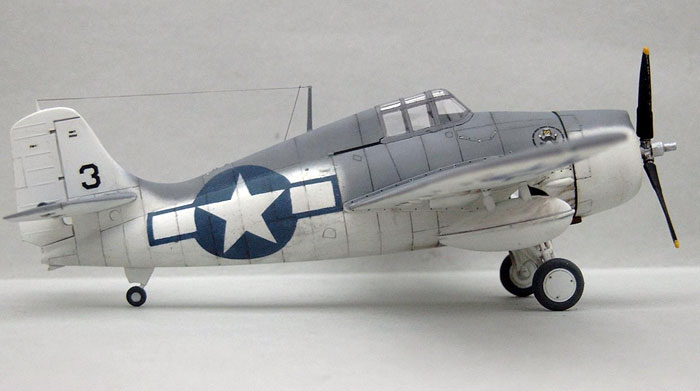
Here is one of my latest projects: Hasegawa's 1/72 FM-1
Wildcat. This is a model that has been 6 years underway because
of lack of interest in the subject. Then suddenly a month ago
when I was going through the stash I found it again and realized
that I only needed to attach the horizontal stabilizers and then
it was ready for painting.
At the time I started this, it was the first time I tried to
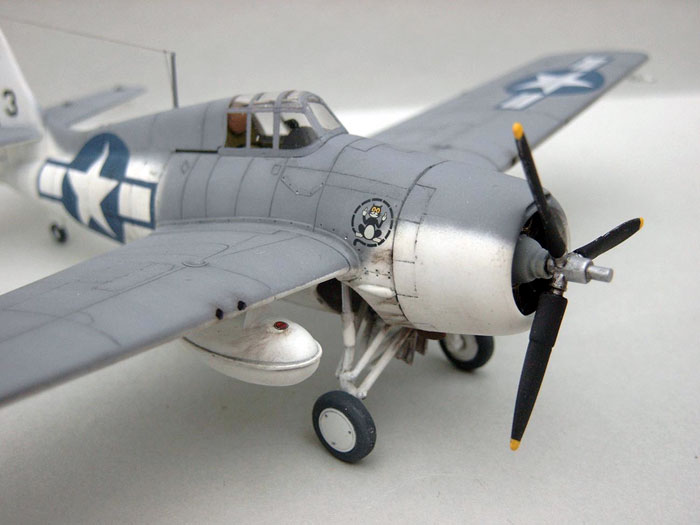
use etch (Eduard), and if i remember correctly it was fitting
the firewall (visible through the wheel well) that caused me so
much trouble the I put the kit aside. Having later done some
more models using etch, this was a easy fix to rectify now.
Eduards set consists of little more than the above mentioned
firewall and a ignition harness and should not cause anyone
other than me any trouble!
I can think of no problem regarding the construction of the
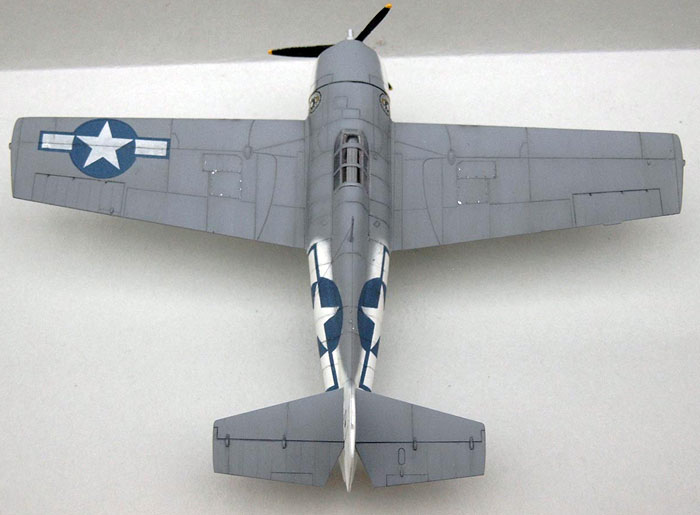
kit. It was a typical Hasegawa effort with finely engraved panel
lines, good fit and poor decals.
Painting, Markings and Finishing
|
I started painting the whole aircraft white ( a mix of
Humbrol 22 and a few drops of Extracolor X21 RFC natural
fabric). Then I used Humbrol 156 for the top surface, this color
being lightened with some drops of white for the center of all
the panels to create a slightly faded look. I find it much
easier to do this than to pre-shade and in this scale I also
think it works a little better.
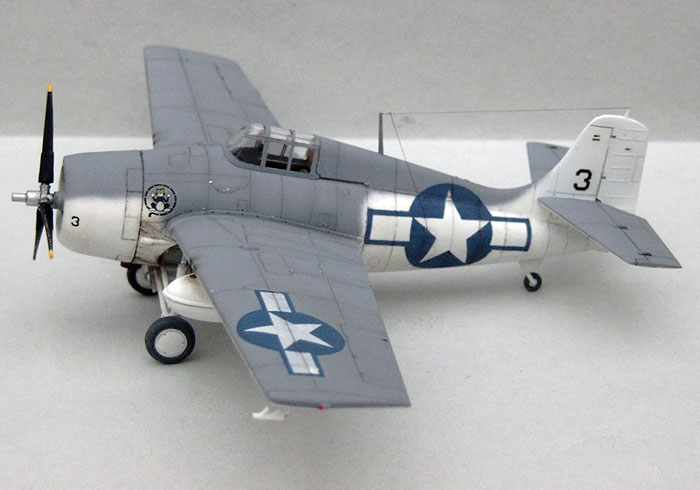
After a few days I washed the panel lines with a heavy
diluted Humbrol dark gray for the top surface and a light gray
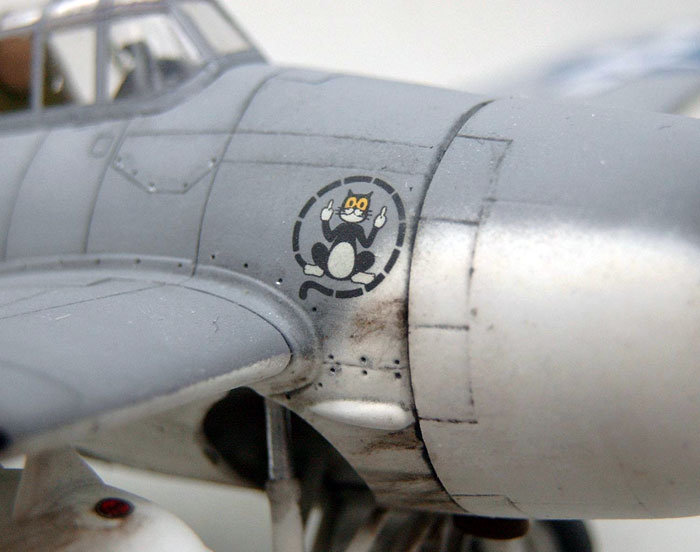
for the white areas. Exhaust stains was made with pastel chalk.
Then followed a coat of gloss and I was ready to put the decals
on.
The Hasegawa decals looks thick even on their sheet, but I
wanted to use the kit decals because of the very cool cat just
behind the cowling. But after fitting the first "star" on the
side and realizing that the white in Hasegawa's decals was more
like eggshell-yellow I quickly removed it again before it dried
up. I found replacements for all the stars on an old Delta-hobby
decal sheet (bought on a trip to Poland in 1992 for less than 25
cent a sheet), these decals are complete opposite of Hasegawa's
being ultra thin, very fragile and able to react to Solvaset.
The only negative thing was that I had problems with heavy
silvering after a layer of Testor's Dull Coat.
After some days looking at the decals I gently cut around the
stars and scraped the clear film of. Because the decals is so
thin they still blended in nice after on more dull coat.
For the antenna I simply used a hair fastened with superglue.
Any comments are welcome, so I can try and correct any
mistakes.
Click the
thumbnails below to view larger images:
Images Copyright © 2004 by
Thomas Pedersen
Page Created 02 December, 2004
Last Updated
02 December, 2004
Back to
HyperScale Main Page
Back to
Gallery Index |