|
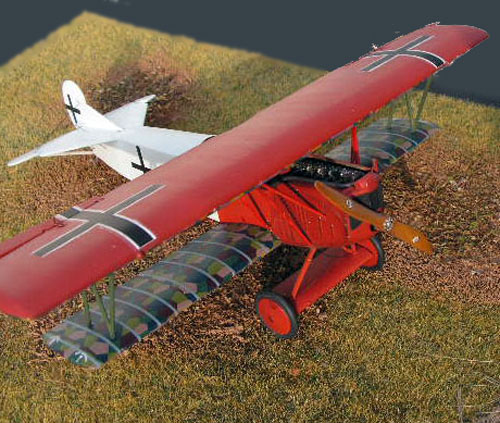
Roden's 1/48 scale
Fokker D.VII
F
by Armin Sobotzik
|
 |
|
Fokker D.VII F |

Roden's 1/48 scale Fokker D.VII is available online from
Squadron
Inspired by the picture of Hans Schultz’s plane (2455/18) in Squadron’s
“Fokker DVII in detail” I decided do build this late F-version in
colours of the famous Jasta 18.
The Kit:
The typical “old fashioned” box contents excellent formed and
detailed parts. There are no sprues overall, no sinkmarks, no oversized
structures. Roden has done a very professional job giving this kit a
touch of high-end quality.
Many thanks at this point to Rob Baumgartner for his excellent review
on
http://kits.kitreview.com/roden417reviewrb_1.htm
Update:
I discovered a suitable photo-eteched set from Part from Poland. It
was not very cheep (16,95 €) but it offers a nice mix of cockpit
details, fittings for struts and ailerons, machine guns and inner
fuselage construction.
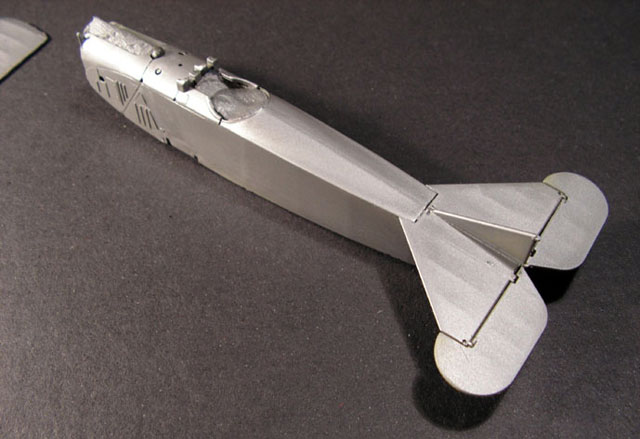
Pre-painting all surfaces:
A bad surprise I got by proving the surfaces of fuselage and wing
parts. Your fingers feel something like rough plastic on modern
desk-tops. So I decided to give all surfaces of fuselage and wings a
coat of Mr. Surfacer 1000. Next day I “polished” this coat smoothly with
1200 sandpaper and much water. To give white coloured planes a touch
more brightness, I prefer to pre-paint all parts with Tamiya AS
Aluminium.
Cockpit:
For inner sidewalls of the cockpit I used small pieces of lozenge
decal of an older propagteam-set. The photo-eteched cockpit details of
Part seemed undersized. So I used the kit ones. But the instrument board
of Part looks very nice after painting.
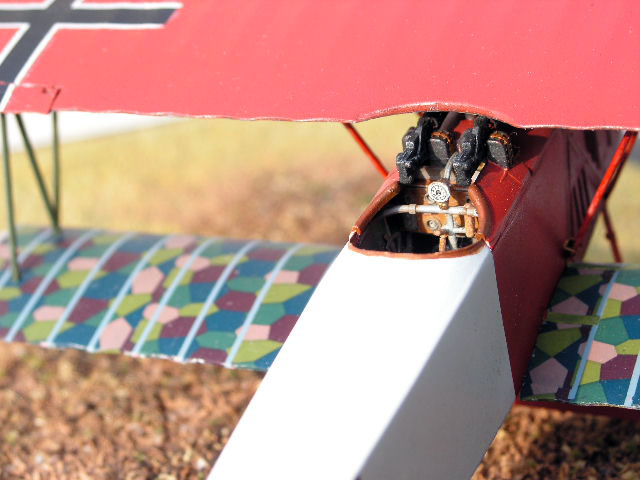
The fuselage structure and control columns are painted gunship grey,
mixed with 20% white. Cockpit floor, steering handles and instrument
board are painted light brown and thinned artist oil „burnt sienna“ to
imitate wooden structure.
Main construction:
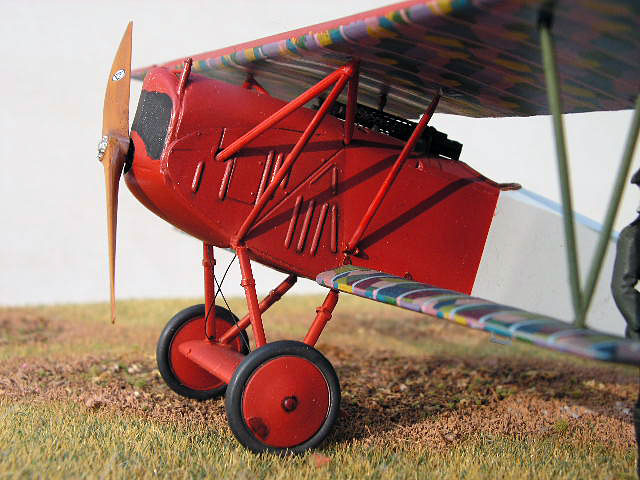
I decided to build the kit with closed engine covers. Fitting of
fuselage, wing halves, elevator, fin and rudders was good. Only a little
Tamiya Putty was needed for the engine cowling and wing tips. A little
more attention you should pay for correct position of lower wing. This
prevents difficulties when upper wing will be put on the struts. In a
sheet of thin clear plastic I “copied” the holes of the upper wing, then
I stabilized it by a small stick of wood. This clear upper wing copy
helps to find out the correct position of struts.
For steering wires I used 0,1 mm nylon string - painted black and
drybrushed steel.
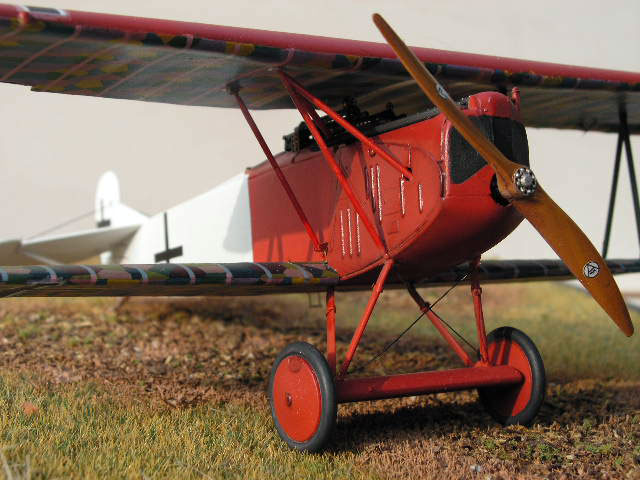
Tamiya flat white is used for the rear half of the plane. To get the
typical vermillion red of german WWI-planes I mixed some drops of black,
yellow and blue with Tamiya flat red. I’m sure it’s not the original
colour, but I like the result. I usually like a “fresh painted” view of
a plane – and so weathering is nearly not existing.
The decals of this Roden-kit are very thin and brittle. So it is
necessary to give all surfaces a clear and strong coat. For this step I
prefer Tamiya acrylic clear. It is drying very quick and You can begin
to apply decals after two hours. Cause of the brittle lozenge decals, I
fixed the edges round the wings carefully with a mix of microsol
“crystal clear” and water.
To imitate the different of metal and fabric parts of the plane, I
gave a thin cote of Humbrol satin color only on the fabric parts but not
on the engine cowling and struts.
Pilot:
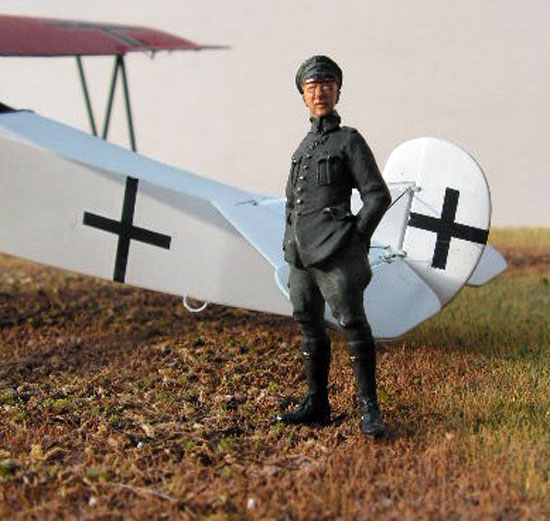
Hecker & Goros “Werner Voss” is posing at the plane – a really nice
formed figure with outstanding details. The “Blue Max” can surely be
painted excellent by modellers with “hawkeyes” – but not by me.
I hope that you will enjoy the pics.
Model, Images and Text Copyright © 2006
by Armin Sobotzik
Page Created 31 October, 2006
Last Updated
21 February, 2007
Back to
HyperScale Main Page |
 Home
| What's New |
Features |
Gallery |
Reviews |
Reference |
Forum |
Search
Home
| What's New |
Features |
Gallery |
Reviews |
Reference |
Forum |
Search