|
Eduard's 1/48 scale
Fokker D.VII (OAW)
by Roger Fabrocini
|
 |
|
Fokker D.VII (OAW) |

Eduard's 1/48 scale Fokker D.VII is available online from
Squadron
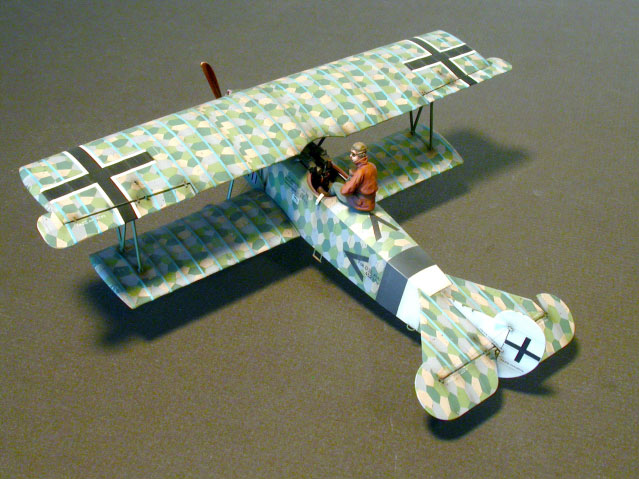
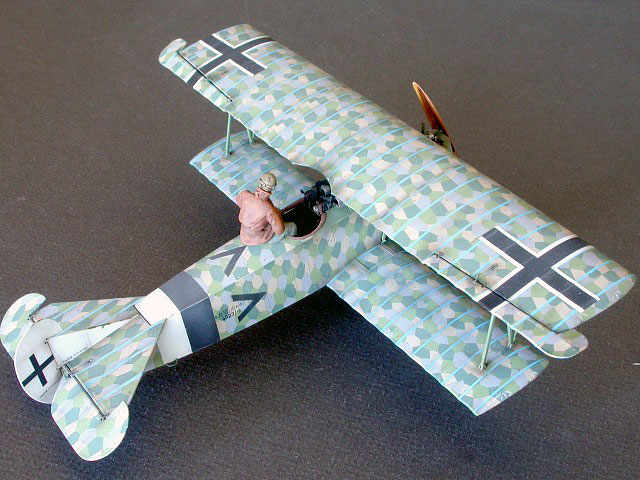
This is the Eduard 1/48 scale Fokker
D.VII (OAW), kit 8131.
I don’t know which I’ve been enamored with more lately, World War one
aviation or Eduard cz. The two seem to go “hand in hand”.
Eduard is producing some of the best
World War One aircraft models on the market today and the D.VII (OAW) is
arguably their best effort so far, although it is not without its
critics. Some do not like the depiction of the rib tape, Eduard’s choice
of subject matter (seeing that Roden has already covered most variants
of the D.VII), price (twice as much as the Roden kits), incorrectly
printed lozenge decals (more on this later), and my personal favorite,
too easy to build (?!).
Those WWI modelers are a tough audience!
For myself, the combination of manufacturer, subject and controversy was
enough for me to start cutting parts off of spruce.
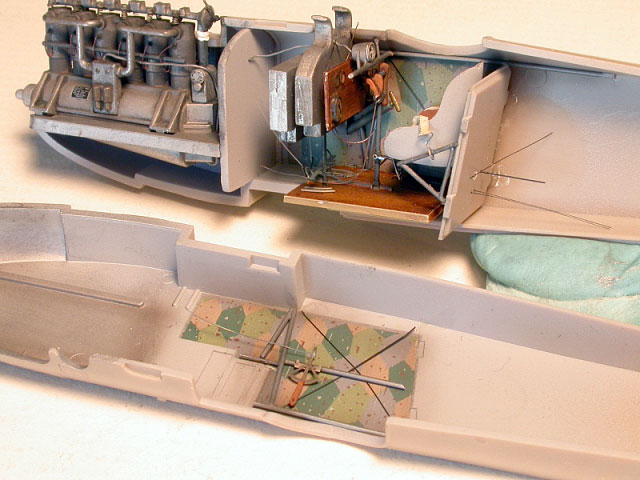
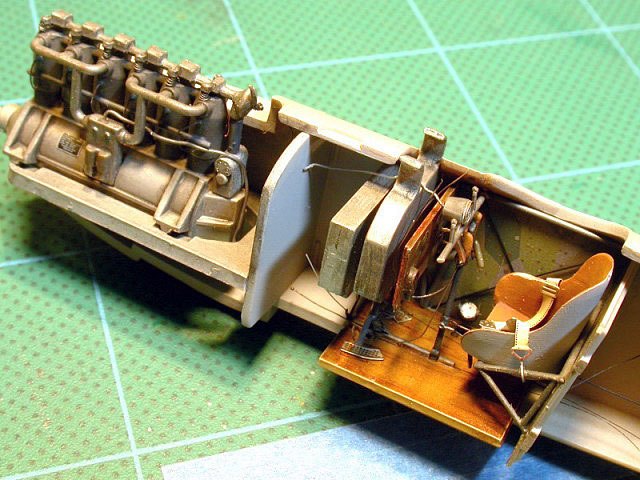
Most detail work went into the engine and cockpit even though most will
never see the light of day again. The engine was detailed with fine
copper wire for spark plug wires, .008” lead wire for various piping,
and valve springs made with coiled .004” stainless steel wire.
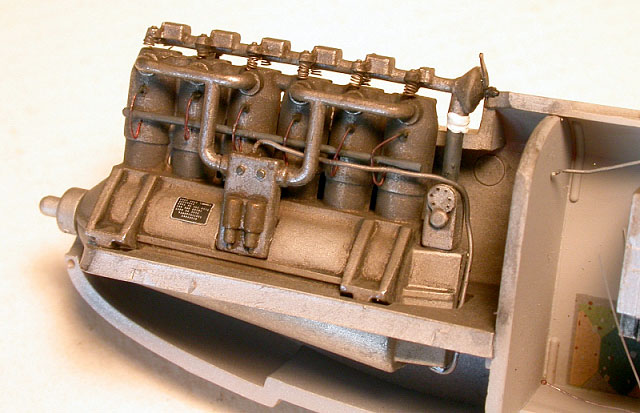
(Construction note: the assembled engine may be inserted into the
assembled fuselage if the radiator is attached last, making masking
easier.)
I was unimpressed with the molded on fuselage framing so I removed them
and fabricated new framing out of .015” plastic rod. Eduard supplies
decals for the interior lozenge in reverse pattern, nice. The balance of
detail work was done with fine copper wire for throttle and spandau MG
control cables, stretched black spruce for control wires and frame
bracing wires. I added a second throttle handle to the control column,
something Eduard missed.
Most detail was painted using Vallejo acrylics. Mr. Metal Color
Metallics were used for the engine and fuselage framing.
During construction Eduard gives you the option of supplementing plastic
parts with supplied P.E. parts. I choose this option to detail the
interior and the Spandau machine guns.
Painting
All parts were primed with Mr. Surfacer
1200 and polished with a micro-fiber cloth when dry. Most of the
airframe would be covered with lozenge decals and this polishing step
allowed me to forgo more surface preparation.
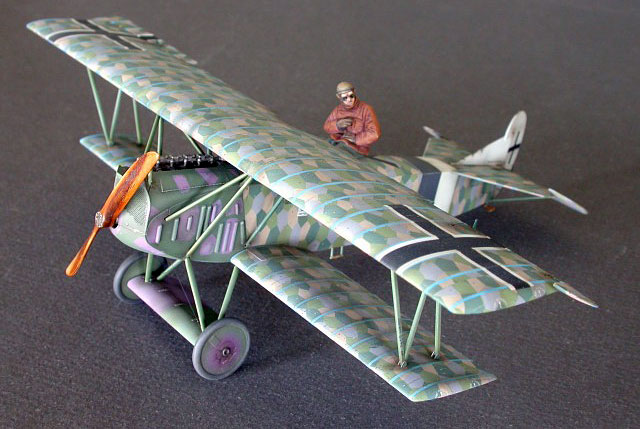
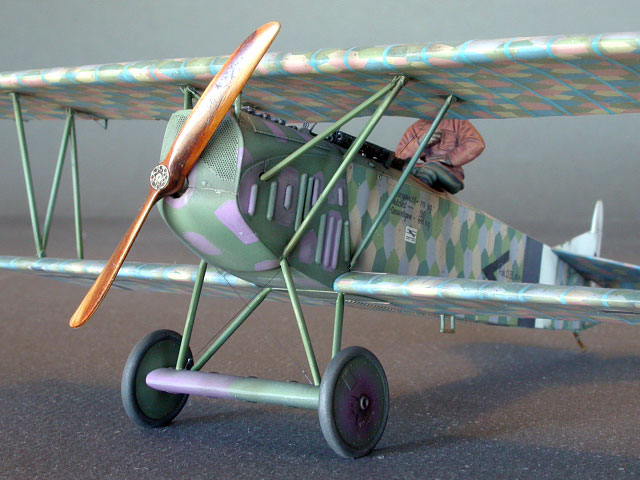
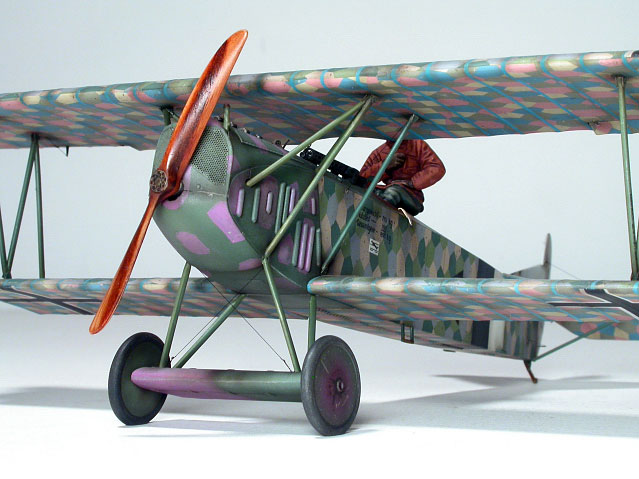
Metal airframe surfaces of OAW built D.VIIs were finished in Fokker
green with a disruptive, so called “giraffe” pattern of mauve on the
cowling and landing gear “wing”. I used Mr. Color #302 for the green.
The giraffe pattern presented a bit of a challenge. I dismissed
airbrushing using masks and choose to hand paint the patterns using
Vallejo acrylics. I used a #0 liner brush to first outline the shapes
using a thin, custom mix of Blue Violet, purple and white. The patterns
were then filled in using various shades of the base color to create a
weathered effect. Mr. Color “Mr. Super Clear Flat” was used as a final
finish.
Decals
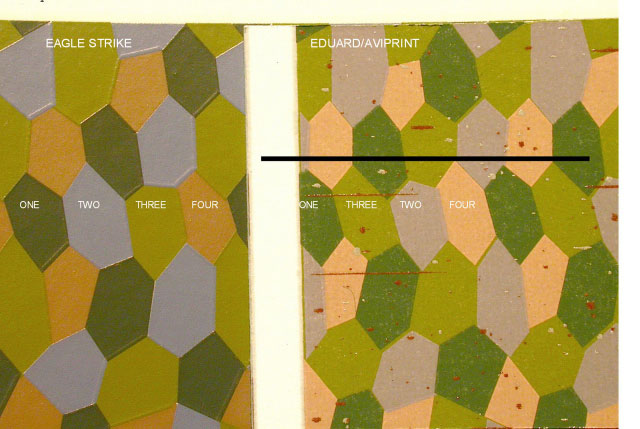
The most tedious procedure was applying
the over 200 separate decals. The task was made somewhat less painful by
the excellent quality of the AviPrint decals. Strong, flexible and well
printed with no real need for setting solutions. The only problem is
with the accuracy of the printing. AViPrint has reversed the placement
of two of the four lozenge colors. I’ve included a picture comparing
correctly printed Eagle Strike lozenge decals to AviPrint decals. I
numbered the colors (1,2,3,4) to show placement error.
You ask, “then why did I use them?”
Laziness (they are precut), and their quality.
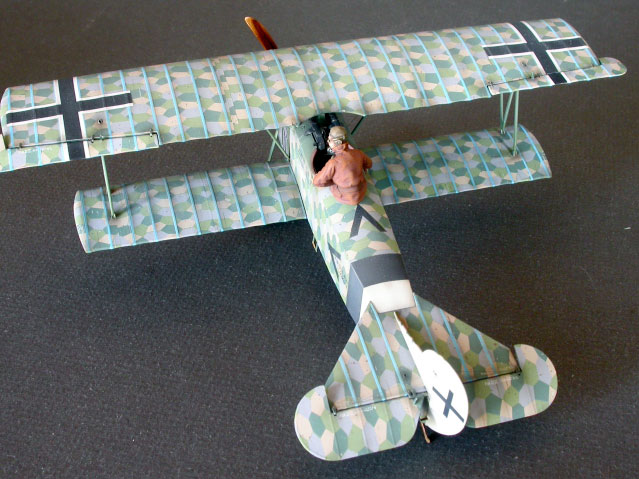
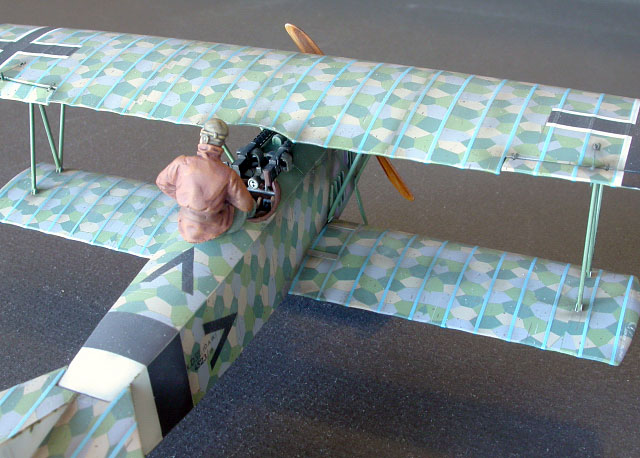
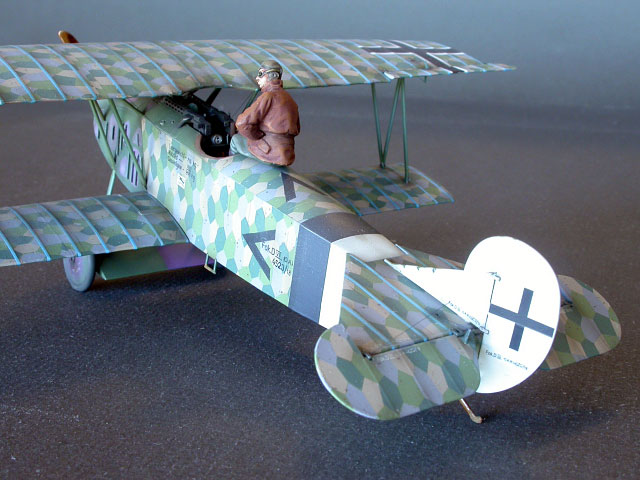
The only fit problem I encountered was with the lozenge decals for the
top wing. The more observant among you will have spotted the added strip
of lozenge between the tenth and eleventh rib. I started applying the
decals from the middle (as Eduard suggests). I should have measured
instead of eyeballing the wing center which threw things off.
Weathering
Truth be told, the challenge of
weathering an airframe covered in decals was the major motivating factor
in building this Fokker D.VII. I needed to find a late-production O.A.W.
built D.VII that had not been extensively repainted, as most German
W.W.I aircraft seem to have been. Research found a picture and profile
of a Jasta 68 D.VII on page 38 of the Albatros Publications Fokker D.VII
anthology 3 that fit the bill. After the unit markings, black and white
fuselage bands, and personal markings, three black chevrons, were
painted all surfaces were given a coat of Mr. Super Clear Flat. I used
three of the basic weathering techniques, dry-brush, oil paint washes
and post shading with a very thin mix of Tamiya Red-brown and black.
(Thanks Brett) I used Humbrol enamel Lt. Gull Gray for the dry brushing
to try and give the lozenge a more weathered fabric look. A mix of raw
umber and black artist oils was used for the wash. Final weathering was
done with the post shading.
The Fokker D.VII is a relatively easy aircraft to align and rig. The “N”
interplane struts make alignment a snap and there are few bracing and
control wires to rig.
All flying surfaces are separate, so I
attached them deflected to show some movement.
Rigging was done with .002” monofilament
run through a black enamel paint marker.
The prop was finished using artist oils
and the shoulder belts were made by cutting the buckles off the kit
supplied belts and attaching them to strips of lead foil from a wine
bottle (chianti classico I do believe).
The pilot is a white metal figure by
Hecker-Goros painted with Vallejo acrylics. He seems to like it up
there.
:
This is a nice kit that I feel doesn’t deserve some of negative comments
it has received. Yes the lozenge decals are inaccurate and Roden has
most of the D.VII “bases” covered and for half the price of the Eduard
kit. I plan on building a Roden D.VII soon and possible comparing the
two.
In its favor the Eduard kit is easy to
build, accurate and well detailed with excellent decals and a very
useful P.E. fret.
It is nice to have a choice.
Click the
thumbnails below to view larger images:
Model, Images and Text Copyright © 2006
by Roger Fabrocini
Page Created 10 February, 2006
Last Updated
21 February, 2007
Back to
HyperScale Main Page |
 Home
| What's New |
Features |
Gallery |
Reviews |
Reference |
Forum |
Search
Home
| What's New |
Features |
Gallery |
Reviews |
Reference |
Forum |
Search