|
Warrior's 1/48 scale
resin
Fairey Fulmar
by Artur Golebiewski
|
 |
|
Fairey Fulmar |

HyperScale is proudly supported by Squadron
To begin with, let me say you need pretty strong
motivation to attempt the 1/48 scale Warrior kit of the Fairey Fulmar.
You can either desire to add one more type to your collection, look at
the challenge of a resin kit or be inspired by the history of the
machine.
Mine was the last case, after having read the sad
obituary.
I yearned to model the Fulmar flown by Stanley Orr
of 806 squadron on this fateful 10th of January 1941. With my
vivid imagination I saw the whole scene as it probably played out.
Diverted by a low level Italian torpedo bomber the CAP is pulled down to
sea level to pursue the laboring Savioas. As the first one is splashed
by Stanley, suddenly a cry on the radio “regain altitude! Stukas
overhead!”. I imagined the terror in the eyes of the sailors, the sound
of the straining Merlins, trying to pull up the heavy fighters and the
ugly, awkward dive bombers starting their dive one after the other.
First one, then two and many more bombs find their mark on the armored
deck of HMS Illustrious, while the first Fulmars are able to strike back
at the fleeting enemy, vulnerable after pulling out of their dive; but
unfortunately the damage is done. The great hulk of the ship is burning
fiercely hidden in smoke. After the last enemy is driven away it is
evident there is no hope of landing on the carrier, the few remaining
Fulmars take off towards Malta, land, refuel and return over the carrier
to defend their mother ship from more and more attacks to come that day.
Because of their bravery they were able to disrupt enough later attacks
where the stricken ship was able to crawl into Malta’s harbor. Then for
a week the Fulmars and all the fighters of the island defended the ship
from more and more bombs, until after temporary repairs the ship was
able to sneak out of the harbor and was taken out of the war with long
repairs at Norfolk, Virginia.
Those few brave Fulmars fighting the Stukas,
Junkers and Messerschmitts embodied the uneven struggle of the Fleet Air
Arm against the Axis in the Mediterranean in early 1941.
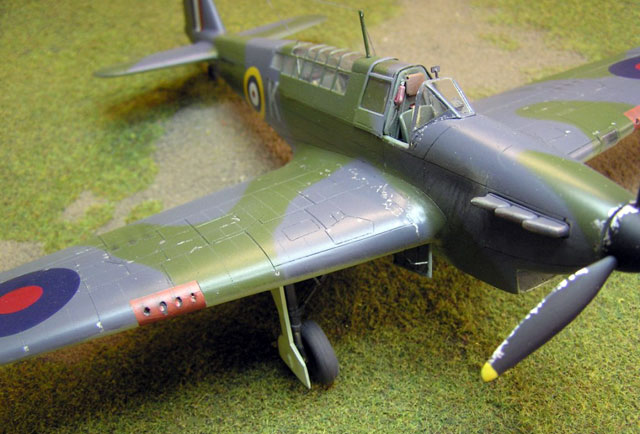
Because of the above I knew right away that my
Fulmar would be the machine flown by Stan on that fateful day and “Aces
High” led me to believe it was this machine “K” with a serial of N1884.
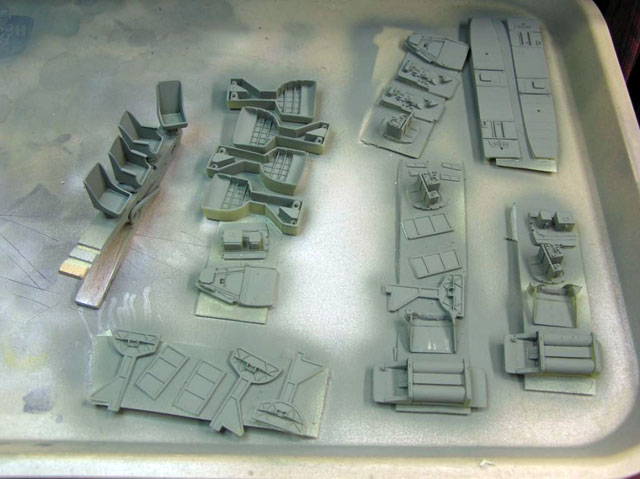
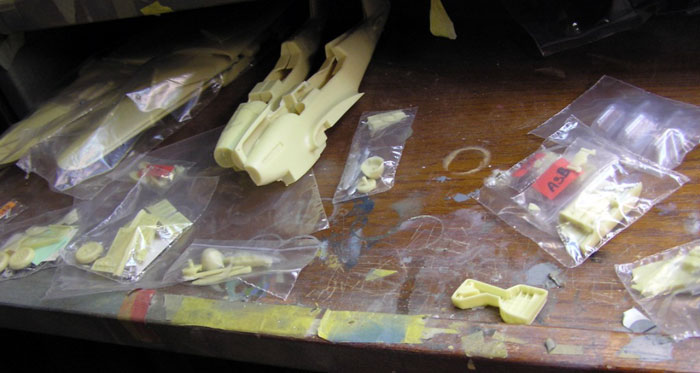
The kit attracted me because it was a rare and
interesting subject. It presented itself very well out of the box. Small
parts are individually wrapped in small plastic bags, with meticulous
little pieces of paper with hand-written numbers, cottage industry
detail at its best! The parts appear to have good detail, reasonable
flash and fine, delicate surface detail. The cockpit gives you more then
the standard “injection molded” complement of details and the addition
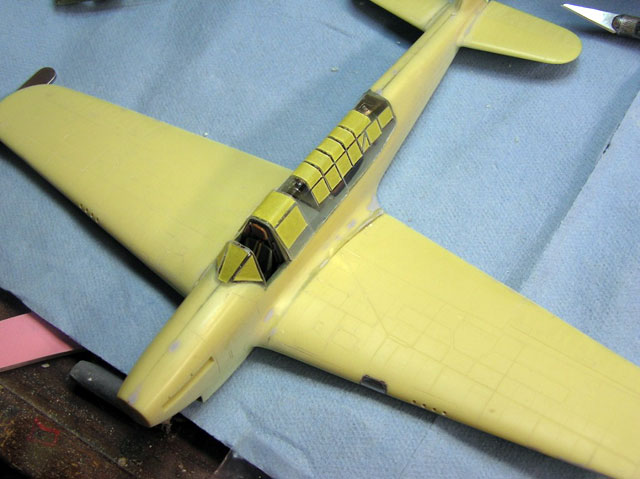
of two canopies are always welcome. Unfortunately upon closer
examination the vacu-formed canopies were not out of the best quality
spotless, clear plastic but did appear to have small imperfections in
opaqueness. Those, however, can be at least somewhat improved by a solid
bath in Future Floor polish.
The instructions could be more comprehensive. You
get one piece of paper. It is basically one sketch of all the parts as
they go together to make a kit, all in one not so big picture, clearly
inadequate and likely to force you to dig into the online references
that are out there as well as the few and far between publications that
show you good detail. Mine was a 4+ publication from the Czech
Republic…highly recommended.
Click the thumbnails below to view larger
images:
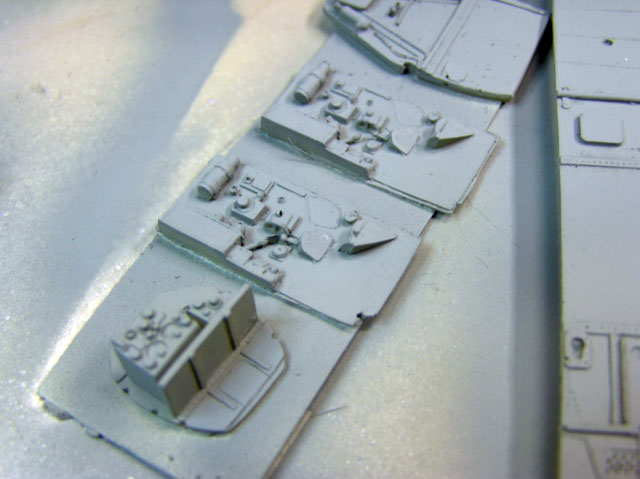
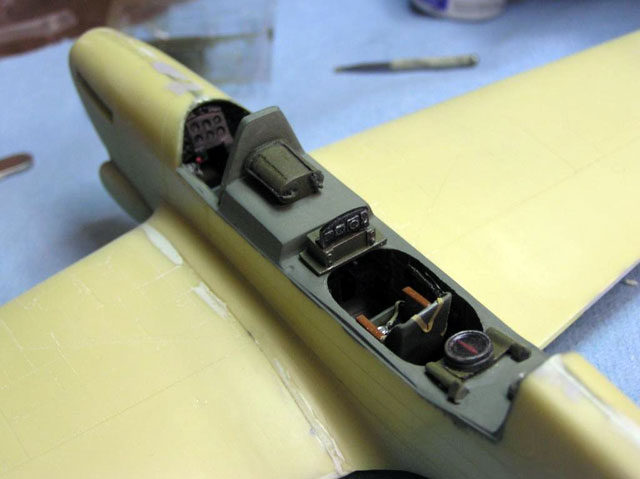
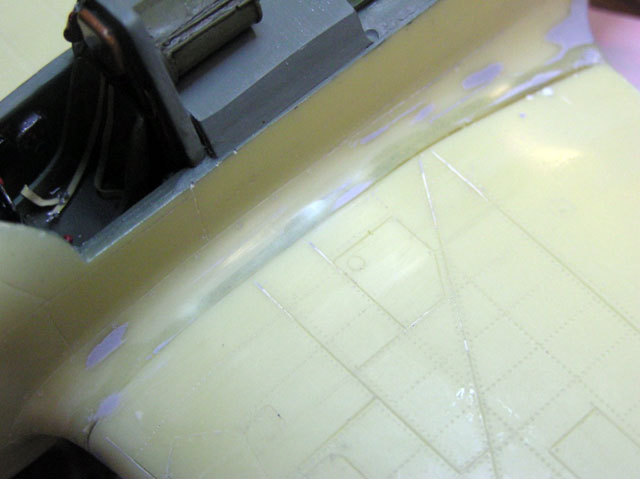
The cockpit came together pretty well. Of course
the width of the cockpit floor has to be reduced in order to fit inside
the fuselage halves as in all models, but after a little fiddling it
made it in and fit snugly. The one aspect that left me wanting more is
detail for the instrument panel, either engrave the tiny scales and
meters so they can be brought out in dry brushing or provide decals/film
with the instrument faces. As it is there are just “gaping holes” that
look somewhat spooky as in one of the pictures.
The undercarriage is entirely out if white metal
and in this case the molding is above average, or better yet one is
better off cleaning off the parts provided then scratch building your
own.
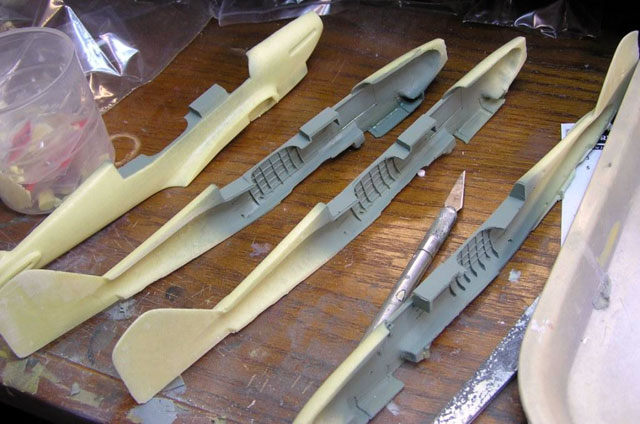
The biggest challenge came when fitting the wings
to the fuselage. They fit reasonably well around the fuselage on the
tops (in my case I had to actually change their angle a little bit)
where the gaps can be filled in. On the bottom around the radiator
outlet, however the wings “sit high” and do not align with the level of
the radiator base. There remains a pronounced “step” that has to be
leveled off and built up on the radiator side, at least so it was with
my two models.
Oh yes, I forgot to mention I built two of them, it
is just a nasty habit of mine, once I start modeling I cannot do a
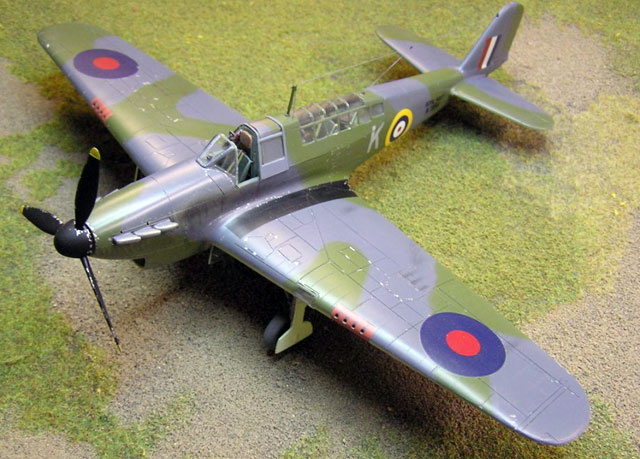
single example, I have to do at least two. As it was the second one was
an Mk II, distinguishable only by the addition of the side air scoops
around the air intake. I also added to that one an additional fuel tank,
one of those crude, slipper type contraptions that were used so
successfully by the Brits in the War.
Once the alignment of the wing underneath is
figured out all that remains is to fill the resulting holes with your
favorite putty and sand, and sand, and sand. You get the idea.
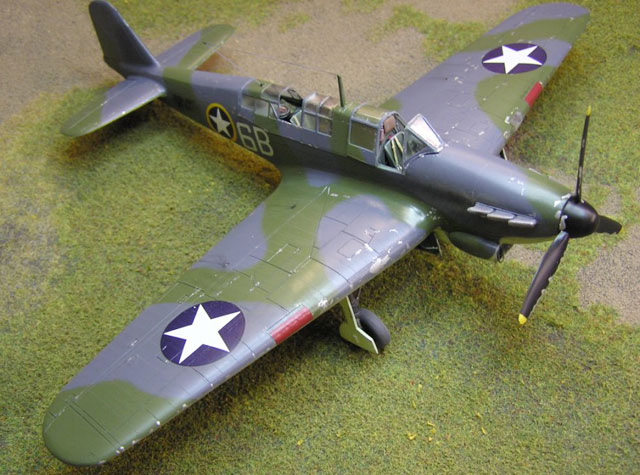
Painting came pretty easy. I used Humbrol 90 for
Sky underneath as the FAA just went over to that standard by late 1940
and Polly Scale Extra Dark Sea Gray and Dark Slate Gray for the tops.
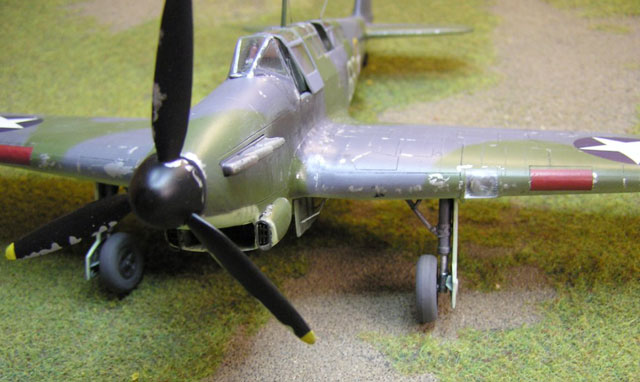
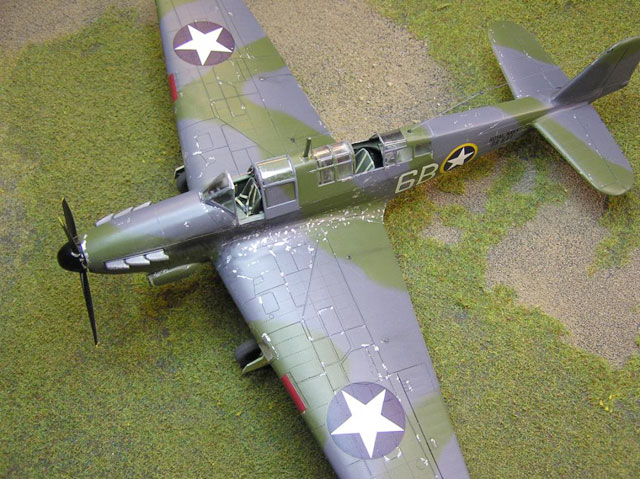
The “American” machine furthermore had the fin flash painted over with a
little darker shade of gray, a temporary fix, probably done on the
carriers while awaiting the invasion. Oh, yes incidentally it is a
machine of 809 squadron flown off HMS Victorious. The Star markings were
a PC effort on the part of British propaganda so as not to outrage the
Vichy French as to the identity of their conquerors…as if that was to
make a difference. In light of this if we were to invade them now we
should probably paint our stars red, as that ally would be more fondly
received as invaders…am I getting off the subject here?
Well, back to the Fulmars. The decals leave you
wanting, while the RAF ones are indeed supplied the red seems to be
closer to “Ferrari red” rather then the “Dull Red” so favored by the
Brits and there are absolutely no serial numbers even for Stan Orr’s
machine pictured in the diagram.
The last few details were fashioned out of the
spares box like the catapult spools under Stan’s N1884 and antenna
masts. I also cheated and did not use the provided white metal blades
figuring it would take too long to get them perfectly smooth. I did
however use the nose cone as it was out of resin without a single
imperfection.
And so one fine September morning the two Fulmars
stood proud on my patio table ready for the picture session.
Altogether the project was well worth the effort
and a little bit of frustration as it gave me something to enjoy that no
big time manufacturer will ever attempt in the near future. I am just
sorry that I was unable to complete them during Stan Orr’s lifetime.
Salut
Stan!
Click the thumbnails below to view larger
images:
Model, Images and Text Copyright ©
2004 by Artur Golebiewski
Page Created 03 November, 2004
Last Updated
03 November, 2004
Back to
HyperScale Main Page |
 Home
| What's New |
Features |
Gallery |
Reviews |
Reference |
Forum |
Search
Home
| What's New |
Features |
Gallery |
Reviews |
Reference |
Forum |
Search