|
Focke-Wulf Fw
190A-4
by Jamie
Haggo
|
 |
|
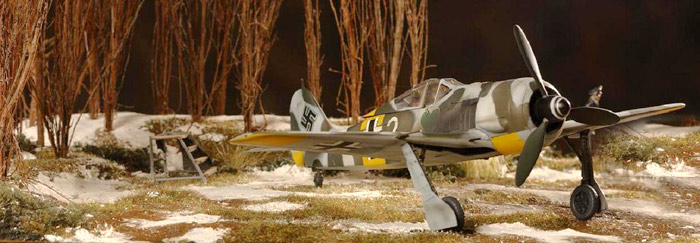
Focke Wulf Fw 190
A-4, 1./JG 54
Oberfeldwebel Anton Döbele, Krasnogvardeisk, Spring 1943 |

Tamiya's
1/48 scale Focke-Wulf Fw 190A-3 is available online from
Squadron.com
Anton Döbele started his operational career in the Spanish Civil War
albeit not in the cockpit of a fighter, he undertook training as a
fighter pilot on his return to Germany. In the Autumn of 1941, Döbele
was appointed to 3./JG54 which was stationed on the Eastern front. He
was a bit of a slow starter compared to other fighter pilots on the
Eastern front having ammased a total of 15 kills by 20 March 1943 on his
216th mission, he had however completed stints as a fighter pilot
instructor in this period. His record started to rise however when he
became part of Walter Nowotny’s Stab Schwarm, consisting of Nowotny (258
victories), Rudolf Rademacher (97 victories) and Karl Schnörrer (46
victories). Anton Döbele was killed in A-4 white 11 (W.Nr. 7082) when he
rammed an Il-2 east of Vitesbsk on 11 November 1943. He had been
credited with 94 victories in 458 missions all of which were over the
Eastern front. On the 26 March 1944 he was posthumously promoted to
Leutnant and awarded the Ritterkreuz.
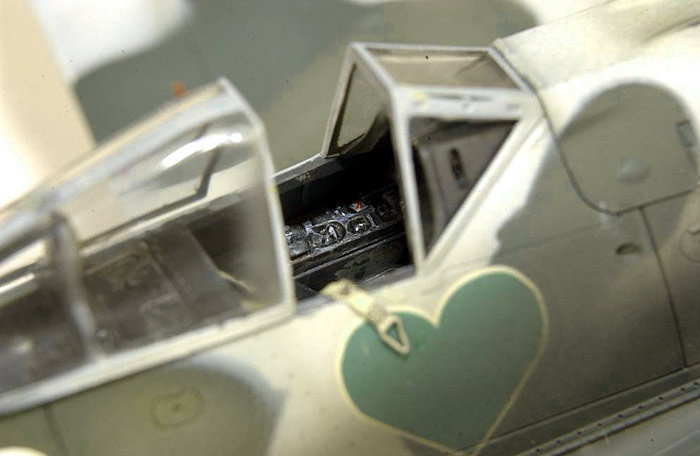
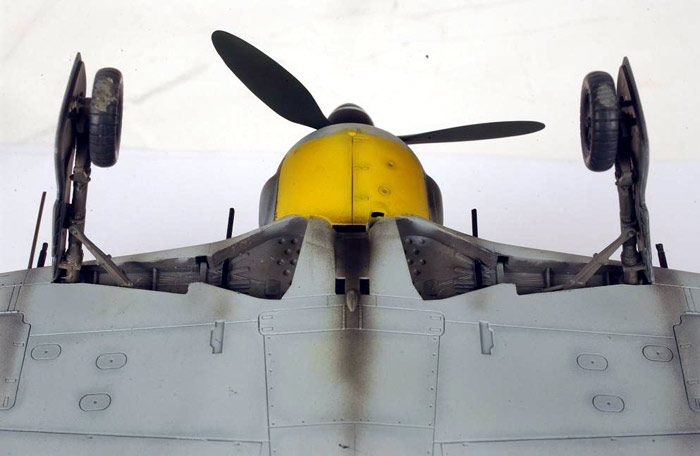
This is the Tamiya 1/48 scale Fw 190A-3 converted to the A-4 variant.
The easiest way to do this is just to sand off the fin tip aerial
mount and create a new aerial from plastic card. There are probably more
changes required but this looked OK to me, but then I am not one for
100% accuracy, just as long as I am happy with the finished product.
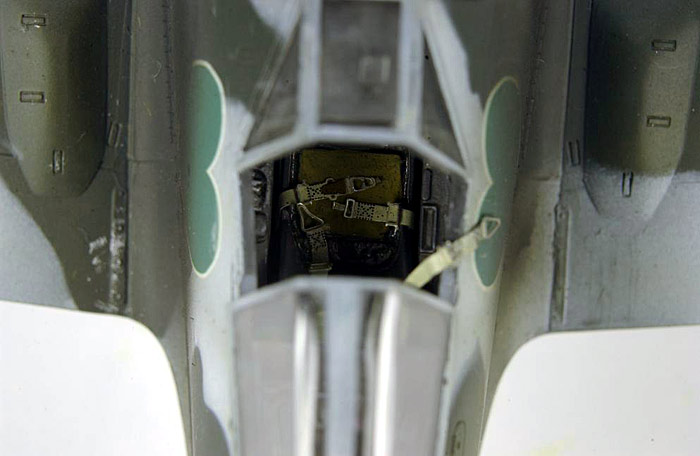
The kit was built out of the box with the exception of the decals and
the addition of Eduard’s wonderful pre-painted etched seat belts. This
was the first time I have used this product and I will certainly be
using them in as many models as I can.
 The
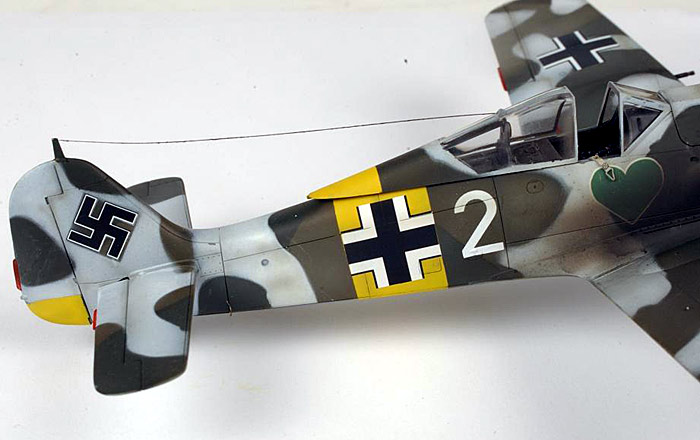
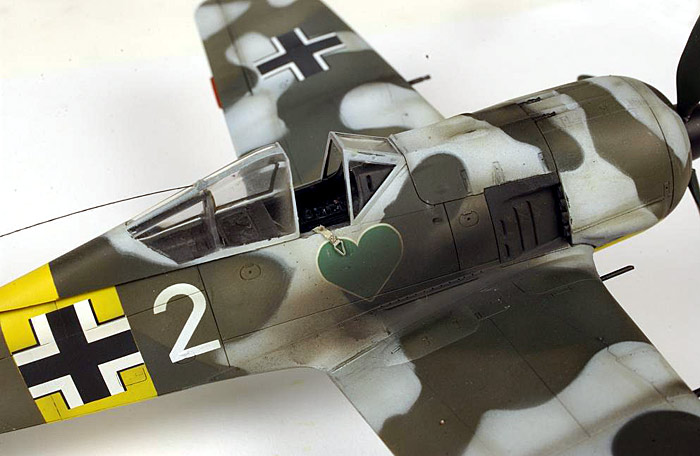
paint scheme is an interesting one. In the spring of 1943 1./JG 54
removed portions of the temporary white scheme to reveal the 2 tone
locally applied green camouflage. No one really knows which colours
these were, if they were locally captured soviet paints, local mixtures
or in my opinion RLM 70/71. I first pre-shaded the panel lines in black
to shadow the recesses of the panel lines, I was not bothered about the
camouflage removing the pre-shading affect because I usually use the
post shading technique but it does mean you don’t normally have to run a
dark wash into the panel lines resulting in a much more subtle effect.
The yellow theatre markings were sprayed first using Tamiya acrylic,
then after painting the 76/70/71 scheme with Polly Scale paints I used
Blu Tac rolled up to provide a soft edge to the white camouflage which
was then sprayed on with again Polly Scale acrylic. I then used my post
shading technique on the white (see
my
article in HyperScale’s Reference Library). After a gloss coat the
decals were applied, they were all from the spares box (all
aftermarket), the Green Heart emblem came from a Ministry of Small
Aircraft Production sheet and is slightly too large but I refer you to
paragraph 2! The
paint scheme is an interesting one. In the spring of 1943 1./JG 54
removed portions of the temporary white scheme to reveal the 2 tone
locally applied green camouflage. No one really knows which colours
these were, if they were locally captured soviet paints, local mixtures
or in my opinion RLM 70/71. I first pre-shaded the panel lines in black
to shadow the recesses of the panel lines, I was not bothered about the
camouflage removing the pre-shading affect because I usually use the
post shading technique but it does mean you don’t normally have to run a
dark wash into the panel lines resulting in a much more subtle effect.
The yellow theatre markings were sprayed first using Tamiya acrylic,
then after painting the 76/70/71 scheme with Polly Scale paints I used
Blu Tac rolled up to provide a soft edge to the white camouflage which
was then sprayed on with again Polly Scale acrylic. I then used my post
shading technique on the white (see
my
article in HyperScale’s Reference Library). After a gloss coat the
decals were applied, they were all from the spares box (all
aftermarket), the Green Heart emblem came from a Ministry of Small
Aircraft Production sheet and is slightly too large but I refer you to
paragraph 2!
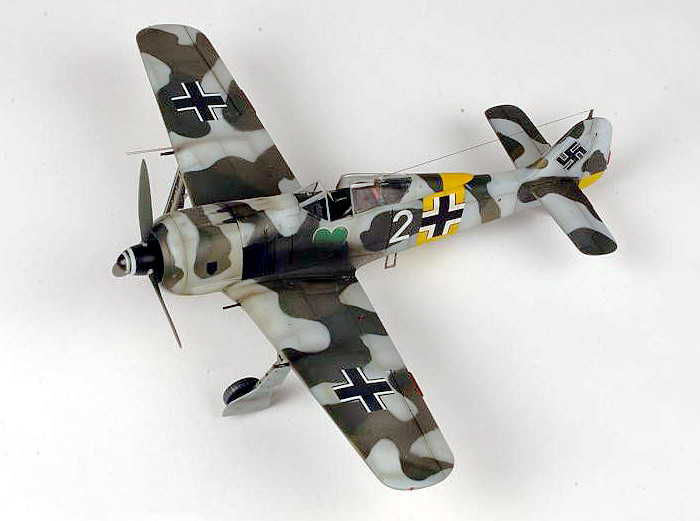
After the last coat of off Polly Scale Matt varnish I was experimenting
and came up with a new method of post shading. This involved using a
‘glaze’ along panel lines. I define a glaze as “dirty” varnish, i.e. a
varnish tinted with in this case RLM 70 and grey. This method is
advantageous because you apply it over the decals and flat coat to give
a more even finish and it is one I will be using in the future for sure.
The final bits were added to the airframe and she was all finished.
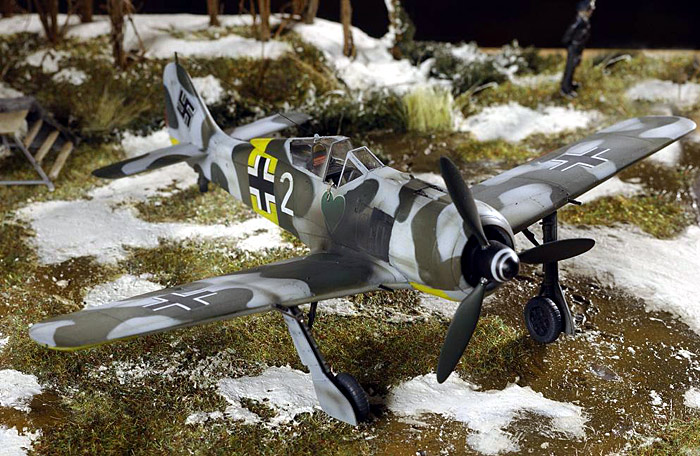
The base was MDF covered in Polyfiller, which when dry was sprayed
with various shades of black and brown. The grass and foliage were added
next as were the trees which came from my children’s Harry Potter broom
sticks (shhhhh, they don’t know)!
The next thing was the partially thawed out snow which was Polyfiller
applied with a moist finger (never thought I’d ever mention a moist
finger in a modelling article)! This final thing was to give the mud a
wet look which was simulated with Johnson’s Kleer floor wax. For
consistency I should apply mud to the wheels and bits of the under side
but the model is not always displayed on the base and I thought this
might look out of place.
To sum up, great kit, easy conversion, interesting colour scheme and new
techniques discovered and honed, for me that’s what modelling is all
about.
Click the thumbnails below to view larger images:
Focke-Wulf Fw 190
Modelling Manuals 20 |
|
|
|
|
US Price: $17.95
UK Price: £12.99
Publisher:
Osprey Publishing
Publish Date:
May 25, 2002
Details: 64 pages; ISBN: 1841762687 |
|
|
Model, Images and Text Copyright © 2004
by Jamie Haggo
Page Created 10 May, 2004
Last Updated
10 May, 2004
Back to
HyperScale Main Page
|
 Home
| What's New |
Features |
Gallery |
Reviews |
Reference |
Forum |
Search
Home
| What's New |
Features |
Gallery |
Reviews |
Reference |
Forum |
Search