|
Tamiya's 1/48 scale Fw
190A-8/R2
Bodenplatte
Sturmbock
by Brett Green
|
 |
|
Focke-Wulf Fw 190A-8/R2 |

Tamiya's 1/48 scale Focke-Wulf Fw 190A-8/R2 is available online from Squadron
Tamiya released the first of their 1/48 scale Focke-Wulf
Fw 190 kits in the mid 1990s. These two kits - a Fw 190A-3 and an F-8 -
were very easy to build and well detailed, but they were not perfect.
The main problems were undersized undercarriage legs and main wheels.
This resulted in a somewhat squat appearance when compared to the Dragon
Wurgers that had been released some years earlier.
Even so, Tamiya's kit established a loyal following due
to its the sheer buildability when compared to the trickier to assemble,
but more accurate, Dragon offering.
The only Tamiya Wurger that I had previously
built was a sole Fw 190F-8 back in 1999. The speed and ease of assembly
was impressive, to say the least.
In late 2005 Tamiya released a new variation on the
theme - a 1/48 scale Focke-Wulf Fw 190A-8 / A-8/R2 kit.
What's in the Box?
I was curious to see how Tamiya would approach the
changes to their basic moulds in order to deliver the tough-looking,
heavily armed and sturdily armoured Stormbock variant.
At first glance, Tamiya's 1/48 scale Focke-Wulf Fw
190A-8/R2 looks very similar to the earlier Fw 190F-8 kit. Indeed, the
main sprues hold the same parts, including redundant weapons unique to
the F-8.
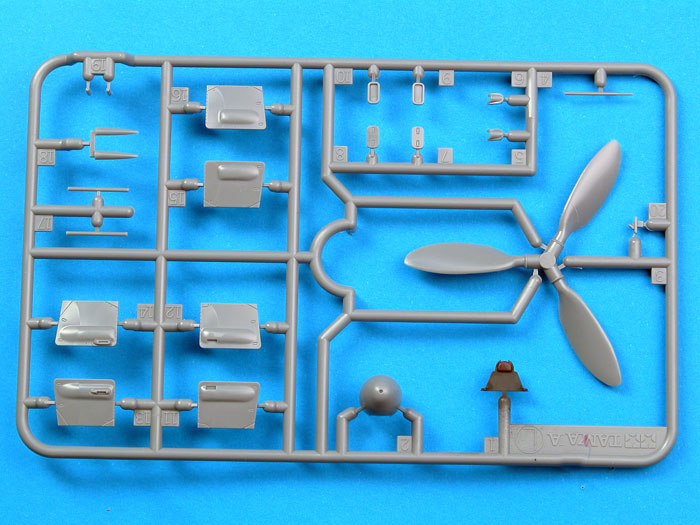
The biggest difference is the inclusion of a new sprue
with a broad-bladed propeller, new wing cannon covers and shell ejector
inserts, and other details specific to the A-8. I believe that the
Sturmbock used the same VDM propeller blades as the Fw 190D-9. Tamiya
already offers a D-9 kit and its propeller blades, while not perfect,
are not too bad. The prop blades supplied with this new kit are totally
new mouldings, and they are not an improvement. The new propeller
assembly is too small in diameter, and the profile looks peculiar.
Examining the wings also reveals some tooling changes.
Most notably, there are now cutouts on the bottom of the wing to
accommodate a selection of different inserts depending on the variant
being built.
Click the
thumbnails below to view larger images:
This new kit includes revised clear parts. In addition
to the standard and blown hoods, Tamiya has supplied the canopy armoured
side panels. These include an accurately raised frame, and are very
nicely done. Only one style of windscreen is included though (some
Sturmbocks were fitted with appliqué armoured glass panels on the
side of the windscreen too).
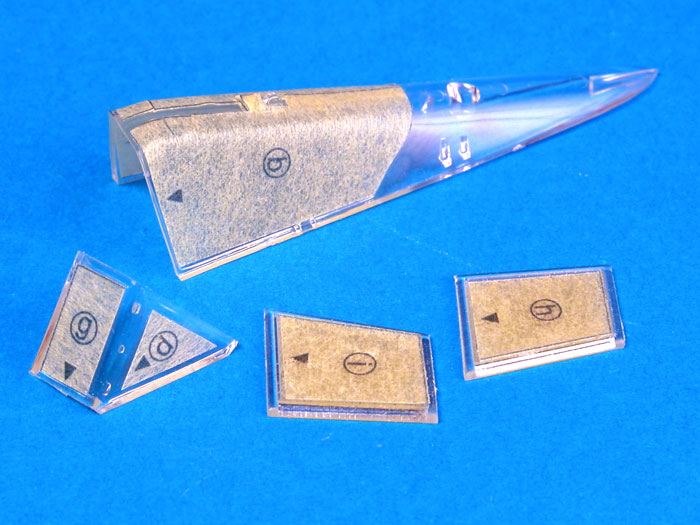
Also new is a canopy masking sheet. This is a very nice
touch, but the individual masks are not die-cut. You do have to cut the
shapes out yourself.
The final multimedia element is a self-adhesive vinyl
(?) sheet with the fuselage armour plates. Lines dividing the individual
plates and fasteners are recessed into the material but, once again, the
modeller must cut them out with a sharp knife.
The kit parts most complained about from the earlier
releases - wheels, undercarriage legs and slightly bulbous gun cowl -
are unchanged.
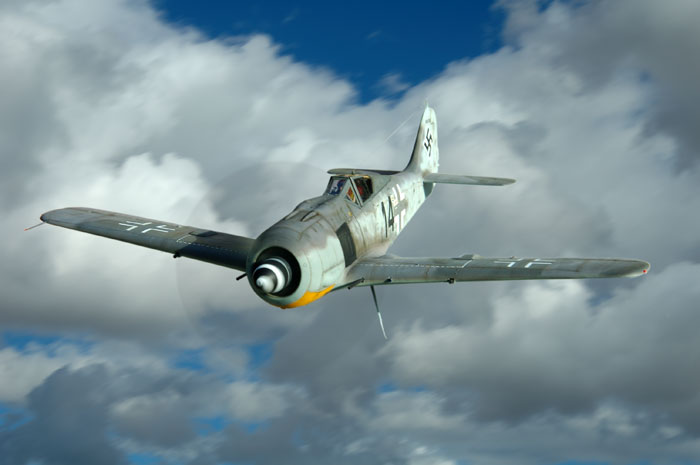
I wanted to build this kit specifically to be
photographed in flight. In the past I have attempted a few different
methods for simulating flight. I have used a hair dryer to spin the
propeller, installed photo-etched "Prop-Blur", and even attempted to add
a blurred propeller in Photoshop. All these methods work in a fashion,
but they all have their disadvantages too.
This time I decided to install a small electric motor.
In 2002, Tamiya re-released their Fw 190A-3 kit with a tiny motor to
spin the propeller. Comparison of the two kits suggested that I could
install the motor in the new Fw 190A-8/R2 with only minor modifications.
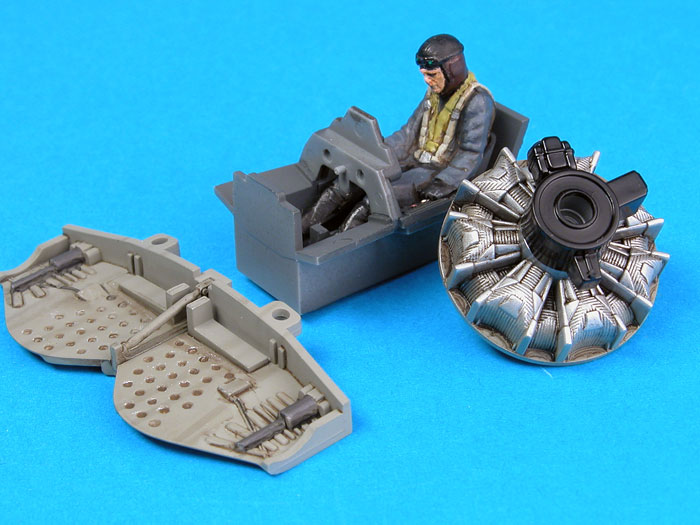
First, though, I assembled and painted the cockpit,
engine, wheel bay and the remaining interior parts. Most of the parts
were pre-painted and weathered while they were still on the sprue. I did
not spend a lot of time detailing the cockpit as the canopy would be
closed, and the seated pilot would hide much of the detail anyway.
Click the
thumbnails below to view larger images:
The pilot was painted with a combination of Tamiya and
Vallejo acrylics, followed by a selective oil wash.
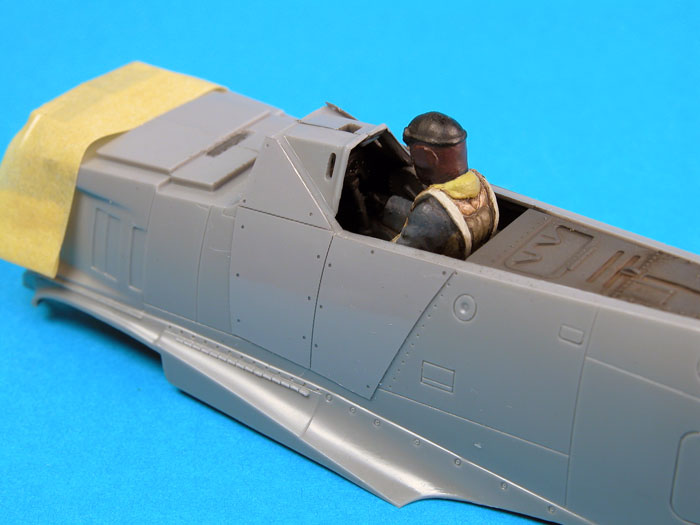
Next, the fuselage armour was cut out of the
self-adhesive vinyl sheet. I used a steel rule and a new blade in my
hobby knife for this task. I was concerned about how well this material
would stick to the kit plastic, but they settled very well. However, I
did not cut off the small bumps under the windscreen before applying the
armour pieces. The result was a noticeable lump under the thin material.
I managed to lift the edge of the armour, slice the lump off the
fuselage, and relay the vinyl without any loss of adhesion.
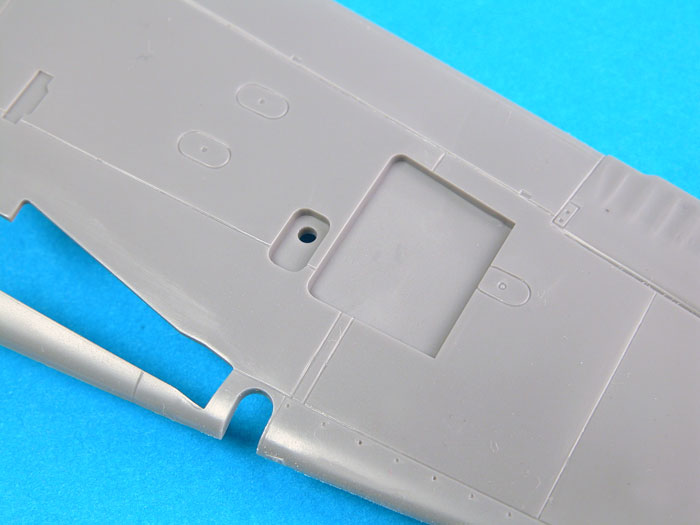
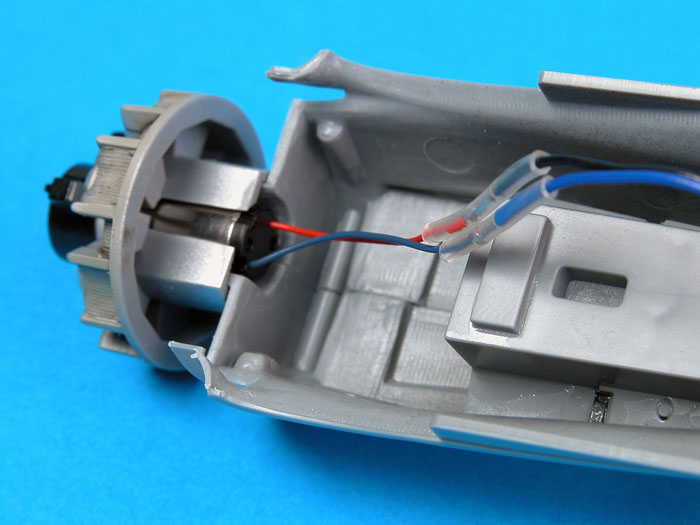
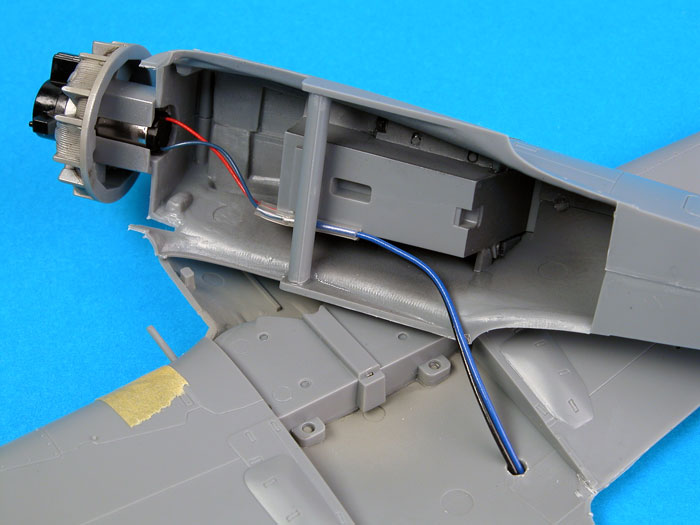
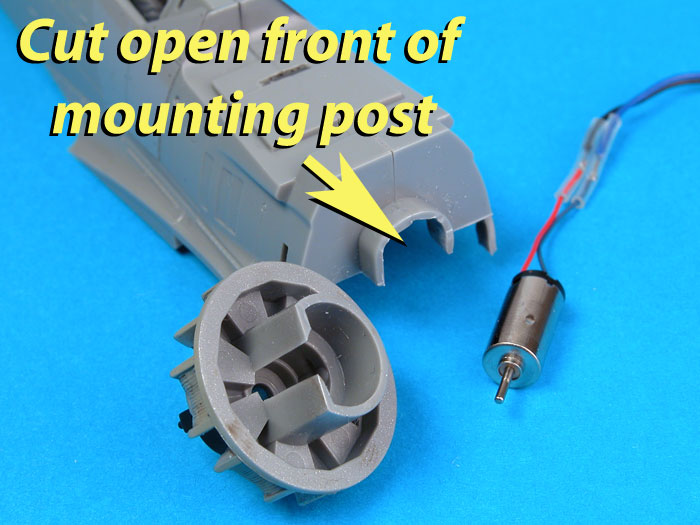
The front of the engine mounting post was cut open in
preparation for installation of the electric motor. The image below
shows how much plastic I cut out of this area.
A hole must also be cut into the bottom of the wing to
feed out the electrical wire for the battery.
I applied a spot of super glue to each side of the
little motor, and slid it into the rear of the plastic engine part.
Click the
thumbnails below to view larger images:
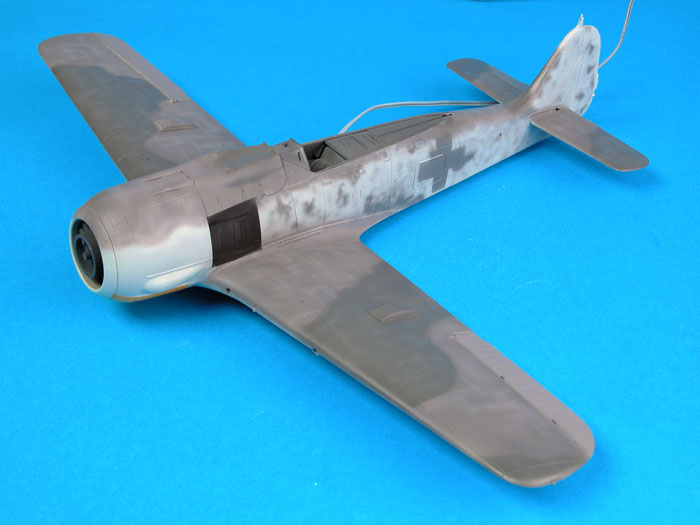
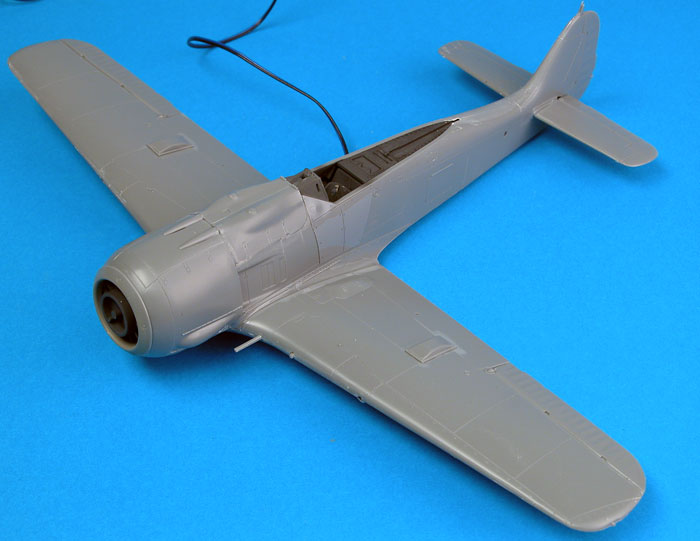
In common with the Focke-Wulf Fw 190F-8 that I built
back in 1999, the balance of construction was almost embarrassingly
fast.
With the cockpit, engine and wheel wells pre-painted,
assembling the fuselage, the multi-part cowl, wings and tailplanes took
less than three hours. This included the time required to remove parts
from the sprues and clean them up. Quite remarkable.
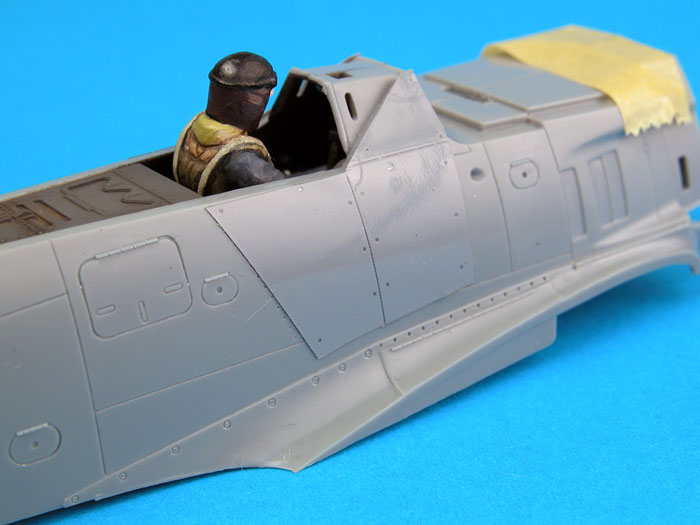
I only encountered one minor alignment issue during
construction. Test fitting suggested that there might be a tiny gap at
the wing root, so I installed a spreader bar (simply a length of plastic
cut from the kit sprue) between the fuselage halves.
Note the lump
under the windscreen beneath the vinyl armour sheet. The armour was
later lifted and the lump sliced off.
During the course of construction I noticed a few other
minor engineering modifications to the original kit parts, including a
new undercut at the front of the gun cowl to accommodate the gun trough
inserts.
The kit propeller was replaced with a part raided from
Tamiya's Fw 190D-9.
I managed to break off one of the 20mm cannon barrels
that are moulded to the wing, so I cut off the other one too and
replaced them with brass tube.
Not a spot of putty was required on the entire airframe.
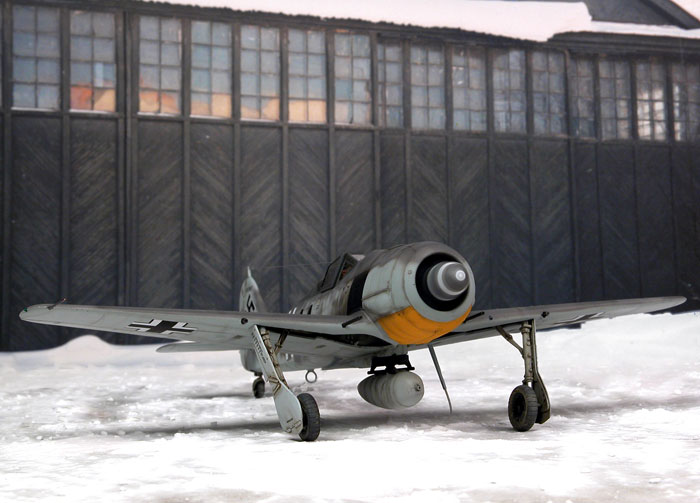
 Yellow
is always tricky. Yellow
is always tricky.
I often have trouble getting yellow paint to cover
properly. I also find that acrylic yellows take a long time to dry and
are very prone to fingerprints and damage even weeks after application.
This time I decided to try to avoid these problems. I started with a
coat of white primer on the lower cowl. This was lightly sanded and
polished before spraying a coat of Tamiya Spray TS-34 "Camel Yellow" on
the area. I decanted a quantity of this gloss yellow paint from the can
into a disposable container and applied the paint using my Aztek
airbrush. This acrylic lacquer still needed two coats over the white
primer, but it dried fast and coped well with subsequent handling.
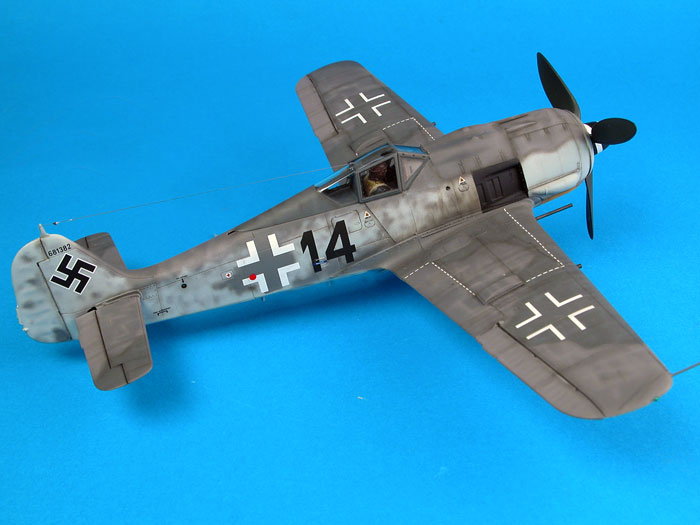
My Sturmbock was one of three Luftwaffe models
that I was painting in the same session. To save time, I sprayed all
three models with an overall base coat of Tamiya AS-5 Light Blue
(Luftwaffe) straight from the can. By the time I had finished spraying
the first light coat on the last model, the first was ready for its next
(and final) coat of the colour.
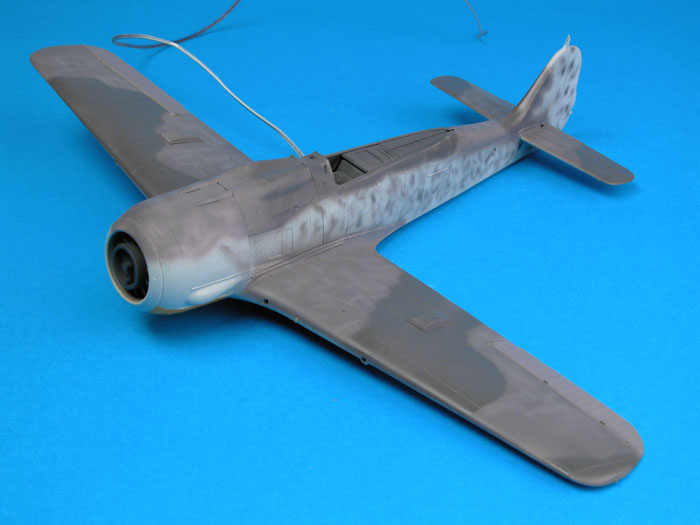
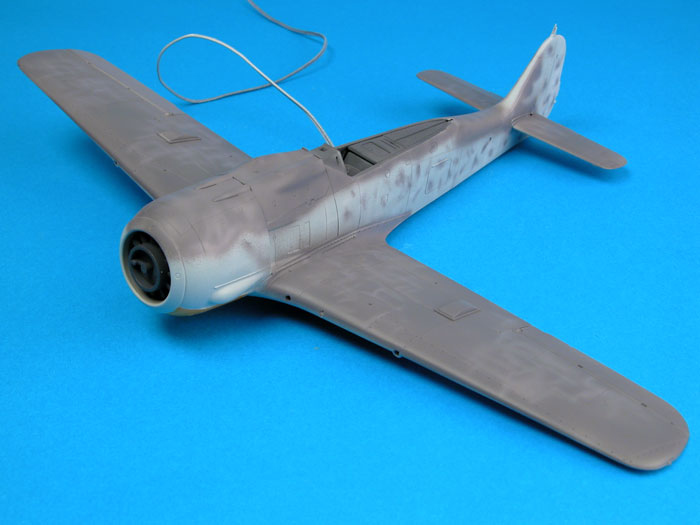
I applied a random mottle over the lower surfaces and
fuselage sides using Gunze acrylic H417, RLM 76. This noticeably paler
shade delivered a pleasingly uneven finish - the first stage of
weathering.
Next, Polly Scale RLM 75 was applied to the top of the
wings, tailplanes and fuselage spine with the Testor Aztek airbrush
fitted with the fine tan coloured tip. A first-pass mottle of RLM 75 was
also sprayed onto the fuselage sides and fin. Similar to the treatment
of the RLM 76, a paler shade of RLM 75 was mixed. Small, random streaks
were sprayed over the base colour.
Click the
thumbnails below to view larger images:
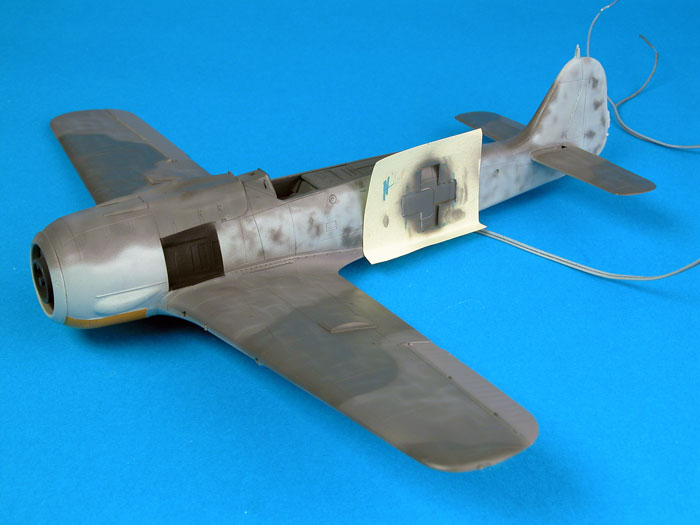
This was followed by a disruptive coat
of RLM 74. I used a mix of Gunze acrylic RLM 74 with a few spots of dark
green.
A mask was cut out of a self-adhesive
Post-It Note to assist painting the grey area behind the fuselage cross.
The fuselage mottle on the real
aircraft was quite messy, suggesting several oversprays and repairs. I
tried to reproduce this look by randomly overspraying the heavy fuselage
mottle with RLM 76 Light Blue, then restoring some of the mottling with
RLM 74 and RLM 75.
With the basic camouflage in place, it
was time to attend to the detail parts. I cut the canopy masks out of
the kit-supplied sheet. Fit was good, and the masks adhered well to the
plastic. I did get a little "bleeding" of paint under the masks at the
top of the canopy where there is a compound curve. Next time I will
burnish the masks down with a toothpick to avoid this problem.
Tamiya supplies two styles of mask for
the sides of the windscreen. The smaller masks presumably represent the
armoured glass. This actually works quite well as an illusion. Another
nice touch is that masks are supplied for both the inside and the
outside of the armoured glass panels.
The panel behind each side of the
engine cowling was masked and sprayed with a 50/50 mix of Tamiya XF-1
Flat Black and XF-63 German Grey. The spinner and propeller blades were
painted RLM 70 using Polly Scale acrylics.
The airframe now received an overall
coat of Polly Scale Gloss in preparation for the decals.
Markings
I was planning to finish my Sturmbock in the
markings of Oskar Bosch, according to a photograph in the excellent
Hikoki book, "Bodeplatte - The Luftwaffe's Last Hope". I could not find
any after market decals with these markings, so I resorted to an old
Aeromaster sheet with black Luftwaffe numbers. The "4"s on this sheet
did not quite conform to the photograph, so I modified them slightly by
slicing a small amount off the diagonal of the digits.

Tamiya decals were used for the balance of the
markings. The kit decal sheet is great, with five marking options
for JG 3 and JG 300. I have heard complaints that Tamiya decals are
thick, but these markings conformed well to panel lines and the
surrounding film virtually disappeared under a coat of Flat Clear.
Finishing Touches
Some additional weathering was applied after the
decals had set. I sprayed a very thin mix of Flat Black and Red
Brown along panel lines and camouflage demarcation. I have
described and
demonstrated this post-shading technique on two recent "Testor's
ScaleWorkshop" videos.
The final step of weathering was a thin wash of Raw
Umber oil paint flowed into panel lines.
The paint job was sealed with a coat of Polly Scale
Flat acrylic, then smaller details such as the 20mm gun barrels,
canopy, DF loop, Morane mast and propeller assembly were attached.
The stubby 30mm cannon barrels provided in the kit have hollowed-out
muzzles - very nice!
The kit pitot tube was replaced with a filament from
an industrial light bulb.
E-Z Line was used for the aerial wire. This elastic
material is easy to work with and, being elastic, is more resistant
to handling than nylon thread. Isolators were built up from tiny
spots of Micro Krystal Kleer.
I took the in-flight photos before attaching the
landing gear and drop tank.
A breather tube was inserted in the front of the drop
tank from fine brass tube, then the drop tank was painted and weathered.
Although they are undersized, I used the kit
undercarriage legs and main wheels. Replacements for both these items
are available (gear legs from either Wurger Mechanic or Airwaves, and
wheels from Eagle Editions). Next time I will use the replacements for a
comparison.
Tamiya's 1/48 scale Focke-Wulf Fw 190A-8 / A-8/R2 kit is
not perfect. In fact, this release seems to have introduced at least one
new error (the propeller assembly) and corrected none of the problems of
the original kits.
Even so, it makes a very attractive model when
completed, and I can forgive these relatively minor problems and easily
addressable problems when I consider just how well the kit goes
together.
Construction is sheer joy.
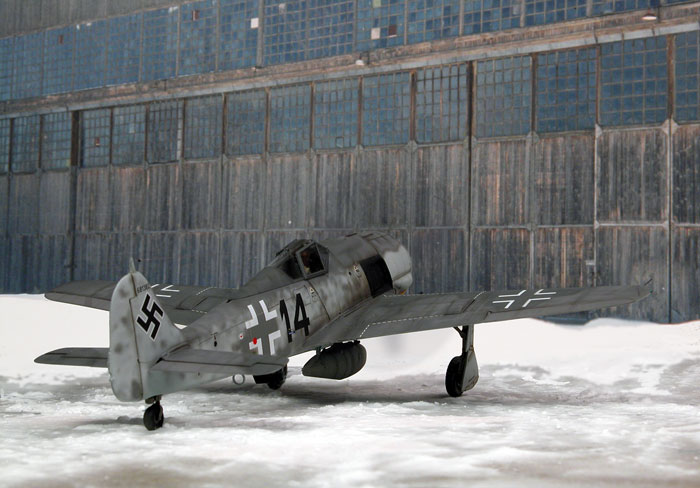
Photography
The hangar and construction photos were taken with a Nikon
Coolpix 5700 digital
camera and optimized in Photoshop CS.
The model was photographed on a cardboard base against a photo of a
German hangar. The cardboard base was given a snowy appearance by
sprinkling the surface with baking soda.
The in-flight photo was taken with a Nikon D70 digital
camera against a plain grey background with the model's motor connected
to a AA battery. The aircraft image was merged with a photo of a cloudy
sky in Photoshop CS.
Finally, the images were cropped, resized to 700 pixels in
width, and saved as .jpg files for posting on HyperScale.
Model,
Images & Text Copyright © 2006 by
Brett Green
Page Created 13 February, 2006
Last Updated
21 February, 2007
Back to
HyperScale Main Page |
 Home
| What's New |
Features |
Gallery |
Reviews |
Reference |
Forum |
Search
Home
| What's New |
Features |
Gallery |
Reviews |
Reference |
Forum |
Search