|
Focke-Wulf Fw
190D-12
by Tim Both
|
|
|
Focke-Wulf Fw 190D-12 |

HyperScale is proudly supported by Squadron
DML’s Focke Wulf 190D-12 comes complete with 2
types of torpedoes which may have been based upon a diagram or sketch of
the D-12 actually using these in service. I don’t believe that there are
any confirmed reports of torpedoes being dropped by a D-12 but they sure
look good… maybe for a Luft ’46 kit! The only other major difference
between this and the DML 190D-9 is the grafting on of the larger Ta-152
tail. The moulding here is inferior to the rest of the airframe and has
quite an orange peel effect to it. A light sand and polish removed most
of the unusual surface.
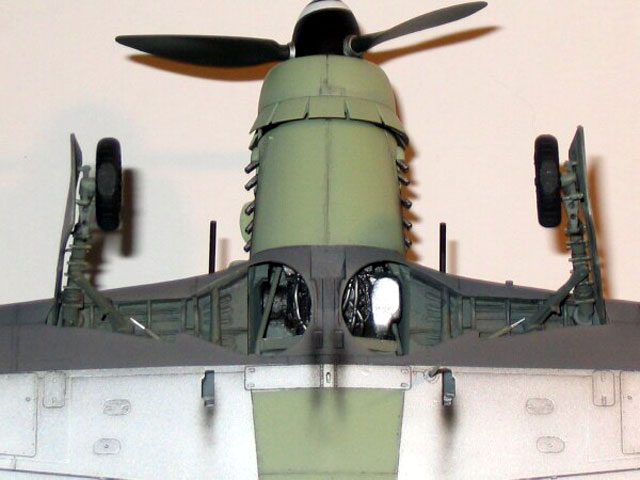
The engine. I used Part-R-Parts engine plug which
slipped into place with no problems whatsoever. I added some plumbing
using some solder and superglue and painted the plug Gunze Burnt Iron
with some silver highlights and a black wash. The ammo containers were
painted RLM02 and washed at a later date. It is up to the modeler to
alter the wheel bay and this proved a short and relatively easy task.
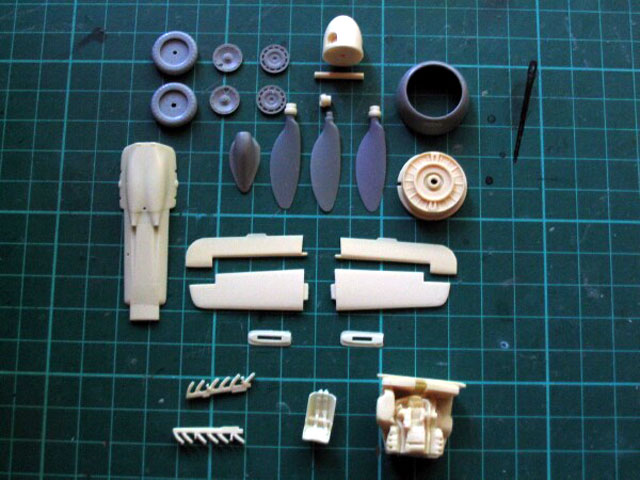
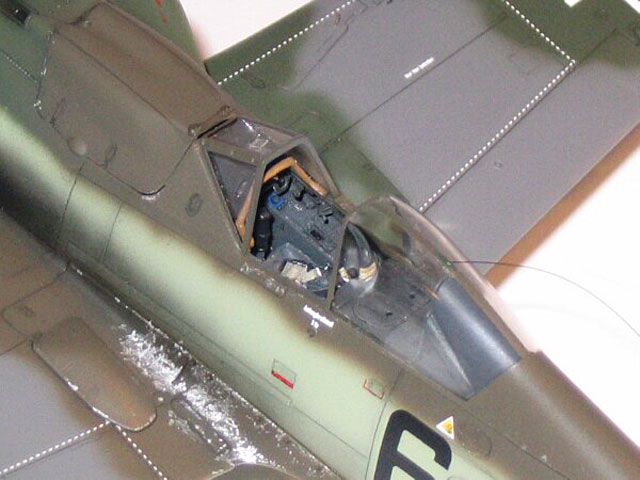
The cockpit. I used Extra Tech’s FW190D-9 (48009) etched set which
contains full cockpit and sidewall detail, seat, harness and instrument
panel. Altogether the cockpit received over 20 photo-etched parts and
the fit was superb. I used an Ultracast Fw190 seat with cast on harness
and this was excellent. It has the correct harness attachment points
behind the pilot. The cockpit was painted with RLM66 and washed with
gloss black and the whole assembly was matt coated before being
installed with 5 minute epoxy.
The airframe. DML’s line of Fw190s have a reputation of being difficult
to assemble but I can say the fit of this kit was faultless! But what
about the wing to fuselage join I hear you say? Knowing too well that
normally this kit would need fuselage spreaders I was very happy to note
that there were no gaps between the wing and fuselage. That’s right, no
gaps!
The rest of the construction was hassle free. The
Wurger Mechanic resin parts were superb in their casting and their fit.
Once the minute casting blocks were removed no further sanding was
needed. I always make sure to remove any evidence of the wing seam as on
the real aircraft no seam existed. This was accomplished with CA glue
and panel lines rescribed with a pin in a pin vise. As a last touch I
used some Ultracast exhausts. While these are designed for Tamiya’s kit
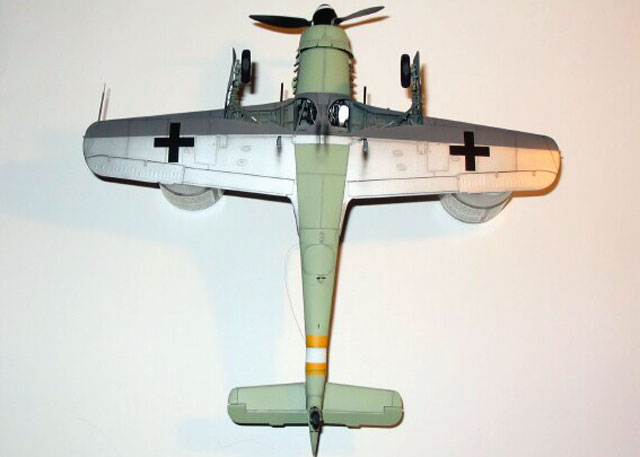
a few minutes with a file ensured a great fit. I added gun barrels with
brass tubing cut to size. I realise in the photo of the belly the
barrels do not line up with the wings in the u/c bays but I can live
with it.
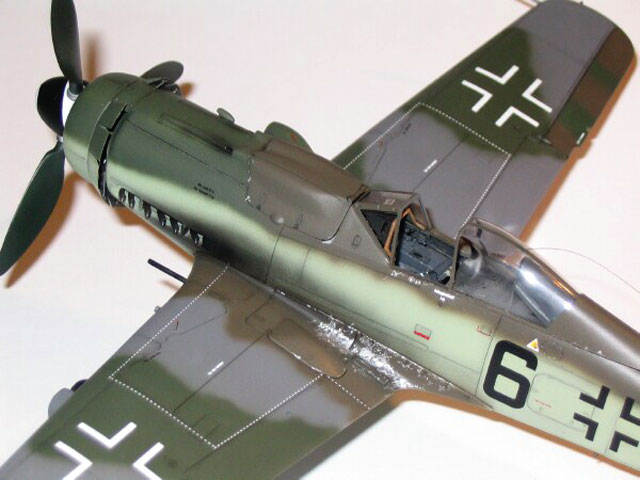
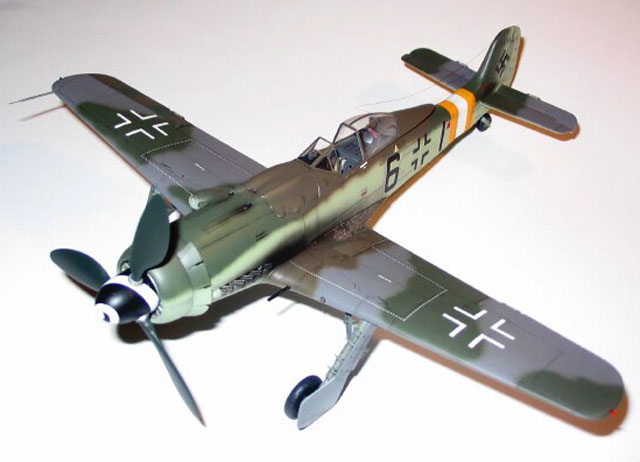
Painting
This was more of a challenge for me than normal as
it required a natural metal belly for this bird. Being an ardent
Luftwaffe fanatic I don’t have much need for natural metal! I used
Tamiya Sky for the oddball late war fuselage and underwing colour and
Gunze 75 and 83 for the rest. For the RLM81 I used the stock Gunze RLM
81 with a couple of drops of red (in about a 10:2 ratio). I sprayed the
natural metal last and used a Humbrol Metal Coat and that worked out
well for me.
I always post shade my panel lines using thinned Gunze clear grey and
then gloss coated the model ready for decals.
Decals
The Eagle Cals were very thin and settled extremely
well into panel lines. I used a full set of stencil data. There’s
something about applying the stencils that make a model more realistic
to me.
Further finishing. A thin wash was applied and then a sealing coat of
gloss over the decals. I added the exhaust stain with some thinned matt
black and then several light coats of Testors Matt Coat. Using the
excellent articles I did my best to align the gear legs correctly and
then lengthen the retraction struts with plastic card. A light chipping
with a silver pen and sharpened tooth pick caused a little wear and tear
on the wing roots and panels.
For me this was the most error free build I have
completed and I cannot recommend enough all of the aftermarket parts I
used. This model took about a month to complete with about an hour each
day spent on it.
I hope you like the end results.
Click the thumbnails below to view larger images:
Focke-Wulf Fw 190
Modelling Manuals 20 |
|
|
|
|
US Price: $17.95
UK Price: £12.99
Publisher:
Osprey Publishing
Publish Date:
May 25, 2002
Details: 64 pages; ISBN: 1841762687 |
|
|
Model, Images and Text Copyright © 2004
by Tim Both
Page Created 13 April, 2004
Last Updated
13 April, 2004
Back to
HyperScale Main Page
|
 Home
| What's New |
Features |
Gallery |
Reviews |
Reference |
Forum |
Search
Home
| What's New |
Features |
Gallery |
Reviews |
Reference |
Forum |
Search