|
Hasegawa's 1/32
scale
Focke-Wulf Fw
190F-8
by
Ian Robertson
|
 |
|
Focke-Wulf Fw 190F-8 |

Hasegawa's
1/32 scale Focke-Wulf Fw 190F-8
is available online from Squadron.com
The Focke-Wulf Fw.190F-8 served as a ground attack
counterpart to the Fw.190A-8. In most respects the F-8 was identical to
an A-8, but with its outboard cannons removed and the ETC 501 fuselage
rack as standard. Early F-8s retained the standard Fw.190A canopy,
although many late F-8s were fitted with “blown hoods”. The outboard
upper-wing plate associated with the deleted cannon was often removed,
although on many F-8s the plates were retained.
Hasegawa released a 1/32 Fw.190 F-8 based on their
popular new-tool Fw.190A-8 kit. Differences from the A-8 kit include
the blown hood (plus a standard flat hood), proper underwing panels for
the F-8, underwing bombs, and a resin SC250 centerline bomb. Note that
an F-8 can also be made using an A-8 kit and the extra parts supplied in
Hasegawa’s Fw.190 D-9 “Rudel” kit. The only part lacking is the resin
centerline bomb.
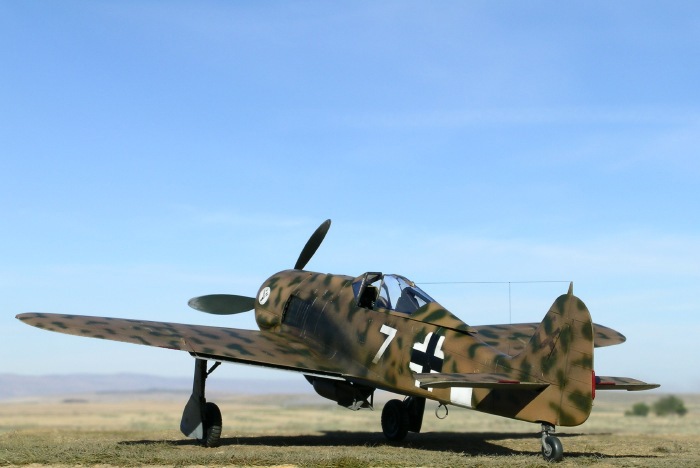
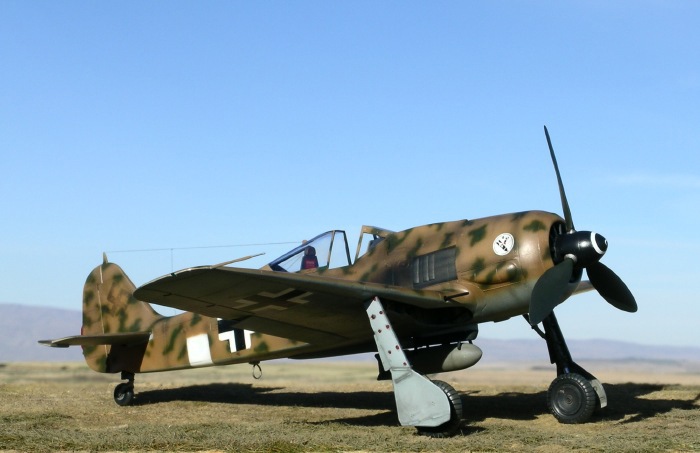
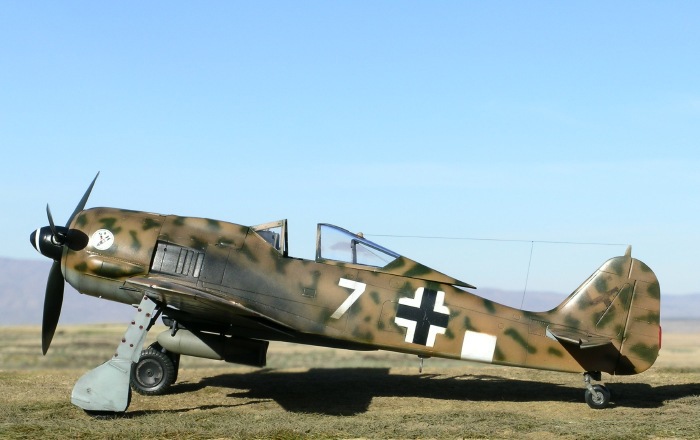
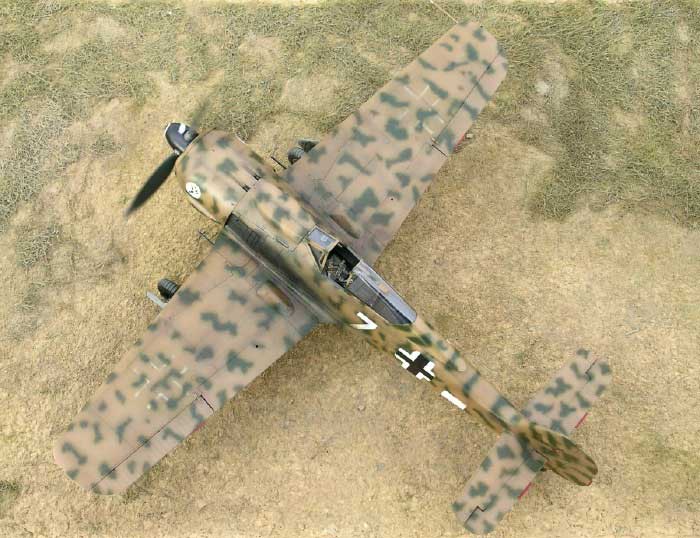
Here I present “White 7”, an Fw.190F-8 from 1./SG 4
in Northwest Italy, late summer 1944. The aircraft in SG 4 at this time
were notable for their hastily applied desert camouflage of RLM 79 with
RLM 80 mottles over RLM 76 undersides. Photographs show that the white
fuselage band, national insignia, and swastikas were not masked during
camouflage application, leaving them overpainted to varying degrees. By
contrast, the unit badge and fuselage number were added after the field
camouflage had been applied, as indicated by their sharp demarcations.
Photographs of Fw.190F-8s from SG 4 can be found in Classic
Publications’ Jagdwaffe series “The Mediterranean 1943-1945” (Volume 4,
Section 4, pp 366-370).
The Hasegawa Fw.190F-8 kit provides no additional
challenges in construction as compared to the A-8 kit. Numerous build
reviews can be found in the HyperScale features section.
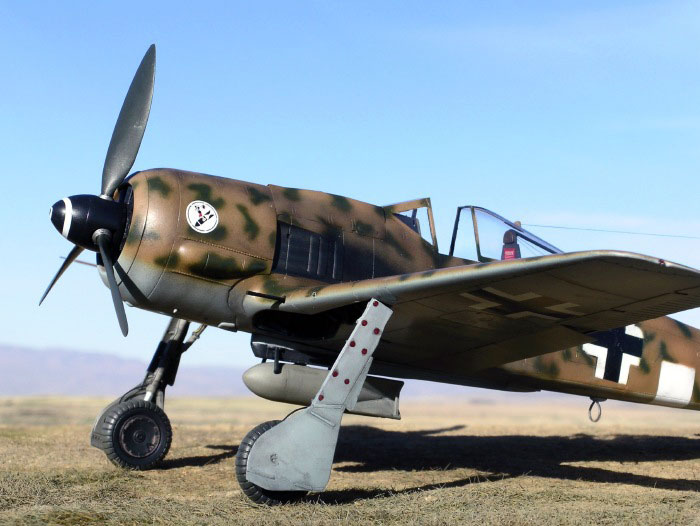
The modifications I made to my model include: resin
seat from Cutting Edge, lead foil belts with MDC buckles, Eagle Editions
treaded tires, brake lines made from solder wire, modified tail wheel
assembly (shortened slightly), and corrected coaming above instrument
panel. The particular aircraft my model represents had a standard
“flat” canopy and lacked the outboard upper-wing plates.
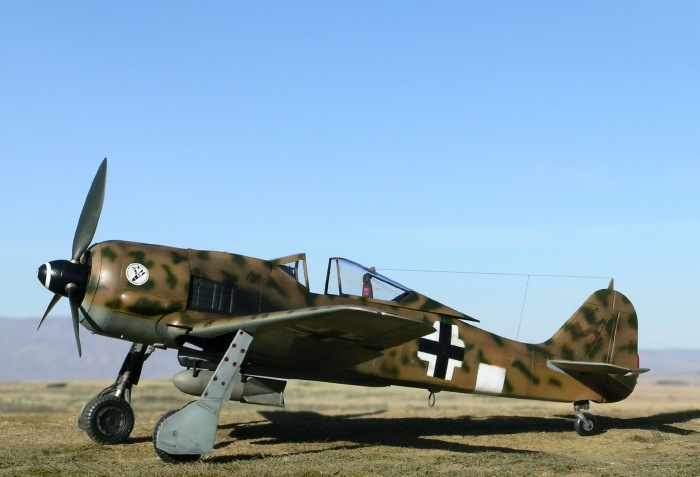
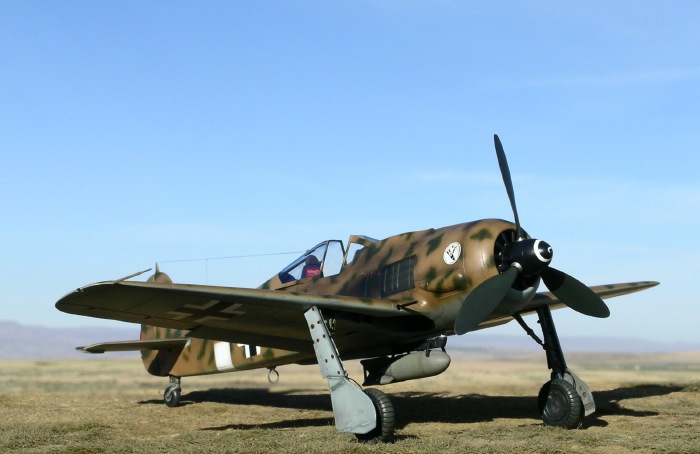
Although Hasegawa provides an option for dropped
flaps, they are engineered to be dropped at an incorrect angle of almost
90 degrees. The flaps on a Fw.190 did not drop more than 60 degrees. I
opted drop the flaps on my model only slightly, as is often seen for
parked Fw.190s. I also repositioned the elevators.
 I
painted the cockpit RLM 66 and the wheel wells and internal flap
surfaces RLM 02, both using Polly Scale acrylics. For the external
surfaces of the model I began by preshading panel lines and various
other areas in black. I then sprayed and masked the white fuselage
band. For the base camouflage of RLM 79/76 I used Aeromaster and Polly
Scale acrylics, respectively. The mottles of RLM 80 were sprayed
freehand using Tamiya’s “olive green” (XF-58). Washes of thinned burnt
umber / raw sienna were applied with a soft brush. I
painted the cockpit RLM 66 and the wheel wells and internal flap
surfaces RLM 02, both using Polly Scale acrylics. For the external
surfaces of the model I began by preshading panel lines and various
other areas in black. I then sprayed and masked the white fuselage
band. For the base camouflage of RLM 79/76 I used Aeromaster and Polly
Scale acrylics, respectively. The mottles of RLM 80 were sprayed
freehand using Tamiya’s “olive green” (XF-58). Washes of thinned burnt
umber / raw sienna were applied with a soft brush.
I used EagleCals sheet
#92 for the SG 4 badges and the national markings on the fuselage and
underside of the wings, whereas the fuselage numbers were taken from
EagleCals #62 (a Bf.109 sheet). Once the
balkenkreuz
decal on each side of the fuselage had dried, I reapplied RLM 79 and 80
over the edges of the decals to simulate the sloppy field application of
camouflage. The fuselage band was unmasked and similarly overpainted on
its upper half.
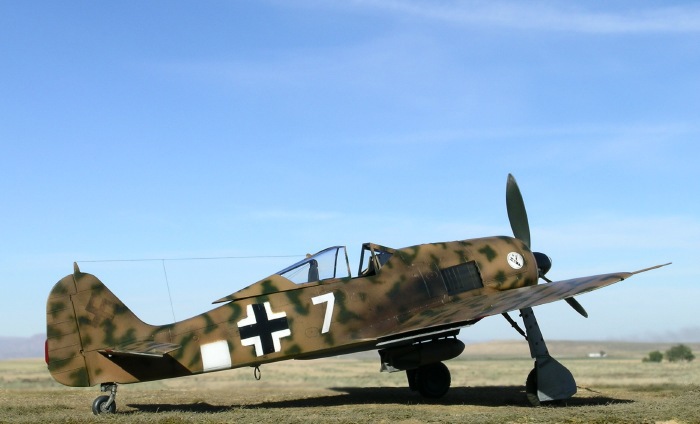
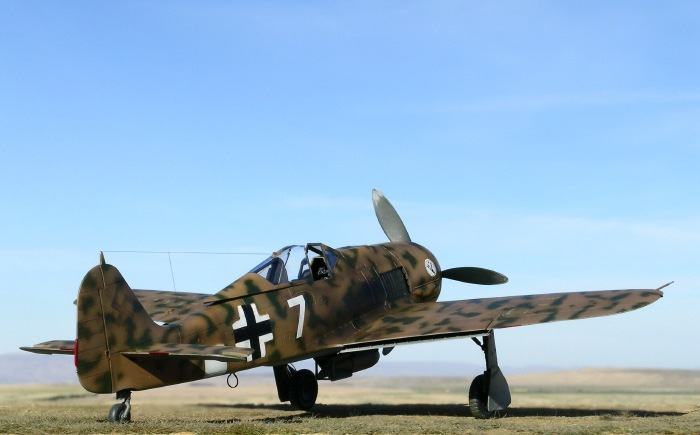
To simulate the
overpainted swastikas I cut a template from Tamiya tape and then sprayed
Polly Scale black on both sides of the tail. After a few minutes I
wet-sanded the swastikas with a micromesh sanding cloth. I then
reapplied patches of RLM 79 and 80 to achieve the overpainted
appearance. A similar technique was used for the upper wing crosses,
leaving only a hint of the original markings.
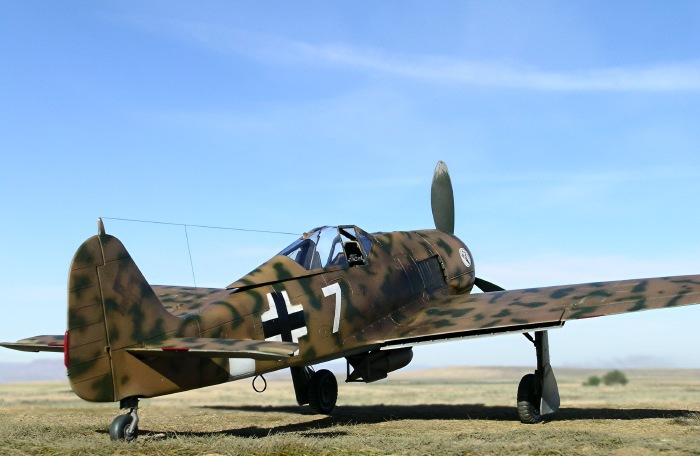
I painted the spinner black and then applied a
white spiral decal from the EagleCals sheet, modifying it slightly by
having it terminate abruptly as seen in photographs. The propeller
blades were painted Alclad duraluminum, followed by Polly Scale RLM 70
(black green). The tips on the backside of the prop blades were then
wet-sanded with a micromesh cloth to expose the Alclad paint underneath,
simulating the worn appearance visible in photographs.
Weathering on this model was kept to a minimum,
apart from the prominent exhaust stains which I simulated by spraying
highly thinned black Polly Scale acrylic once the decals had been
applied.
A wooden cutting board was used as the base for the
model. Celluclay was used to make the basic ground cover. The
celluclay powder was mixed into a paste with water and white glue,
tinted with light brown acrylic paint, and then spread thinly over the
cutting board. Note that the cutting board had previously been treated
with several coats of clear lacquer to prevent warping while the
celluclay dried.
While the celluclay was still wet I added pieces of
Heki grass mat (item # 1574 - Wild Grass Savanna). Heki products are
available for purchase in the United States at “Scenic Express”. I then
sprayed the grass light brown to give it a singed-in-the-desert-sun
look.
Images were taken with a Nikon Coolpix 5400 digital
camera. The “sharpen edges” tool of Adobe Photoshop was used to restore
some of the clarity and crispness lost during image compression.
Click on the thumbnails
below to view larger images:
Model, Images and Text Copyright ©
2006 by Ian Robertson
Page Created 08 November, 2006
Last Updated 21 February, 2007
Back to HyperScale
Main Page
|
 Home
| What's New |
Features |
Gallery |
Reviews |
Reference |
Forum |
Search
Home
| What's New |
Features |
Gallery |
Reviews |
Reference |
Forum |
Search