|
Yellow 14 in 1/32
scale
Focke-Wulf Fw
190F-8
by
Ian Robertson
|
 |
|
Focke-Wulf Fw 190F-8
with ER 4 bomb rack |

Hasegawa's
1/32 scale Focke-Wulf Fw 190F-8
is available online from Squadron.com
The Focke-Wulf Fw 190F-8 served as a ground attack
counterpart to the Fw 190A-8. In most respects the F-8 was identical to
an A-8, but with its outboard cannons removed and the ETC 501 fuselage
rack included as standard. In addition, many late F-8s had the “blown
hood” style canopy rather than the flat style common on A-8s.
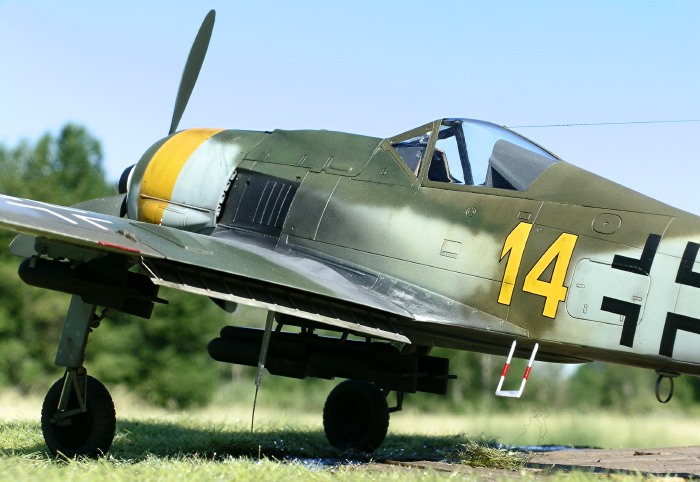
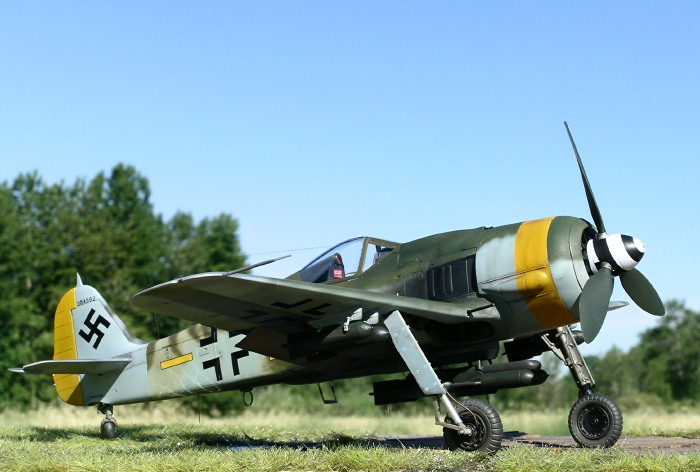
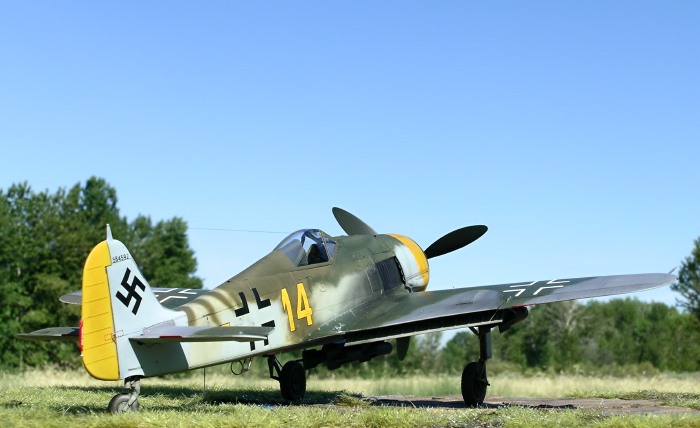
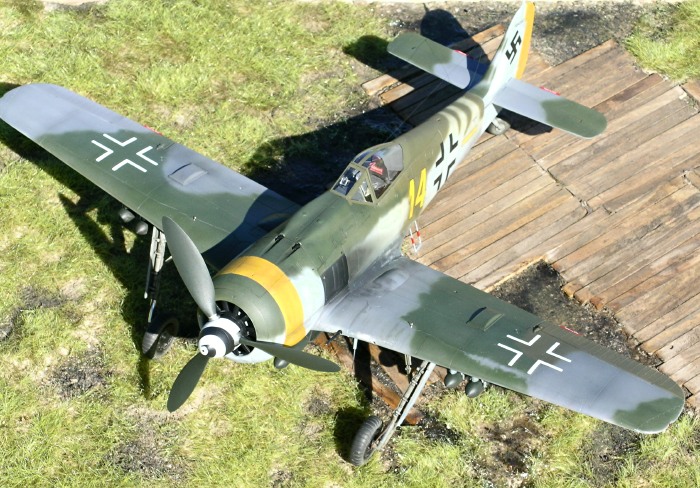
Here I present “Yellow 14” (W.Nr. 584592), a
colorful late-war Fw.190F-8 from SG 2 or SG 10. There are two photos of
this aircraft sitting in a scrap heap on page 78 of Squadron’s “Walk
Around Fw.190A/F”. A color profile of the aircraft is presented a page
earlier, and on Eagle Strike decal sheet #48-028. While no markings are
available for this aircraft in 1/32, suitable decals can be scrounged
from a number of sources (see below).
Hasegawa’s F-8 kit
(and an alternative way to make one)
Hasegawa’s newly-tooled 1/32 Fw.190F-8 kit is
substantially more expensive than their A-8 kit owing to the resin bomb
that is provided. However, there is a cheaper way to make an F-8
(without the resin bomb of course) if you are also planning on building
a Fw.190D-9. Here’s how:
Hasegawa’s 1/32 Fw.190D-9 “Rudel” kit contains all
the parts needed to convert an A-8 kit into an F-8 (blown hood,
underwing bomb racks with 4 SC50 bombs, and appropriate underwing
panels). The only catch is that if you use these parts from the D-9 kit
you will be constrained to building a D-9 with a flat style canopy. The
good news is that there are many decal options for such a D-9 (e.g.,
EagleCals #21-32, 58-32, 60-32, 61-32; Eagle Strike # 32012, 32014;
Cutting Edge # 32033, 32034).

Numerous build reviews for the Hasegawa’s 1/32
Fw.190A-8 kit can be found in the Hyperscale features section, so I will
not revisit the details here. Suffice it to say that after building
three 1/32 Hasegawa Doras, one A-5, one A-8 and two F-8s, Hasegawa’s
Focke-Wulf Fw190s are among my all-time favorite kits.
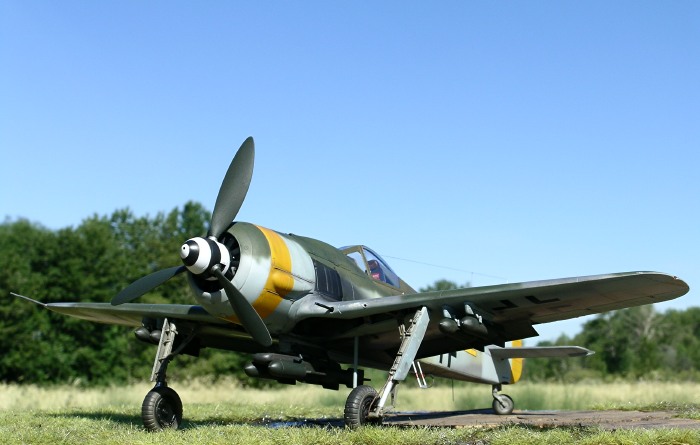
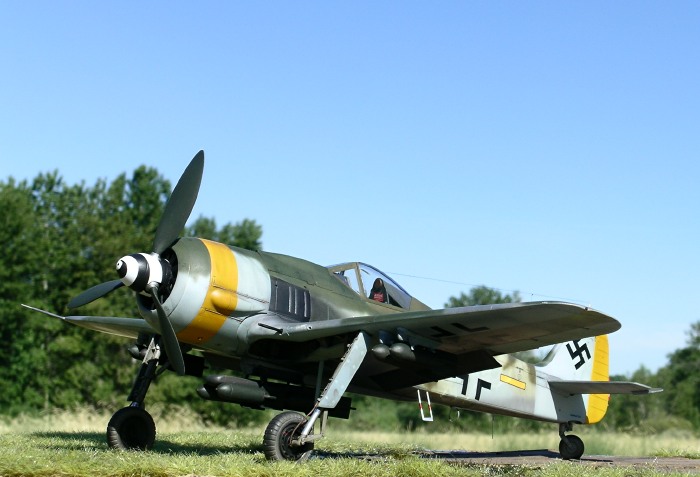
Modifications
For interest I added a resin Einhängerost 4 (ER 4)
multiple bomb rack from J.Rutman Products, and I used eight SC50 bombs
from two Fw.190D-9 “Rudel” kits – two on each wing and four mounted on
the ER 4 rack. Other modifications included a Cutting Edge resin seat
with molded seat belts, treaded tires from Eagle Editions, brake lines
made from wire, and a loop antenna made from a strip of metal. I
removed the lower undercarriage panels as was sometimes done on aircraft
operating in muddy or snowy conditions (note that the photos of “Yellow
14” do not show this modification). I also repositioned the elevators
and tail wheel for added interest.
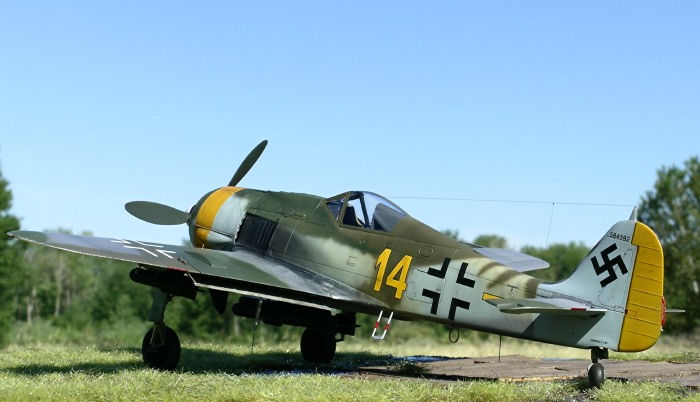
Interpretation of “Yellow 14’s” Colors
The photographs in
Squadron’s Walk Around book (pg 78) show that “Yellow 14” has a striking
camouflage scheme. However, caution is warranted when interpreting
colors from black and white photographs because speculation always plays
a role. Here is how I arrived at the scheme on my model using the
Squadron photographs for reference:
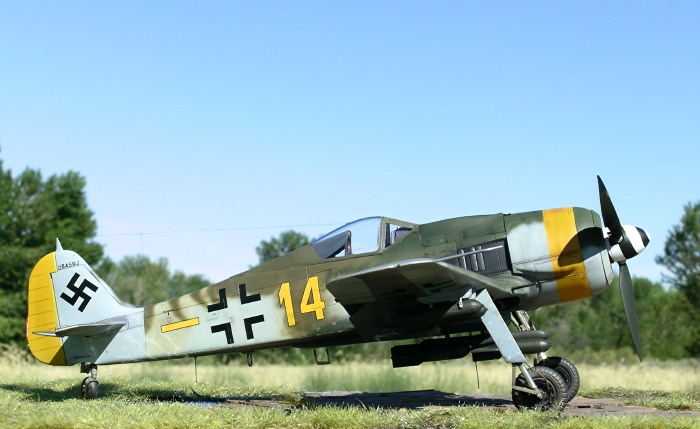
It is clear that the
rear half of the wing undersides on “Yellow 14” were natural metal,
whereas the ailerons and forward half of the wings were RLM 76. It is
also clear that the tail was a replacement (or a subassembly) because
the colors and camouflage change abruptly where the tail attaches to the
fuselage. Note that the tail spine has a thin band of darker
camouflage (RLM74/75 or 75/83?).
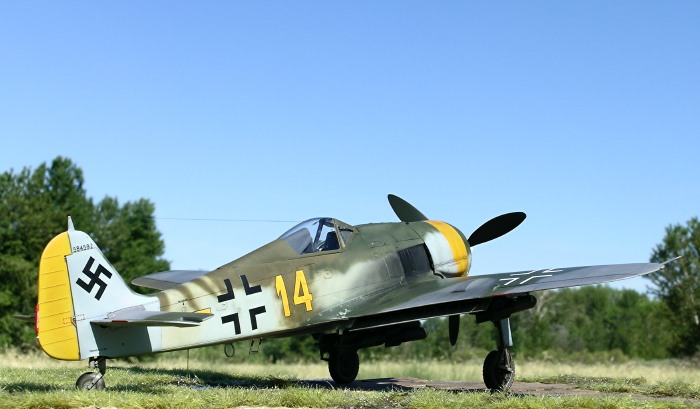
Camouflage for the
remainder of the aircraft is less obvious, but some reasonable guesses
can be made. The low contrast between colors on the upper fuselage
suggest RLM81/83, as indicated in both the Squadron and Eagle Strike
profiles. (According to Jerry Crandall of Eagle Editions, many late-war
aircraft which appear monotone in photos may actually be RLM81/83, owing
to the low contrast between these colors. This effect is demonstrated
by taking a color photo of a model with RLM81/83 and converting it to
gray scale).
Both the Eagle Strike
and Squadron profiles suggest a continuation of RLM81/83 on the upper
wings. However, this interpretation seems unlikely to me given the
pronounced contrast visible between colors on the upper wing. In my
opinion a more likely combination is RLM75/83, since these colors
exhibit greater contrast and are considered by many to have been common
on late war German fighters. There also appears to be a small, slightly
darker, patch of RLM81 on the port wing beneath the cross and on the
aileron. This patch gives further support to the notion that the upper
wings were not predominantly RLM81/83. An alternative to RLM75 on the
wings is a lighter grey found on some late-war fighters (Jerry Crandall
– personal communication).
The sides of the
fuselage also present some difficulty (and thus provide the modeler with
artistic elbow room!). The cowl and tail appear to be standard RLM76,
as does the area around the Balkenkreuz.
However, the rear spine and the area around the yellow bar appear
slightly darker in the photo, particularly when compared to the light
color of the tail. Therefore, I have interpreted this as an area of
“straw” colored RLM76. The same rationale was applied to the area in
advance of the “14”.
Paint and Decals
 Polly
Scale acrylics were used for all painting except RLM81 (AeroMaster
acrylic) and natural metal (Alclad duraluminum lacquer sprayed over Mr.
Surfacer base). Polly
Scale acrylics were used for all painting except RLM81 (AeroMaster
acrylic) and natural metal (Alclad duraluminum lacquer sprayed over Mr.
Surfacer base).
·
Cockpit – RLM66
·
Wheel wells, landing gear, internal surfaces of flaps
– RLM02
·
Spinner - painted white, masked with a curved strip of
Tamiya tape for the spiral, and then painted black.
·
Propeller blades – RLM70
·
ID bands – painted yellow over a light grey base and
then masked for duration of painting
·
Camouflage – see interpretation provided above
Once the paint was
dry, I sprayed a thin coat of Future floor wax over the model to give it
a glossy finish in preparation for decals. The national markings and
stencils came from spare EagleCals sheets, whereas the yellow “14’s”
came from Eagle Strike sheet #32052, and the yellow bars from EagleCals
#78-32. Once the decals were dry I applied a 50/50 mixture of Polly
Scale clear satin and clear flat as a top coat.
The werknummer was
applied using dry transfers.
A wooden cutting board was used as the base for the
model. Celluclay was used to make the basic ground cover. The
celluclay powder was mixed into a paste with water and white glue,
tinted with brown acrylic paint, and then spread thinly over the cutting
board. Note that the cutting board had previously been treated with
several coats of clear lacquer to prevent warping while the celluclay
dried. While the celluclay was still wet I added pieces of Heki grass
mat (item # 1574 - Wild Grass Savanna). Heki products are available for
purchase in the United States at “Scenic Express”.
Images were taken with a Nikon Coolpix 5400 digital
camera. The “sharpen edges” tool of Adobe Photoshop was used to restore
some of the clarity and crispness lost during image compression.
Click on the thumbnails
below to view larger images:
Focke-Wulf Fw 190
Modelling Manuals 20 |
|
|
|
|
US Price: $17.95
UK Price: £12.99
Publisher:
Osprey Publishing
Publish Date:
May 25, 2002
Details: 64 pages; ISBN: 1841762687 |
|
|
Model, Images and Text Copyright ©
2005 by Ian Robertson
Page Created 08 August, 2005
Last Updated 08 August, 2005
Back to HyperScale
Main Page
|
 Home
| What's New |
Features |
Gallery |
Reviews |
Reference |
Forum |
Search
Home
| What's New |
Features |
Gallery |
Reviews |
Reference |
Forum |
Search