|
Fonderie Miniature's 1/48 scale
Piasecki H21 Shawnee
by Mick Evans
|
 |
|
Piasecki H21
Shawnee |

Fonderie
Miniature's 1/48 H.21 Shawnee is available online from Squadron.com
Fonderie Miniatures continues its French flown aircraft
theme with a 1/48 scale Piasecki H21 Shawnee.
The kit contains 97 moulded plastic styrene parts in a
medium grey colour soft styrene plastic. As usual detail on these parts
is not bad but the panel lines require a light re-scribe to obtain a
consistent level of detail as some lines are not as clearly defined due
to the moulding process.
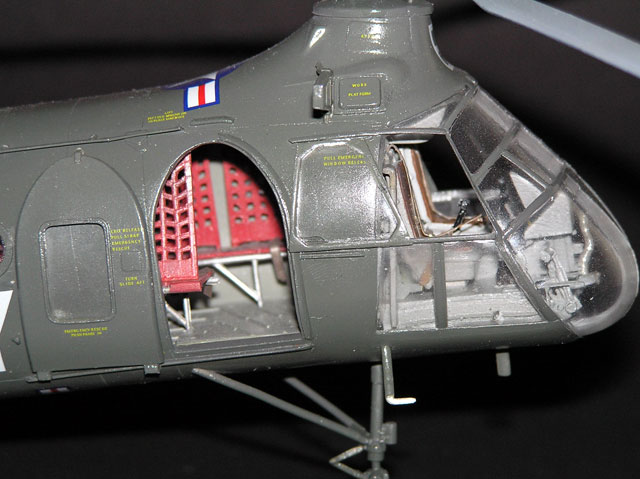
20 clear parts are provided for the cabin windows. The
main canopy is moulded in the typical vacu-formed style and, as usual,
is not entirely crystal clear, but a quick dip in Future floor polish
improves the clarity.
The resin parts are nicely moulded and add a high level
of detail to the kit. There are 5 resin parts in all.
A major air bubble was evident on one of the main wheels
that required filling. The intermediate gearbox, instrument console,
nose, and main wheels, are all cast and have a very realistic level of
detail to them.
55 cast metal parts are also included. Most of these need
a bit of clean up of flash, and some need some gentle straightening, in
particular the rotor heads. The level of detail is good and under a coat
of paint these parts look great.
For the first time FM has provided an extensive step by step instruction
sheet, with quite good detailed drawings and this is a vast improvement
over previous kits. Mating surfaces need to be heavily sanded, in
particular the trailing edges of all control surfaces to achieve a
realistic thickness. The 2 fuselage halves do not marry up too well in
circumference, but some gentle pressure while gluing should solve the
problem. As with all the previous FM kits that I have built, I am sure
that this is caused by, removing the parts from the mould while they are
still hot. Interior detail provided is good with all the major bulkheads
and cabin floor being provided. 18 webbing seats are provided for the
cabin area, but these need some extensive cleanup.
The decals are clearly printed with the carrier film
being thin. All decals are in register with good colour definition.
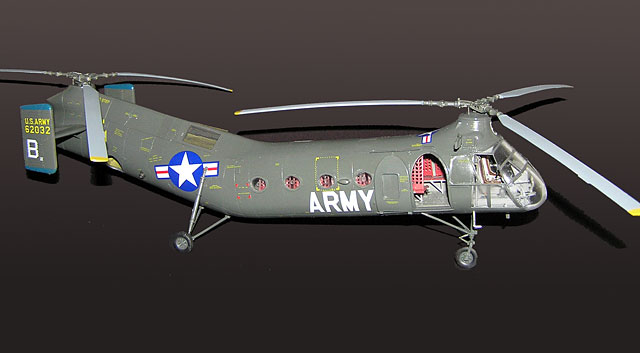
Markings are provided for three aircraft:
-
A French Navy aircraft
of Flotile 31F in overall Gloss Dark Sea Blue based in Algeria 1956,
-
A French Armee de Terre
(ALAT) of 25eme Division de Parachutistes in overall Satin Olive
Drab based in Algeria in 1958, and
-
A US Army version in
overall Satin Olive Drab.
The build for the Shawnee commenced with some very extensive cleanup
of all of the mating surfaces of every part and in this kit there are
some parts. The instructions need to be followed meticulously, and if
you are used to looking at exploded diagrams for assembly, then you will
have to get used to reading instruction. There are 6 pages of written
instructions with a few detailed drawings.
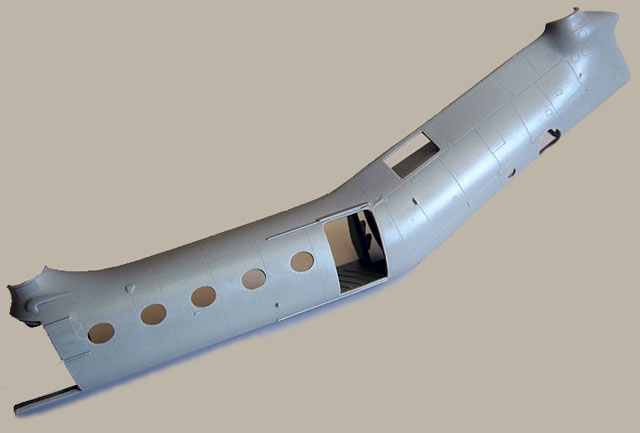
Construction started with the sanding of the fuselage halves until the
excess moulded plastic was removed. Next all of the bulkheads and
interior parts were cleaned up and dry fitting began.
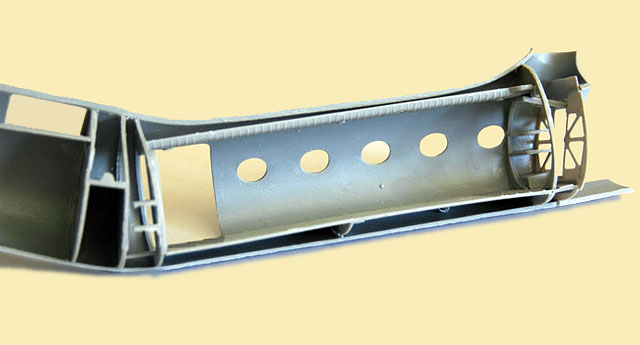
The fuselage walls were thinned down to accept the cabin floor and the 7
bulkheads. This process requires constant thinning and trial fitting
until a snug fit is achieved.
The cabin and gearbox area is quite a complex build, requiring a fair
amount of cleanup work and painting. The detail here is very good but
requires quite a lot of extra work, in particular the passenger seat
webbing.
Once this process is complete, the fuselage assembly is a very easy
assembly process. The cockpit then becomes the next big challenge. The
instructions need to be followed to the letter to ensure that every
thing fits correctly in its right place.
The tail plane assembly is the next area for assembly and both the
horizontal and vertical surfaces need to be thinned down a lot to
achieve the correct thickness at the leading and trailing edges. The
horizontal tail, and vertical fins were added after the cleanup process
and very little filler was required around the fuselage joins.
The next major task was the transparencies. Firstly all parts were cut
out and trimmed and then dipped in Future. The cockpit transparencies
were not an easy fit, which is an understatement. They just don’t fit at
all without modification. I had heard of one reviewer giving up at this
point in assembly. On trial fitment of the nose transparencies a 1 cm
gap appears at the top, and any attempt to pull it in forces the sides
to bulge dramatically. The solution was to remove the sliding windows,
then put a relief cut down the panel line below just the sliding
windows, and remove some of the clear panel below. I know that I
sacrificed some accuracy, but at least it now fitted. Removing the
fuselage area below the cockpit floor and then adding a plastic card
replacement after the transparencies are fitted also helps the process.
The sliding window rails then had to be removed from the fuselage sides,
as they did not align with the sliding window cutouts. New rails were
then manufactured and fitted. The canopy frames were all masked and any
seams were filled and sanded. The masking was left on until after the
kit was completely painted. I spent a lot of time blowing all of the
sanding dust out of the fuselage, and a final complete immersion in
water ensured that when the masking was removed no dust adhered to the
inside of the transparencies due to static caused by the tape removal.
The last major project was the rotors. They were a straightforward
construction project that looked very effective when painted.
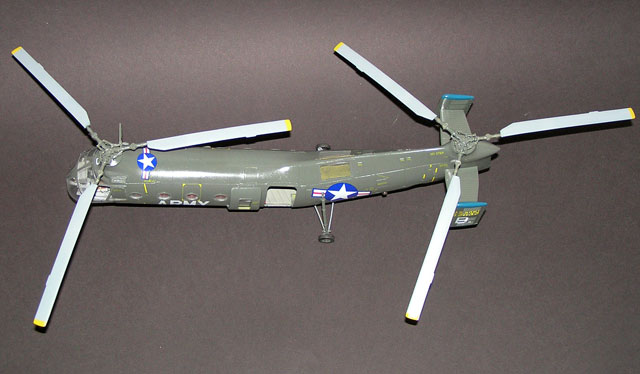
The kit was finished in XtraColor enamels for the standard Vietnam US
Army scheme of Olive Drab with grey and black rotor blades.
The decals went on very well and snuggled down with a bit of decal
set. The kit was over sprayed with semi gloss before the cabin windows
were fitted with white glue.
The final fit out of the rotors and cabin doors made for an awesome
finish.
The end result was well worth the effort I put in which was approx 35
hours of construction.
Thanks to Squadron for the review kit.
Click on the thumbnails
below to view larger images:
Model, Images and Text Copyright © 2005 by
Mick Evans
Page Created 10 March, 2005
Last Updated
10 March, 2005
Back to
HyperScale Main Page
|
 Home
| What's New |
Features |
Gallery |
Reviews |
Reference |
Forum |
Search
Home
| What's New |
Features |
Gallery |
Reviews |
Reference |
Forum |
Search