|
1/48 scale
scratchbuilt Halibag
Handley Page
Halifax
Part One
by
Philip Robson
|
 |
|
Handley Page
Halifax under construction |

HyperScale is proudly supported by
Squadron.com
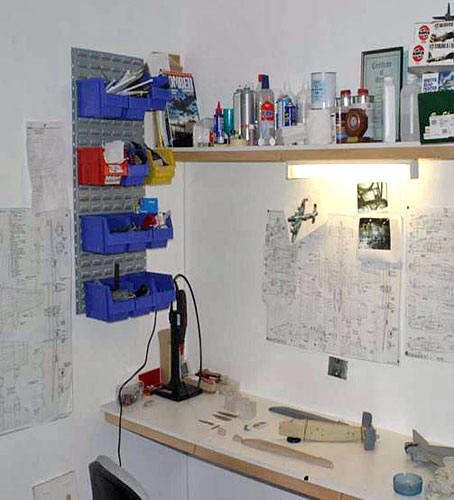
This is my workshop, simple but efficient. Funny how much stuff you
end up needing. What were empty shelves and surfaces all of a sudden are
full.
This would be my return to model making after a break of about six
years, so what subject? kit? or maybe scratchbuild. My thoughts were
leading me in a Whitley direction when the Halifax became my preference.
The path was set, plans (MAP) were purchased, the internet scoured for
pictures.
Early fuselage construction commenced with making the patterns for
what was originally going to be a kit.
Two side profiles were cut out of 1.5 mm plastic. Provision was made
for two spars each for the tail and wings .On a 'contiboard' building
board the fuselage sections were attached and the gaps between filled
with balsa superglued in. The two sides were then roughly sanded and the
two sides mated together using brass tubing in the spar locations. Brass
tube enables you to engineer the pieces so that they always register.
The rough sanded blanks were then filled with pollyfiller and sanded
again. Once happy with the shape (oh yes just wait) the blanks were
wiped over with casting resin which gives a lovely surface to work down
to a finish. Once sanded and primed the area around the canopy was not
right. If the shape is not right when you come to mark all the framing
positions they will not fit. The whole area was cut out and redone.
Eventually I did it by cutting out the individual FLAT panes of the
canopy and fixing them into their correct spacial position, then filling
and sanding to get the curved panes and transitions. Once happy the
blanks were converted into solid resin pieces using a silicone mould
(£80 in rubber and it leaked all over the kitchen).
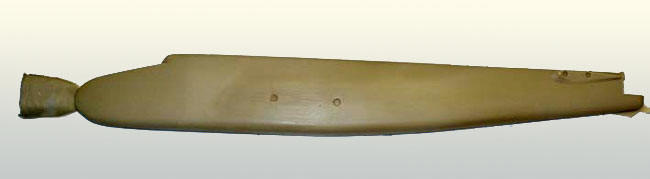
After many weeks of work we arrive at the point shown below. The
exterior has been scribed and the enormous process of grinding out the
inside of the shells begun. How I ended up doing it this way I don't
recall but it was certainly satisfying to turn the blanks into beautiful
complex pieces. Go get you motor tool and grind a little bit of resin.
Now imagine grinding away a piece bigger then a bag of sugar. The Hoover
was my constant companion. All windows were lined with brass to give a
sharp edge. Some consideration should be given to the amount of handling
they would take over the coming years (I seem to work quite slowly).
When you scribe on the panel lines is when you find out how well you
have got the shape. Thankfully most areas were fine. Before the halves
were ground out they were fixed together and moulds taken of the nose
and canopy areas. These would be used to form the transparencies.

Once sufficiently thin the internal structure was represented with
plastic strip. Thanks Evergreen. Verticals were fitted and then probably
close to 500 horizontals were fitted using liquid poly. For areas under
stress it will not hold strongly enough but for all the small horizontal
pieces it allowed their fine positioning and accurate glue placement
using a fine brush. All the joints were gone over a couple of times. The
main thing achieved now was the positioning of the floor insert which
fits accurately in each of the halves or when together. These parts have
been refitted many hundreds of times as the build has progressed.
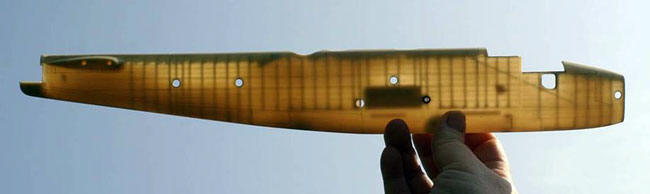
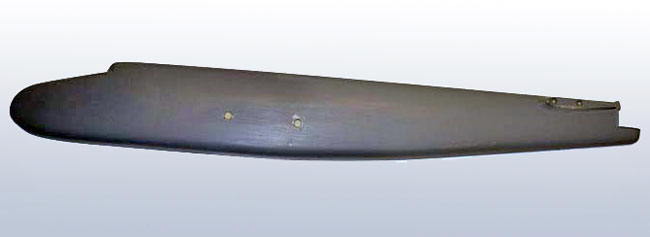
Shown below is the floor insert.
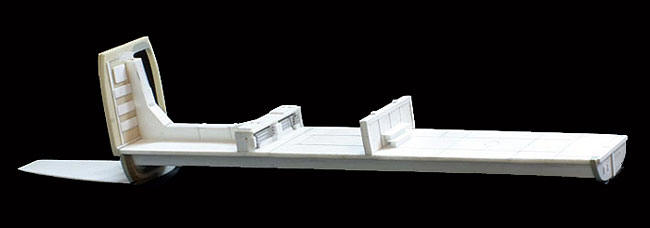
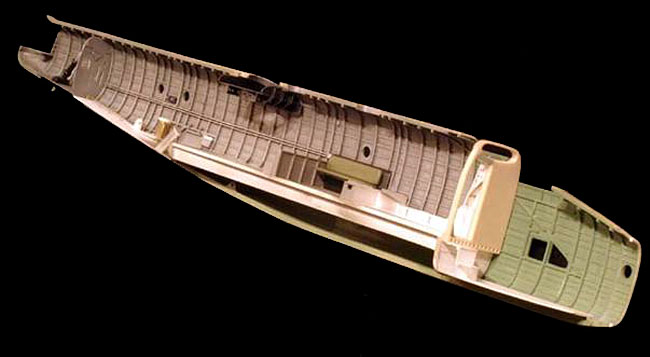
Here is the port fuselage half with the internal structure slowly
coming along. The Pilot's platform and front spar are shown in position.
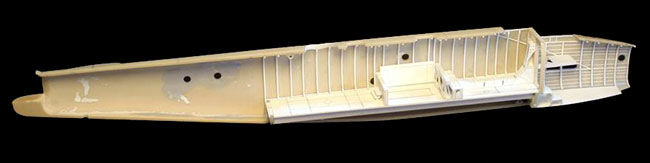
Quite a jump forwards here as the fuselage structure is complete.
Colour? I debated long and hard about this, green or natural metal. The
advice that I took was from those close to the Canadian rebuild of NA377
at Trenton and from those at 57 Rescue a Halifax appreciation site. The
fuselage interiors were painted with Humbrol enamels, a mix of aluminium
and brown as a first coat then a wash of Tamiya smoke (A truly brilliant
product) Next stage was a drybrush to pop out the detail . The turret
mounting was then constructed in plasticard and installed. As a happy
coincidence when about a year later I purchased a Classic Airframes
Defiant the turret fitted EXACTLY in all respects. Either it was luck or
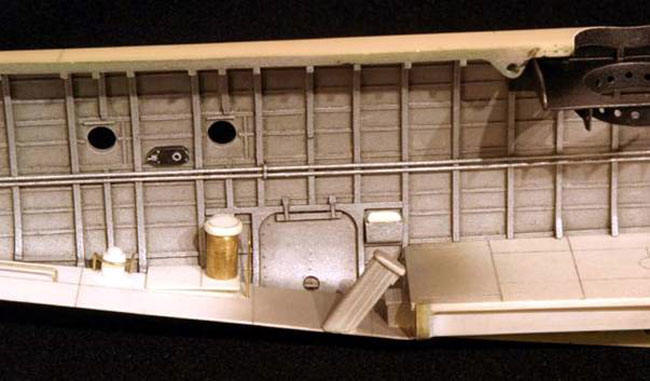
we both independently got it right. Seen below are the control rods back
to the elevators, the flare chute ( since replaced with a more accurate
version), the Elsan, the compass and an oxygen regulator.
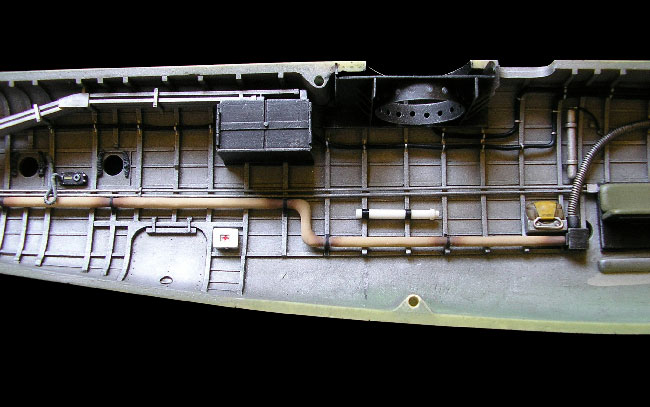
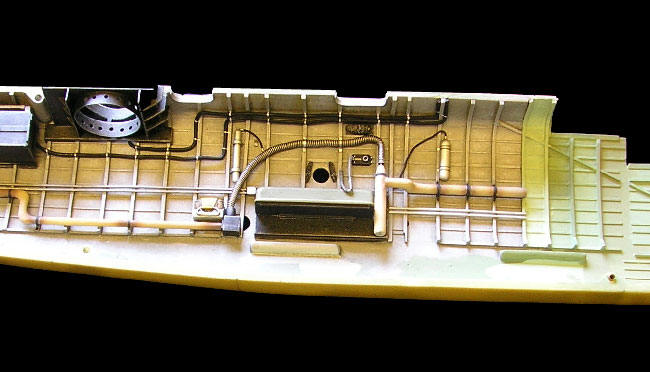
In the next shot the detailing in this area is almost complete.
Additions include the rear turret ammunition racks, a simplified
impression of the wiring, parachute stowage, two hydraulic accumulators,
curtains, oxygen regulator. The brown pipe work connected by the ribbed
tubing is the heating system pipes which were coated with asbestos.
Between the wiring and the ribbed pipe is an oxygen bottle stowage
point. These are a net bag that small personal oxygen bottles were
stowed in. The various shades of green were part of an attempt to get at
the colour I wanted. Looking at a wide range of photos the available
colours all looked too dark or too green. I have made my own mix and it
falls midway between them all. Later additions to this area were 4 photo
flash flares and a strange fitting for which I have no idea of its
purpose.
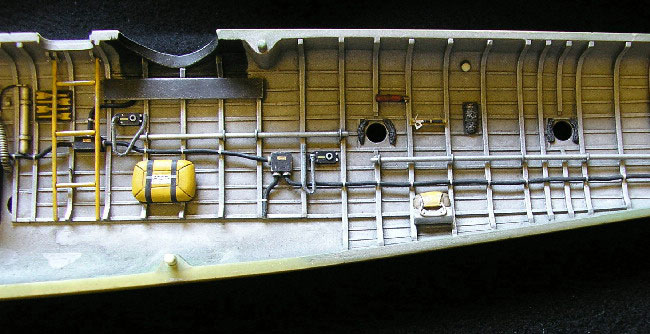
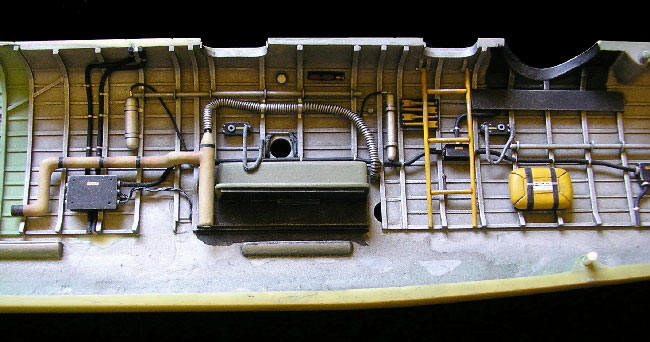
The other fuselage half contains much the same as the other with the
addition of the escape ladder, life raft, paddles, fire extinguisher, an
interior light and various electrical junction boxes. The paddles I know
realize should be in a bag attached with a lanyard to the life raft.
This brings me pretty much up to date. Next time I will cover more
interior detailing, and the tail planes.
To be continued.
Click on the thumbnails
below to view larger images:
Model, Images and Text Copyright ©
2005 by Philip Robson
Page Created 09 March, 2005
Last Updated
09 March, 2005
Back to
HyperScale Main Page
|
 Home
| What's New |
Features |
Gallery |
Reviews |
Reference |
Forum |
Search
Home
| What's New |
Features |
Gallery |
Reviews |
Reference |
Forum |
Search