|
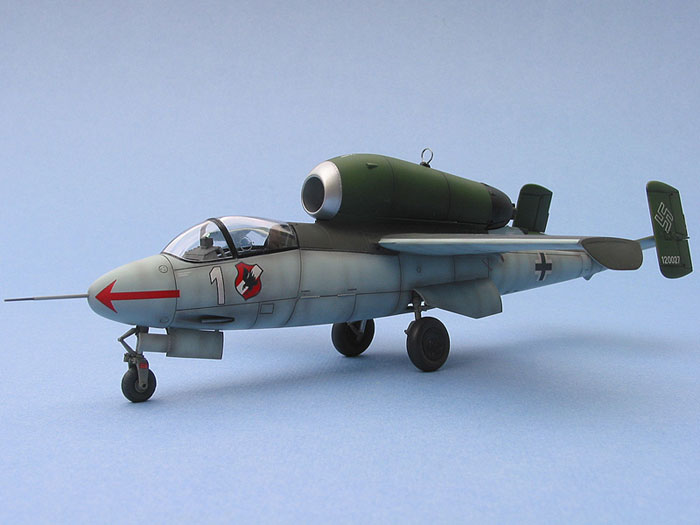
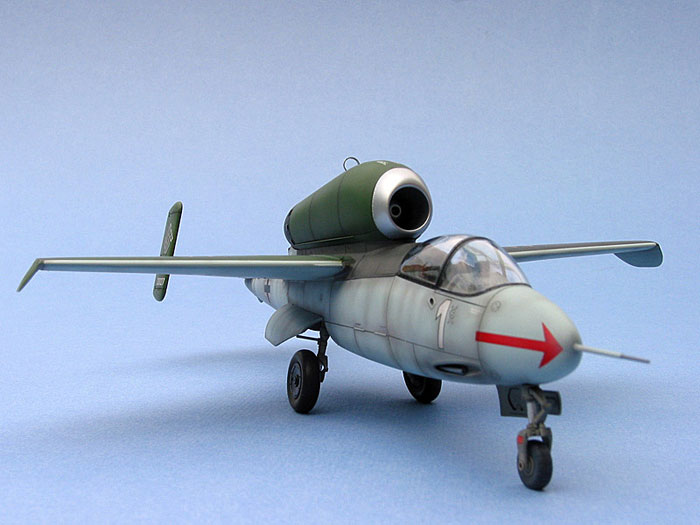
Tamiya's 1/48 scale
Heinkel He 162A
by Tony Bell
|
 |
|
Heinkel He 162A |

Tamiya's 1/48 scale Heinkel He 162A-2 is available online
from Squadron.com
I am a slow builder, no denying it.
Between the demands of my family, work and my other hobbies, the best I
can usually manage is three to four months for a straight forward, out
of the box build. Anything more involved can take much, much longer.
Just ask me about my Marauder. No wait! On second thought, don’t – it’ll
just depress me.
OK, so here’s the situation: Due to work related obligations I’m on call
and can’t venture more than an hour’s drive from the office. My wife is
taking the kids up to a friend’s cottage in the Muskokas and I’m stuck
at home all by my lonesome for the weekend. Time for a little self pity?
No! Time some serious modelling! Yay!
What to do? I could get back to work on my long term P-80 project which
seems to have stalled completely, or I could go for an ultra-quick OOB
build and see just how much can be accomplished in two and a half days
of intense, concentrated modelling. The former would be the responsible
thing to do, whereas the latter more satisfying. But this is a hobby and
satisfying trumps responsible any day, so a speed build it is.
Now to choose a kit. A recent release Tamigawa Wunderkit is just
the thing, with no need for any aftermarket stuff or scratchbuilt
details in order to get an acceptable result. I have the Hasegawa P-40E
in the stash, but the fiddly fuselage parts breakdown will be too
time-consuming to do properly. Yet another Tamiya P-47 or P-51? Erm, no
thanks, I’ve already done those to death. Oooh, I know, the new Tamiya
He-162! It’s small and simple and the paint schemes are dead easy. Plus,
it should just about fall together, engineering-wise.
On your marks, get set, GO!
Getting Started
After going over the instructions and doing a paint inventory to
ensure I had all the right colours in stock, I sat down on Friday night
with my various cutting and abrading implements to remove and clean up
all of the parts that go between the fuselage halves. Lately I’ve
abandoned my side cutters and X-acto for removing parts from the trees
in favour of my razor saw. Yes, I now saw my parts off the sprues. While
it may sound more time consuming, it actually pays off in cleanup time,
as one can cut the attachment stubs almost perfectly flush with the
parts.
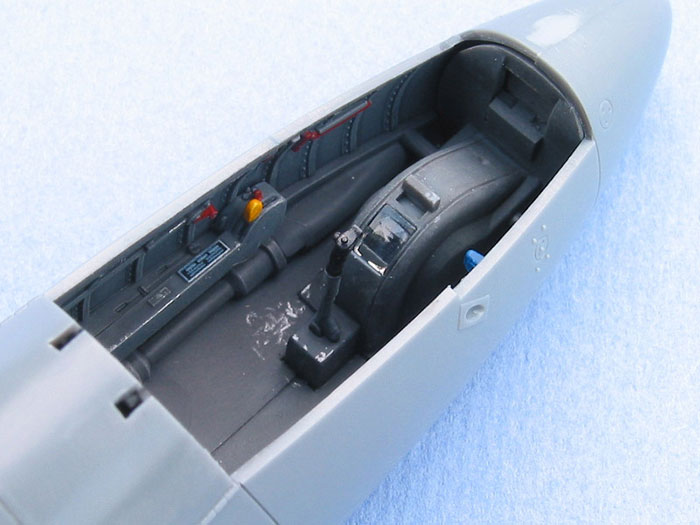
 Starting
with the cockpit parts, I pre-shaded things with Tamiya semi-gloss black
and then sprayed XF-63 for the RLM66 dark grey. I added a few drops of
Future to the XF-63 to cut the chalkiness. Starting
with the cockpit parts, I pre-shaded things with Tamiya semi-gloss black
and then sprayed XF-63 for the RLM66 dark grey. I added a few drops of
Future to the XF-63 to cut the chalkiness.
I concocted a mixture of Polly Scale semi-gloss, India ink and water
to use as a wash, and once that was dry, I sprayed Polly Scale flat and
drybrushed everything with a medium grey mixed from Citadel acrylics.
Normally I would have drybrushed with artists’ oils, but they take at
least 48 hours to cure properly, so acrylics were the order of the day.
Citadel acrylics were also used to pick out the details on the side
consoles and cockpit walls. There is a little clear piece that attaches
to the nose wheel well, presumably so the pilot could tell if the gear
was down. This was fixed in place with a little bit of Future floor wax.
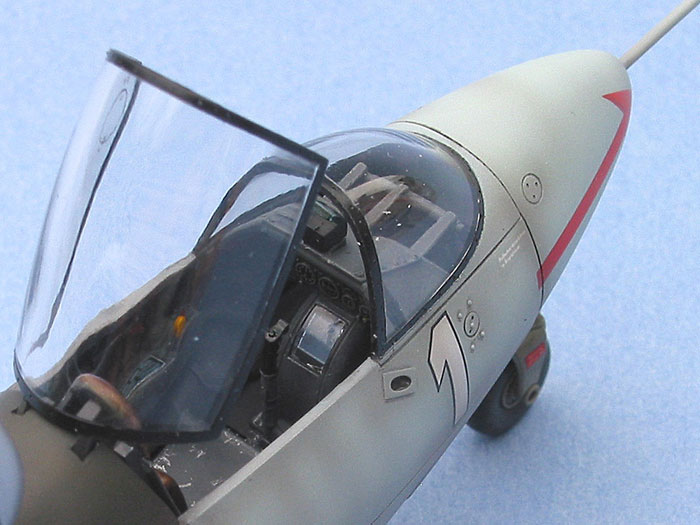
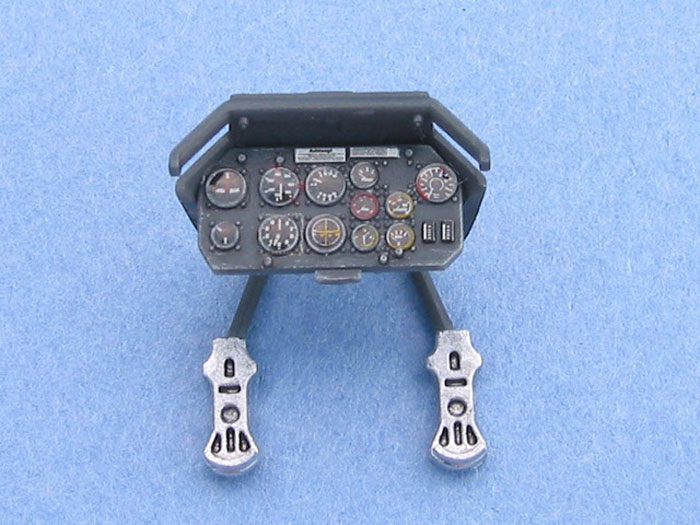
The instrument panel features blank gauge faces and a nice colourful
decal, which fit perfectly. By flooding the panel with Gunze Mr. Mark
Softener and carefully aligning the decal, I was able to get it to
conform perfectly. After allowing it to dry for an hour, I sprayed it
with Polly Scale Flat and applied a small dab of five minute epoxy to
each gauge face for the glass. The IP is an absolute gem, and I can’t
see how any aftermarket resin or photoetch panel could offer any form of
improvement.
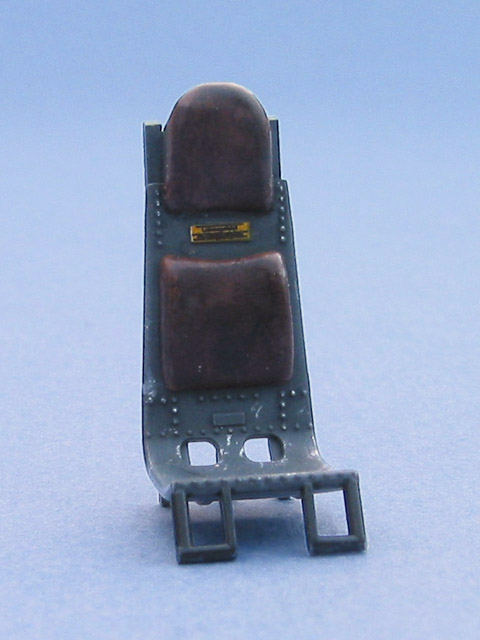
One thing I strive to do with each build is to stretch my skills a
little bit by attempting something new, and this time it was the look of
leather. Like a lot of folks, I have been eagerly following Klaus H’s
progress on his amazing 1/32 Revell He-162. One of the many things that
has struck me about his build is the utterly convincing leather cushions
on his ejection seat. I shamelessly copied his technique, and all credit
must go to him. First off, I painted the seat cushions Model Master
Acryl “Wood”, which is a nice yellowish tan colour. MM Acryl doesn’t
brush paint for crap, so the headrest had to be masked off with Blu-Tak
and airbrushed. The back rest is a separate piece, so no masking was
needed for it. Once the wood colour had dried, I placed a few dabs of
Citadel “Chaos” black, “Blood” red and “Scorched” brown onto a film
canister lid. With a fine brush and some soapy water, I applied several
thin, uneven, watery coats of various shades of brown ranging from
red-brown to almost black, allowing each coat to dry before moving on to
the next. The result was a subtle leathery patina which I finished off
with a clear coat of 50/50 Polly Scale semi-gloss and flat applied with
a brush. The seat was finished off with some light scratching and
scuffing using a Prismacolor Silver pencil.
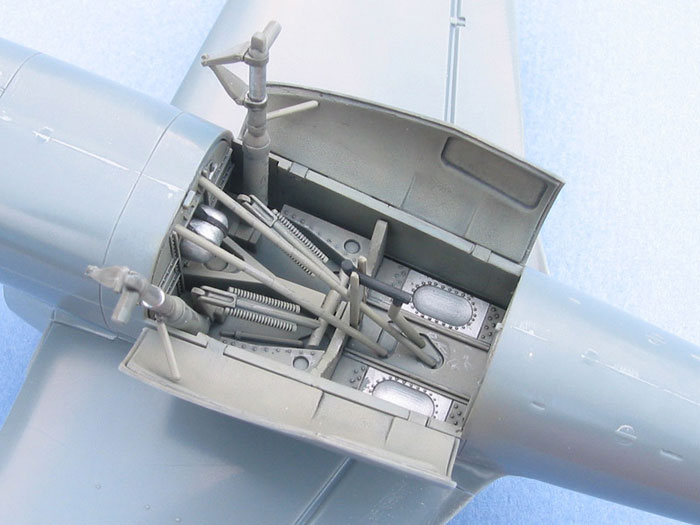
Moving on to the wheel wells, I dry fitted the front and rear bulkheads
and then glued all the rods, springs, beams, etc and gear legs to the
roof , whereupon I popped the bulkheads off and sprayed everything with
Gunze RLM02. Various detail bits were brush painted with Citadels, a
wash of ink and Polly Scale was applied and the whole thing sealed with
a flat coat. The gear well looks very busy and complicated, and the only
addition that I might want to make would be some brake lines, were I to
stray from my out-of-the-box course (but I didn’t).
Assembly
My efforts so far had taken me until early Saturday evening. In less
than 24 hours I was ready to close up the fuselage. A new record! Take
that, Jack Bauer!
I snapped the main gear well bulkheads on without any glue and attached
the whole assembly, along with the cockpit bits to one half of the
fuselage. I left the seat off, as it can be inserted later when the
model is complete. Holding the fuselage halves together, I ran liquid
cement along the seams to join them. Immediately afterwards I brushed
some Gunze Mr. Surfacer along the seams and set the fuselage aside. I
turned to the wings and tail next, which went together perfectly. There
is a tiny bit if play in the stabilizers, so some care is required to
ensure that they are square. At this point I decided it was a good time
to turn in and let everything dry over night.
The next morning, after a mug of tea and a bowl of Cheerios, I broke out
the sandpaper and smoothed out the seams on the fuselage and wings,
using a Staedtler Mars plastic eraser as a miniature sanding block, and
taking care to preserve the stall strip on the inboard leading edge of
the wings.
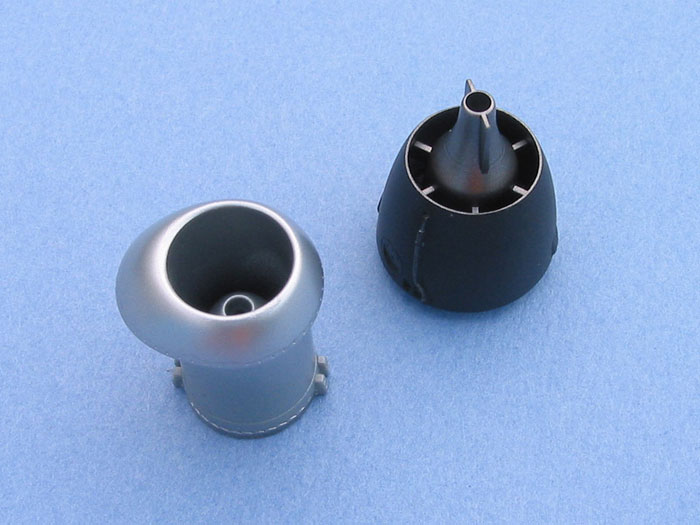
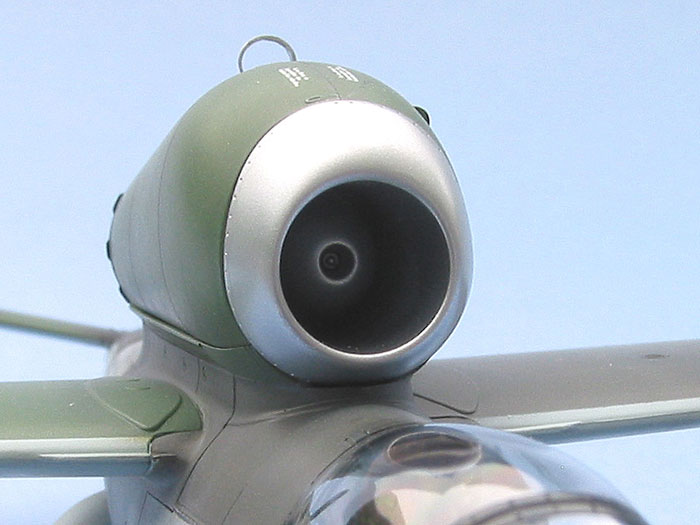
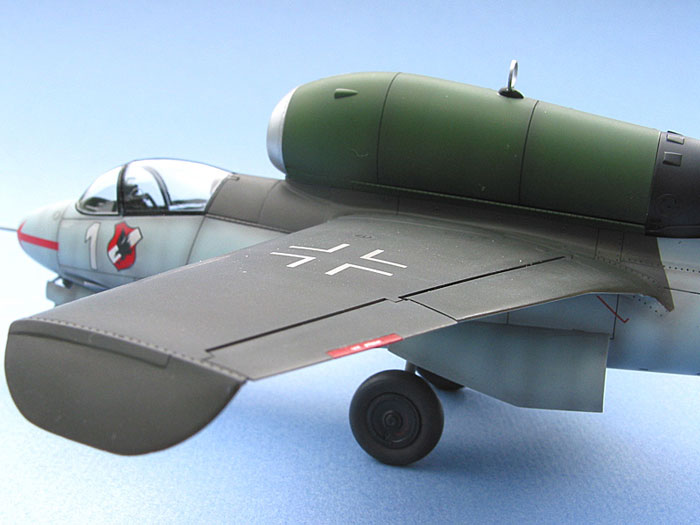
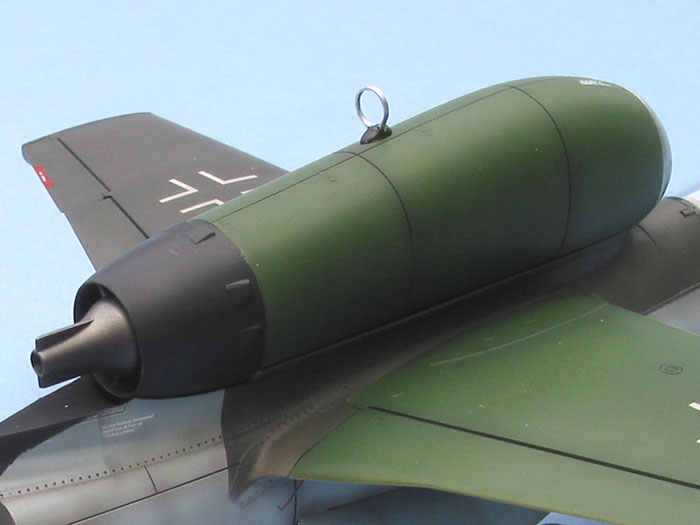
Next I assembled the engine. I decided not to go with the open engine
panels as I want to eventually detail the engine with wire & stuff and
display it next to the finished model on the stand provided with the
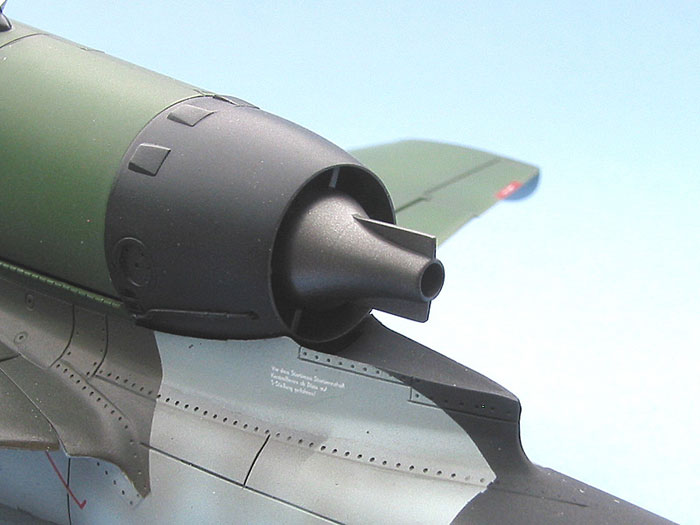
kit. The intake and exhaust trunks require some careful filling and
sanding on the insides to eliminate the seams. The seams were filled
with Mr. Surfacer 500 and sanded with a rolled up piece of 600 grit. I
followed this with an airbrushed coat of Mr. Surfacer 1000 and some more
sanding with rolled up 3600 and 4000 Micromesh cloths. I then sprayed
them with Alclad, Aluminum for the intake and Steel for the exhaust. The
engine pod was the one thing that fit less than perfectly. When
assembled as per the instructions, it rests about 1/32” too far aft. I
left off the polycaps and enlarged the holes in the pod to allow it to
sit properly. I stuffed little blobs of Blu-Tak into the polycap wells,
which served to hold the engine in place.
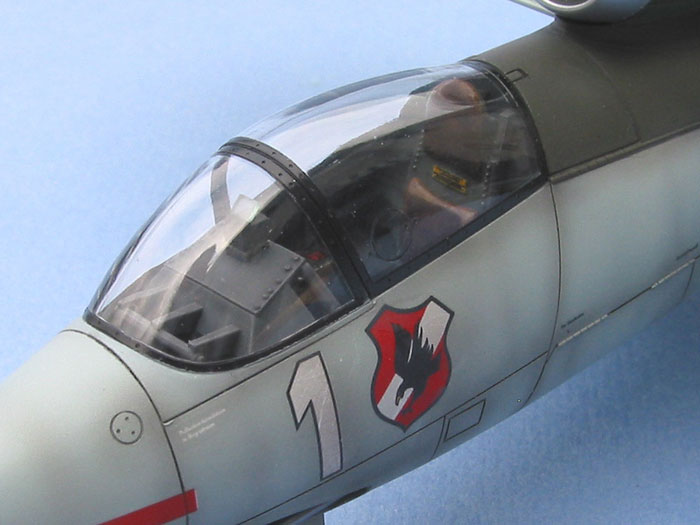
The canopy bits are exceptionally clear and distortion free, which is
all the more impressive considering their compound curvature. Although
they don’t need it for clarity’s sake, I nonetheless gave them a dip in
Future as protection against painting mishaps. For the windscreen, I
stuck a piece of tape to the forward inside edge to act as a handle,
whereas the rear portion has a nice handy tab between the hinges at the
back. I filled a film canister with Future and held the parts with
tweezers as I dipped them in and slowly extracted them, all the while
looking for any little bits of flerm that might mar the finish.
After the Future had cured with the help of Mr. Microwave Oven, I
carefully painted the little circular port in the canopy with a thin,
soapy wash of Citadel black and dabbed away the dried excess with a
tightly folded damp paper towel. I then masked the canopies with Tamiya
tape, applying oversized pieces and trimming them very carefully with a
brand new X-acto blade whilst holding the pieces up to a bright light. I
sprayed the frames gloss black and then masked the frames off before
attaching the windscreen with liquid glue. The aft portion was fitted in
place without any cement and taped to the forward bit to keep it in
place while I painted the rest of the model.
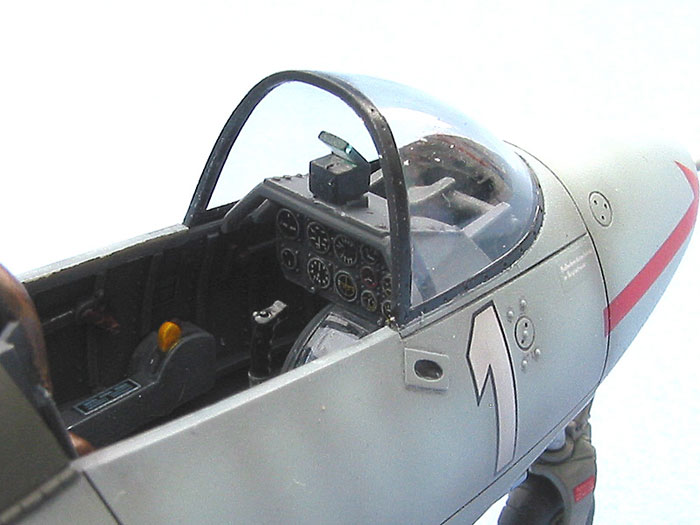
The other clear piece is the Revi gun sight, which has a seam running
right up the middle of the reflector glass. If this weren’t to be an
IPMS rules OOB build then I would have simply lopped off the glass and
replaced it with a clear piece of sheet styrene. As it was, I scraped
the seam with a knife, sanded it with 1500 grit, brushed it with Future
and painted the edges with thinned Gunze clear green. I painted the body
of the sight dark grey and attached it with superglue to the instrument
hood.
One week later…
After the initial flurry of activity, once more life got in the way
of modelling (I never confuse the two), and it wasn’t until the next
weekend that I was able to resume my “speed build”. I temporarily
attached the engine pod (sans intake and exhaust) and wiped the model
down with alcohol to remove finger oils and suchlike. I then pre-shaded
the panel lines by airbrushing them with Tamiya semi-gloss black thinned
80% with pure rubbing alcohol.
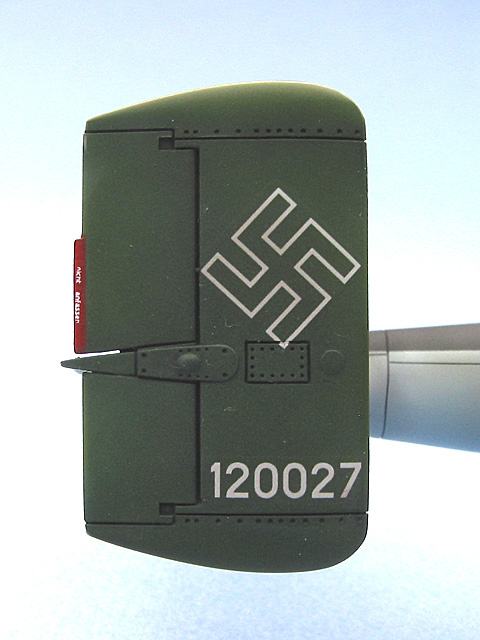
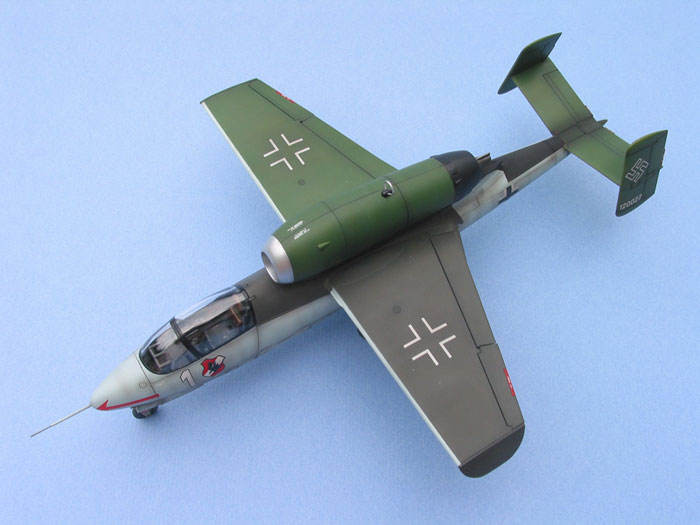
The RLM76 was a 50/50 mixture of Tamiya XF-23 Light Blue and X-2 White,
with a dash of XF-66 Light Grey to de-saturate the colour a bit. The
RLM82 Lichtgrun is XF-5 Green, again with a dash of XF-66, while the
RLM83 Dunkelgrun is XF-61 lightened with a bit of white. All the colours
were thinned about 60% with rubbing alcohol and Future, and sprayed on
in light coats, allowing the pre-shading to show through just slightly.
I applied the paints in order from light to dark, masking between
colours with Tamiya tape.
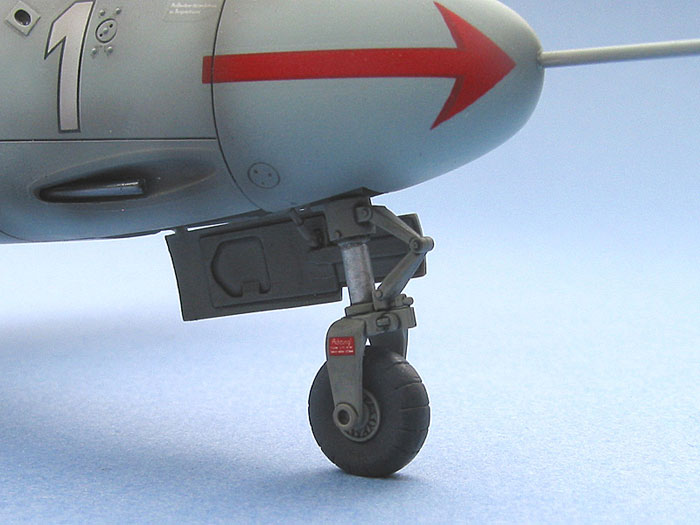
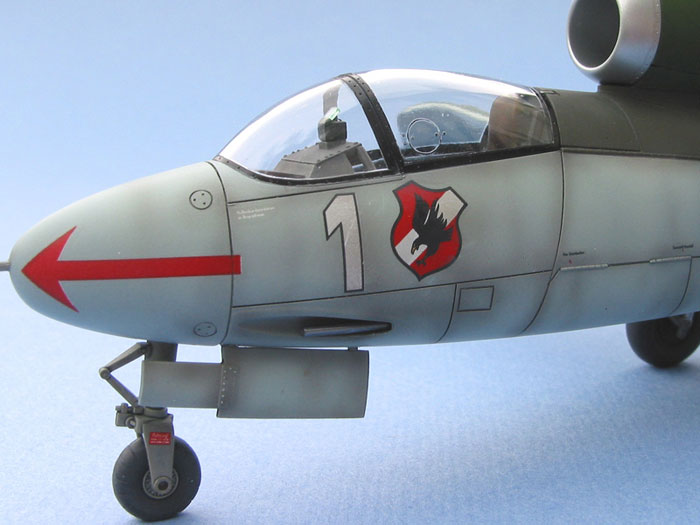
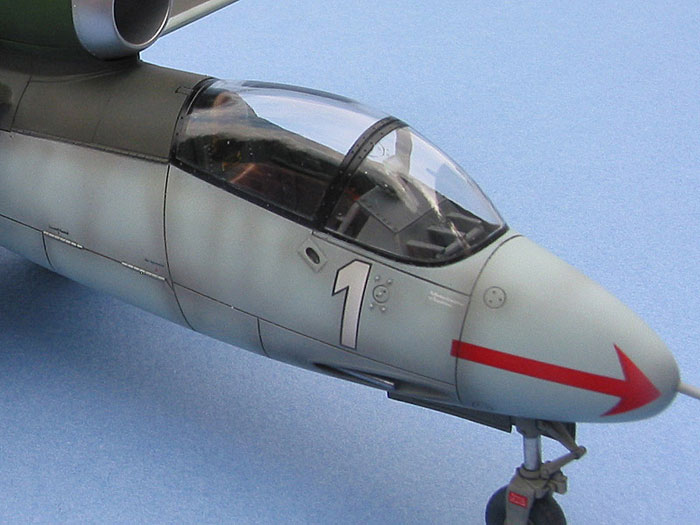
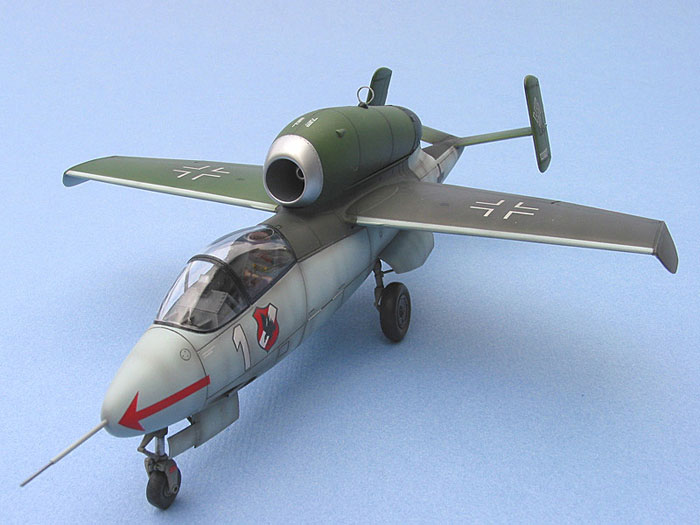
Next was a coat of Future as a prelude to the decals. The kit decals are
a big improvement over Tamiya’s previous efforts, appearing to be quite
a bit thinner than before, albeit still not nearly as thin as the better
aftermarket brands. Colour density was very good, but the registration
was a bit off, with a sliver of white showing at one end of the red
arrows. They went on well too, responding quickly to Gunze Mr. Mark
Softener and spot applications of Solvaset for the panel lines. After
the decals had dried I sealed them in with another coat of Future.
Although these decals are thinner than usual for Tamiya, they’re still
thicker than I’d like so I gently rubbed them down with a 3600 grit
Micromesh cloth after the Future had hardened to blend the edges in
further.
Next up was the panel line wash. I mixed a greyish-brown schmutz colour
from Citadel acrylics and thinned it with distilled water and a good
healthy glob of liquid dish detergent. I used a medium-fine brush to
apply the wash to all the panel lines and then wiped away the excess
with a damp paper towel once the wash had dried. The dish soap reduces
the ability of the paint to adhere to the surface, making it much easier
to clean up.
I then mixed up a similar schmutz colour from Tamiya paints and thinned
it about 90% with rubbing alcohol. I airbrushed the decals to blend them
in and tone them down and sprayed it along the panel lines for a bit of
post-shading. I also did some random streaks on the fuselage and wings
and then took some of the RLM76 light blue, thinned it likewise and
toned down the shading, as well as adding some more streaks to the
wings. Once everything was to my liking, I sealed it all in with an
airbrushed coat of Polly Scale flat, thinned with distilled water.
Brain Fade
Ah yes, the brain fade. No project is ever complete without one.
After flat-coating the model it was now time to remove the canopy masks,
an activity I always enjoy. Off came the masks and as I was admiring my
handiwork something struck me as being not quite right. I was unable to
put my finger on it right away, but after a few moments it struck me: I
had put the gun sight on backwards! Thankfully both the canopy and
engine pod were only temporarily attached allowing me to manoeuvre my
micro-chisel in there and pop the gun sight loose. Superglue and
tweezers got it back on again.
A relatively minor brain fart to be sure, but it would have been pretty
embarrassing not to have noticed it until someone pointed it out to me
at the local contest…
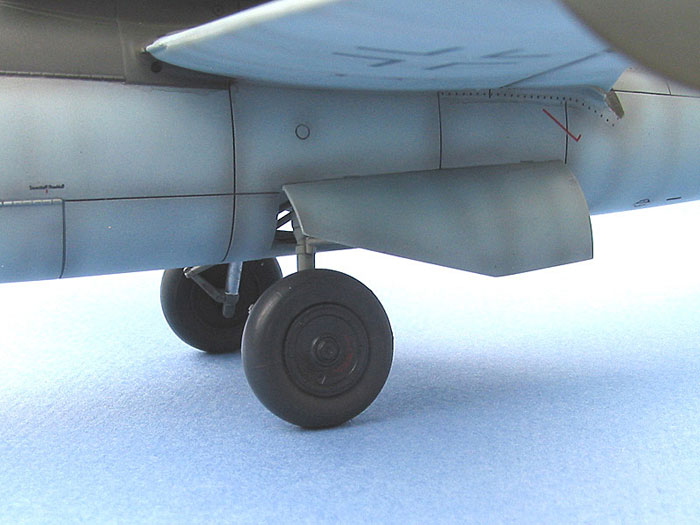
Fiddly Bits
There is an annoying ejector pin mark on the nose gear oleo strut
which I filled with superglue and sanded smooth. The main gear doors had
some pin marks which were also filled with superglue and scraped smooth
with a micro-chisel. I sanded flat spots on the wheels and painted the
hubs semi-gloss black. I stuck each wheel on a toothpick and brush
painted the tires with a dark brownish grey mixed from Citadels. I then
dusted each tire with MiG “European Dust” pigment and airbrushed
straight mineral spirits to fix the pigment in place. With my pinkie, I
smeared MiG “Black Smoke” around the circumference of the treads to
darken them. The fit of the wheels on the main gear legs was so tight
that they could be press fit in place without any glue. The cannon
barrels and pitot probe were brush painted Humbrol Metalcote steel
(wonderful stuff) and buffed with a soft cloth.
I left the hinged part of the canopy unattached so that it can be posed
either open or closed. Nor did I glue the engine pod on, instead leaving
it attached with Blu-Tak in the event that I ever complete the exposed
engine (Ha! As if!).
Although I never had any illusions that I might complete a model in
one weekend, I still achieved a new personal best by finishing this
one in less than three weeks. It is a testament to the outstanding fit
and engineering of this kit that, although I finished quickly, I never
had to rush things or cut corners.
A lot of folks questioned Mr. Tamiya’s latest choice of subject matter,
given that the Trimaster/Dragon/DML kit is perfectly adequate. I for one
however, would probably never have built this particular aircraft had
Tamiya not released it. I’m glad they did.
Click the thumbnails below to view larger images:
Model, Images and Text
Copyright © 2006 by
Tony Bell
Page Created 01 August, 2006
Last Updated
21 February, 2007
Back to
HyperScale Main Page |
 Home
| What's New |
Features |
Gallery |
Reviews |
Reference |
Forum |
Search
Home
| What's New |
Features |
Gallery |
Reviews |
Reference |
Forum |
Search