|
Revell's 1/72 scale
Heinkel He 177
Greif
model and text by John Maher
images by Tony Bell
|
 |
|
Heinke He 177 Greif |

Revell's
1/72 scale Heinkel He 177 is available online from
Squadron
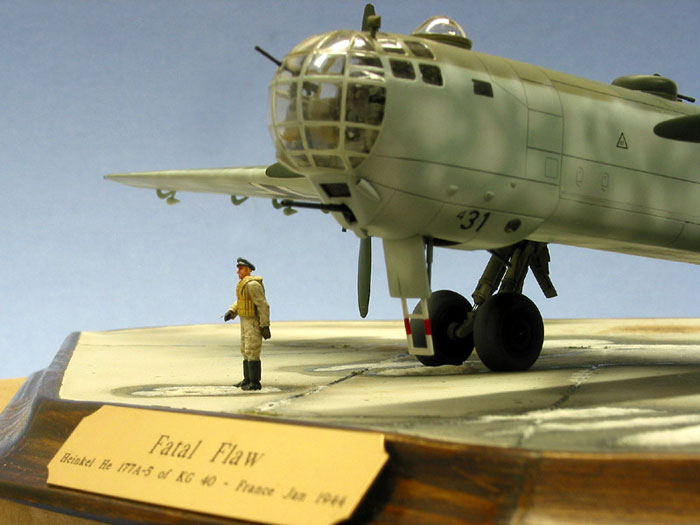
Here is my vignette
featuring the Greif and entitled “Fatal Flaw,” an allusion to the less
than successful idea of trying to make a four-engined aircraft into one
with two engines.
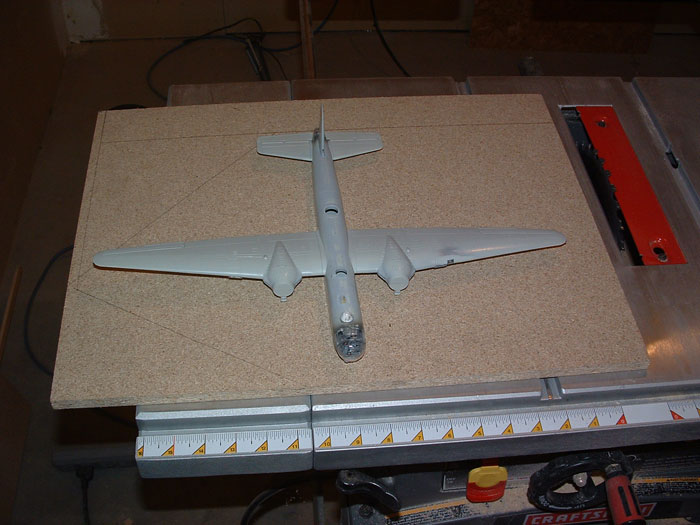
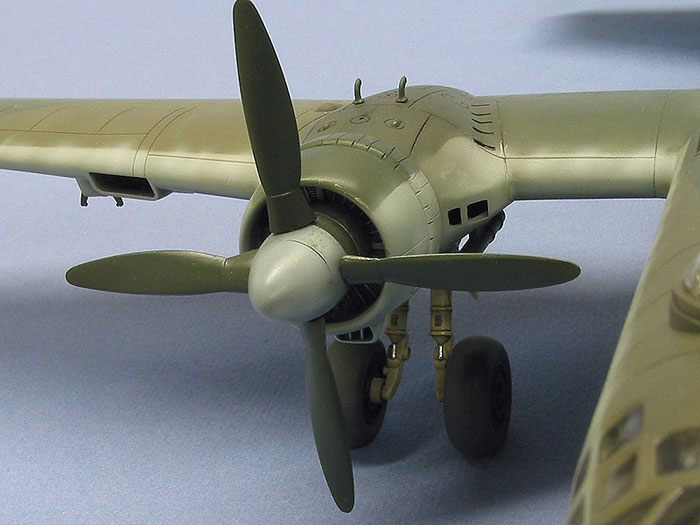
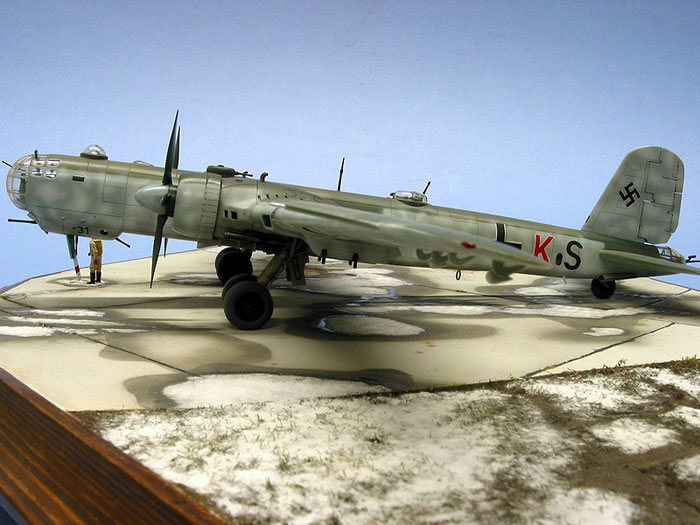
I chose the 1/72 Revell Heinkel He 177A-5 because I wanted something
other than my usual 1/48 scale aircraft so I wouldn’t be tempted to do
anything except build out-of-the-box and could therefore concentrate on
the overall finish. While not quite up to the standard of Hasegawa or
Tamiya, the Revell kit is very good in must respects except for the
clear parts.
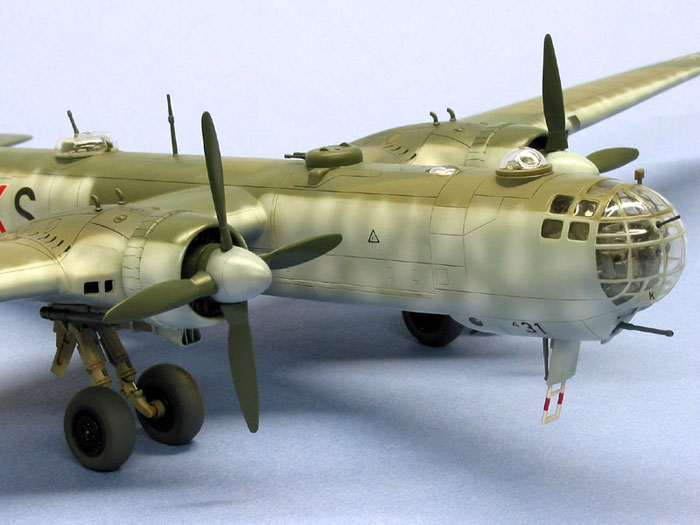
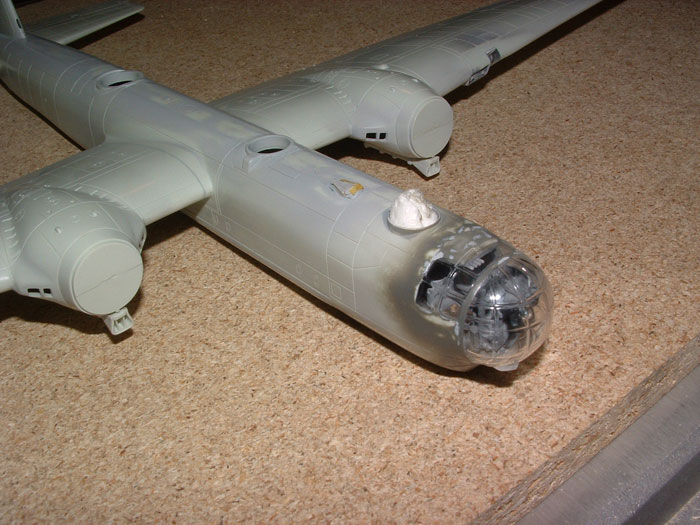
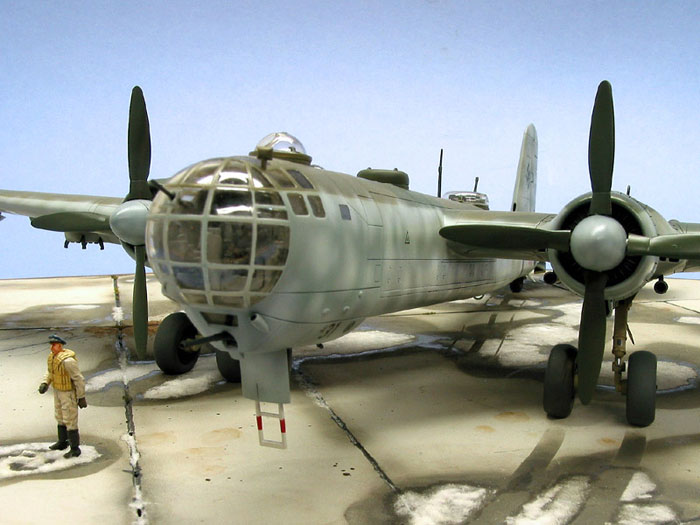
The main nose sections
in particular required a lot of hours to remove imperfections from both
the inside and outside with Micro Mesh, after which they were dipped in
Future. These parts were then attached with five-minute epoxy because it
dries clear and gives a strong bond. Seams were filled first with super
glue and then Mr. Surfacer to ensure a perfectly smooth join. To protect
the glass areas while sanding the joins, I simply put strips of Tamiya
tape over the areas needing protection.
For the various cabin windows I first bevelled their inside edges so
that when the clear part was inserted, it would stand proud of the
fuselage. I then filled any gaps with Cyano and smoothed over the whole
thing with Micro Mesh. This results in a perfect transition between the
glass and the surrounding fuselage.
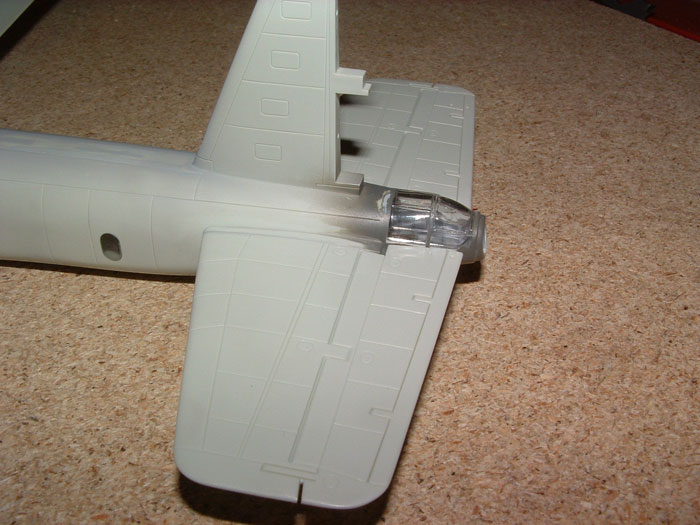
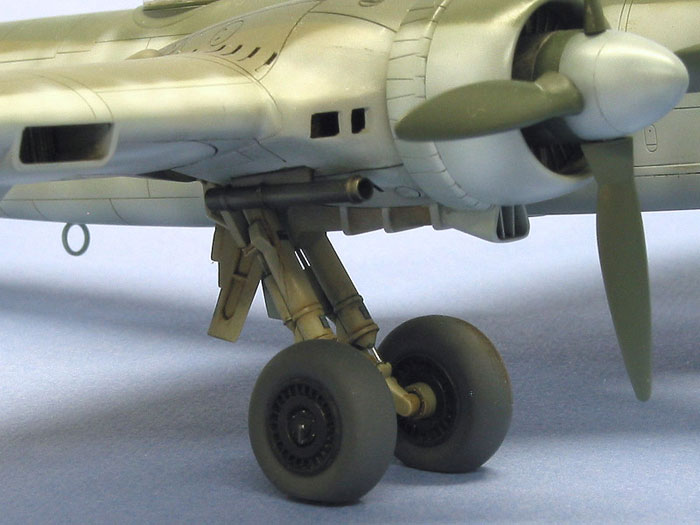
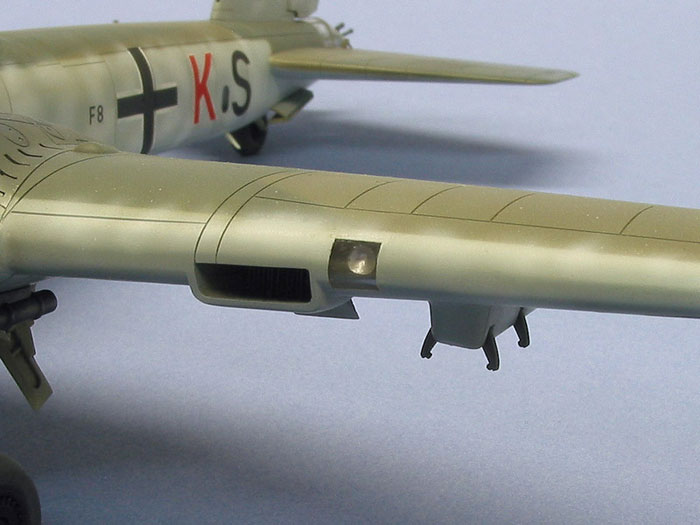
To create the landing light, I used my pin vice without drilling all the
way through the plastic. This results in a concave depression that was
filled with Model Master chrome silver. The bulb was masked using a disk
of Tamiya tape punched out with the Waldron sub-miniature punch set and
then the surrounding area was over sprayed with RLM 66 from Model
Master. The kit-provided clear cover was attached with five-minute epoxy
and blended in with Cyano and Micro Mesh. As with the cabin windows, the
result is a prefect transition with the surrounding plastic.
I masked off all the clear parts using a combination of Eduard masks and
Tamiya tape. The Eduard set was in the old style and they were very
tricky to work with. Any that were to go on flat areas such as the cabin
windows gave no problems but on the compound curves of the main
windscreen, it was hard to get them to stay down. In fact, I ended up
having to repair a couple of frames by removing overspray with Goo Gone
and then re-masking them with Tamiya tape. However, this was less work
than trying to mask the whole canopy with individually cut strips of
tape. Eduard has since reissued their masks using the same material as
Tamiya tape.
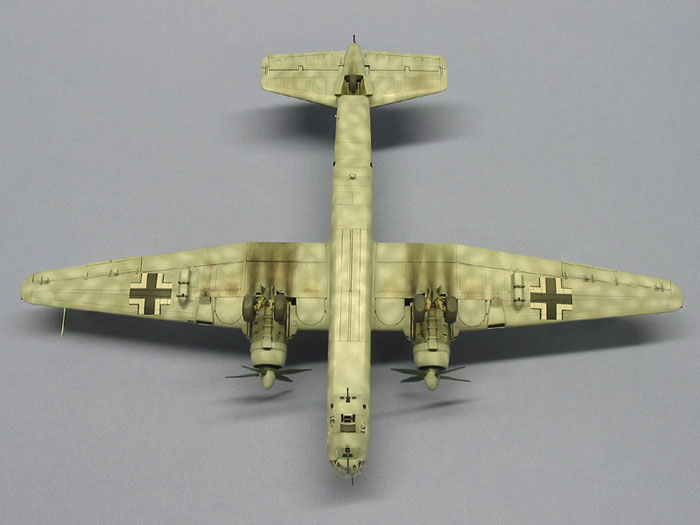
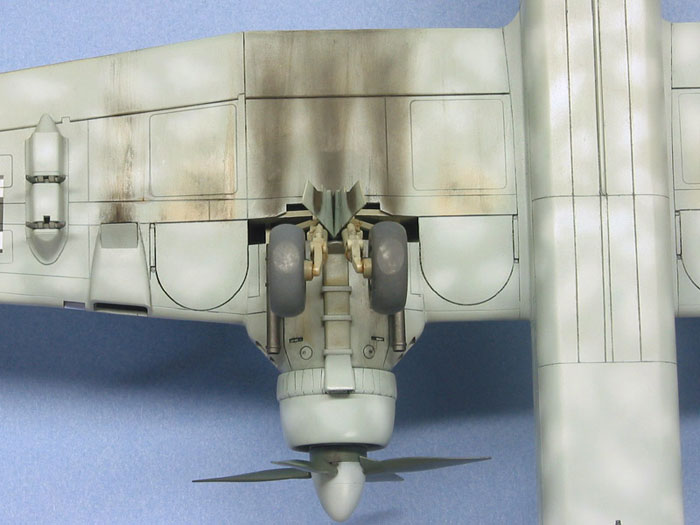
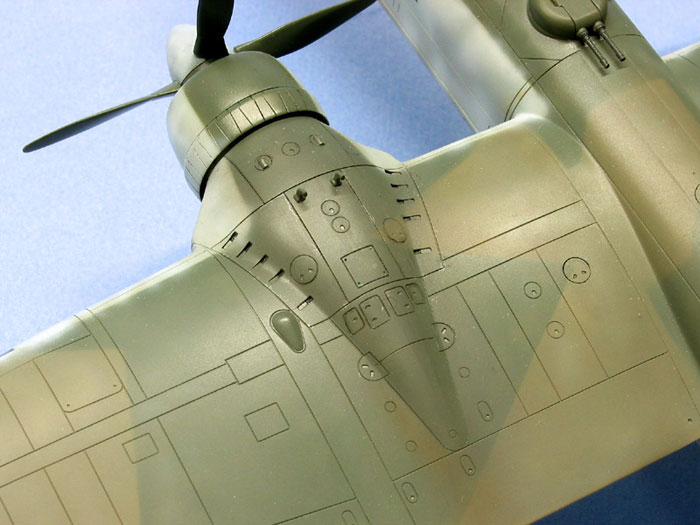
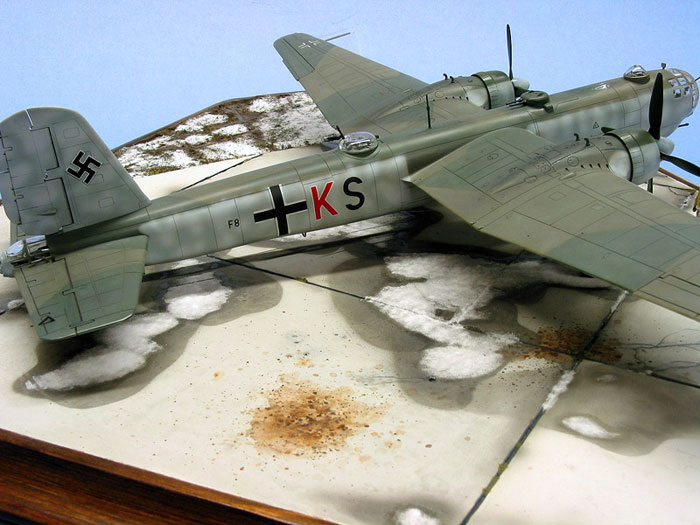
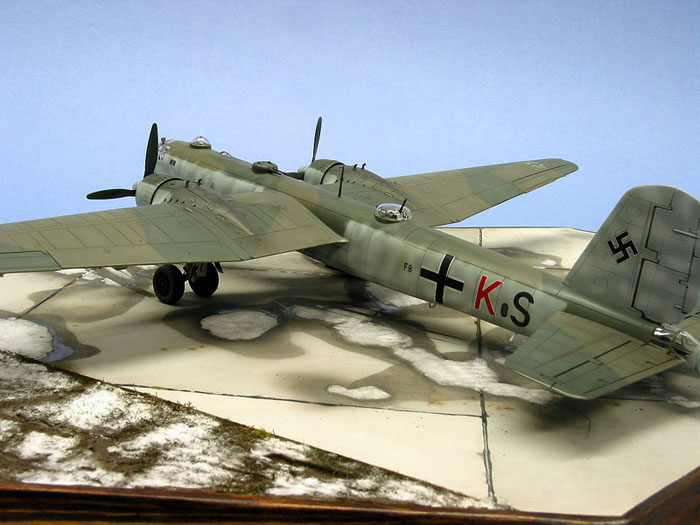
Once everything was
together, I set about painting the airframe with Gunze acrylics. I began
by laying down a pre-shade of dark grey. I sprayed it on
indiscriminately along panel lines, heavier here, hardly at all there. I
used about a fifty-fifty paint/alcohol mix with a high pressure setting
on my compressor.
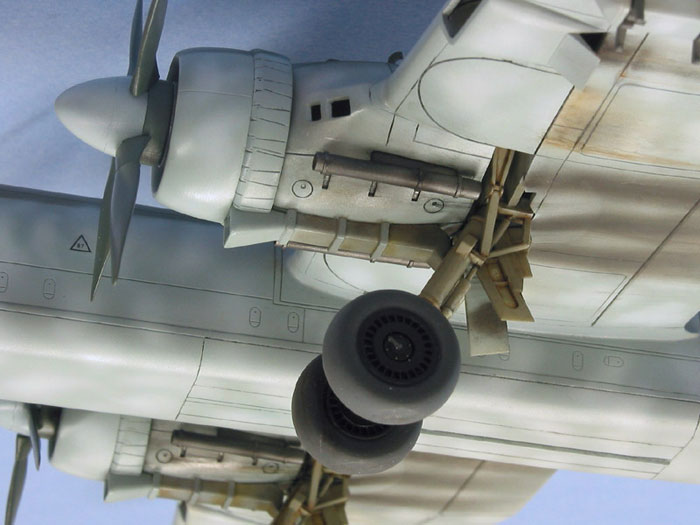
 I
then started adding the camouflage with a mix of about 5-10% paint to
90-95% thinner. I also ratcheted the pressure way down to 12lbs/psi. And
rather than using a broad spray pattern, I actually painted each panel
individually. The main colours were RLM 65 (Gunze H67), 76 (fifty-fifty
mix of Gunze’s H67 and white), 70 (Gunze H65) and 71 (Gunze H64). I
mixed three shades of each colour: the base colour was a mix of
out-of-the bottle with about 25% white added; I then mixed another shade
with 20% or so white added to the first shade with the final shade made
by mixing equal parts of the first two shades. Each time a created I new
shade, I added more thinner. This gave me the result I was looking for:
panel lines that are subtly accented plus the uneven fading typical of
an old veteran. I
then started adding the camouflage with a mix of about 5-10% paint to
90-95% thinner. I also ratcheted the pressure way down to 12lbs/psi. And
rather than using a broad spray pattern, I actually painted each panel
individually. The main colours were RLM 65 (Gunze H67), 76 (fifty-fifty
mix of Gunze’s H67 and white), 70 (Gunze H65) and 71 (Gunze H64). I
mixed three shades of each colour: the base colour was a mix of
out-of-the bottle with about 25% white added; I then mixed another shade
with 20% or so white added to the first shade with the final shade made
by mixing equal parts of the first two shades. Each time a created I new
shade, I added more thinner. This gave me the result I was looking for:
panel lines that are subtly accented plus the uneven fading typical of
an old veteran.
I used paper masks for
the separation of the main colours of 65, 70 and 71. The mask was
attached with Tamiya tape doubled-over so that the paper was slightly
raised from the surface of the model. This results in a soft edge on the
colour separation. The cloud patterns in 76 were done free hand.
The decals are a combination of Microscale, Aeromaster, Third Group and
kit-supplied. They were applied over a Polly Scale gloss base with Micro
Set and Solvaset used to get them to settle down into the panel lines.
Once dry, I then applied several coats of gloss followed each time by a
gentle rub down using Micro Mesh 6000, 8000 and 12000 grades. This
removes any ridges along the decal edges and therefore gives a true
painted on look.
Once I was satisfied that everything was properly blended in, I over
coated the model with Polly Scale flat. The weathering is a combination
of artist acrylics, artist oils and Mig Pigments.
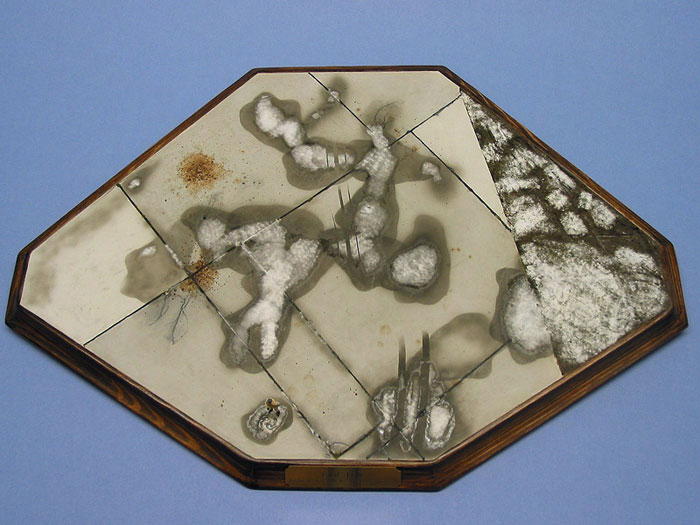
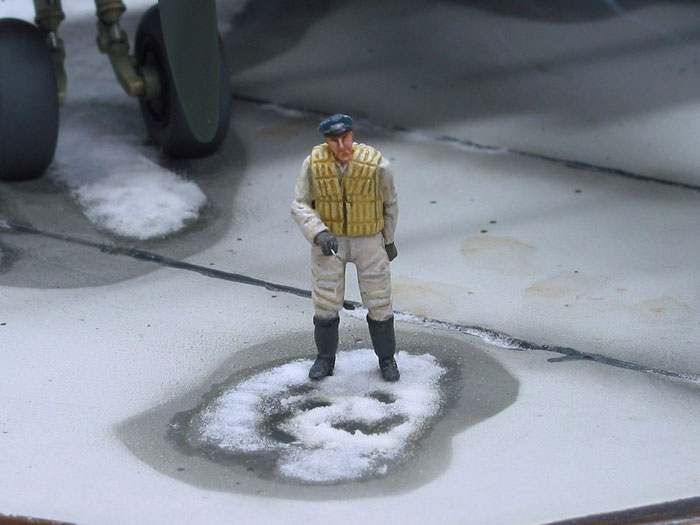
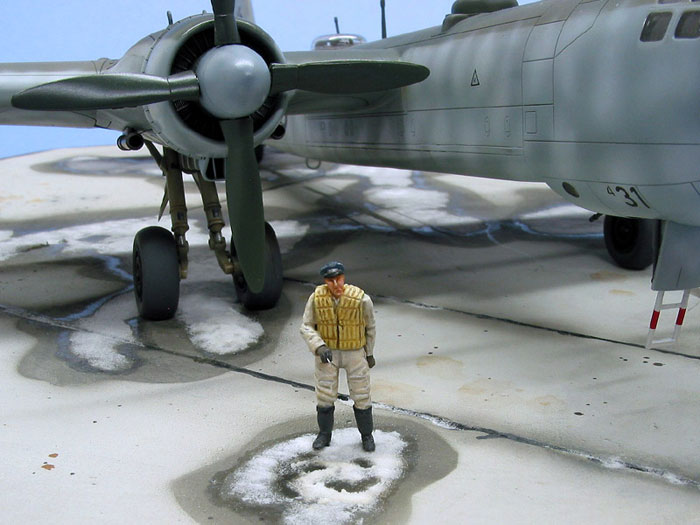
I always like to place
my models on a base with a figure to give them a sense of scale. The
Heinkel I was modelling operated from the coast of the Bay of Biscay on
long-range reconnaissance missions over the Atlantic (hence the cloud
pattern camouflage on its belly). So I chose to give a sense of
inclement weather by having melting snow on the ground.
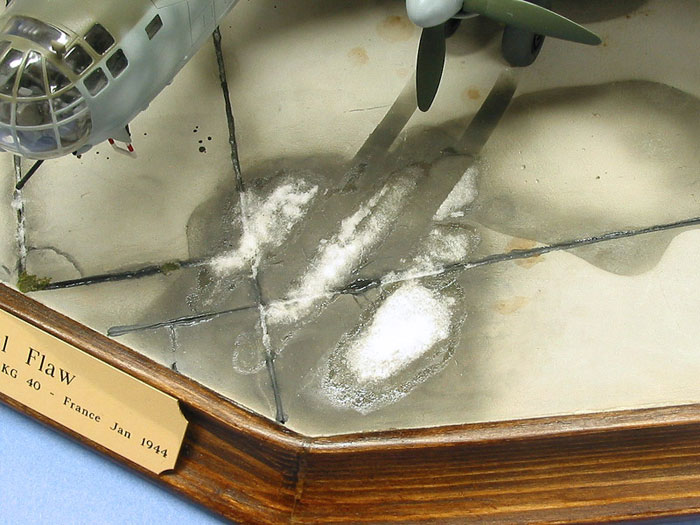
The base itself was cut to exactly fit the model, which meant its shape
was not four-sided. This gets you out of the problem of dead space
around the aircraft and therefore needing to add things like support
equipment. I wanted to entry this model in the aircraft category in
competitions and the rules for most shows allow aircraft to be displayed
on bases with only crew figures along side and no other models. Doing
differently usually means having to enter the diorama category.
To create the hardstand with expansion slots, I laid out the framing for
the concrete sections using plastic strip into which I poured CGC
drywall compound. I then levelled this with a metal straight edge. Once
dry, I removed the plastic strips and then filled the remaining crevices
by injecting matt black acrylic paint with a syringe to keep the flow of
paint even. I then painted the various sections different Humbrol greys
to represent the repaired sections typically seen on any concrete
surface.
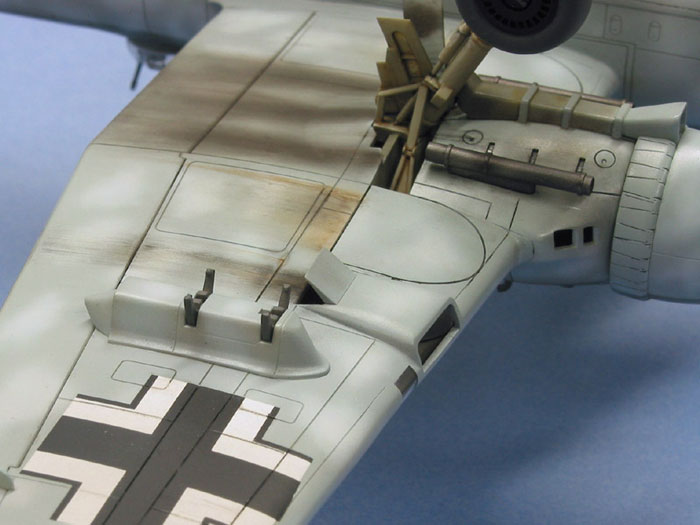
The melting snow has certainly attracted a lot of attention whenever
I’ve displayed the model and here’s how I did it: I first cut an
amoebae-like shape into a piece of paper. I then used this as a mask to
spray the wet areas on the base. I used this one mask by simply flipping
it around and overlapping it at random so that the viewer can’t see a
pattern. I used a dark panzer grey to create this effect, all the while
being mindful of how water dries on concrete. I also masked off a
pattern to suggest the aircraft’s tyres had gone through the melting
snow, again paying attention to how this happens in the world around me.
I then created the wet spots around the edges of the dark grey by
outlining them first with airbrushed Polly Scale clear gloss and then
following up with hand brushed Future. I’ve actually found that you have
to touch-up the Future once and while to maintain that
so-glossy-it-must-be-wet look. The snow was added last and it is made
with baking soda affixed with hair spray.
The figure is from CMK and has had his arms slightly modified to make
him look like he’s posing for a picture. His face was painted with
Winsor Newton oils and his clothing was done with Humbrol. I also added
a fine piece of stretched-sprue to one hand to represent a cigarette.
But I couldn’t attach a piece small enough to suggest just the
cigarette, so I ended up painting it to look like a cigarette holder
with a smoke in it.
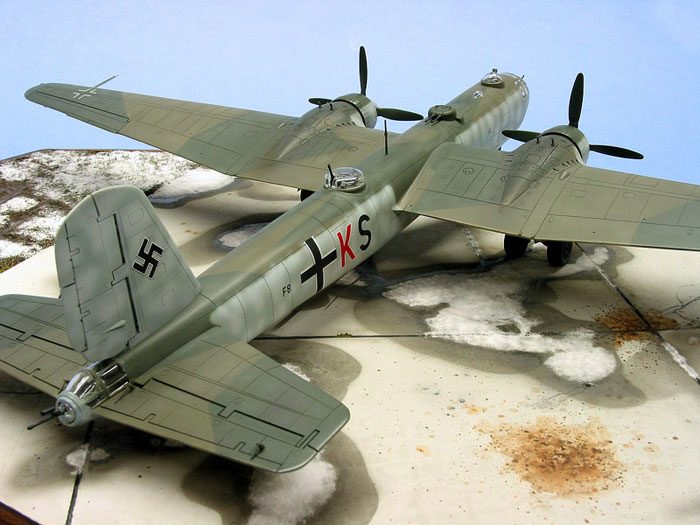
The finished scene represents a He 177 of KG 40 based in France in
January 1944.
Click the thumbnails below to view larger
images:
Model and Text
Copyright © 2006 by
John Maher
Images
Copyright © 2006 by Tony Bell
Page Created 25 April, 2006
Last Updated
25 April, 2006
Back to
HyperScale Main Page |
 Home
| What's New |
Features |
Gallery |
Reviews |
Reference |
Forum |
Search
Home
| What's New |
Features |
Gallery |
Reviews |
Reference |
Forum |
Search