|
Classic Airframes' 1/48
scale
Heinkel He 51 B-1
by Brett Green
|
 |
|
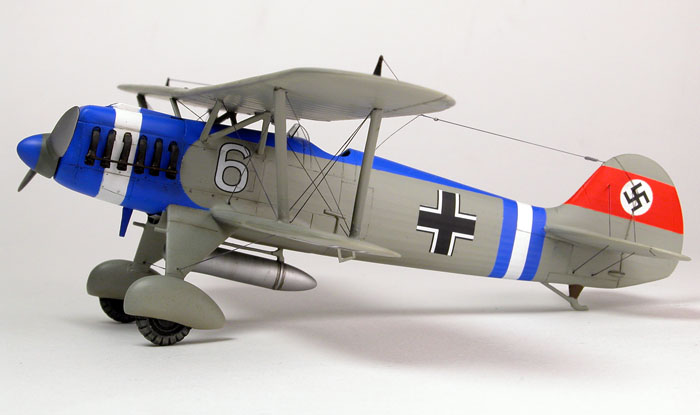
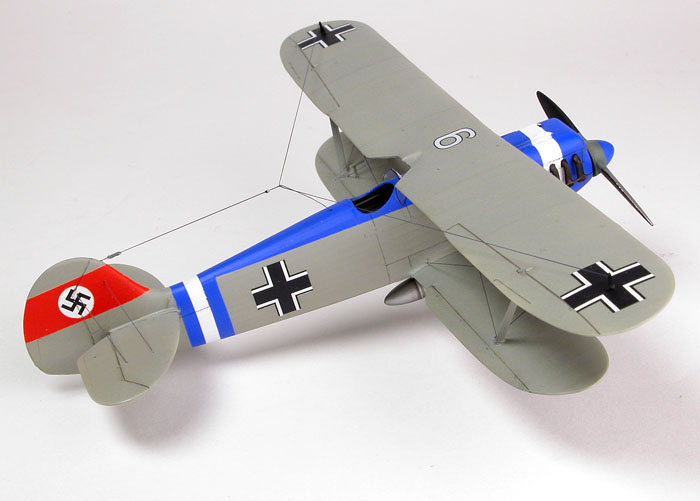
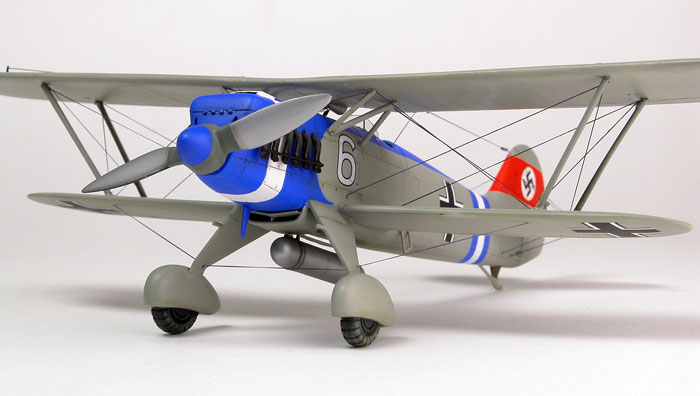
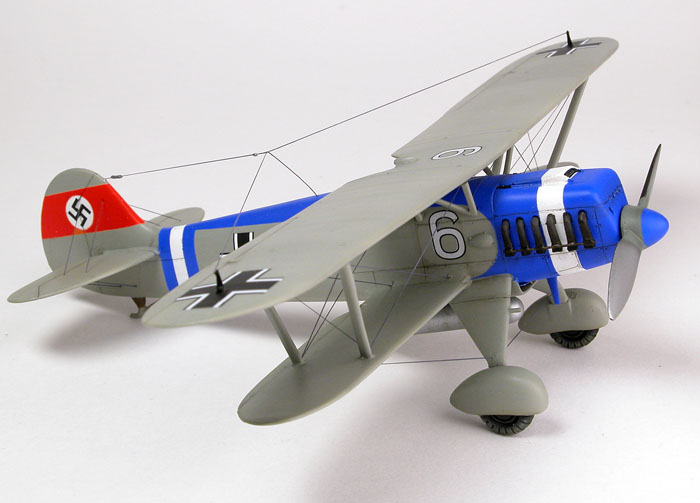
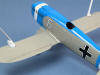
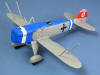
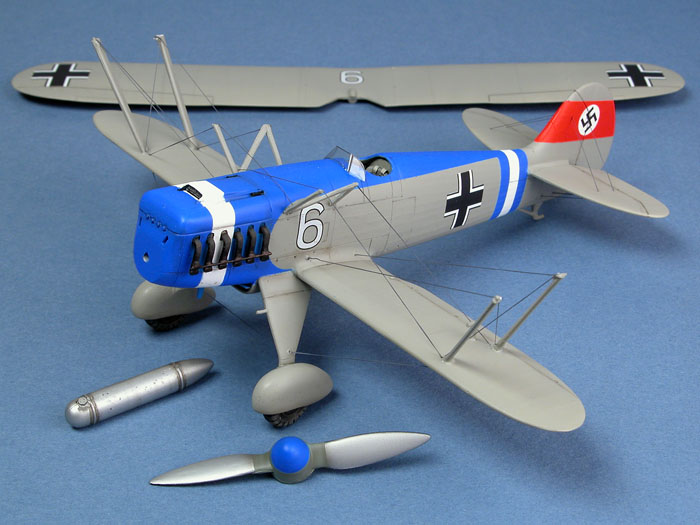
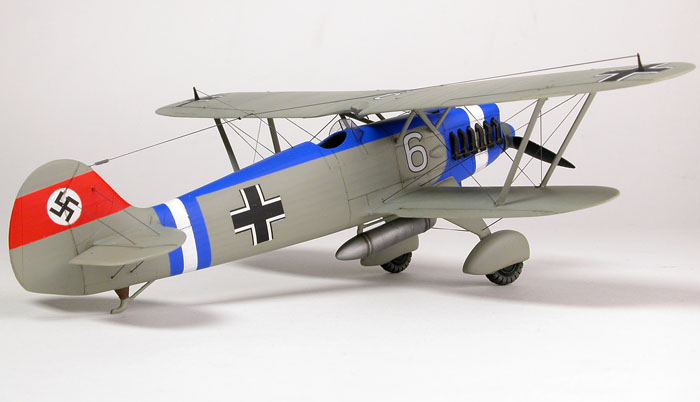
Heinkel He 51
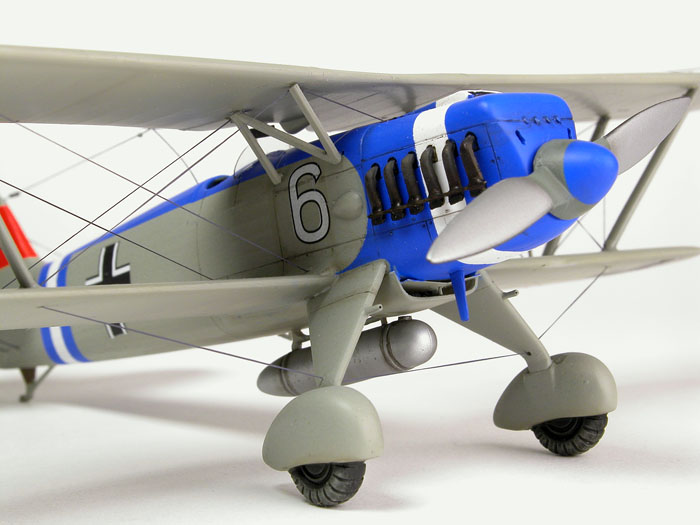
2./JG 135, Bad Aibling, Germany, September 1936 |

HyperScale is proudly supported by Squadron
I needed an early Luftwaffe fighter model in a pre-war
scheme for a future project with a fast-looming deadline. Apart from my Bf 109 V4 in Spanish Civil War markings, I did not
have anything answering the description in my collection of built
models.
At a local Sydney hobby shop, I found a dusty box that
might fit the bill - Classic Airframes' 1/48 scale Heinkel He 51. I
handed over a very reasonable AUD$30.00 and rushed home to see what I
had pulled out of the lucky dip.
Classic Airframes released their Heinkel He 51 in 1996.
The standard of these early limited run kits could be variable, and I
was a little uneasy about what might await me. My anxiety was heightened
because I had never built a biplane, at least not during my adult
modelling career - maybe an Airfix Sopwith Camel in the 1960s.
Upon opening the box I was pleasantly surprised to find
a model with excellent fabric texture, thin wing and tailplane trailing
edges and a few resin and phot-etched enhancements. My $30 seemed to be
well spent.
The kit betrayed its early origins by its thick sprue attachments and
flash surrounding smaller parts. First, all the plastic parts were
removed from the sprues with a side cutter and cleaned up with a sharp
hobby knife and sanding sticks. This took less than a half hour, spent
with the family in front of the television (earning brownie points while
modelling - priceless).
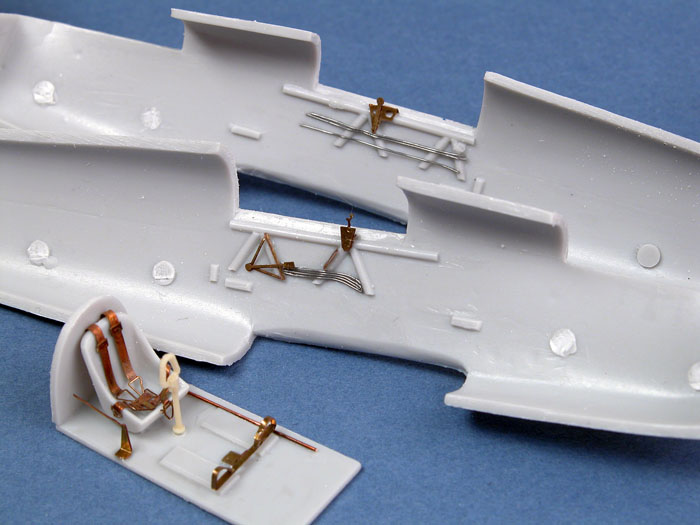
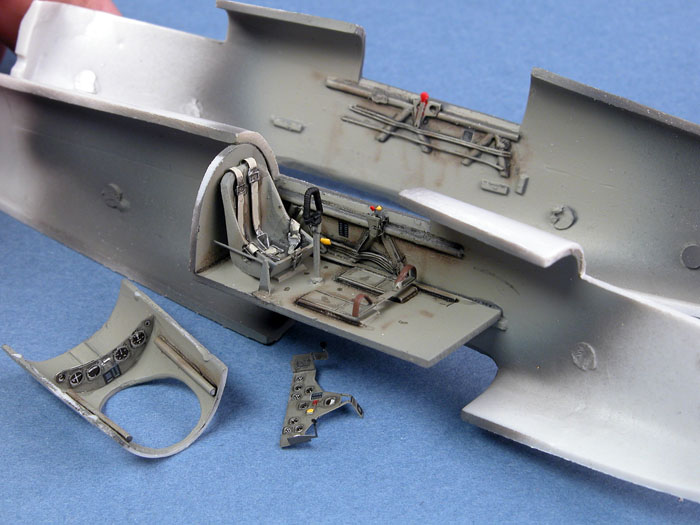
The cockpit was simple but adequately detailed. Basic parts were
supplied in styrene, supplemented with photo-etched instrument panels,
rudder bar, quadrants and harnesses, and a nice resin control column. I
added some fine electrical wire to the lower sidewalls, and structural
detail (plastic strip) to the upper sidewalls. The only other
improvement was to sand down the sides of the pilot's seat, which looked
a bit too thick.
Click the
thumbnails below to view larger images:
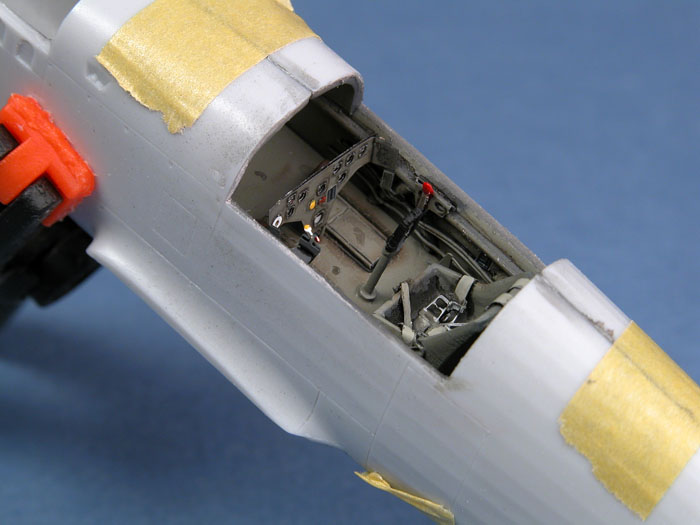
 The
cockpit paint job commenced with a coat of Tamiya Flat Black followed by
Gunze RLM 02 Grey. The 02 colour was misted in several thin coats onto
the parts at a high angle, leaving natural shadow areas in black.
Streaks of grime were sprayed from my Aztek A470 airbrush using a thin
mix of Black and Red Brown. This was followed by a pinpoint wash of
Tamiya Semi-Gloss Black paint applied to the edges of framework and
panels to add further depth to these structural features. Next, details
such as straps, knobs and buckles were picked out with acrylic paints
and a fine brush. Chipping was simulated here and there with a
well-sharpened 2B pencil, and spots of oil and dirt with thinned black
acrylic paint. The
cockpit paint job commenced with a coat of Tamiya Flat Black followed by
Gunze RLM 02 Grey. The 02 colour was misted in several thin coats onto
the parts at a high angle, leaving natural shadow areas in black.
Streaks of grime were sprayed from my Aztek A470 airbrush using a thin
mix of Black and Red Brown. This was followed by a pinpoint wash of
Tamiya Semi-Gloss Black paint applied to the edges of framework and
panels to add further depth to these structural features. Next, details
such as straps, knobs and buckles were picked out with acrylic paints
and a fine brush. Chipping was simulated here and there with a
well-sharpened 2B pencil, and spots of oil and dirt with thinned black
acrylic paint.
I also applied cockpit placards to the sidewalls and instrument panels
from a Reheat decal sheet. The whole cockpit finally received a coat of
Polly Scale Flat.
Test fitting the fuselage halves revealed that the top
of the rear cockpit bulkhead was marginally too wide. A whisker was
sanded off the top edge of the bulkhead to achieve a perfect fit. This
is probably the easiest fitting Classic Airframes cockpit I have
installed, presumably due to the absence of resin parts.
Before I glued the fuselage halves together, I decided
to plan for the tailplanes, which did not have any locating tabs to mate
with the fuselage. First, I tacked the horizontal tailplanes on to the
rear fuselage with a couple of spots of superglue, then drilled holes
into the mating surfaces of the tailplanes from the inside of the
fuselage. I then snapped off the tailplanes, sanded the mating surfaces
and installed short lengths of brass rod as locating pins. This method
ensures perfect alignment between the tailplanes and the fuselage.
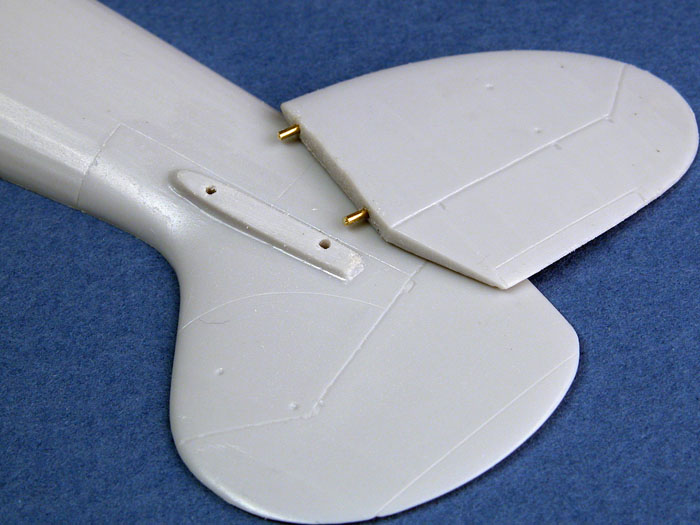
You can use the same method for wings without locating
tabs too. I have used a similar technique for years, but I would like to
thank Lee Coll for sharing the suggesting the simple but rather brilliant additional step of supergluing the parts to the fuselage before drilling the locating
holes.
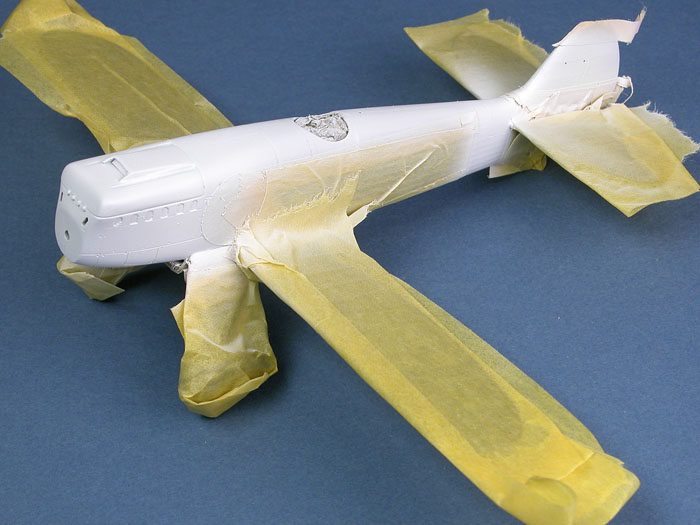
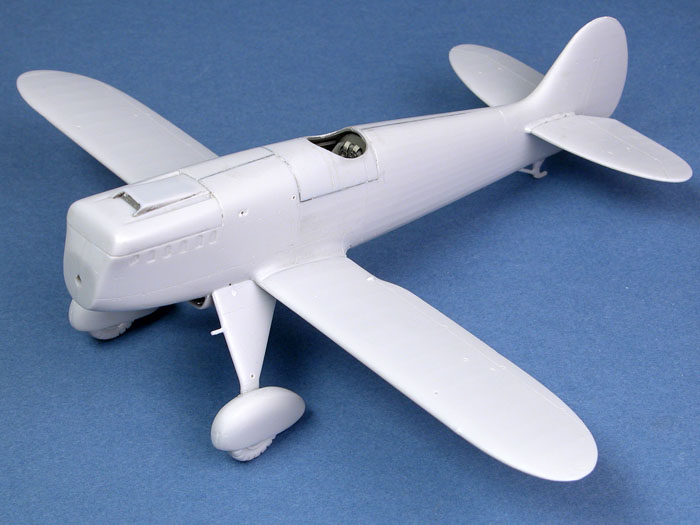
Construction from this point forward was fast and easy.
The fuselage halves aligned nicely. They were clamped together then
Tamiya Extra Thin Liquid Cement was flowed along the join lines. The
wing roots needed some trimming before the full-span lower wing was
glued in place, but fit was then perfect. The brass pins in the
horizontal tailplanes worked like a charm - gap free and precisely
aligned.
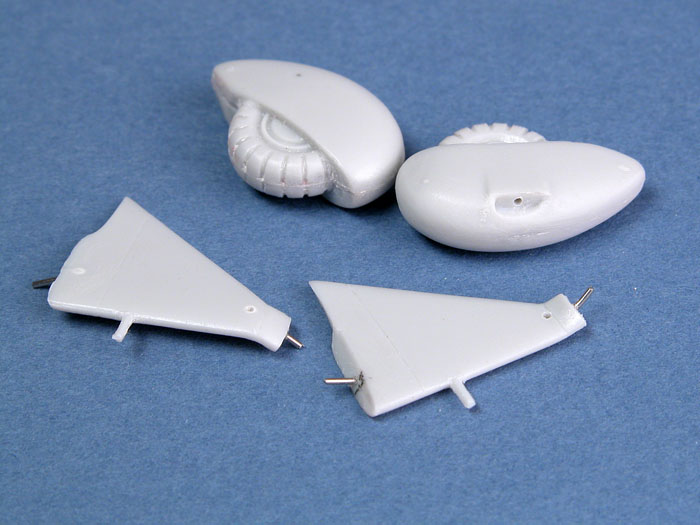
The only part that did not fit well was the radiator
housing, but a few minutes trimming and sanding fixed that problem.
The spatted undercarriage legs were drilled and pinned
to reinforce attachment to the fuselage at the top, and the wheel
fairings at the bottom. Reinforcement pins were also installed in the
interplane struts and the tail skid.
Click the
thumbnails below to view larger images:
|
|
|
|
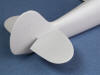
Fit and alignment of the tailplanes was perfect after the installation of brass pins
|
|
|
|
Overall fit of the airframe was surprisingly good for an older limited run kit
|
|
|
|
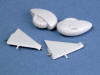
Gear leg spats were reinforced with brass pins
|
|
|
|
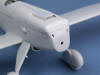
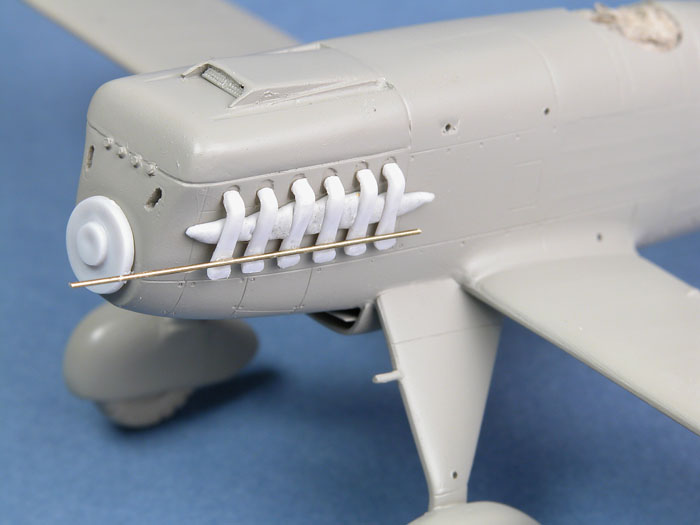
Detail was added to the fuselage face. Ventilation slots were drilled out and fasteners were punched from styrene sheet
|
|
|
Detail was added to the fuselage face. In photos, there
appear to be four raised shapes along the upper cowl join line. Four
small circles were fabricated using my punch and die set. These were
glued in place. Two diagonal ventilation slots were also cut into the
front of the fuselage.
I was concerned about the alignment of the long exhaust
stacks. References show that the pipes were sometimes linked by a metal
rod. I temporarily secured the individual stacks to the outlets in the
engine cowling using Blu-Tack, then glued a length of brass rod to the
row of exhausts using thick super glue. This thick glue is a reasonable
depiction of the welding.
These assembled exhausts were used as a template for the
second set.
With the basic airframe assembled - sans upper wing -
holes were drilled in preparation for subsequent rigging.
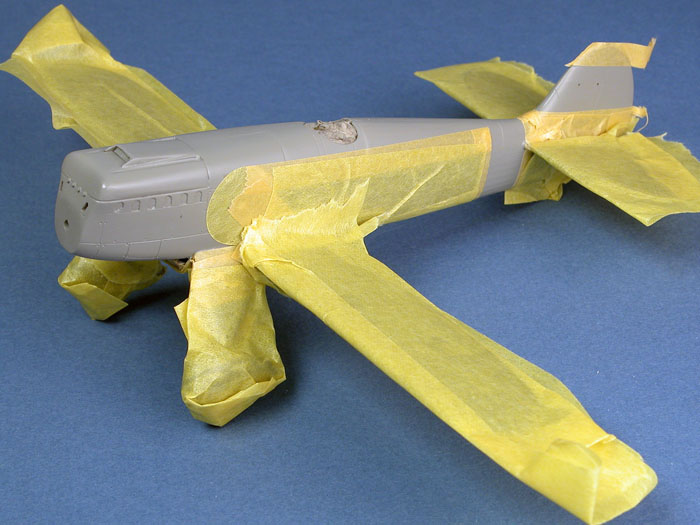
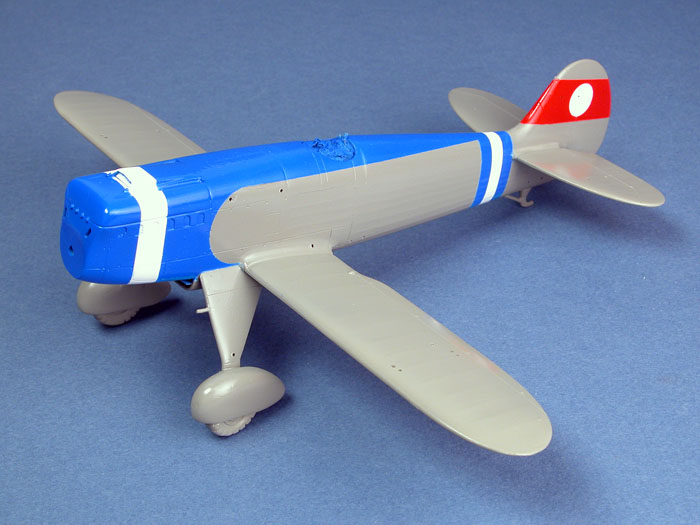
Painting is easy to describe, but was time consuming in
execution.
First, the model received a base coat of RLM 63 overall.
I used a 50/50 mix of Gunze H70 RLM 02 and H332 Light Aircraft Grey for
this shade. The result was a light grey colour with a hint of green.
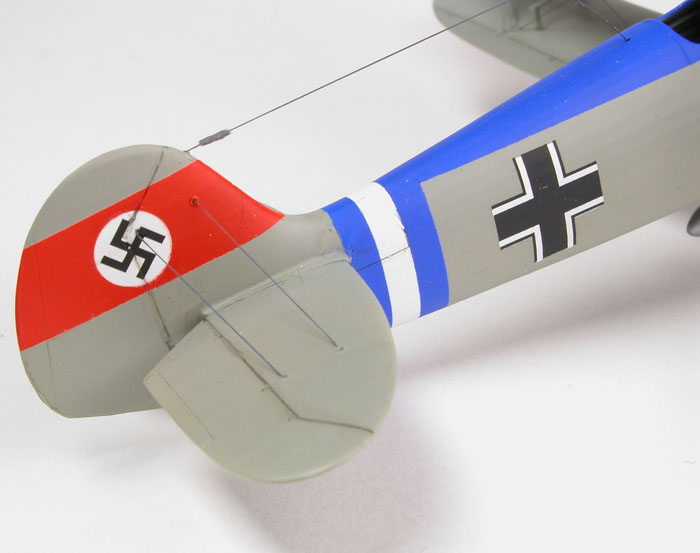
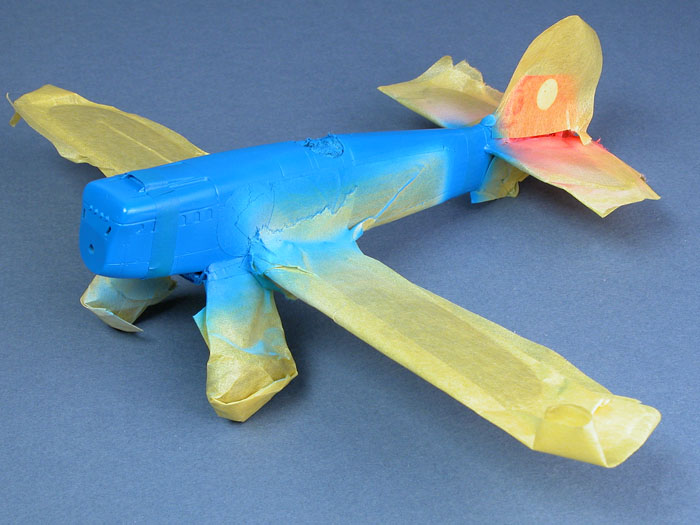
Now came the masking of the national markings on the
fin, the fuselage deck and the rear tail band. The mask for the
crescent-shaped demarcation of the engine cowling was cut from 4cm wide
"Kamoi" tape (marketed by Tamiya) using an Olfa circle cutter. A
combination of Kamoi and narrower Tamiya tape was used for the rest of
the masking.
A coat of White Primer was laid down to provide a
smooth, pale base for the bright (and temperamental) colours to follow.
Pure White was then sprayed in the general areas of the fuselage bands
and the circle for the Hakenkreuz.
The next step was to mask the white circle on the fin
and the two white fuselage bands. With this done, Tamiya spray colours
were decanted into containers and sprayed from my Aztek A470 airbrush. I
wanted a robust, fast drying gloss finish and Tamiya's spray lacquers
offer these qualities. The price is a noxious cloud of vapours, so a
filter mask is essential while spraying. Tamiya TS-49 Bright Red was
used for the RLM 23 of the national markings, while a 50/50 mix of TS-44
Brilliant Blue and TS-23 Light Blue was my interpretation of RLM 24.
Click the
thumbnails below to view larger images:
I was quite pleased with the results when the model
emerged from its paper cocoon.
I was inspired to reproduce this colourful scheme after
reading about the Luftwaffe pre-war marking system in Volume Two of Ken
Merrick's excellent "Luftwaffe Camouflage and Markings" series from
Classic Publications, and finding
Bob Pearson's
"History in Illustration" web page on the Heinkel He 51.
The paint job was sealed with a couple of thin coats of
Future floor polish.
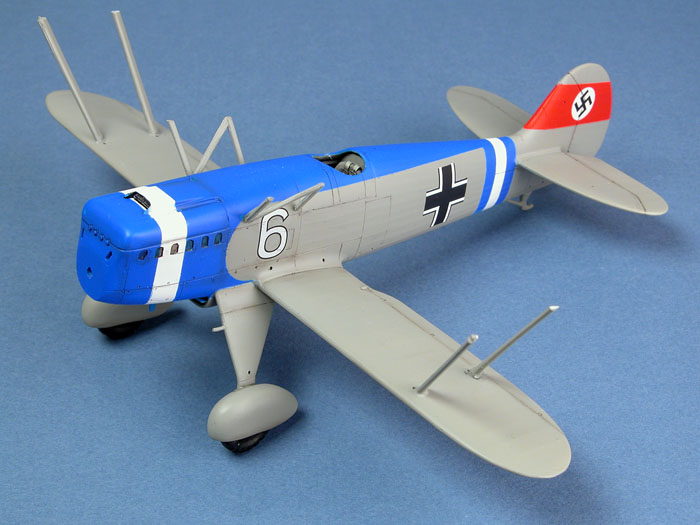
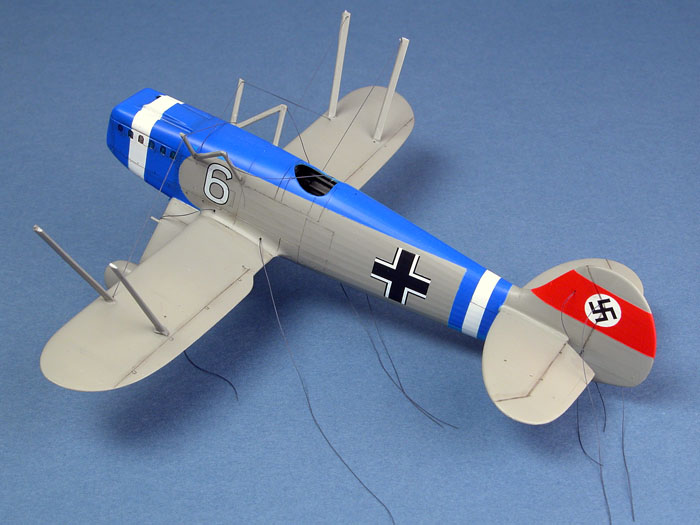
Decals came from various sources - national markings
from a Cutting Edge sheet and from Classic Airframes' Bf 109 B kit, with
the "White 6" coming from a Tally Ho generic Luftwaffe code sheet. Most
of the decals behaved well, but the number on the port side silvered
after the flat coat was applied.
Weathering was kept to a minimum, as I am sure that
these aircraft would have been maintained in excellent condition. The
main emphasis was on control surface hinge lines, which each received a
thin line of a dirty black-brown. Cowling and cockpit panels received
even more restrained treatment. A few translucent chord-wise streaks
were added to the top wing. The final weathering step was a very thin
wash of Tamiya Semi-Gloss Black applied to the major panel and hinge
lines with a fine brush.
Click the
thumbnails below to view larger images:
|
|
|
|
Decals were sourced from various miscellaneous sheets. Numbers came from a generic "Tally Ho" Luftwaffe codes sheet
|
|
|
|
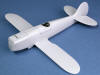
The front struts were held in place with Blu-Tack while the top wing was positioned.
|
|
|
|
Once I was satisfied with the position of the wing in relation to the front struts, they were glued in place.
|
|
|
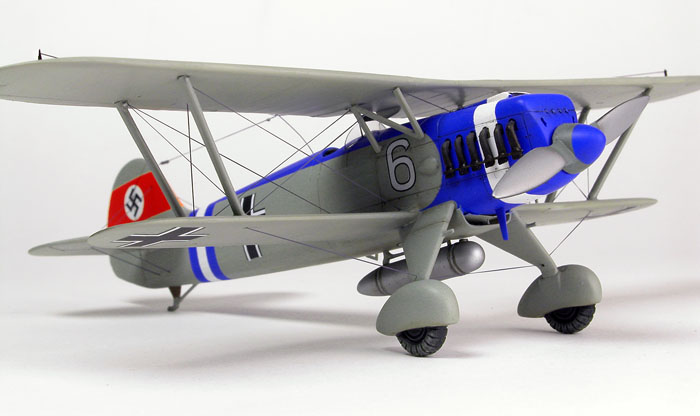
With painting and weathering complete, it was time to
face my greatest fear - aligning the struts and the top wing.
First I temporarily positioned the forward main struts
on the bottom wing with blobs of Blu-Tack. I held the top wing in
approximately its correct position, and adjusted the top of the struts
to fit into my pre-drilled holes in the bottom surface of the top wing.
When I was satisfied with the alignment, I applied a bead of super glue
to the base of both struts using a fine piece of wire as the applicator.
Next, I lined up the rear struts directly behind the front struts and
glued them in place. Once again, I test-fitted the top wing. This time,
it seemed that the rear struts were slightly too tall so I trimmed them
to a more appropriate height while they were still glued in place.
I placed the interplane struts into the holes drilled
into the fuselage, then test-fitted the top wing for a third time. The
metal pins offered a degree of flexibility, permitting the unglued
interplane assemblies to find their own level under the weight of the
wing.
Now the model was sprayed with its flat coat - Polly
Scale Flat. This acrylic coat dries fast and resists fingerprints. It is
also very reliable in the level of gloss achieved. The first coat
delivers an eggshell finish, almost flat. The second coat is dead flat.
I was satisfied with a single coat for most of the airframe, with a few
bands of "dead flat" on the top of the upper wing.
At this stage I decided to lay the groundwork for the
rigging.
E-Z Line was chosen as the rigging material due to its
elasticity and robustness. Its thickness also looked about right to my
eye. I started by gluing lengths of E-Z Line into some of the
pre-drilled holes in the airframe. My original plan was to complete the
rigging when the top wing was secured, but I thought I would rig a few
lines beforehand on the tailplanes and undercarriage. These early
attempts were time consuming and fiddly, but not especially difficult,
especially with the in-built elasticity of the rigging material. I built
up a rhythm and found myself rigging the entire airframe before
installing the top wing. This was relatively easy thanks to the greater
access afforded without the obstruction of the top wing.
The finishing touches included the windscreen, the
auxiliary fuel tank and the propeller assembly.
The windscreen was cut out of the flat acetate sheet and
folded into shape. A thin bead of Micro Krystal Kleer was brushed along
the bottom lip of the windscreen and it was carefully positioned in
front of the cockpit opening.
Photos of the wooden propeller assembly suggest that the
front face of the blades were sometimes painted silver. I thought it
would be interesting to combine this with a non-reflective black rear
face and 02 Grey on the centre section. I was tempted to "wear down" the
front of the propeller to reveal bare timber, but I thought it was
unlikely that these pristine pre-war birds would be neglected to such a
degree. The propeller was progressively masked and sprayed the four
colours - first RLM 24 Blue, then RLM 02 Grey, then silver and finally
black.
The external fuel tank was assembled and a disc punched
to represent the filler cap. The tank was painted silver and moderately
weathered using a combination of airbrush and paint brush.
The previously assembled exhaust stacks were brush
painted with Testor's non-buffing Burnt Iron Metalizer, and the stubs of
the machine gun barrels received a coat of Gunmetal.
The wheels were brush-painted Flat Black, and received a
dusting of Tamiya pastel chalks.
And now, the moment of truth.
I mixed up a batch of Araldite 5 minute epoxy glue and
applied small dabs to the tops of the interplane struts and the rear
outer struts. I then filled the locating holes for the forward outer
struts in the top wing with super glue. I carefully positioned the wing
over the forward outer struts, and promptly dropped the wing. No damage
done, so I repositioned the wing and lowered it more carefully onto the
forward struts. With the front struts in the locating holes, I gently
tipped the wing back onto the rear struts. I needed to apply a little
extra pressure to get the rigged interplane struts to sit down evenly.
In the end, I balanced a can of Humbrol paint on top of the wing to
maintain the pressure while the glue dried.
The result was a reasonably well aligned wing assembly.
Not perfect, but I was satisfied as a first attempt.
I still had to rig the aerial wires. The photo-etched
mounts on top of the wings were secured with epoxy cement, and E-Z Line
was once again used for the rigging.
Just when I thought that I had finished, I realized that
I had not installed the rear-vision mirror and the boarding ladder. The
ladder was simple enough, but it was tricky to maneuver the tiny
photo-etched mirror into the narrow space between the deck and the top
wing.
Classic Airframes' 1/48 scale Heinkel
He 51 was not quite as scary as I first thought it might be. For a
start, it fitted together quite well.
Rigging and installing the top wing
were also worse in anticipation than execution.
The model went together surprisingly
fast too. I started cutting parts from the sprue last Sunday afternoon,
and I was adding the finishing touches almost exactly one week later
with only a few hours work each day (well, maybe more than a few
hours over this last weekend...)
After seeing how attractive this
colorful specimen looks, I feel like tackling another pre-war Luftwaffe
subject, maybe this time with the Chrome Yellow trim of JG 234.
Anyone out there got a spare Classic
Airframes Arado Ar 68?
Click the thumbnails below to view larger images:
Model,
Images & Text Copyright © 2006 by
Brett Green
Page Created 08 October, 2006
Last Updated
21 February, 2007
Back to
HyperScale Main Page |
 Home
| What's New |
Features |
Gallery |
Reviews |
Reference |
Forum |
Search
Home
| What's New |
Features |
Gallery |
Reviews |
Reference |
Forum |
Search