|
Henschel Hs 129B-2
by
Richard Macer
|
|
|
Henschel Hs 129B-2 |

Hasegawa's 1/48
scale Hs 129B-2 is available online from Squadron.com
Although I finished this model a few years ago, it is
only now I have finally become organised enough to send the photo's into
Brett for possible inclusion as an article for Hyperscale!
The Henschel Hs129 was one of those slightly esoteric aircraft used by
the Luftwaffe in WW2, a very simple and sturdy yet heavily armed (and
armoured) ground attack aircraft.
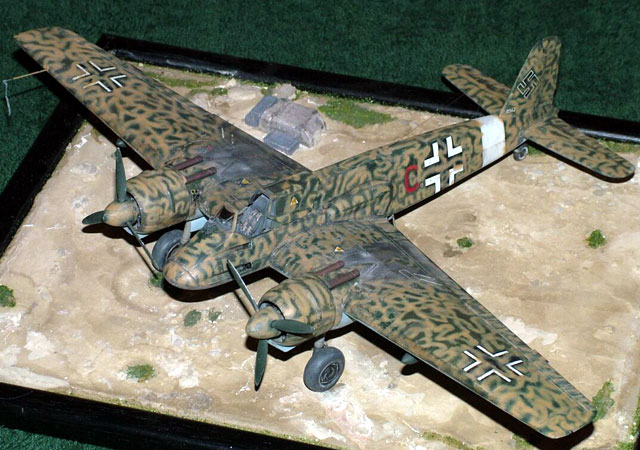
Hasegawa's beautiful 1/48 scale Henschel Hs 129 will
undoubtedly be in most avid Luftwaffe modeller's collections by now, and
surprise surprise, I was so taken by it upon purchase, that I actually
finished mine!
I think it came as a bit of a shock to the modelling community when this
kit was announced a few years ago, although it was very well received
when it eventually arrived. In fact I cannot recall of any gripes about
accuracy, price, quality or whatever. The kit has a very simple parts
breakdown but this actually helps the overall appearance of the finished
model. I will point out a few problem areas that I encountered along the
way.
Firstly, I made a very basic error in that I was so
eager to get started I didn't spot the very prominent ejector pin marks
on the inside of each cockpit half- go have a look at your kit- see what
I mean? The really stand out beautifully once you have painted the
cockpit and assembled the fuselage halves- hmmmm…
Warning- those beautiful filler point covers on the top
of the fuselage will be less beautiful unless you pack them with
something from underneath and treat assembly very carefully. It is very
easy to chase them too far down in to their recess and have to dig them
out again with a scalpel point, meanwhile getting glue everywhere! The
basic wing parts are really easy to assemble, but be careful when
setting the dihederal as there is quite a bit and Hasegawa throw the
ball to you on this one. So remember, once you have checked, check again
and again until set, and those wings should be set straight as a die too
if is to capture the "look" of the aeroplane.
At some early point you will have to decide on the use of the aircraft
as to theatre, there is a hole in one of the fuselage nose fairings that
is apparently for the cockpit heater- a sort of solid fuel boiler for
pilot comfort if you like, at least that’s what I read somewhere.
Eastern front a/c almost definitely had this, but mine was going to be a
North African plane. Martin Pegg told me the scheme I would eventually
decide upon- well he didn't but his fantastic book did. I fell in love
with the profile for "Red C" as depicted here, and felt it would be a
real challenge- (it was!) As I was building the kit "straight from the
box" I had no need for the very fine looking detail sets by CMK,
although I must admit the thought crossed my mind more than once. Most
of the remaining construction was very simple (even I could do it)
although I thinned down things like the undercarriage doors, engine
cowling ventilation slot fairings and so on to make things look a little
more appealing. I would at this stage admit to having a temporary bout
of insanity by hollowing out the tailwheel & yoke moulding and painting
a white wall on the tyre. I surpised myself here and I am pleased with
the result I eventually achieved. Another area where careful assembly is
required are the two large ailerons, although not difficult, again a
fair amount of attention is required at an early stage before things go
pear shaped on you. Well that’s the construction over with, so on to the
paint shop….
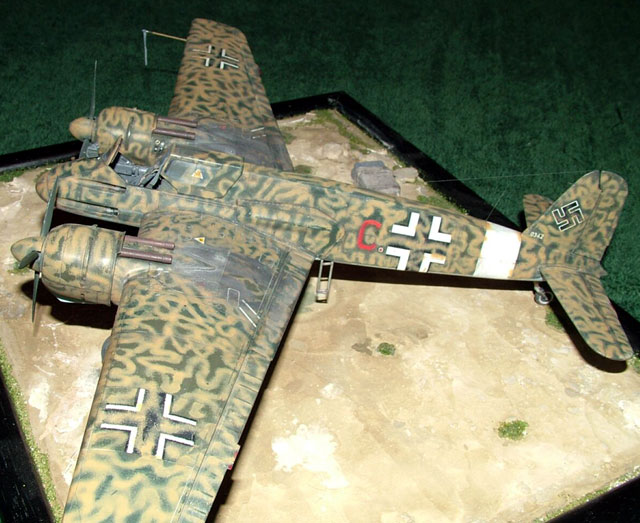
"Red C" is finished in a squiggle overspray of a golden
looking sand colour, and I would not like to hazard a guess as to the
true shade. But it had great appeal for me, much more so than my actual
understanding of how a representative finish could be successfully
achieved! I firstly sprayed the model in hand mixed 70/71/65 and
naturally it was the best 70/71 I have ever managed, this is of course
because I was about to cover it in yellow….
My real problems started when I assumed I would
just mix the correct colour for the squiggle and "plug n play," I could
not have been more wrong. I started by using my Testors Aztec thingy,
but quickly switched to my trusty Badger 200. I then started to think
twice about using acrylics for this particular operation as I was
certainly not getting the results I was after. I think the basic problem
was that if I had been spraying a darker colour over light, then I would
not have needed such quantity of paint as I was needing to use to get
solid colour trying to go light over dark." I just could not achieve a
thin solid line with any consistency and to be frank, it would have been
very easy to leave the model with a paint finish which I felt could have
been better. Things started to improve when I switched to Humbrol
enamels. This time the coverage was there, but the pigment was not so
fine and the gun had to be opened up more than I really wanted to stop
blockages etc, this in turn meant too much overspray that blocked out
the greens underneath more or less completely.
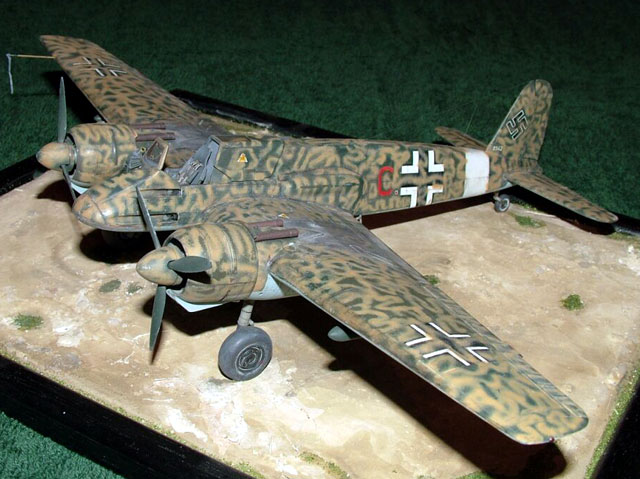
I did eventually master the technique required to put the lines in the
right places (no not underhand style- grin.) With practice I managed to
approximately follow the spray patterns that a full size human being
would have been able to achieve on a full size aircraft, so all was not
lost.
In the end, I realised that to go further with things would probably be
unwise, so the model was left for a "cooloing off period" while the
paints hardened and stabilised. This allowed me to get back onto the
model with some very fine abrasive and gently reduce the surface and
eliminate much of the overspray.
Ultimately I was reasonably happy with the final finish,
even if not quite the easy and fun five minute breeze I had always
thought it was going to be- ha ha! Modelling as we all know, is a
learning process and boy I certainly learnt an awful lot here!
All said and done, a very enjoyable kit with few obvious faults, I hope
you enjoy it.
Model, Images and Text Copyright © 2004 by
Richard Macer
Page Created 19 March, 2004
Last Updated 19 March, 2004
Back to
HyperScale Main Page
|
 Home
| What's New |
Features |
Gallery |
Reviews |
Reference |
Forum |
Search
Home
| What's New |
Features |
Gallery |
Reviews |
Reference |
Forum |
Search