|
Czech Master Resin's 1/72
scale
Hughes H-1 Racer
by
Mark Davies
|
 |
|
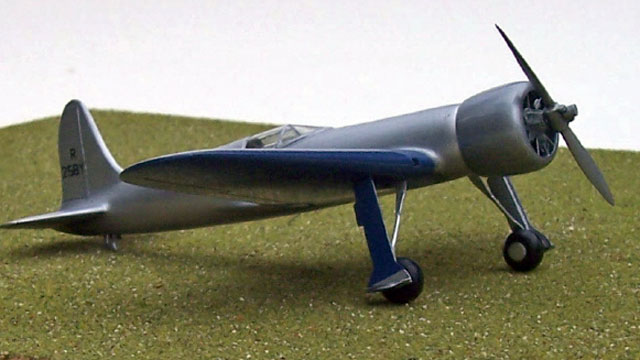
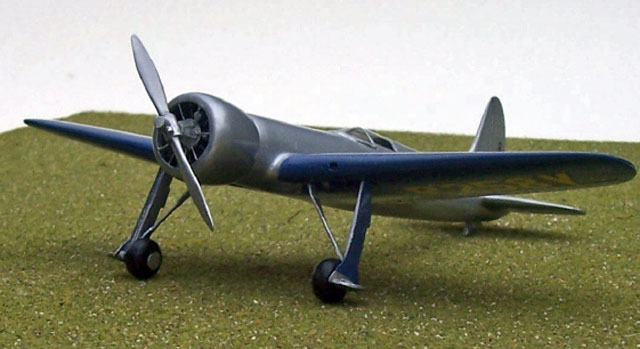
Hughes H-1 |

HyperScale is proudly supported by Squadron.com
The Hughes H-1 racer may be familiar to many as a result of the movie
“The Aviator” where Leonardo de Caprio played Howard Hughes, and crashed
an H-1 into a beet field. The design was very advanced for 1935 with its
highly streamlined shape, close-cowled radial engine, flush-riveting,
closely sealed retractable undercarriage, enclosed cockpit, flaps and
drooping ailerons amongst its modern features. The plane was had two
sets of wings during its lifetime; the short span wings to set the
air-speed record, and the long span for transcontinental Los Angeles to
Newark record. The Smithsonian’s website provides some interesting
additional information can on the Hughes H-1. Also a very nice flying
Hughes Racer Replica was produced of the long-span version.
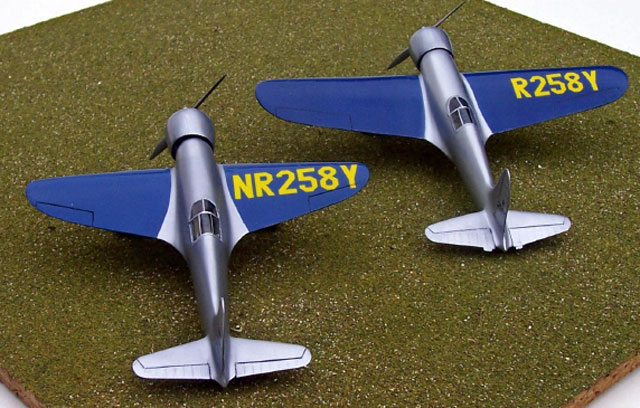
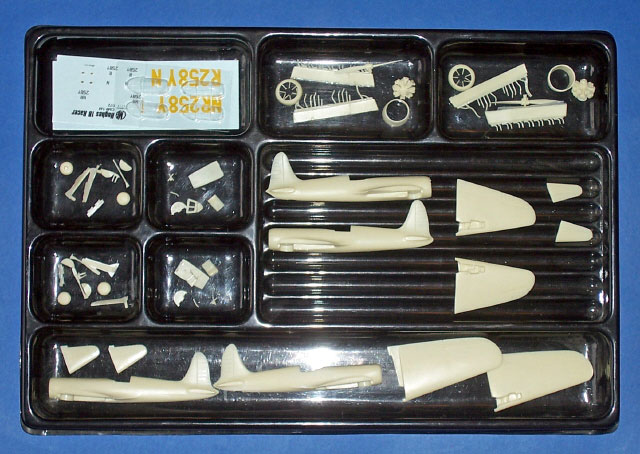
I was very pleased when I got my Czech Master resin (CMR) kit of the
Hughes H-1 to find it included two kits enabling both versions of the
plane to be built. Despite initial appearances only the engine, cowling,
cockpit, canopy, wheels and tail-skid are common parts to both versions.
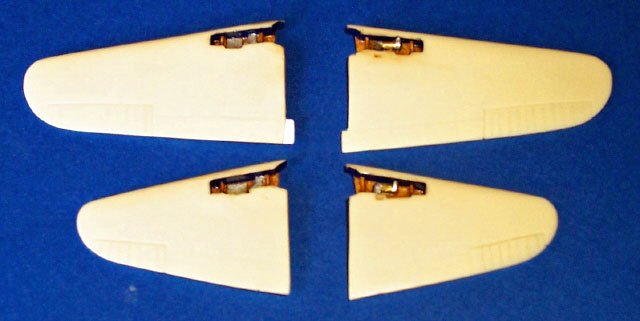
The two sets of wings have different main undercarriage wells and doors
which dictate different fuselage mouldings, and the horizontal
stabilizer differs as the long span version has trim tabs on the
elevators.
A useful in-box review of the kit is provided at Internet Modeler's
website. Suffice to say that the kit comes with good instructions, a
comprehensive walkaround of the preserved original aircraft, and clear
colour scheme guides.
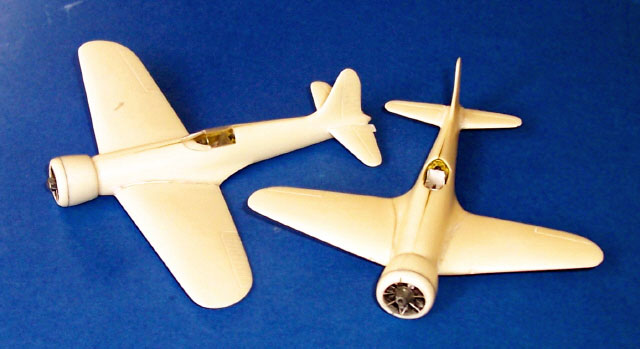
I decided that building the two versions side by side was the obvious
way to go. CMR has done a great job in minimizing the amount of mounting
block attached to the parts leaving very thin residual resin waste to be
removed. As a result I quickly had all parts removed and cleaned up
ready for painting and assembly, being careful to keep the two versions’
parts separated. I added some simple lap belts and painted sub
assemblies before tackling assembly.
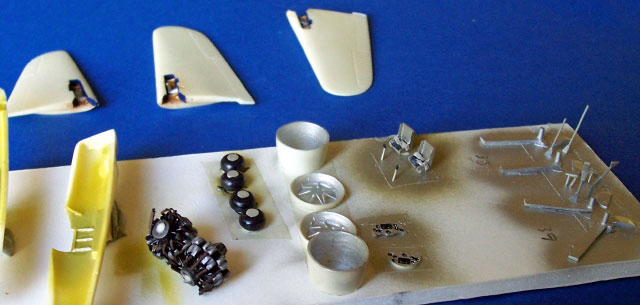
The very detailed engine deserves mention as the original’s complex
exhaust system is provided. This is the most challenging part of the
kit, and in truth one that would be best appreciated if you choose to
model with a cowl panel removed. Possibly this is one area where the kit
could be simplified. The cockpit includes good detail for the scale,
including what I understand to be large stall-warning horn behind the
pilot’s head. The wheel wells in both wings have a lot of internal
detailing, and the instructions provide clear guidance on painting
these.
The basic airframes were quickly assembled, and the first two vac-form
canopies were easy to trim and fitted Ok without further practice,
although four are provided with the kit. The cowl braces are provided in
resin, but are probably pushing the limits of resin in this situation a
little for scale finesse. Whilst definitely quite useable, I chose to
replace mine with fine plastic rod. I also added a small circular plate
to one cowl brace which was apparent in the kit’s photo walkaround (I
have no idea as to its purpose).
The resin mouldings are quite smooth and generally extremely blemish
and pin-hole free, requiring only the most cursory remedying. I think I
over-trimmed the fuselage when sanding for 100% flat mating surfaces,
and as a result had to fill a slight gap between the fuselage halves.
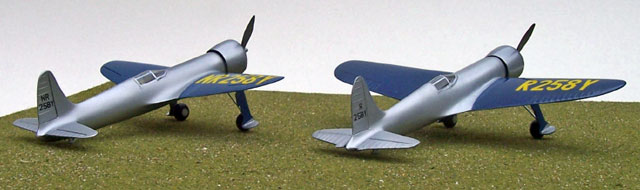
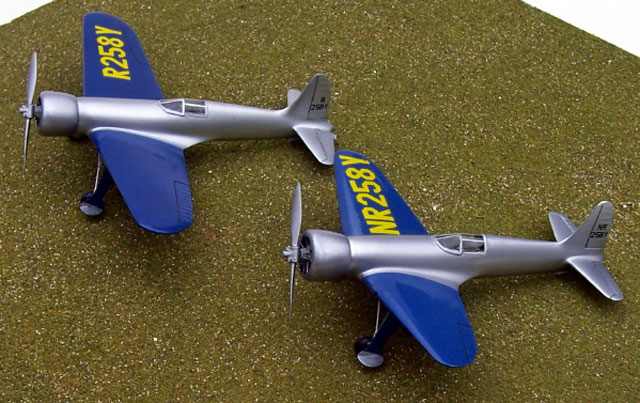
Painting was very straightforward. My aluminium base was an aluminium
car lacquer, and this was then “dressed up” with Alclad II. I find this
is a cheap and effective way to provide an adequate base to spray Alclad
II over, and so economise on this relatively expensive product. The blue
wings used a mix of Humbrol paints, and these were then glossed up with
brush-applied future (to avoid the aluminium fuselages) in preparation
for decaling.
The decals are very thin with excellent opacity; the yellow codes
showing no blue through them. They were easy to apply and presented no
problems at all. I should point out that I photographed my models before
applying the propeller logo decals to the props.
I feel that CMR have done very thorough job with the Hughes H-1. It is
particularly pleasing that both versions of the can be built for the
price of one kit, rather than simply being presented with having to
choose an option. The relative complexity of the engine exhausts aside,
these are very simple resin kits to build, and have added a very
interesting and attractive aircraft to my collection. I highly recommend
these kits to anyone with one or two resin kits under their belts.
Click the thumbnails below to view larger
images:
Model, Text and Images Copyright ©
2006 by Mark Davies
Page Created 16 September, 2006
Last Updated 21 February, 2007
Back to HyperScale
Main Page
|
 Home
| What's New |
Features |
Gallery |
Reviews |
Reference |
Forum |
Search
Home
| What's New |
Features |
Gallery |
Reviews |
Reference |
Forum |
Search