|
Czech Master Resin's 1/144
scale
Martin Mars JRM-1
by Angus McDonald
|
 |
|
Martin Mars JRM-1 |

HyperScale is proudly supported by
Squadron
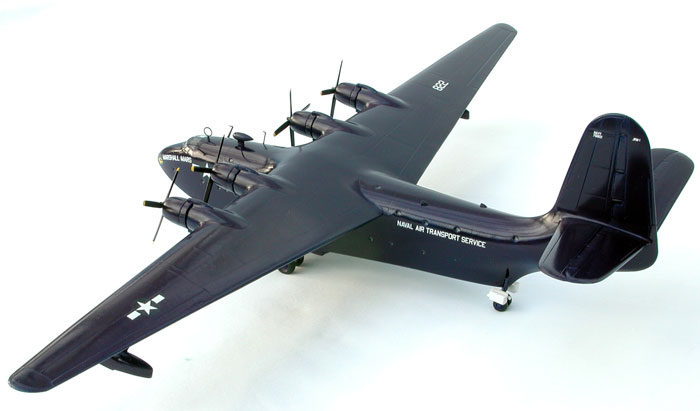
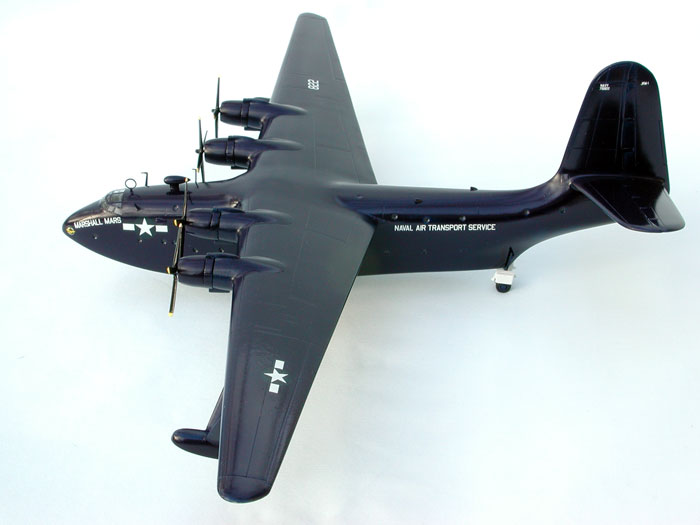
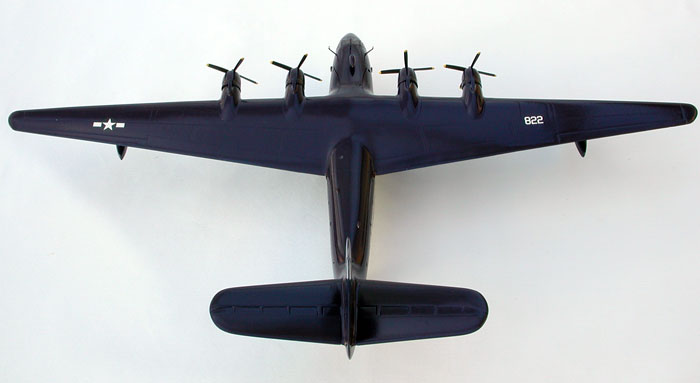
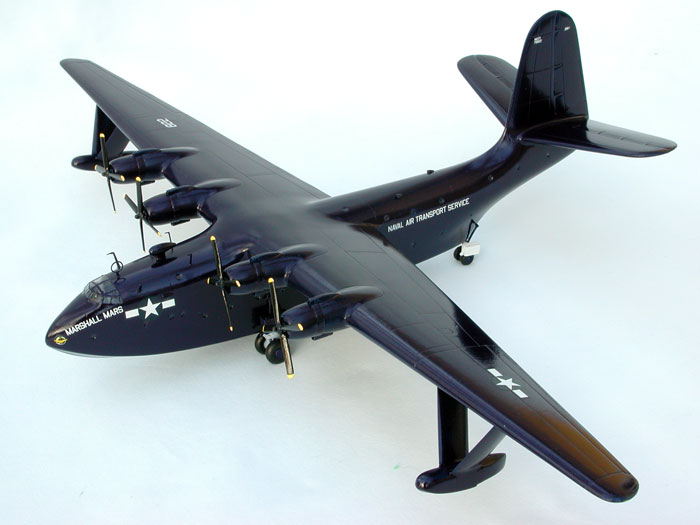
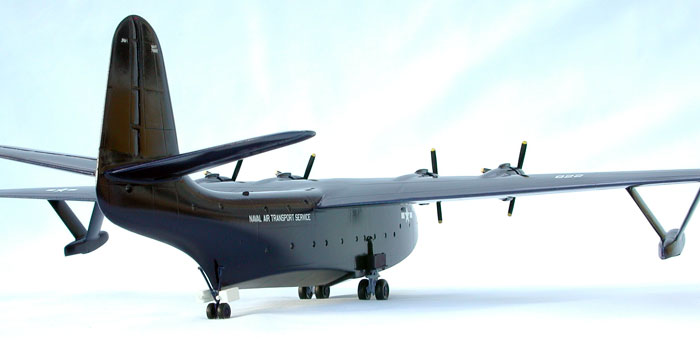
The Martin Mars JRM-1 is Czech Master
Resin’s latest foray into the world of 1/144 scale models, and a truly
incredible subject it is to.
I have a soft spot for flying boats. They
are typically a wonderful combination of curves, hulls, high wing and
sheer brooding massiveness. The Martin Mars satisfies all these
categories. Its 200 foot wingspan exceeds that of the B-52 and Boeing
747, resulting in a model whose span in 1/144th scale is virtually that
of a 1/72nd scale B-17! And it’s full of gorgeous curves, and thick wing
sections, and a stunningly elegant wing plan form.
Right, enough of that drooling, what about the kit? Well, it’s resin,
all of it!
Yes, all of it.
There are no metal parts (the beaching dollies are all resin), and no
vacu-formed transparencies. The latter are now moulded out of clear
epoxy resin.
As usual, the parts are beautifully engineered, smooth, virtually bubble
free, with finely engraved panel lines. Each wing half is a massive
single cast of resin. I spent ages fondling them. Tail and tailplanes
are separate solid castings. There are some very fine, delicate, thin
casting for parts like the beaching dolly. All is not sweetness and
light, I’m afraid. Due to the record high temperatures Europe endured in
the summer of 2004, CMR experienced tremendous problems with casting
resin. Thus, some of the parts suffered minor amounts of damage. The
trailing edges of the wings came in for a particular beating, looking in
some places like mice had been nibbling on them. One of the tailplanes
had deep gouges, and there was evidence of resin splatter and flakes
being caught up in the parts. While the cowl flaps are so delicately
thin, I’m amazed so few got damaged. All of these faults were trifling
to rectify with a bit of super glue, wet-n-dry and elbow grease.
Construction proceeded relatively
quickly, partly due the small number of parts which typically make up a
CMR kit, and partly due to their good fit. You need to dry fit parts,
trim them, and square them up. No big deal.
It was when I glued the hollow fuselage halves together that I really
began to admire the sheer skill of the pattern maker. The fit was
extraordinary, miles better than many mainstream manufacturers are
capable of. And this is a kit made out of resin, of a subject full of
compound curves forever changing direction. This feeling continued when
fitting those huge wings to the fuselage. With a minor bit of trimming
you can end up with a tight fitting wing, butting right up against their
roots on the fuselage. There are gaps between the top of the wing and
the fuselage which need filling and sanding, however it was no great
effort.
Oh, I’m a bit dubious of the ability of the thin resin walls to take the
weight of the wing, especially when the weather gets warmer. So I braced
the fuselage with rectangular strips cut from old credit cards.
Fair sized gaps occurred at joins of the tailplanes and tail to the
fuselage, necessitating copious quantities of super glue and vigorous
sanding. Again, no great shakes.
While the epoxy resin transparencies have suffered some loss of clarity
(though it is improving as CMR get to grips with this new technology)
this is greatly offset by the ease with which they can be trimmed and
glued to the fuselage. I think the whole process of trimming them from
their moulding stubs and blending them into the fuselage took about half
an hour (note I built both the JRM-1 and JRM-3). Compare this against
the half an hour it typically takes me just to cut and trim a vacu-formed
transparency from its backing sheet.
The beaching dolly did not fair well in the casting process. They
required much trimming to get even part way respectable, and even then I
gave up trying to extract the resin from between the wheels and frame.
However, once painted you can’t really notice.
Various bumps, chutes and vents were made from scratch, and glued into
appropriate places on the fuselage. I did miss out on one set. They
occur on the wing leading edge, just over the fuselage. It was late in
the construction process when I noticed them, but just couldn’t bring
myself to produce them. It was getting really close to Christmas, and I
wanted these models finished.
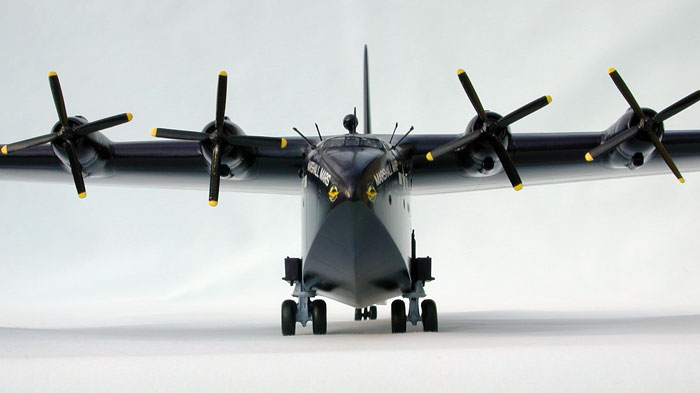
Painting, ha!
This followed the usual McDonald
tradition of ‘foul up and cock up’. As usual, I didn’t have any official
colour to match the gloss Sea Blue of the JRM-1’s. I did notice,
however, that Citidal’s Midnight Blue seemed to come fairly close. So,
thinning it with Halfords screenwash I began my adventure in spraying.
Do you know how difficult it is to spray a dark colour and get a
consistent finish, especially when the paint wouldn’t flow properly (due
to my not mixing it properly) or when it did flow I got drips. Needless
to say there was a considerable iteration of paint, swear, sand away
flaws, cuss, paint, etc. I think about four coats of paint saw me reach
my temper limit, and call it a day. Only now came the gloss coats.
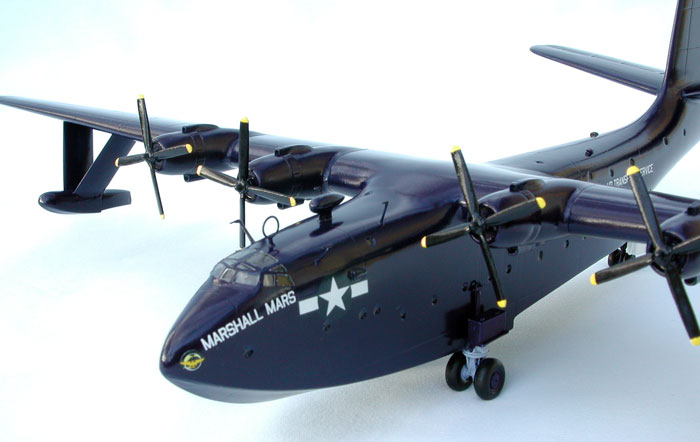
A coat of Future/Klear was sprayed on. The wonderful CMR decals applied.
Then another coat of Future/Klear. Loud blaspheming as I notice the
severe drips. Then a repeat iteration of careful sanding, cussing,
spraying, swearing, over sanding so cutting down to the primer, painting
of Midnight blue, spraying of Future/Klear, more blaspheming, etc, etc,
etc. I think I must have used about a quarter of a bottle of Future/Klear
on this model. But it boiled down to me determined to get a really
smooth glossy finish, and nothing was going to stop me.
Finally satisfied, I stopped. Granted it is rare, if not impossible, to
find a photo of the real aircraft sporting such a glossy finish, but
trust me it looks really, really drop dead gorgeous on this aircraft.
Photography
Photographs were taken with my trusty 3.4
MP Nikon 880. F-Stop set to something between 9.2 and 11.4, depending on
the vagaries of the Nikon and the prevailing gloom of the British
weather. Even though set to fully manual operation, the Nikon still sets
the F-stop to approximately what it thinks it should be. I can’t
remember, but the exposure times varied from 1/30th second through to
1/8th second, depending on the thickness of cloud passing over the
house.
As with any resin kit, you are going to
need a reasonable amount of skill to build CMR’s Martin Mars JRM-1. This
is no shake and bake kit. If you can build an Airfix, Heller or older
Revell/Tamiya/Hasegawa, etc kit, you can build this.
But the result is truly stunning. The Martin Mars is just full of
wonderful curves, with a wing plan form of jaw dropping elegance. And
CMR have captured these features in their beautiful kit.
Angus McDonald
Click on the thumbnails
below to view larger images:
Model, Images and Text Copyright © 2005
by Angus McDonald
Page Created 18 February, 2005
Last Updated
18 February, 2005
Back to
HyperScale Main Page |
 Home
| What's New |
Features |
Gallery |
Reviews |
Reference |
Forum |
Search
Home
| What's New |
Features |
Gallery |
Reviews |
Reference |
Forum |
Search