The
Junkers Ju 388 was developed from the Ju 188 as an advanced night
fighter intended to replace the Ju 88G in service with the Luftwaffe. It
differed from the Ju 188 in several aspects, the two most prominent
being a remotely controlled gun turret in the tail and a completely new
front fuselage with pressurized crew compartment. The engines were
intended to be either BMW 801G or Jumo 222, but late delivery problems
lead to twin BMW 801TJ power plants being mounted on the prototypes.
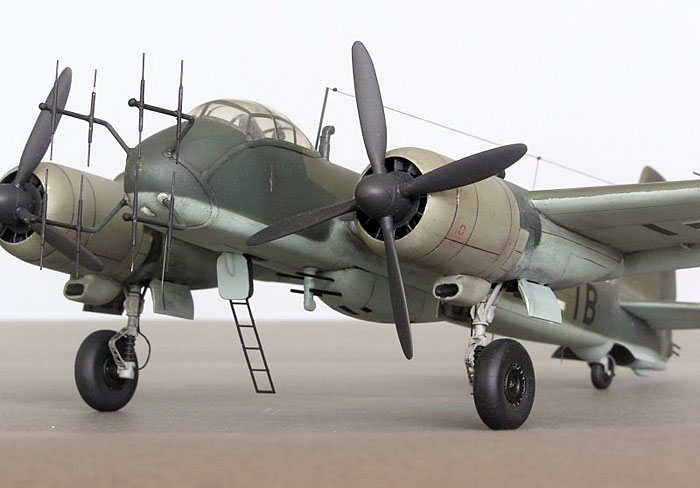
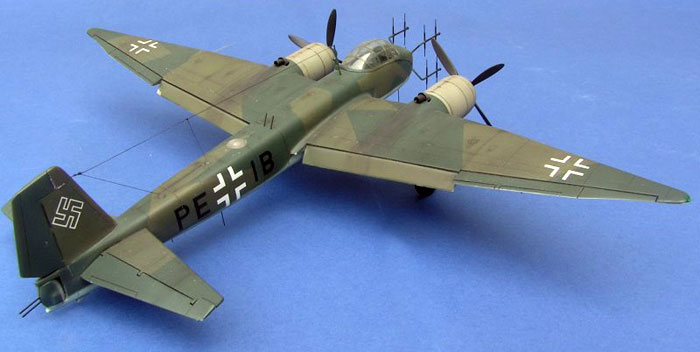
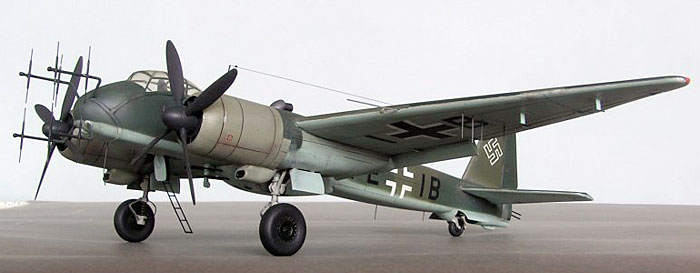
The V-2
was built as a prototype of the intended Ju 388J-2 series. It carried
SN-2 radar with the characteristic Hirschgeweih antennae.
Offensive armament consisted of two MG 151 and two MK108 cannon in a
ventral gondola arrangement plus two more MG 151s mounted in Shräge
Musik mid fuselage configuration. The V-2 was test-flown in the
beginning of 1944, and it has been fairly well documented on a few
preserved photographs.
It is
believed that at least one of the Ju 388 prototypes was tested
operationally by Kommando 388 early in 1945, but naturally it was too
late for the 388 to reach series production. The only Ju 388s to achieve
operational status were the "K" (bomber) and "L" (reconnaissance)
models.
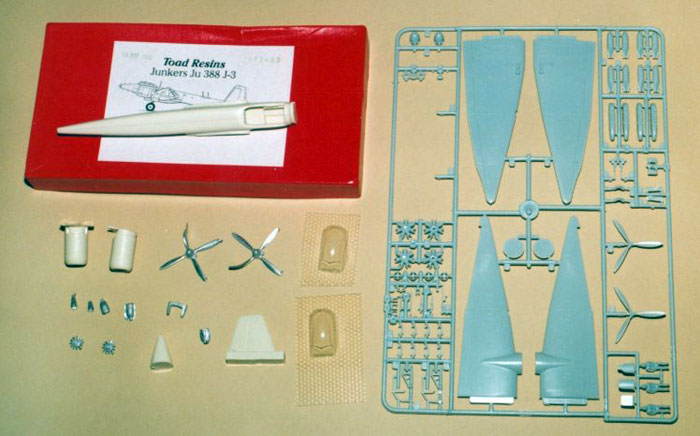
Toad Resin Conversion
In 1995 I
bought the Toad Resin Ju 388 conversion set from Peter Long (resin and
white metal) for the Italeri Ju 188. For five years the small red box
lay beside my workbench collecting dust as I was not really pleased with
the kit, until I finally decided to do something about it. The resin
fuselage was 5 mm too long, warped and too round compared to my opinion
of the Ju 88 family fuselage, and the white metal propellers were
totally unusable. Actually, the best I can say of this conversion set is
that it triggered my interest in the 388!
In the end
all I used was the fin, tail turret and the canopy, the engines were
also used, but only as a basis for the completed ones. A few white metal
items were also used. I have some other Toad conversions that are much
better, so they must have had a bad day!
The Italeri 1/72
scale Ju 188
This is an old kit with raised panel lines, but all in all a sound kit.
The Ju 188 has the late style large fin and stabilizers and longer wing
tips needed for the 388. The cockpit interior is sparse and the landing
gear is not as good as that in the AMT Ju 88 kits, so several kit boxes
were opened! I have a batch of old Ju 188 and Ju 88C Italeri kits, and
some AMT Ju 88 G and C’s for projects like this.
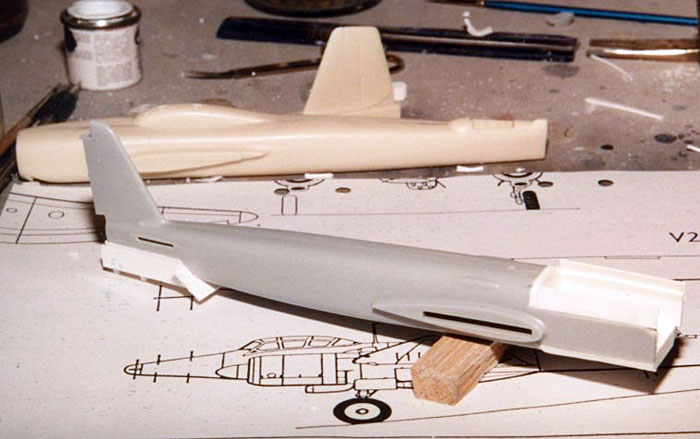
Fuselage Construction
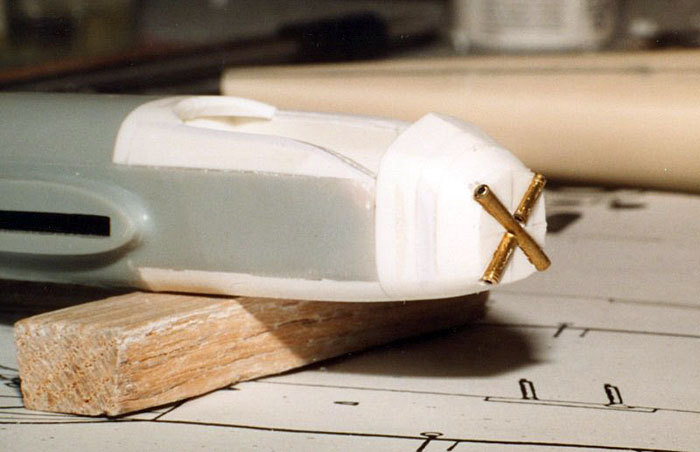
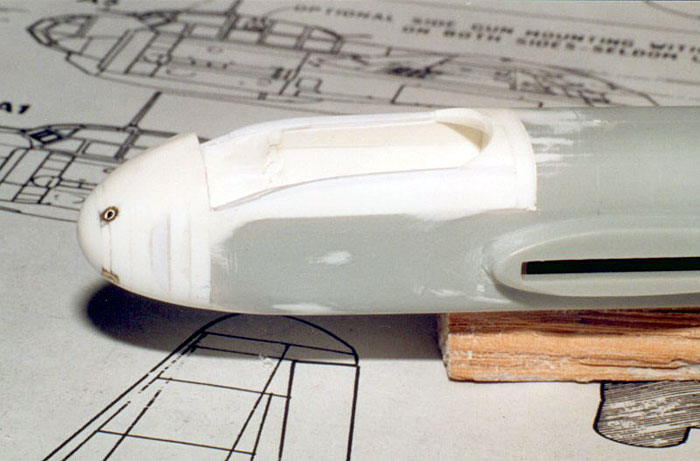
This left
me with the pleasure of a considerable scratch-building effort! A new
forward fuselage was built up from plastic card. The nose was built from
layers of plastic card with brass tubes to insert the radar antennae
poles into. The nose was completed with more plastic!
Click the
thumbnails below to view larger images:
Rear bulkhead and seats were taken from the AMT
Ju 88G kit. A square hole in the floor for the crew access hatch was
made. The interior was painted dark gray and dry brushed and the seats
received belts from lead foil from a vintage claret bottle!
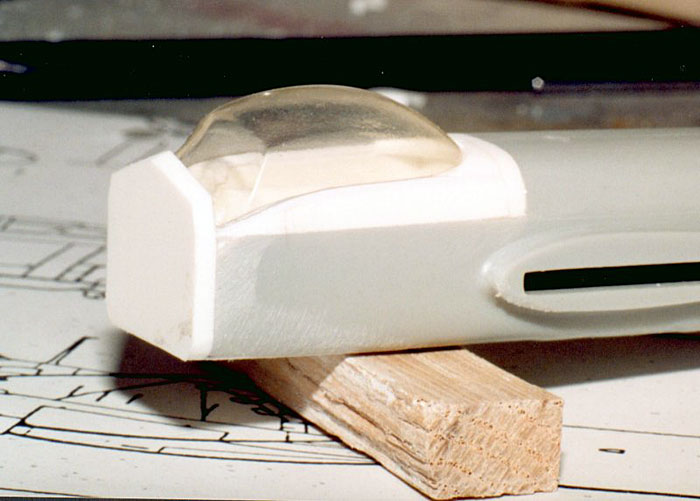
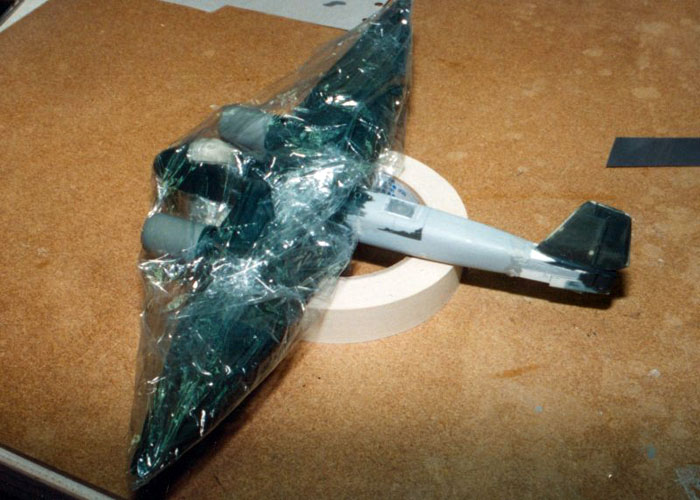
A recess
was made around the edge of the fuselage where the canopy was to be
glued, and the area in front of the windshield had to be built up with
Milliput to fit the canopy. After polishing the canopy it was glued in
place using Future and more Milliput was used up front.
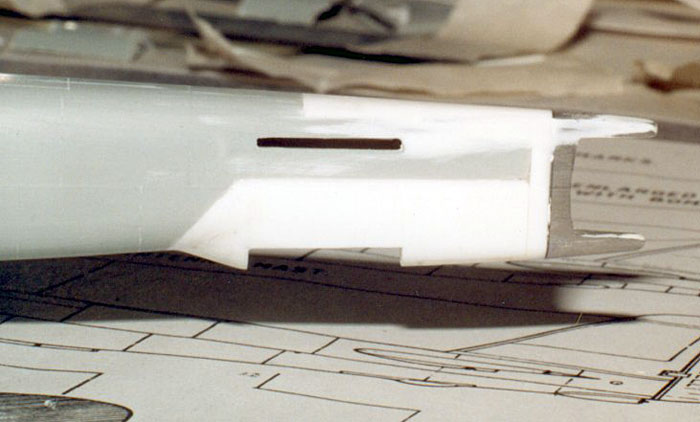
The rear
fuselage also required extensive reworking with enlarged cross-section
for the tail turret. The lower part of the fuselage was built up around
the wheel well with plastic card.
Click the
thumbnails below to view larger images:
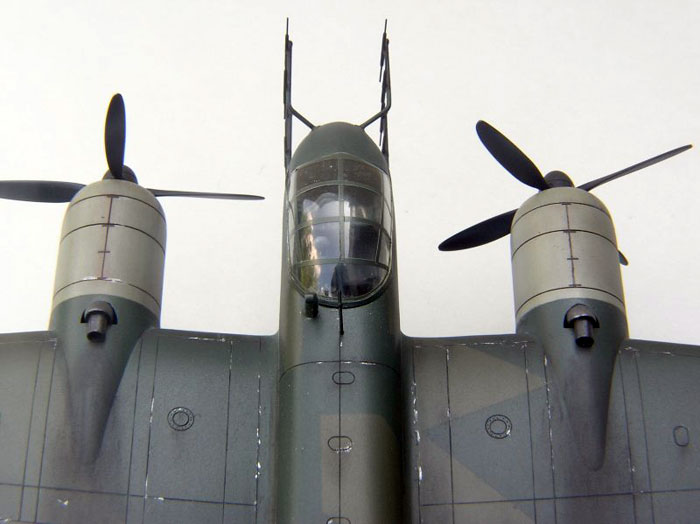
For the
Peilgerät antennae housed inside a Perspex window on the top of the
fuselage I used an Eduard PE part inside a clear piece of plastic sanded
flush and masked during painting.
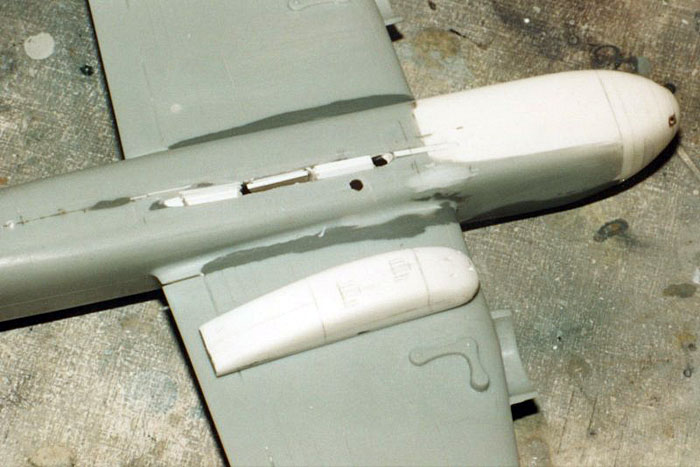
The belly
cannon pod was built from layers of plastic card sanded to shape after
the old SMI drawings.
The kit
had raised panel lines which were sanded down and as usual I tried to
engrave thin panel lines.
Wings and Engines
The wing
halves were scribed before assembly as it is much easier holding them
steady that way. The wing halves were joined and the wheel wells glued
to the underside.
Now it was
time to join the wings with the fuselage, a very important stage in the
construction! I was very careful with the dihedral and had the model in
a jig while the glue set, but the next morning I was sure the wings were
not at the right angle! I used my old Dremel tool and made a cut in the
lower body where the belly pod would be, and carefully bent the wings
upwards inserting small pieces of plastic card in the crack until I had
achieved the right angle. The result was good and after some more glue
and another overnight setting time I was happy!
Click the
thumbnails below to view larger images:
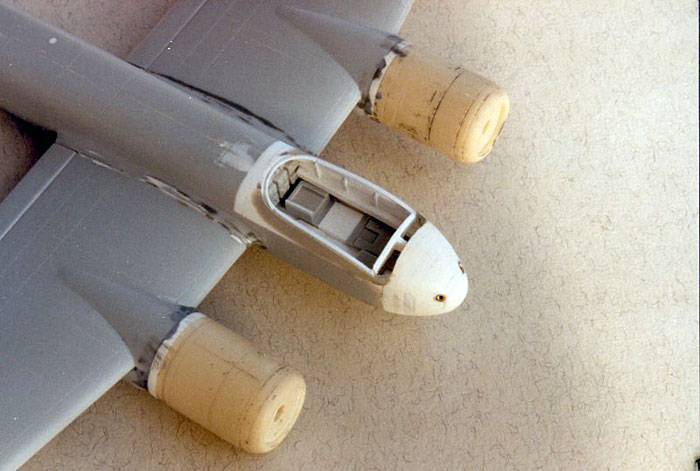
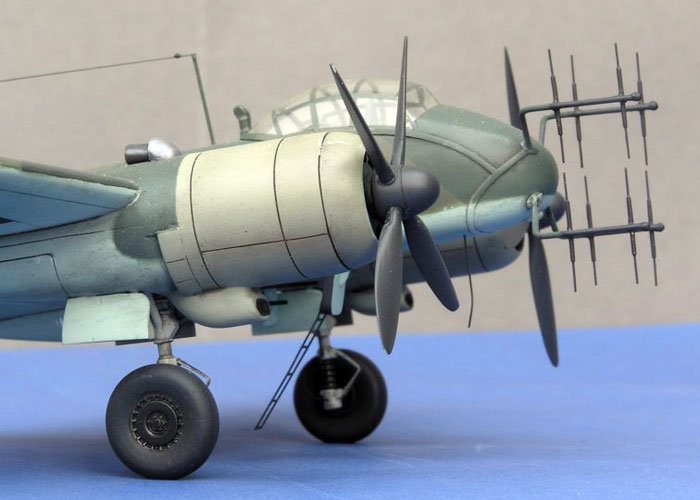
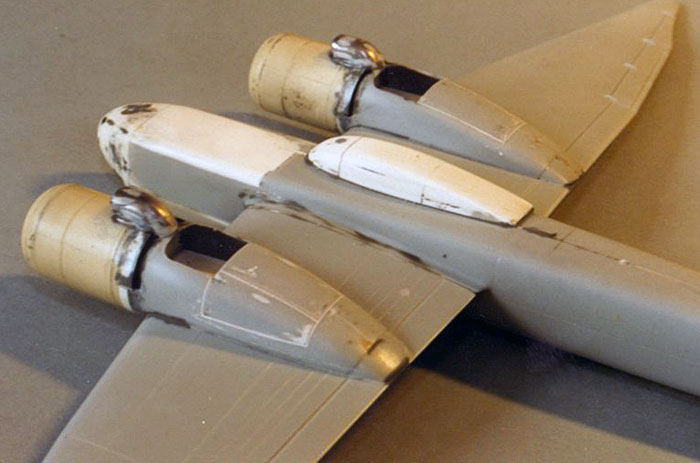
The Toad engines were very simple in the front
end. Iit was sawed off and replaced with Italeri Ju188 parts and on the
rear lower end I added exhaust shrouds from plastic card. The engines
were mated with the wings, where some preparations had to be done, but
it turned out very good.
Click the
thumbnails below to view larger images:
Toad white metal scoops for the compressor were
glued on the underside of the engine, and on the top white metal
compressor exhausts were tried but did not look good enough and were
replaced with scratch built plastic exhausts.
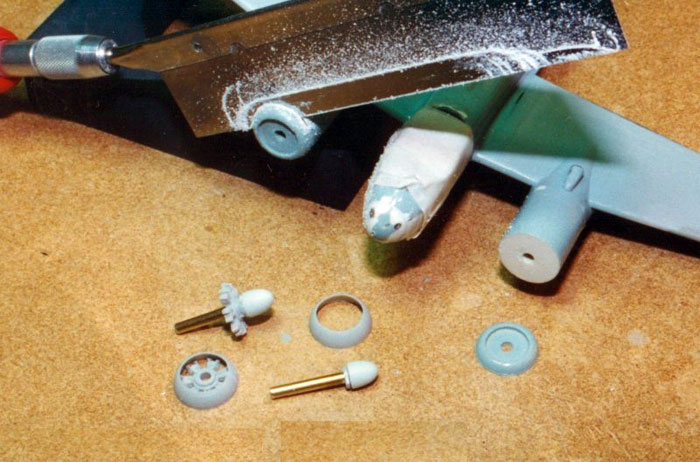
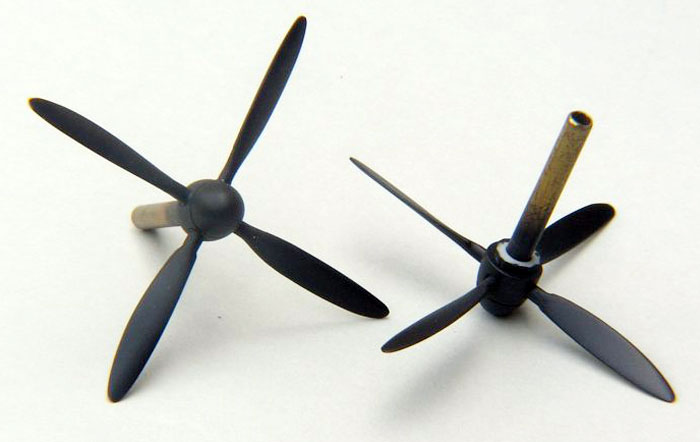
Propeller
spinners were machined and received a piano wire shaft, and one
propeller blade from the spares box was prepared and used as a master
for resin casting.
Undercarriage legs and actuators came from the AMT Ju 88G, completed
with Eduard oleo legs.
With the
airframe almost complete I decided to pay some attention to the wings,
and decided to arrange the flaps in the down position. They were removed
with a razor saw and after some fitting work they looked good installed.
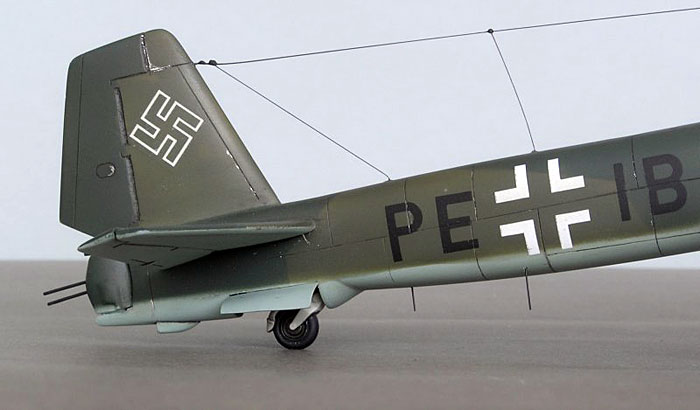
Tail
After some
wet paper sanding the Toad fin was glued to the fuselage, and on the
Italeri stabilizers I cut off the elevators and glued them in a slightly
drooped position.
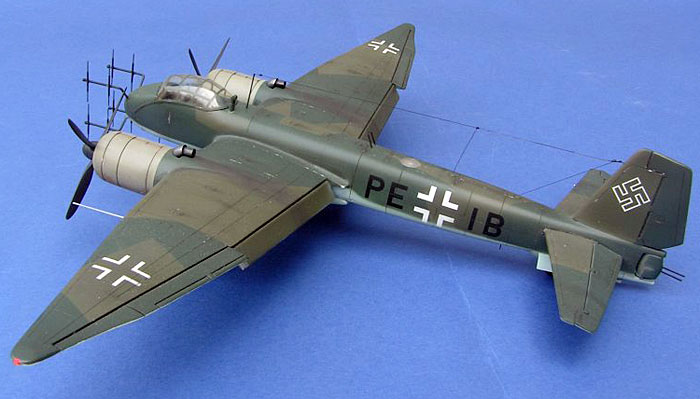
According
to the AP Press book the Ju 388 was painted in the “old” bomber splinter
scheme of RLM65/70/71 for the Ju 88, even the dedicated night fighter
prototypes were painted like this.
The model
was sanded with #1200 wet paper and washed in soap water before masking
the canopy, and then the RLM65 was applied to the lower surfaces, except
for the engines which on this specific airplane still were in the RLM02
primer.
All
surfaces to be RLM65 were masked, and because the 388V-2 had a hard
demarcation line between the light blue and the upper surface colors the
masking was easy to do, then the RLM71 was sprayed. The RLM71 areas were
masked and finally the RLM70 area was painted.
The Big Mistake
When all
painting was done there was one area that was not as I had anticipated,
the demarcation line on one side of the rear fuselage, so I repainted
it. But apparently I used some old paint, because it did not dry!
The day
for the exhibition was near so action was called upon! I placed the
model under a 60 watt light bulb to dry. I left my hobby room to fetch
something and of course I forgot the model completely, remembering it
three hours later! I ran to my and saw a sight I do not want to see
again. The lamp was at least 5 cm from the fuselage but the effect had
been devastating and the fuselage sagged considerably! I tried to
correct the fuselage by supporting the it and keeping it standing on its
wheels. It did not turn out good, so after the fuselage had gone stiff
again, the razor saw was used, and an hour of surgical work commenced.
A piece of
the fuselage was replaced with new parts from my Ju 88 spares, and after
Milliputting and rescribing painting was done once more, this time with
new colors! The old, distorted piece can be seen in the photo!
Click the
thumbnails below to view larger images:
The
Peilgerät antenna was also damaged and had to be redone, this was
the third and final time!
I painted
the areas needed and the final result was acceptable, but I can spot a
few traces of this horrifying experience.
Superscale
Balkenkreutze and Swastikas were used and the letters came from
my spare decals box.
When the
model was painted RLM70 I also painted a piece of clear decal film to be
used for cockpit canopy framing. The decal was painted with matte Future
and then cut in strips which were transferred to the canopy. The decal
strips adhere quite well but care must be taken when washing the canopy
from the decal solvents.
The
antenna poles for the SN-2 were made from piano wire, not the perfect
solution but a sturdy one! The antennas are from 0,12 mm piano wire,
slightly longer than the thin brass tube in the center of the antenna.
When preparing these small piano wire pieces I must admit that
eventually almost every sharp piece ended up piercing my thumb! Aligning
the poles and gluing the antennas was tedious but possible with some
patience. The real antennas are not “telescopic” like mine but thicker
in the middle, this is only one method of visualizing, maybe not the
best?
There are
more antennas, the right wing lower side have two FuG 101 radio
altimeter antennas and both wings have FuG 217 tail warning whip
antennas also on the under side. The lower fuselage have the FuG 16ZY
(VHF radio) whip antenna, the FuG 25 IFF antenna and the FuG 10p
trailing antenna for HF radio, all made from sprue stretched after
heating (strue).
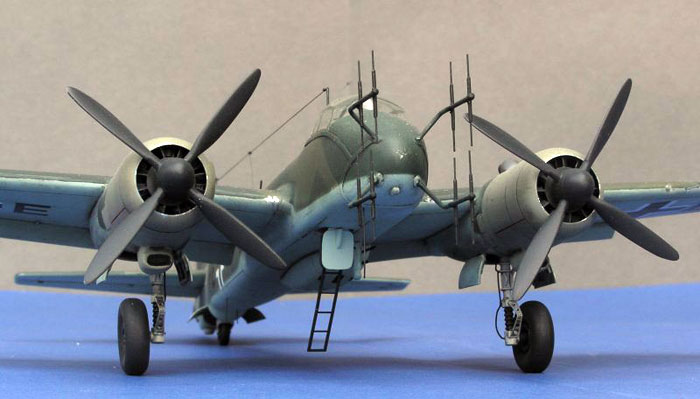
The remote
tail gunner had periscopes on the fuselage behind the cockpit pointing
up and down; Toad white metal parts were used.
All guns
have brass tube barrels, note the Schräge Musik installation of
MG 151-20 on the fuselage top.
From the
Eduard Ju 88 PE set a crew access ladder was installed on the entry
hatch.
Well, what
can I say? I enjoyed the project - does model building get much better
than this?
Special
Hobby released their Ju388J-2 a few months before I finished my project,
and of course I bought that model to compare. There are some
differences, but I’m still very satisfied with my version of this
could-be night fighter! AJ Press also released their two books of the Ju
188/388 about the same time which contains some useful information I
could have benefited from, but isn’t this the beauty of modeling:
whatever you do it can be made better on the next model!
The AJ
Press books were too late but can be recommended, there are other books
that are interesting but they don’t have so much to offer apart from the
few known photos:
-
Griehl:
Star of the Luftwaffe
-
Squadron Signal: Ju 88 in action part 2
-
Green: Warplanes of the third Reich
-
Schiffer Military: German night fighters in world war II
Click the
thumbnails below to view larger images:
German Night Fighter Aces
of World War 2
Aircraft of the Aces 20 |
|
|
|
|
Author: Jerry Scutts
Illustrator: John Weal
US Price: $19.95
UK Price: £12.99
Publisher:
Osprey Publishing
Publish Date:
June 5, 1998
Details: 96 pages; ISBN: 1855327147 |
|
|
 Home
| What's New |
Features |
Gallery |
Reviews |
Reference |
Forum |
Search
Home
| What's New |
Features |
Gallery |
Reviews |
Reference |
Forum |
Search