|
Hasegawa's 1/48 scale
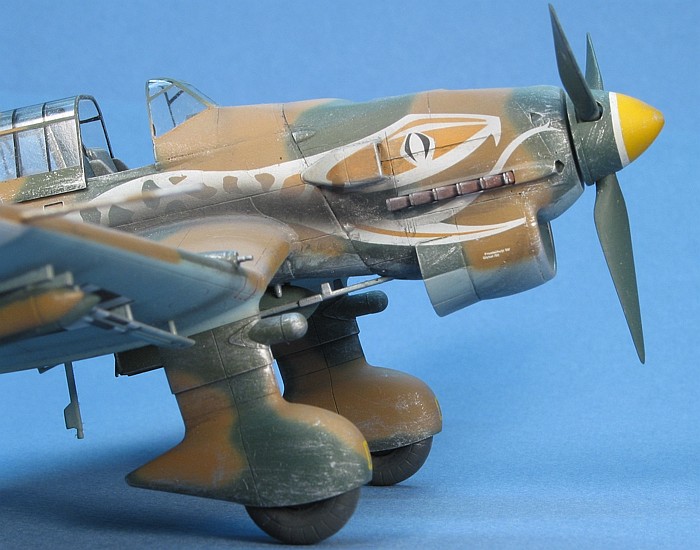
Junkers Ju 87B-2 Stuka
by
David W. Aungst
|
 |
|
Junkers Ju 87B-2 Stuka |

Hasegawa's
1/48 scale Junkers Ju 87R-2 is available online from
Squadron
I'm not really that fond of "trucks that fly" and the Stuka is no
exception. However, when adorned with unique personal markings like
those used by Lt. Hubert Polz from 6/StG 2, even I can be
persuaded to build a flying truck.
This is Hasegawa's 1/48 scale model of the Stuka. I had been
contemplating getting the Monogram or HobbyCraft kits for some years to
build this project. When Hasegawa released their version of this
aircraft, it made the choice of which kit to buy rather simple.
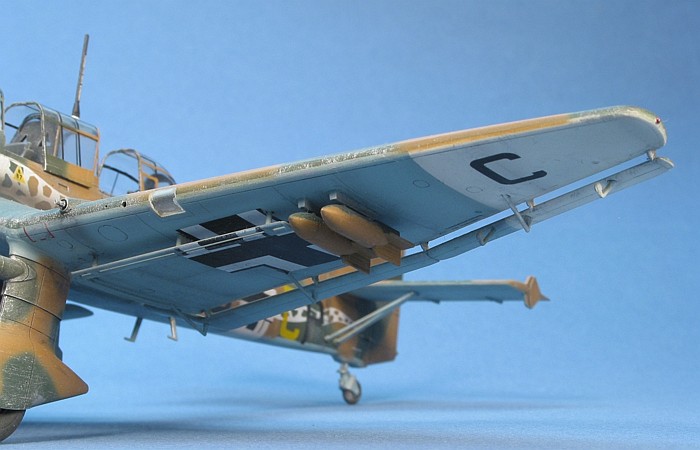
The is not an out-of-the-box build, but it is close. The only changes I
made to the basic kit were to cut and replace the wing control surface
actuators with styrene rod stock. Hasegawa molds these rather crudely as
thick triangles (with the wing flight controls molded as part of the
wing). Hasegawa would have done better to mold the flight control
surfaces separately and then provide the proper rod details for the
actuators.
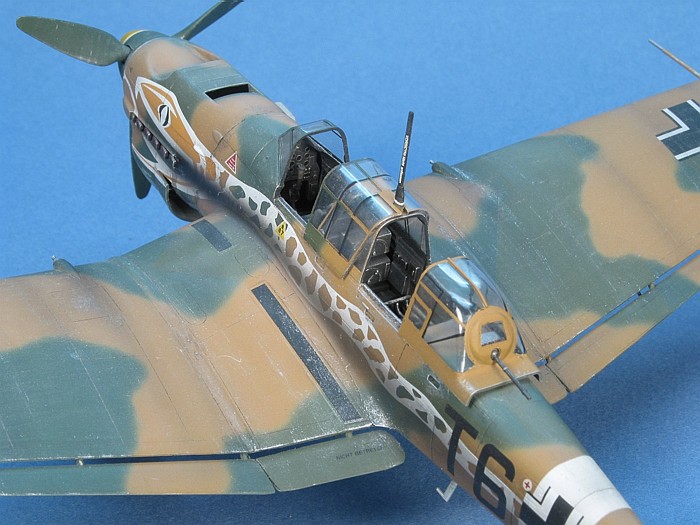
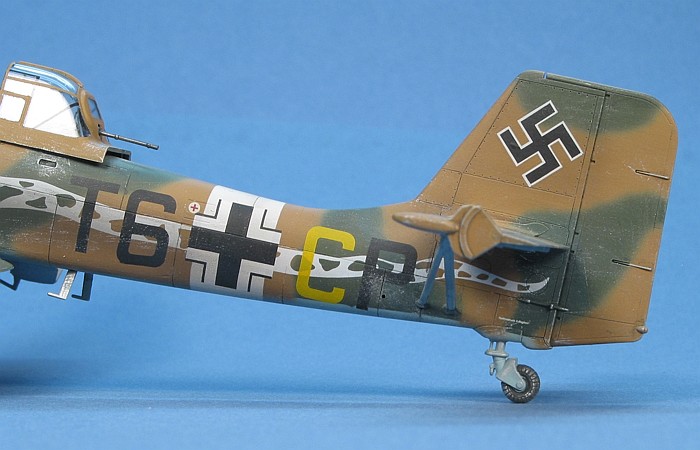
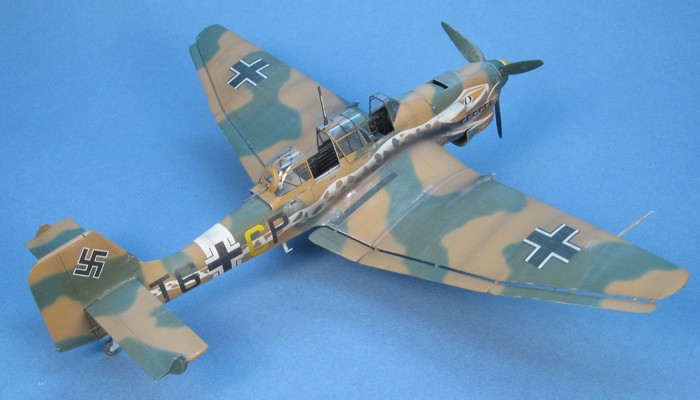
The only other problem I had with the kit involved the horizontal
tails. Constructed with the braces in the locator holes that Hasegawa
molds, the tails are forced to doop quite noticeably. I cut off the
fuselage locators and mounted the bracing higher on the fuselage side to
keep the tails level.
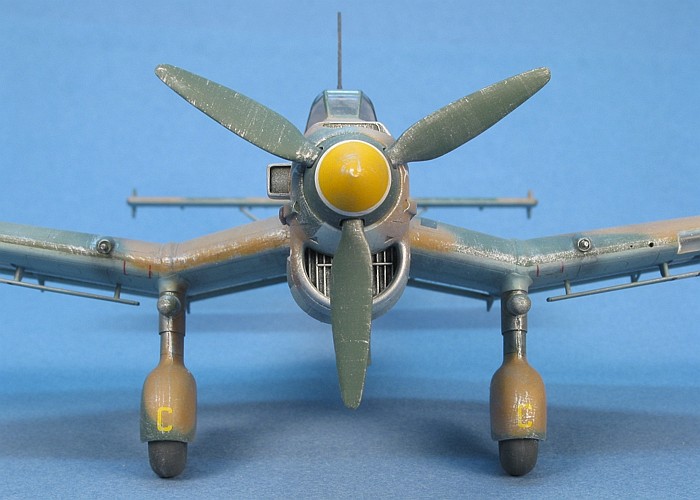
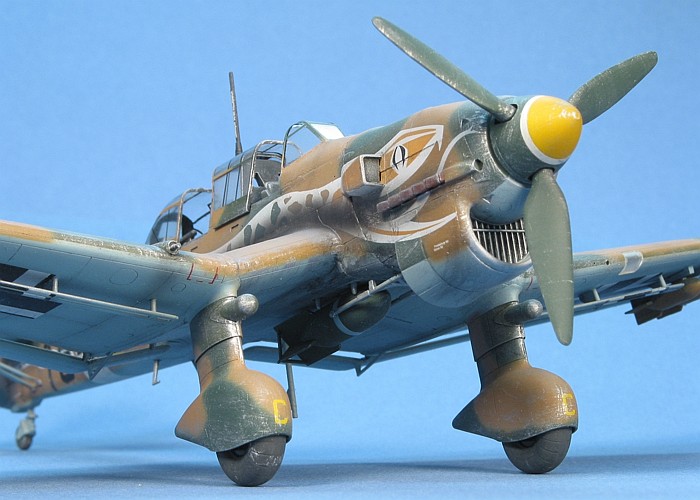
My only real complaint about the kit detailing relates to the engine
compartment. There is a sizable view of this area afforded through the
lower cowl flaps. The kit is totally empty inside the nose. To minimize
the view, I painted the entire nose interior in Black-Gray (RLM 66) at
the same time I painted the cockpit interior. It would have been nicer
if Hasegawa had provided a piece to fill this void.
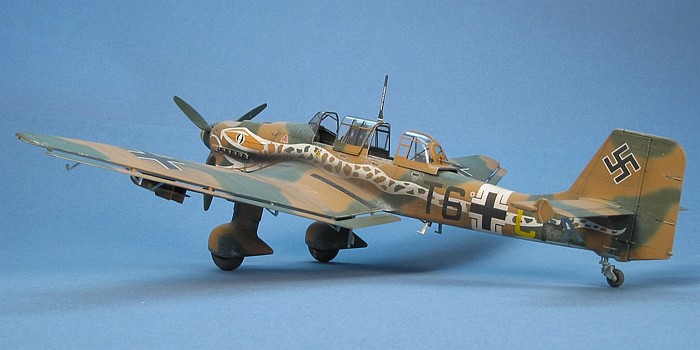
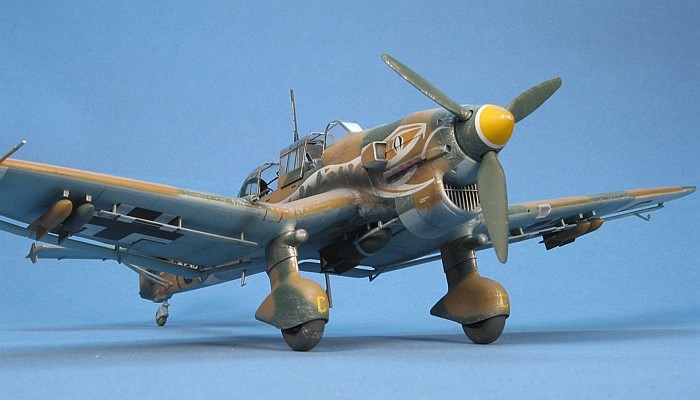
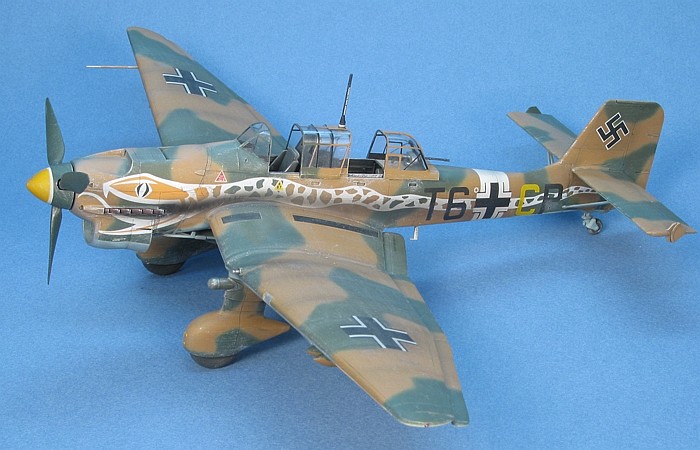
 The
camouflage on the model is painted using Floquil Military enamel paints.
The camouflage is the "standard" Black-Green (RLM 70) and Dark Green (RLM
71) splinter over a Light Blue (RLM 65) bottom with Sand Yellow (RLM 79)
applied in a random pattern over the top side splinter camouflage. The
camouflage on the model is painted using Floquil Military enamel paints.
The camouflage is the "standard" Black-Green (RLM 70) and Dark Green (RLM
71) splinter over a Light Blue (RLM 65) bottom with Sand Yellow (RLM 79)
applied in a random pattern over the top side splinter camouflage.
I had no idea how difficult it would be to apply the RLM 70 and RLM71
splinter camouflage to the aircraft. It took longer to mask the model
than it did to air brush the paint. I now know why most modelers select
later war Luftwaffe topics for building where the camouflage is more
free form. I came close to not applying the sand camouflage after all
the work it took to create the green splinter scheme.
I chose to make the cockpit interior Black-Gray (RLM 66) as I was told
this was more common. I used the Floquil Military enamel paint for this,
but most of the rest of the detail items on the model are Testors Model
Master enamel paints.
The decals come from Three Guys Replicas (sheet #48005). The Hasagawa
special release of a kit including these markings was not available,
yet, when I built this model. The "snake" aircraft has always been my
favorite Stuka, ever since I first saw the box art on the old 1/32nd
scale Revell kit. The Three Guys instructions for these decals are very
complete and actually give the camouflage for the entire aircraft (left,
right, and top sides).
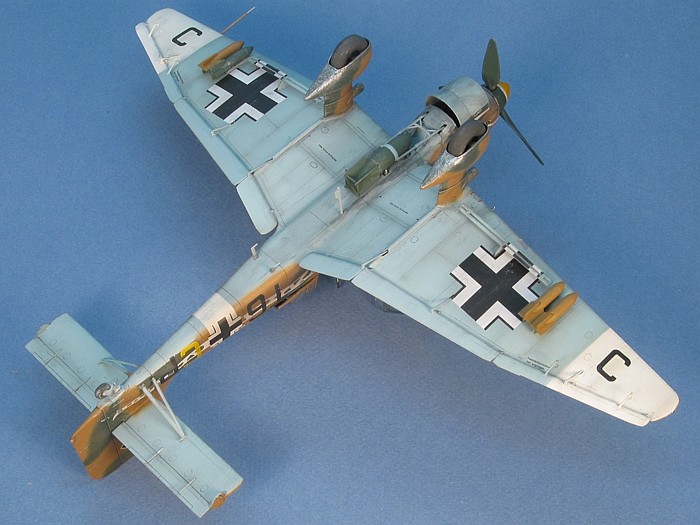
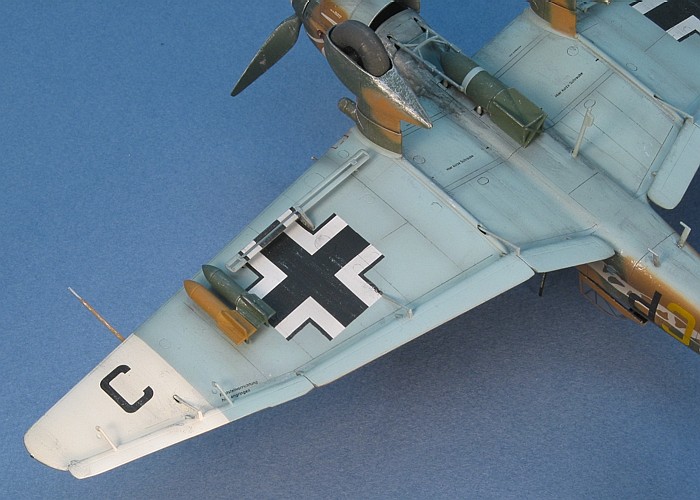
I was not satisfied with the look of the upper wing sand camoulfage.
While the fuselage was painted in free-hand soft edges, the instructions
showed the wings painted in a splinter pattern. I chose to ignore the
instructions and paint the upper wings in the same style free-hand soft
edges that are found on the fuselage. Thus, the model is not accurate as
painted, but the model sits on my display shelves and has to please me.
I like the look with this camouflage much better.
The snake markings provided me with a problem. Are the snakes on both
sides of the real aircraft? Apparently nobody knows that answer to this.
Or, at least, at the time I built the model, nobody did. I have not kept
up with any discussions to see if the snakes have been verified or not
to being on both sides of the aircraft. The decals came with snakes for
both sides. Since I like symetry, I decided to use the right side snake.
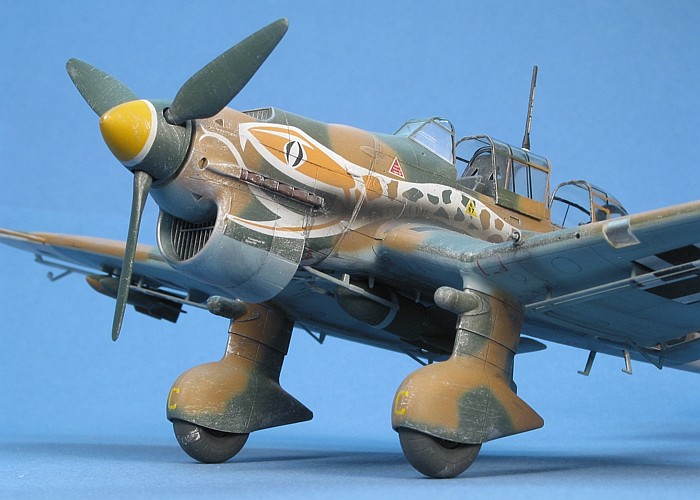
I carefully cut the head marking decal to go around the tropical filter.
I then hand painted the tropical filter in white and sand to make it
blend into the snake marking. The sand paint color I used was not an
exact match to the decal color, but it was close enough and was only
used on the underside of the filter housing.
The last thing to bring up about the markings is the age-old question
-- where they white and camouflage color (as on my model) or were they
red and white. According to reading I did and some information I
obtained from a Luftwaffe savvy friend, the correct colors are as I have
modeled, here. The red and white markings date back to the old Revell
1/32nd scale model box art. Apparently, people liked that version so
much that it got repeated in various reference sources and became
something like an urban legend. Who said that repeating a lie often
enough can not make it truth?
I used a combination of thinned down enamel paint washes and air brush
shading to weather the airframe. This was completed by a final dry
brushing of silver to pop out the surface details. I had been told from
a couple sources that Stukas got really beat in the field with lots of
exhaust staining. I hated covering half of the snake decals I worked so
hard to get applied, but I decided to follow the advice and heavily
weathered the airframe. For a more complete discussion of what I do to
weather my models, see my posting on "Weathering Aircraft".
It still is just a "truck that flies", but it has really neat
markings.
Hasegawa's 1/48 scale Stuka holds a special place on my Luftwaffe
models display shelf. While the this is a nice kit that presented me
with no real problems, it is still likely to be the one and only Stuka
that I will ever build.
|
Additional Images and Project
Summary |
Click the
thumbnails below to view images full-sized.
Click the "Back" arrow on your browser to return to this page.
|
|
|
Project Statistics |
|
Completion Date: |
16 November, 1995 |
|
Total Building
Time: |
43.5 |
|
Research: |
2.5 |
|
Construction: |
10.6 |
|
Painting
(includes creation and printing of custom decals): |
24.1 |
|
Decals / Markings
(includes creating and printing custom decals): |
5.0 |
|
Extra Detailing /
Conversion: |
1.5 |
|
| |
Junkers Ju 87
Stukageschwader of North Africa and the Mediterranean
(Combat
Aircraft 6) |
|
|
|
|
Author: John Weal
US Price: $19.95
UK Price: £12.99
Publisher:
Osprey Publishing
Publish Date:
July 25, 1998
Details: 100 pages; ISBN: 1855327228 |
|
|
Model, Description and Images Copyright © 2005 by
David Aungst
Page Created 31 March, 2005
Last Updated
31 March, 2005
Back to
HyperScale Main Page |
 Home
| What's New |
Features |
Gallery |
Reviews |
Reference |
Forum |
Search
Home
| What's New |
Features |
Gallery |
Reviews |
Reference |
Forum |
Search