|
Hasegawa 1/32 Conversion
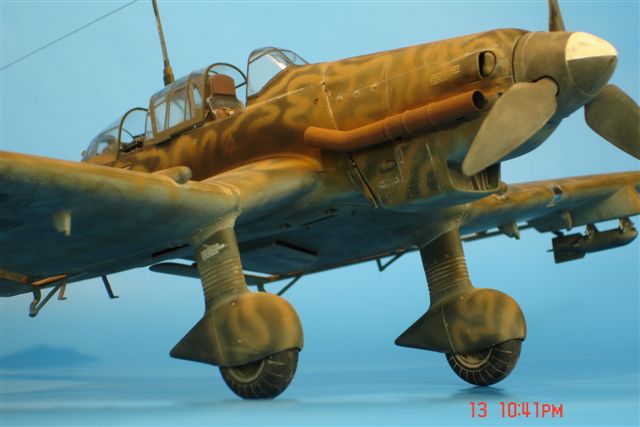
Junkers Ju 87D-3 Stuka
by Alan Roffey
|
 |
|
Junkers Ju 87D-3 Stuka |

Hasegawa's 1/32 scale Junkers Ju 87G
Stuka is available online from Squadron.com
It is not that I have to be different just to be
awkward, but it is that I cannot wait to buy the first version of a new
kit release, but then discover, after a bit of research, that I would
actually like to do a different version that will probably be released a
few months down the line! So it was with the Hasegawa 1/32 Stuka.
I realised I didn`t really like those big cannon on the G. So, since the
G is a D with big guns on it, I decided I would do a D.
My first thought was to do a desert scheme, but from looking at books,
discovered there were not many D`s sent to Africa, and those that were,
all seemed to be in the dark greens; Boring! As usual, I was seeking
something different. I found what I was looking for in a book called
`Ghost Bombers: The moonlight war of Nachtschlachtgruppe 9 in Italy`.
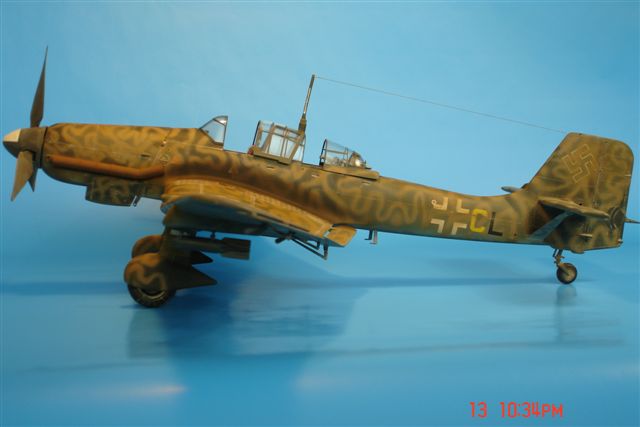
One of the colour profiles in this book shows a D3 with the usual greens
and RLM 65 modified by brown wave pattern on the upper services and a
medium grey wave pattern (RLM 75?) on the undersides: Wunderlich!!
However, there were a few problems to overcome. My Nachtschlacht D3
would need bombs, which you get with the kit, but no bomb racks or
shackles to go with them. Also, I needed to source some huge flame
dampers for the exhausts. More of this later. I know, I`m such a tease.
I slapped the cockpit together in short order and washed
it with black/brown artists oils. Before doing this, I checked the fit
of it in the fuselage halves. It was very tight. In other words, very
good.
Whilst waiting for the wash to dry, I started assembling the wings, in
my case the shorter G1 variant wings to represent a D3. After fitting
the trailing edge flaps/ailerons, I jumped ahead to stage 13 of the
instructions to attach the connecting rods between wing and flap/aileron
with super glue to secure them in the right position before the
polystyrene cement dried that I had used to attach the flaps/ailerons to
the wings.
Earlier, I had assembled the nose, which fits extremely well. I decided
I could paint the radiator grills after camouflage painting.
The design and fit of the inner wing is a masterpiece of
plastic mould engineering. I love the way it goes together and ensures
the correct anhedral and dihedral. The join lines of the outer to inner
wings was not quite so good, but nothing too much to worry about.
Back to the cockpit: I dry brushed with Aeromaster medium sea grey and
then brushed on some Rub `n` Buff, to simulate wear, in appropriate
places. The seat belts are Eduard pre-painted. Lazy I know, but who
cares. I used the kit transfers for the radio dials and instrument
panel. I`m not a modelling snob when it comes to these. I think they
look good if they are printed correctly.
Before I knew it the fuselage was together complete with the nose
section, and the wings were test fitted to it. The fit was incredibly
tight. Believe it or not, no glue was required. Precision engineering!!
However, the real test is if the undercarriage goes on at the correct,
vertical, angel. After making good all join lines on fuselage and wings,
I rejoined them without using glue.
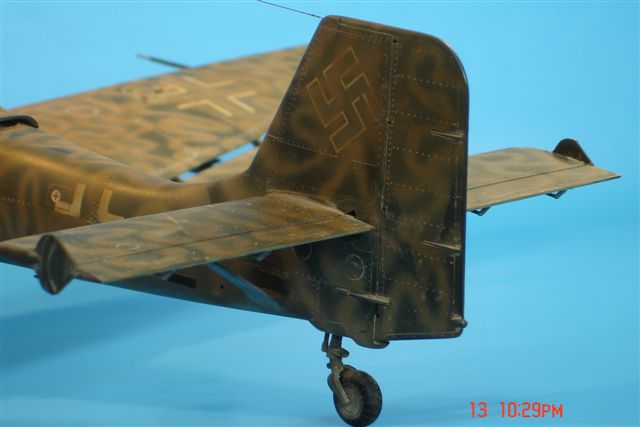
The tailplane was not quite as good a fit, but did not present any real
problems. I used polystyrene cement to affix the horizontal stabilisers
and then super glue for the support struts.
It is at this point that I like to take hold of the airframe and `fly`
it around whilst making an engine noise. On this occasion, this puerile
activity included a Stuka dive toward the carpet.
What to do about the undercarriage? I decided to put it on now, wheels
and all. I would hand paint the wheels after spraying.
Now that almost the whole thing was together, I noticed it has a
considerable weight to it. Not surprising I suppose, since it is about
the same size as 1/24 Spitfire.
At this stage, I would normally mask the canopy and fix it on ready for
spraying. However, I was still waiting for the Eduard mask to arrive
from Czeska. Therefore, I started checking out the bomb racks I
plundered from my spares box. I have no idea what kit they came from and
they were probably in there for years. But I did know they fitted the
contour of the wing very well and were quite a reasonable match to
photos in the afore mentioned book.
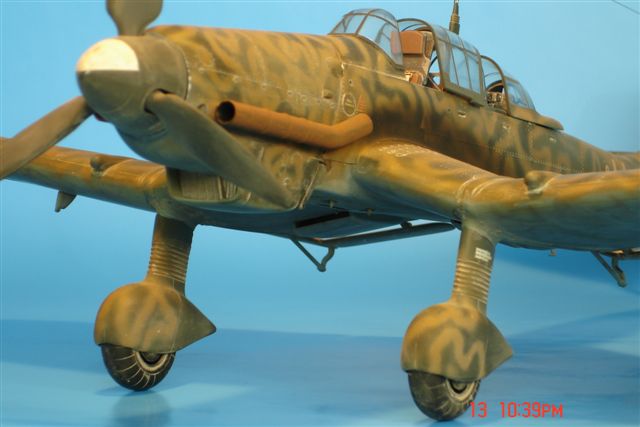
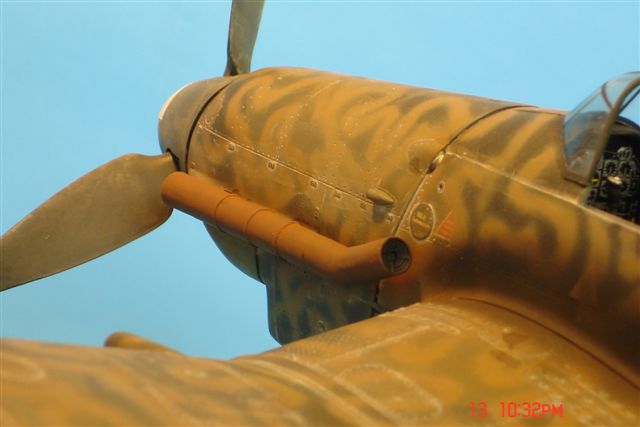
I also started work on the flame dampers for the
exhausts. Where did I get them from? Well, I looked around my display
shelves for old kits that I would not worry about taking bits off, and
there was the ideal candidate: a Tamiya 1/48 Heinkel 219 with those
massive flame dampers. So big in fact, they are the right size for 1/32!
Of course some modifications would be required, but luckily there was
enough material to work with.
Meanwhile, I was doing the final necessaries prior to spraying: there
are some annoying injection pin marks on the undersides of the
flaps/ailerons. The embossed ones were quickly sanded flat, but the
engraved ones had to be filled. They were quite shallow, so I was able
to use one of my old favourites: Snopake. This is no good in its new
state, as its too thin, but leaving it open exposed to the air, thickens
it up.
Fitting the landing light is a very risky business, as you can easily
lose it inside the wing, perhaps never to come out! This is an example
of when you should not follow the instructions. Had I spotted the
problem, I would have glued the light to the upper wing prior to
cementing the wing halves together. I got around the problem by
attaching the light to the end of a paint brush with Play Doe, so it
would not fall off whilst I fixed it in place with gel super glue.
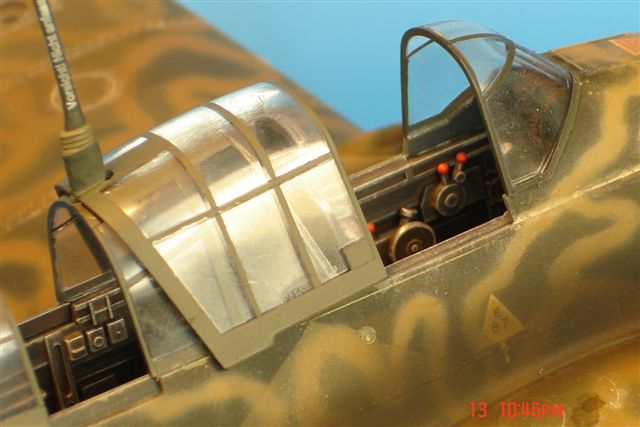
Whilst masking the canopy with Eduard masks, I realised Hasegawa had not
made an opening in the pilot`s sliding canopy to accommodate the aerial
mast. Since I wanted the canopy fully open, I cut this out with a mini
hacksaw. Due to the risk of damaging this clear part, this is not for
modellers of a nervous disposition. However, as long as it`s taken
steady, it should be OK, especially if you cover the canopy in masking
tape.
As my Stuka has no forward firing armament, or any use in the dive
bombing role, I did not fit the gun sight. Come to think of it, my model
should not really be called Stuka, it being an abbreviation of
Sturzkampfflugzeug, the German for Dive Bomber.
And so to the spraying. As my model would be covered in
wave pattern camouflage over the original Eastern Front colours, I saw
no benefit in pre-shading, as this affect would be obliterated by the
wave pattern. Instead I would post fade and/or post shade over the wave
pattern. Therefore, I started with a quick and simple blanket spraying
of the underside with PolyScale RLM65. These paints seem to have gone
out of fashion, but I still have quite a large stock left, and I think
they are very good. Next came the similarly quick and simple spray of
the lighter of the two greens. I`m one of those who does not like the
lack of contrast between RLM 70 & 71, even though it may be historically
accurate, so I lightened my 71 with dirty white. Now came the intricate
masking for the splinter scheme. One at a time, I cut out the paper
masks supplied in the instructions, covered each with strips of Tamiya
tape with a lot of overlap, then cut around the outline of the template
to dispose of the excess tape. Then I was able to peel off the tape in
one piece and apply to the model. This took much longer than I thought:
two hours! About four times longer than it took me to do the spraying of
the RLM 70, which I darkened with black.
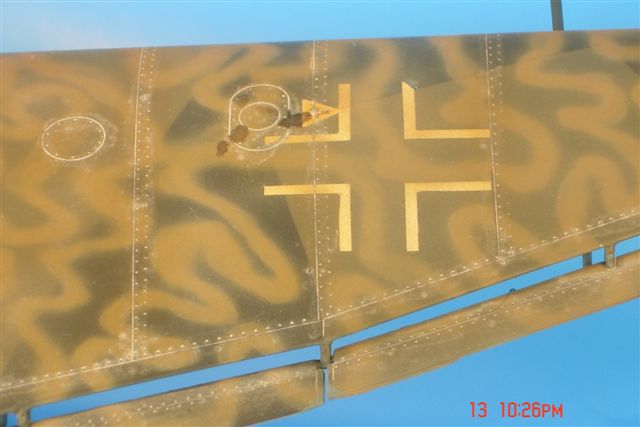
I applied transfers now, as these would have been on the airframe prior
to NSG9`s application of the wave pattern, except the Gruppe codes.
After spraying the required areas with gloss varnish, I had no problems
with the transfers. I don`t believe in using Micro Sol if it is not
necessary, and I only needed it on the underwing balkenkreuze.
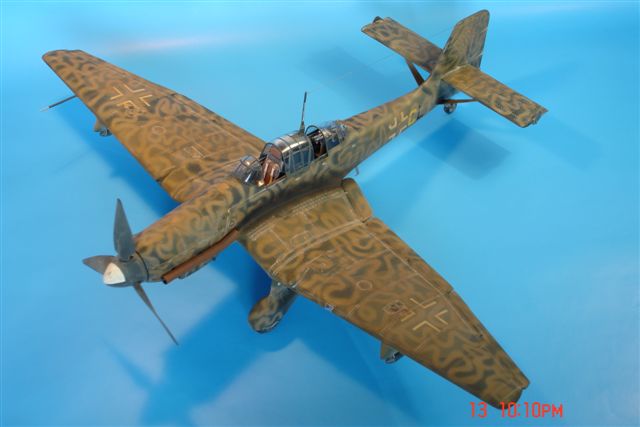
Now came the difficult part! For spraying the wave pattern RLM75 on the
undersides, I removed the front nozzle from my Iwata to give a finer
line. This was something of a risk as this was the first time I had
tried this trick. It went reasonably well, but with frequent stoppages.
After completion, I misted over with the same colour to blend it in a
bit. For the upper surface wave pattern I mixed RLM79 with RAF Dark
Earth.
At this stage, I pondered for a couple of days on how to
do the weathering. I wanted to represent an aircraft in an Italian
summer with plenty of dust around. I had recently weathered a Tamiya
1/48 Panzer III with Mig Pigments `light dust` heavily thinned with
distilled water, and found it very effective. So, I tried it, mixed with
`Europe dust`. It brought out the panel lines and rivets very nicely. I
removed the excess with a fine tool I use quite a lot; my little finger.
After completing the upper wings and tailplane, I
suddenly realised I had not sprayed on a coat of varnish! So what you
might be thinking. Well, when Mig Pigments dry when they have been
thinned with water, they revert to their original powder state, and are
therefore easily blown away by airbrushing, which is exactly what
happened. Curses! I had got a really good looking weathering technique
onto the model, only to lose it all.
Before redoing it, I decided to do some post shading of the panel lines
with a thin mix of a dirty brown colour thinned with turps. Oh dear! Big
mistake. When I tried to re-apply the Mig Pigment it would not take.
Curses again. What to do now.
I thought a revarnish with Humbrol matt coat would solve the problem and
this proved mostly, but not entirely, effective. I had to redo some
areas two, or even three times to finally get a satisfactory result.
This all took time and tried my patients, but at least I`ll know next
time around what procedure to use.
I glued on the flame dampers and then did the staining from them, which
is Humbrol matt coat and Humbrol matt black thinned a lot with white
spirit. To complete the exhaust affect I coated the matt black dampers
with Mig Pigments `light rust` then dusted it when dry to leave a
residue.
I did some fuel stains with thinned Tamiya semi gloss black around the
four fuelling points on the wings, and that was about it apart from
adding bombs, aerial, canopies and prop.
The one problem I had left, and the only annoying thing
about the kit, was how to fit the pilot`s sliding canopy in the open
position without it being perched too high and therefore looking
ridiculous! I decided to take the plunge and use gel super glue. This
risky technique didn`t go too badly, having glued the pilot`s canopy to
the canopy that holds the aerial mast (at the top where there is enough
framing to hide misting) before gluing both to the fuselage. There is
some slight distortion visible in the clear plastic when viewed from a
certain angel, but I am satisfied with the overall result.
This was a long project, and there were times when it
languished a bit, especially when things went wrong with the weathering
process, but perseverance is sometimes the name of the game in our
hobby, and I got it right in the end. By the time you read this, I dare
say Hasegawa will have released a D variant, but I`m not bothered, I`ve
already made one!
Model and Images Copyright 2006 by Alan Roffey
Page Created 27 July, 2006
Last Updated 26 July, 2006
Back to
HyperScale Main Page
|
Home
| What's New |
Features |
Gallery |
Reviews |
Reference |
Forum |
Search