|
Hasegawa's 1/32
scale
Junkers Ju 87 D-3 Stuka
by
Ian Robertson
|
 |
|
Junkers Ju 87 D-3
Stuka |

Hasegawa's
1/32 scale Ju 87 D Stuka is available online from Squadron.com
Although the Junkers Ju.87 Stuka is arguably the quintessential
symbol of the Luftwaffe in WWII, a number of German allies employed the
aircraft as well, including Romania, Italy, Bulgaria, Slovakia, and
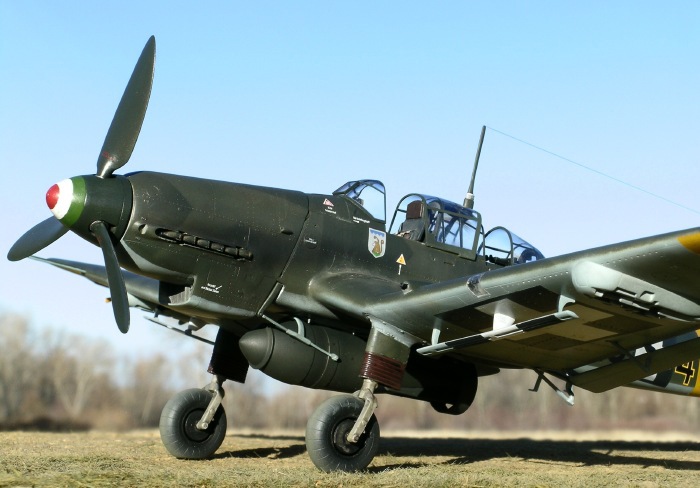
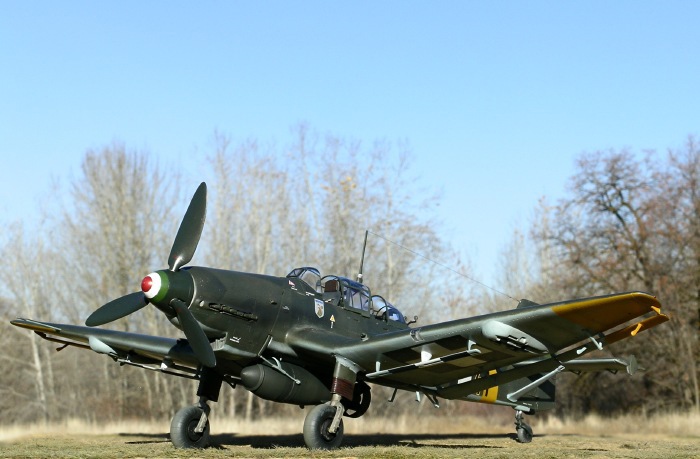
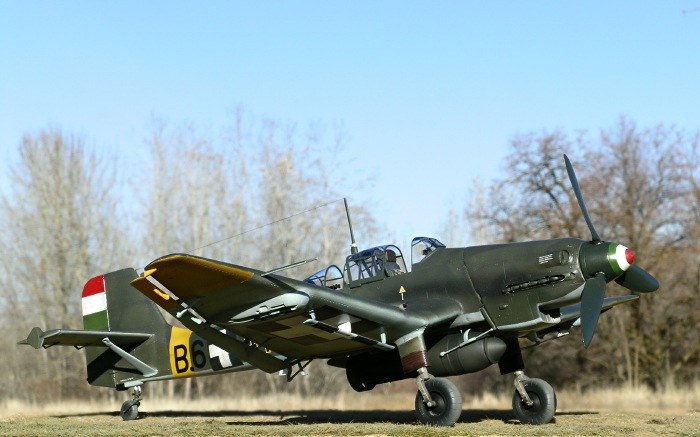
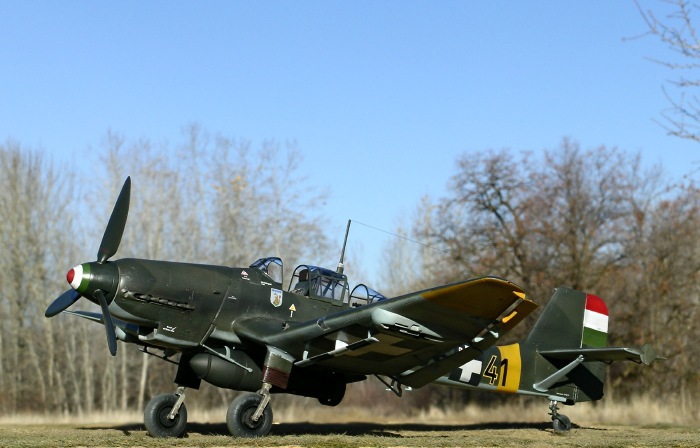
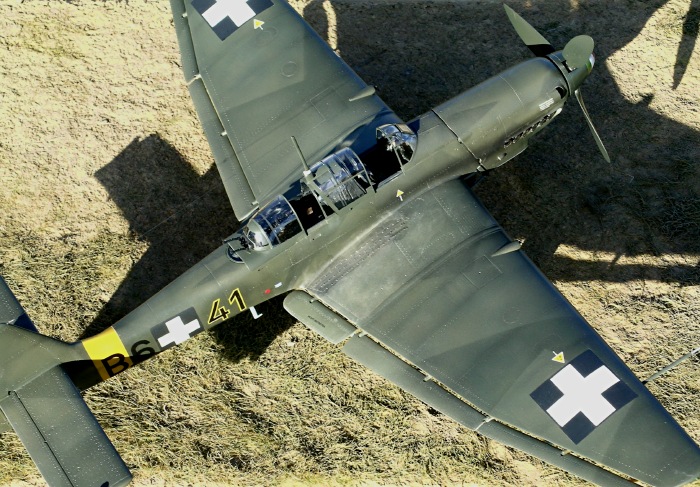
Hungary. My model represents B.6+41, a Hungarian Ju.87D-3 from 4./StG
77, piloted by Laszlo Devenyi and manned at the rear gun by Gabor Perjes.
This particular aircraft had its wheel covers removed, a common practice
when operating from muddy or snowy airfields.
Hungary first requested the Stuka in 1940, but did not receive the
aircraft in any numbers until 1943. From 1940-1942 Hungary received a
small number of Ju.87A-1s and Bs for training purposes. The first major
delivery came in 1943, consisting of 22 B-1s and B-2s. This batch was
followed by several deliveries of D-3s and D-5s through 1944.
Combat losses of Stukas to the Soviets were high. For example, of the 21
Doras delivered to 4./StG 77, 15 aircraft and 6 crews were lost between
1 August – 22 October 1943, after which the group was withdrawn from
frontline service. While active on the frontline the group flew more
than 1,200 sorties, dropped 810,000 kg of bombs, and rear gunners
claimed two La-5 and one P-39 shot down.
Hasegawa’s 1/32 Ju.87D is superb kit, and a real monster, dwarfing their
Bf.109s and Fw.190s in the same scale. Current offerings in the Hasegawa
series include the Ju.87G-1/2 with underwing cannons and the Ju.87D1/3/5
with 1,000 kg bomb. In early 2007 Hasegawa is releasing a limited
edition Ju.87D-8 night Stuka with flame dampers.
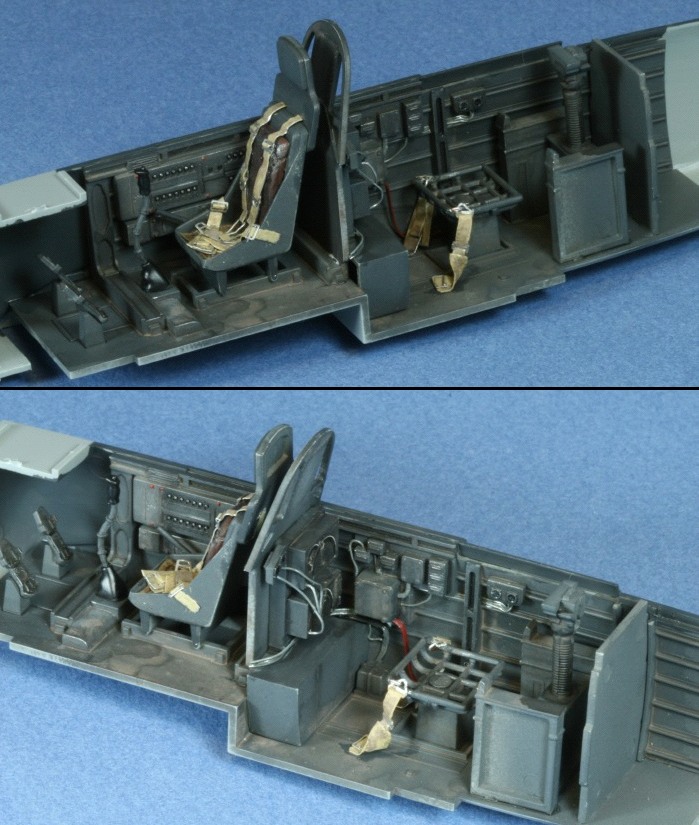
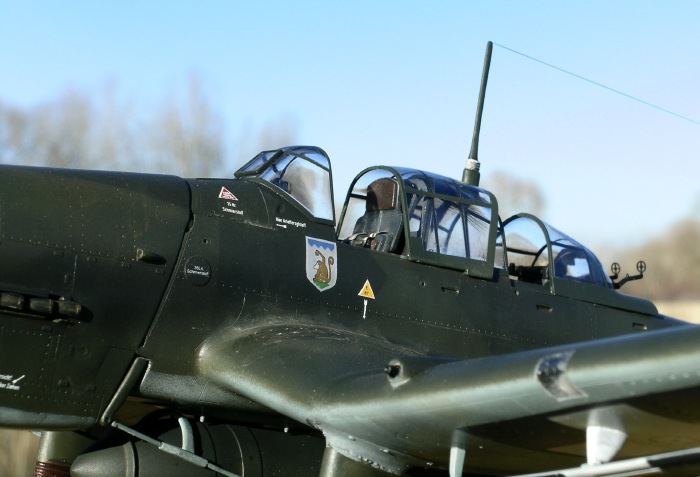
Overall, the detail and fit of this kit is excellent. The cockpit lacks
detail in some areas, although it looks sufficiently busy once a little
wiring is added to the radio equipment and a seat pad and belts are
installed. I used Apoxie Sculpt to make the seat pad, and lead foil for
the belts. The etched metal buckles were taken from the seatbelts that
came with the kit. I added a resin gun sight from Quickboost after I
lost the kit part. I also added brass ammunition belts for the rear
guns, although this was done after the photographs below were taken.
The canopy is a bit tricky to display in the open position owing to
the thickness of the plastic; however, with a little coaxing it is
manageable. The interior framing of the canopy is supplied in the form
of decals colored RLM 66. However, the carrier film would be a
distraction in my opinion so I masked and painted the framing instead.
Note that the actual frames were tubular, so an avid detailer may want
to try something using styrene tubing – something to consider at least.
I used etched metal for the rear gunner’s crosshairs.
I replaced the kit exhausts with resin exhausts from Quickboost. It’s
a small detail that adds a lot to the look of the model, although one
could always hollow out the kit exhausts.
I had some difficulty with the attachment of the outboard portions of
the wings because the seam kept splitting. Be careful to apply
sufficient amounts of glue and you should be fine as long as you don’t
hold the entire model by a wingtip.
From what I have read online and can glean from photos, the propeller
blades in the kit are improperly shaped for a Dora. Replacement
paddle-shaped blades can be purchased from Jerry Rutman (http://www.jrutman.com/),
which is where I got mine. My replacement blades had minor flash and
pits that needed to be filled, but this took only a few minutes.

Jerry Rutman also makes metal landing struts that can be used to
build a Stuka with the wheel covers removed. The modification involves
cutting off the wheel covers and inserting the metal strut into the
remainder of the landing gear fairing. The struts on my model were glued
in place with 5-minute epoxy – this allowed repositioning as the glue
set. I used Aires resin wheels in place of the kit parts. Below I show
how the wheels were attached to the struts.

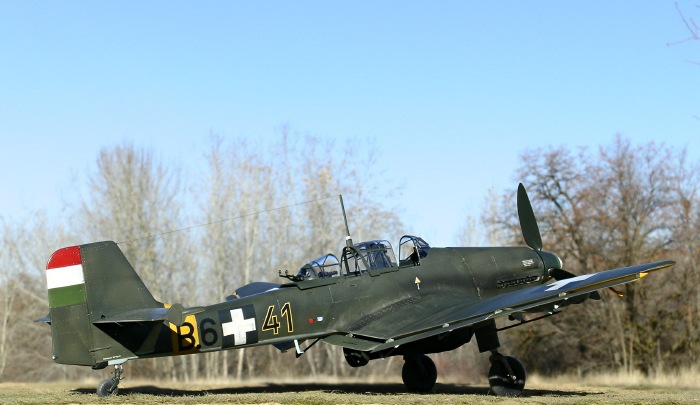
 After using Tamiya Fine Gray Surface Primer to expose any unfilled
seams on my model, I painted and masked the yellow fuselage band and
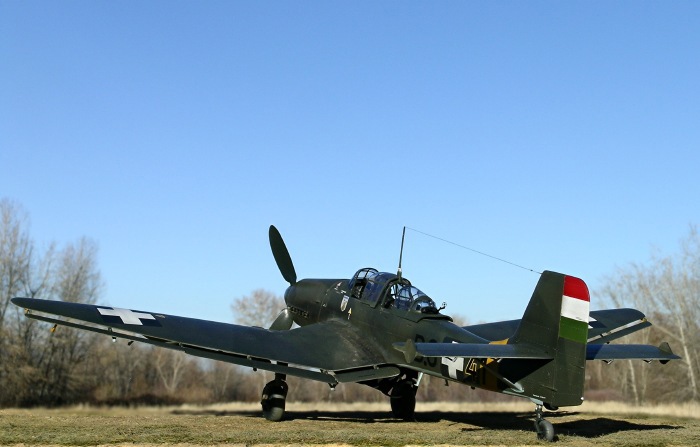
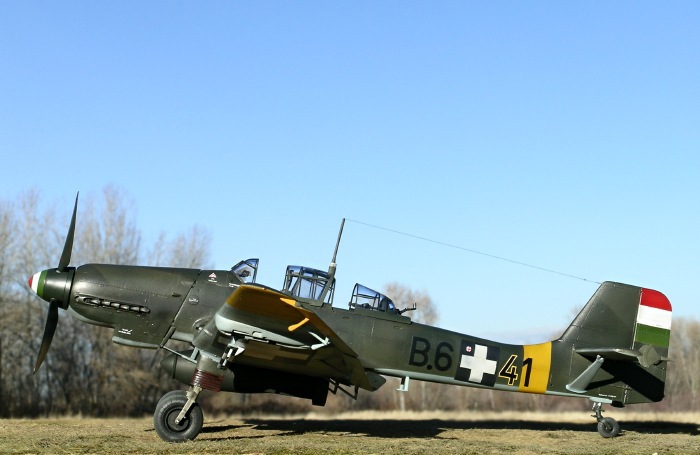
lower wingtips. I then moved on to the Hungarian national markings.
These markings were created by first painting the appropriate positions
with Tamiya white primer, masking the crosses, and then masking the
square surrounding each cross and painting it scale black. The national
markings were then completely masked until the camouflage had been
painted. The red/white/green bands on the rudder and spinner were
painted and masked in a similar manner. After using Tamiya Fine Gray Surface Primer to expose any unfilled
seams on my model, I painted and masked the yellow fuselage band and
lower wingtips. I then moved on to the Hungarian national markings.
These markings were created by first painting the appropriate positions
with Tamiya white primer, masking the crosses, and then masking the
square surrounding each cross and painting it scale black. The national
markings were then completely masked until the camouflage had been
painted. The red/white/green bands on the rudder and spinner were
painted and masked in a similar manner.
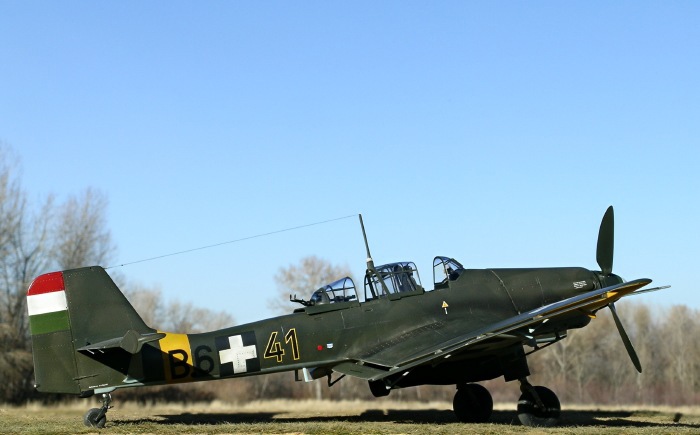
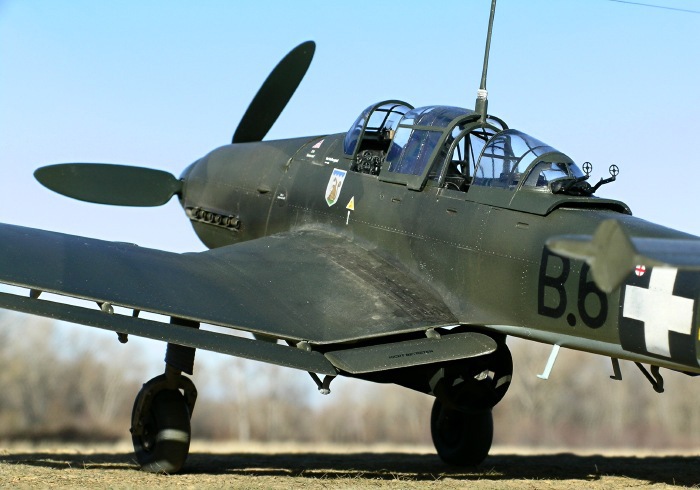
The camouflage was painted using Polly Scale acrylics. The underside of
the model was painted RLM65, whereas the upper camouflage was painted in
a standard RLM70/71 splinter pattern using paper masks supplied with the
kit. Photos reveal little contrast between the two upper camouflage
colors, so I mixed 25% RLM70 to the RLM71, and to both colors I added a
touch of brown.
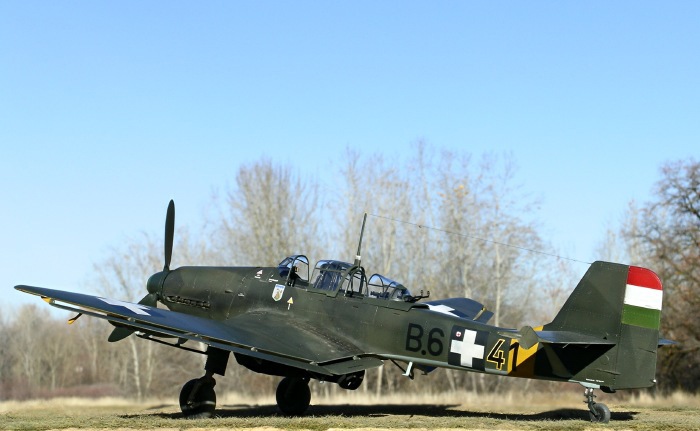
Exhaust stains were painted using highly thinned black paint. The dirt
on the wing roots was simulated by spraying highly thinned light brown
paint and then stippling it with a brush until dry. Darker washes were
also applied.
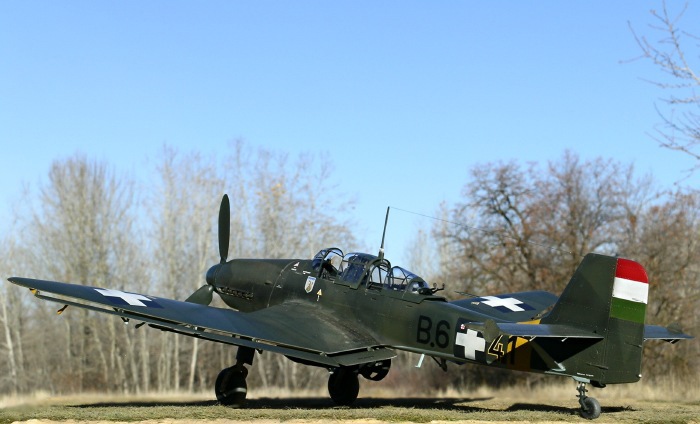
I made my own decals for the serial numbers on the fuselage. Creating
the black codes was easy – I scanned the appropriate symbols from 1/48
decals, resized them in Powerpoint, and then printed them on to Testors
decal paper using an HP Deskjet printer. Once the ink dried I applied
several thin coats of Testors “decal bonder”, a clear lacquer. Creating
thin yellow outlines over the “41” was trickier. Once the black “41”
decals had dried on the model, I cut thin strips of yellow decal from
spares and then applied and trimmed them individually until the outlines
were complete.
I also made a decal for the unit symbol – a monkey throwing a coconut.
Mushroom Model Magazine’s “Ju.87 In Foreign Service” was the source for
the pattern (pg 85). Note that this book also provides a color profile
of B.6+41 (pg 78); however, the position indicated for the “41” on the
port side is slightly off when compared to a photo of the actual
aircraft (see Squadron’s “Hungarian Air Force”, pg 12).
I used EagleCals decals for the octane symbols and various stencils
on the aircraft.
A wooden cutting board was used as the base for the model. Celluclay was
used to make the basic ground cover. The celluclay powder was mixed into
a paste with water and white glue, tinted with light brown acrylic
paint, and then spread thinly over the cutting board. Note that the
cutting board had previously been treated with several coats of clear
lacquer to prevent warping while the celluclay dried. While the
celluclay was still wet I added pieces of Heki grass mat (item # 1574 -
Wild Grass Savanna).
Heki products are available for purchase in the United States at
“Scenic Express”
http://www.scenicexpress.com/ , although you will need to call them
directly because the item is not listed in their online catalog. I
sprayed the grass light brown to give it a late fall look, consistent
with the bare trees in the background.
Images were taken with a Nikon Coolpix 5400 digital camera. The “unsharp
mask” tool of Adobe Photoshop was used to restore some of the clarity
and crispness lost during image compression. The “blur” tool was used to
help merge the back edge of the base with the background.
-
Nohara, S., Kunie, T, Shiwaku, T.
1994. Aero Detail 11 – Junker Ju.87D/G Stuka (translated by S. Hards).
Dainippon Kaiga Co.\
-
Filley, B. 1986. Ju.87 Stuka In
Action. Squadron/Signal Publications
-
Punka, G. 1994. Hungarian Air Force.
Squadron/Signal Publications
-
Wawrzynski, M. 2005. Ju.87 In Foreign
Service. Mushroom Models Publications
Click on the thumbnails
below to view larger images:
Model, Images and Text Copyright ©
2006 by Ian Robertson
Page Created 28 December, 2006
Last Updated 21 February, 2007
Back to HyperScale
Main Page
|
 Home
| What's New |
Features |
Gallery |
Reviews |
Reference |
Forum |
Search
Home
| What's New |
Features |
Gallery |
Reviews |
Reference |
Forum |
Search