|
Hasegawa's New 1/32 Scale
Junkers Ju 87G-1 Stuka
by Jerry Crandall
|
 |
|
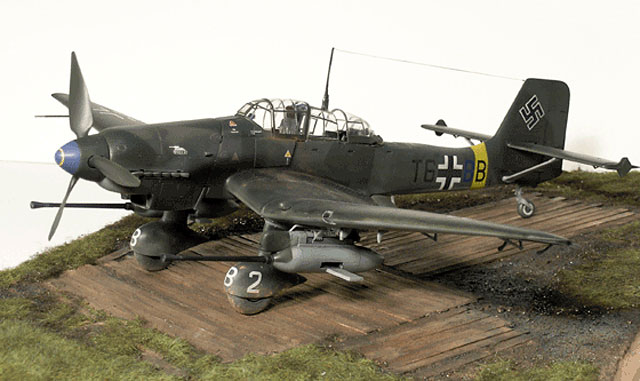
Junkers Ju 87G Stuka |

Hasegawa's 1/32 scale Junkers Ju 87G
Stuka will be available online from Squadron.com
When I received my Hasegwa 1/32 scale Ju 87 Stuka kit last week, I
was very anxious to do a quick build in order to try out our new
EagleCals 97 or 98 decals.
I ultimately decided on EC#98 as I liked the "B" and the "2" on the
wheel pants.
Being spoiled about building a quick build Fw 190 or Bf 109 in a few
days, I thought I could accomplish this build in maybe a day or two
longer.
Boy was I fooled.
The quickest I could put this together was one solid week, with only
a few hours off for football! This Stuka kit is, I must say, extremely
well engineered and in general has excellent fit; however you must (and
should) take your time in order to do justice to the details. I can't
wait to see what Chris or Ian can do when they take their time, as this
can be finished into a terrific model!
I encountered a few problems during construction. Firstly. when I put
the fuselage halves together I could not get the cockpit floorboard to
fit properly. As a result, the forward fuselage would not meet. I ended
up trimming off a little edge of the cockpit floor. If you look
carefully into the cockpit there is a slight gap. This might have been
caused by my haste in assembling the cockpit itself.
Secondly, the upper cockpit combing does not fit the top of the
fuselage correctly - it tapers too quickly leaving a step at the top of
the fuselage. If you attempt to spread it to match the fuselage, the
windscreen will not fit properly into the grooves.
Lastly, I'm not too thrilled about the system of using two-color
decals to represent the inner cockpit framing. One set is meant to be
seen from the outside which is a dark green color, the other set is a
dark gray 66 type color that will seen from the inside. The decals leave
the carrier film which, unfortunately shows through the canopy. By
trimming the carrier film away, the decals become very thin and fragile,
and in my mind do not accurately represent the tubular inside cockpit
bracing, although I don't know how else this could have been replicated.
When finished, this is a very striking model partially due to its
impressive size and all the extra details typical of the Ju 87. A word
of caution - you can't hurry this process of adding all these small
details as I learned the hard way, breaking off the glued-on control
surfaces TWICE! You really have to think carefully and be diligent in
handling the model as you progress. Another casualty can be seen in the
photos, the rear canopy that slides over the rear machine guns suffered
'battle damage' (too close to a hot light bulb!).
Thanks to Dr. Charles Metz who has come to my rescue by graciously
raiding parts from his kit to replace mine due to my stupid mistake!
Eagle Editions will be replacing the kit provided propeller blades with
a resin EaglePart as they don't correctly represent the actual aircraft
props.
Model and Images Copyright 2006 by
Jerry Crandall
Page Created 11 January, 2006
Last Updated 21 February, 2007
Back to
HyperScale Main Page
|
 Home
| What's New |
Features |
Gallery |
Reviews |
Reference |
Forum |
Search
Home
| What's New |
Features |
Gallery |
Reviews |
Reference |
Forum |
Search