|
Revell's 1/48 scale
Junkers Ju 88A-4
by
Peter Kormos
|
 |
|
Junkers Ju 88A-4 |

Shanghai
Dragon's 1/48 scale Ju 88A-4 is available online from Squadron
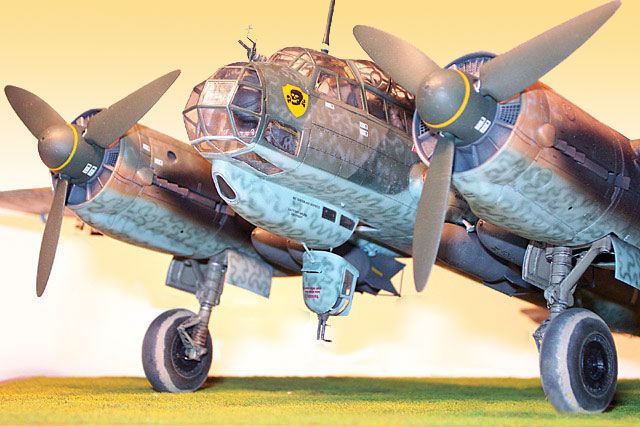
Here is my Junkers Ju 88A-4 kit from Revell.
For detailing, I used the #48246 Eduard photo etched set, the Aires
resin cockpit. Also I made a lot of home made items that were built into
the kit.
The following table contains the summary of these home made items:
| Cockpit |
87 |
| Main gear bays |
2 x 31 |
| Tail gear bay |
88 |
| Engines |
2 x 9 |
| Lights/Clear parts |
10 |
| Other external surfaces |
78 |
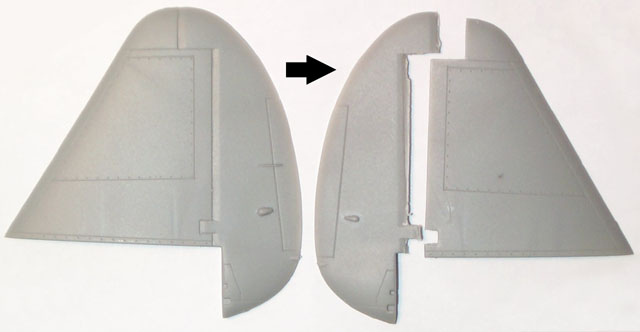
First, I separated the control surfaces from the horizontal and
vertical stabilizers. The resulting gaps were then filled with stretched
sprue and filler.
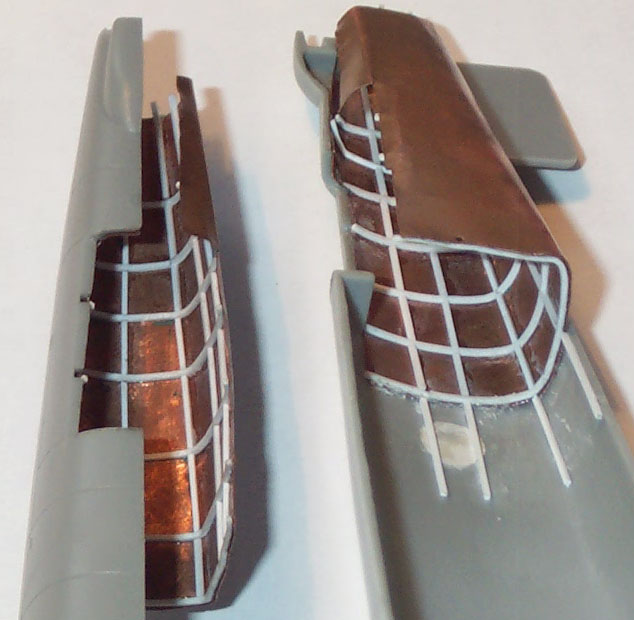
I wanted to assemble the fuselage (without the cockpit area) and
wings as soon as possible so that the glue I use for holding the parts
together would have time for setting. So I detailed the tail and main
gear bays as best as I could and started to glue things together.
Click the thumbnails below
to view larger images:
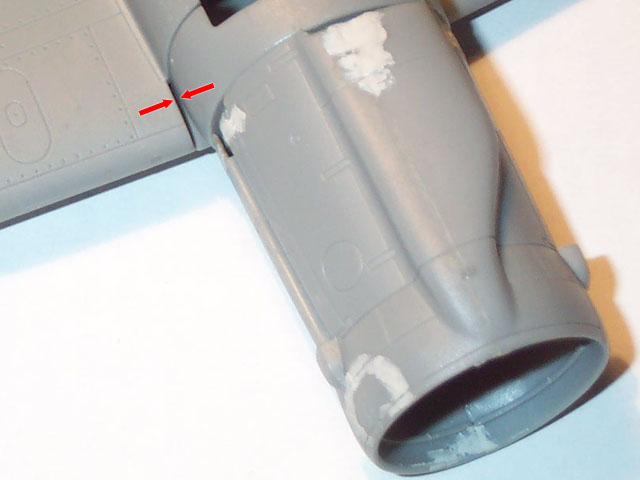
The model is definitely not a shake-and-bake kit, but with patience
most of the fit problems can be corrected. On some areas I had to shave
away some plastic on others I had to use filler to blend the connecting
parts together.
Click the thumbnails below
to view larger images:
One can find little surface imperfections here and there, but the
most noticable is the mis-aligned panel lines on the belly and - as Mr.
Floyd Werner highlighted in his recent Mistel articles - is the fit of
the wing tips. Unfortunately, I glued the wing tips together so a good
amount of time was spent to eliminate the step between the wingtip and
the wing.
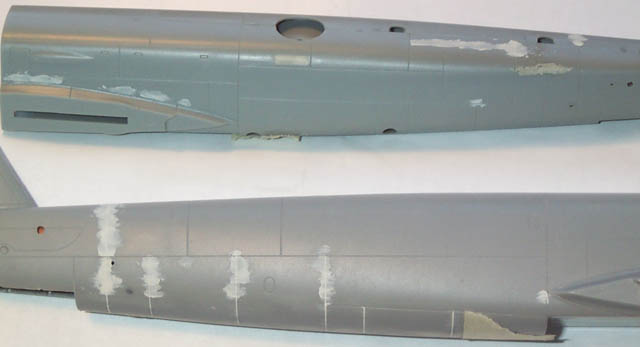
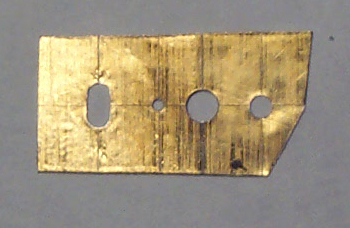
The prominent fuel filler cups are also missing on the fuselage
spine, so I used custom made templated to re-scribe these details.
Before painting, I sprayed Gunze Mr Surfacer to have an even surface
and the rivet lines were reproduced based on the line drawings of the
AeroDetail booklet.
I used Gunze acrylics for the camouflage. "Hard" edge demarcation
line between the original RLM70/71/65 camouflage was achieved with a
combination of paper masks and Blue-tac. Next came the RLM79 color and
sun faded all RLM 70/71/79/65 colors (but almost nothing is visible from
that after the wave-pattern was applied).
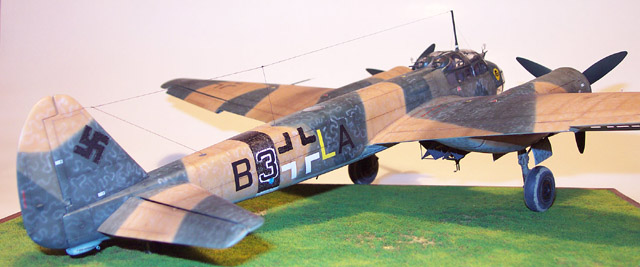
RLM79 and the wellenmüster (or wave-pattern) was sprayed on free hand
with my good old Holding airbrush using the fine 0,2 mm nozzle and
needle. The paint was first thinned in about a ratio of 1:5 and the air
pressure was reduced a little bit under 1 Bar. Here and there the paint
run or the squiggle happened to be too wide. On these places, I
overpainted the squggles with the underlying color, and then re applied
them. Some places I had to do this again and again 2-3 times until I was
satisfied.
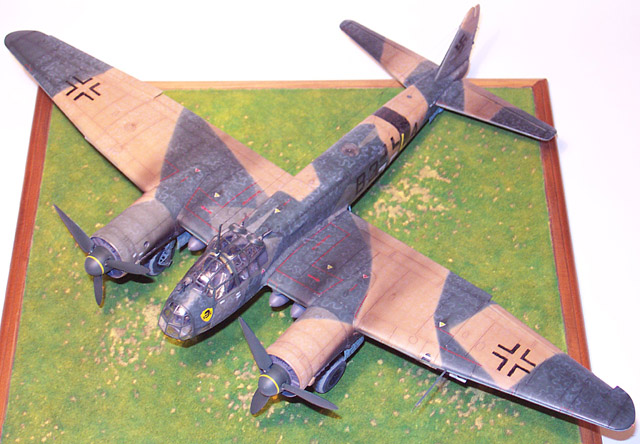
I used markings from an XtraDecal sheet (#X01348) and some of the kit
decals that went on without any problem.
For the exhaust stains, I used a combination of black, brown and grey
acrylics from Gunze and Tamiya, oil stains were replicated with black
and burnt umbre artists oils.
Squadron/Signal Ju88 Part1
Aero Detail Ju88
http://www.ju88.net/
Conclusion &
Acknowledgements
|
I am not 100% happy the way the wave-pattern turned out, but I can
live with it. While I was building the kit, I promised myself not to
build any more Ju88 kits from Revell (aka. ProModeler), because of the
fit issues and some missing details. Well, after finishing this model
I'm not that certain any more... ;-) but first, I'll finish my pending
projects... and then... who knows....
Acknowledgements
I'd like to thank my good friend Károly Brassai for lending me his
Squadron/Signal booklet, and my internet friends: Charles Green, David
E. Brown, Kevin Meadows, Ákos Szabó and the kind members of the TOCH
message borard for helping me in the research phase.
Click the
thumbnails below to view larger images:
Model, Images and Text Copyright İ
2004 by Peter Kormos
Page Created 25 May, 2004
Last Updated
25 May, 2004
Back to
HyperScale Main Page |
Home
| What's New |
Features |
Gallery |
Reviews |
Reference |
Forum |
Search