The
Junkers Ju 88C-4 was a night fighter based on the A-5 with the new,
longer wing and some other differences from the A-4 based C-6, which
succeeded it after less than 100 C-4 were built. The C-4 was produced
between late 1941 and early 1942.
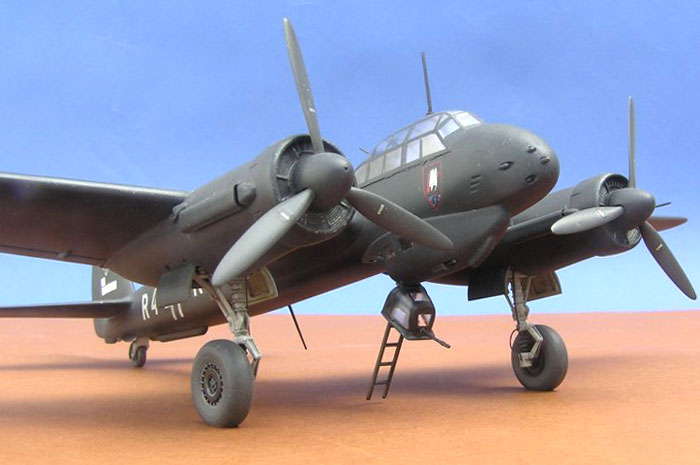
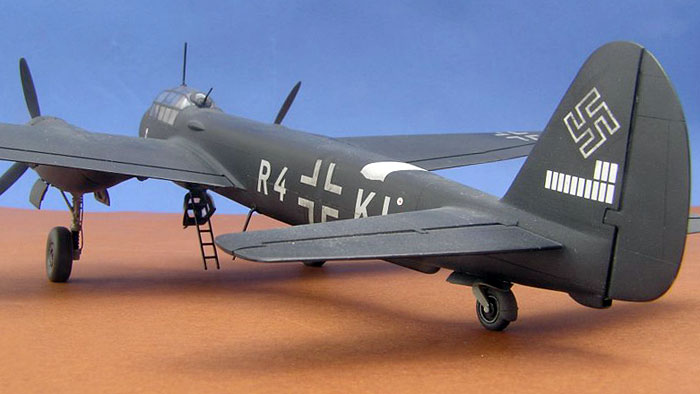
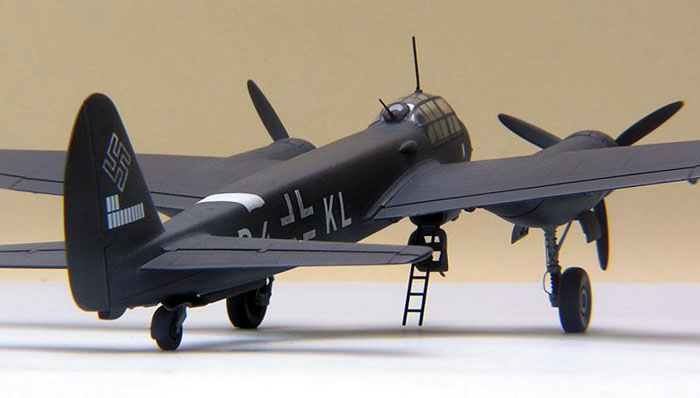
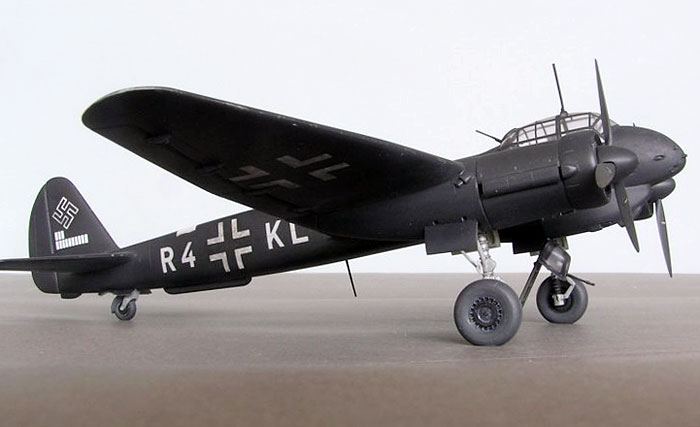
I decided to paint my model black as I had bought a decal set from Peter
Roberts of PD Models, very thin and accurate decals. R4+KL, which
suffered a landing accident in Catania, Italy, in August 1942 was the
individual I chose as the subject of my model.
Italeri's 1/72 scale Ju 88C-6 in the box
This kit was released in the early nineties and was a giant leap
compared to the earlier kits of the Ju 88. The only competitor is the
AMT C and G version which was released a year or so later, but I prefer
the Italeri kit because of the thin raised panel lines that can easily
be removed. The AMT kit has engraved panel lines that I find too large
for this scale, but apart from that the kit is as good as Italeri’s, and
the landing gear and interior is much better.
To convert the Italeri C-6 to a C-4 this was done:
·
The asymmetric cowling on the engine lower side was completely removed
as the Jumo 211 G or F didn’t have the extra air cooler the C-6’s Jumo
211 J had
·
Italeri Ju 188 propeller blades were used as they are more narrow and
thin (metal vs. wooden propeller blades) than the kit propellers
·
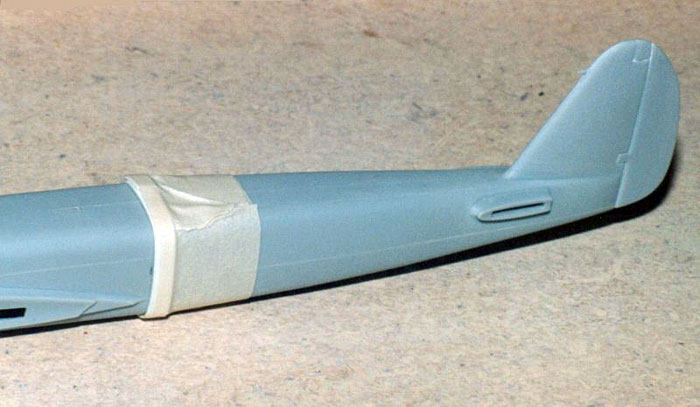
The C-4 did not have a balanced rudder, so the upper part of the rudder
was made shorter
The C-4 also had weaker landing gear than the C-6, but the Italeri gear
is thin enough to represent that!
Fuselage and Cockpit
Before
assembly all panel lines were removed, and new lines not crossing the
fuselage joint were scribed with a Bare Metal scriber.
Click the
thumbnails below to view images full-sized:
The
fuselage halves were then mated using liquid cement, and the cockpit
interior was completed almost stock, painted dark gray and dry brushed
in a lighter shade, only seat belts in lead foil and ReHeat belt buckles
were added. Now was the time to scribe the missing panel lines. Here the
new rudder contour can also be seen.
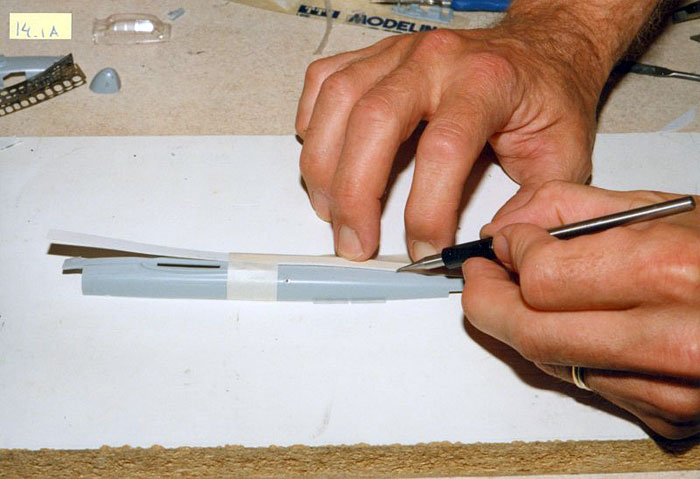
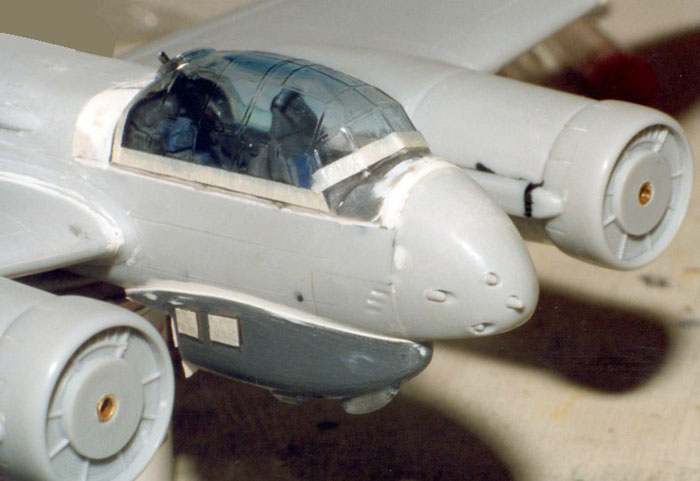
The Falcon
canopy was measured and the razor saw was put into action, removing
plastic both in front of and behind the cockpit. One problem with the
Falcon canopy is that it was designed for the much wider Revell C-6
fuselage.
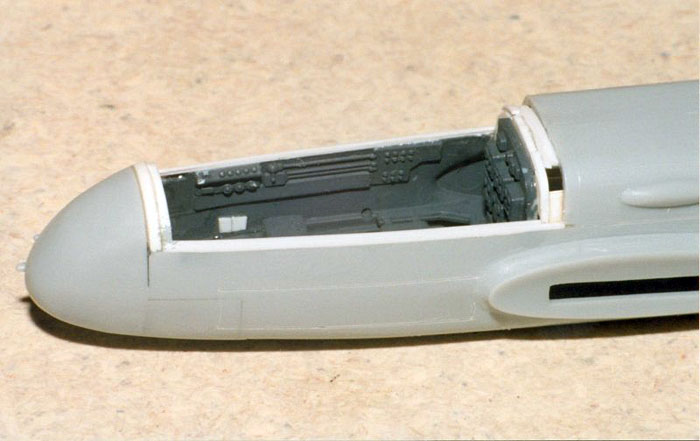
With the
excess plastic gone I used plastic card to build the frame on which the
canopy would rest, a recess was made on the port and starboard using
plastic strips 0,3 x 0,2 mm to get a better surface to glue the canopy
to. As it is virtually impossible to sand down the plastic in the canopy
it was necessary to use putty for the final blend with the fuselage
front and rear. The images below show the interior and a dry fit.
Click the
thumbnails below to view images full-sized:
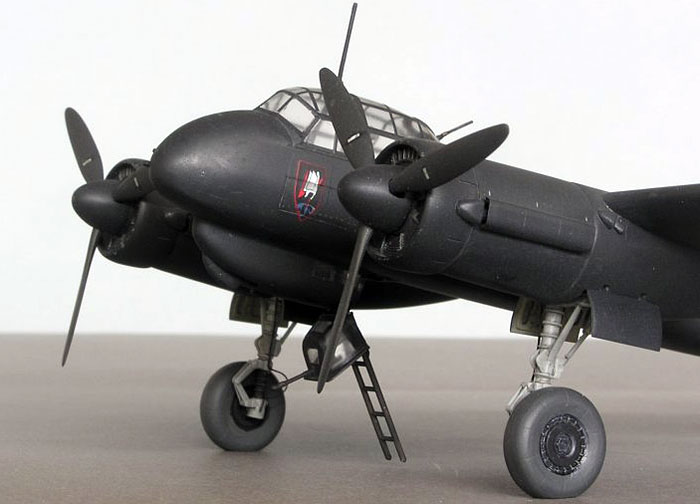
The
ventral gondola is clear and fit quite well, the rear part was left off
as it would be in the down position with a ladder, and the windows were
masked. The hatch actually looks different on the C-4 but not so much
that it matters. As the hatch would be down the inner surface of the
gondola had to be painted matte black too, and the windows were also
masked.
The blind
landing antenna FuBL2 was located inside a cover painted like the
aircraft and not “bare” like in the kit, this was made from sprue and
glued far back on the lower rear fuselage.
Wings and engines
The
already scribed upper and lower wing halves were sanded flat on the
mating edges, and the trailing edge was made much thinner as it tends to
be much too thick if nothing is done. I use liquid glue for the wings
and I’m very careful to get the wings straight. Sometimes even drooping
a little at the tip to simulate heavy, fuel-filled wings, but not so on
this Ju 88.
The wings
have a dihedral of 13 mm in this scale, and to strengthen the
fuselage-wing joint I usually bend a piece of brass tube or piano wire
and insert it through the fuselage. The wings may have to be prepared
for this depending of how thick the tube or wire is, and this calls for
careful dry fitting.

The piano
wire is glued using epoxy glue, and for the wing/body joint I use liquid
cement. The airframe is then put in a “jig” using paint jars or
something similar in height, so the dihedral can be adjusted to the
final, perfect look. It’s also very important that the fin is absolutely
vertical, and sometimes mild force must be used in this operation, but
with good preparation of the wings that will not be necessary. With the
airframe in the jig, the stabilizers were glued using liquid cement and
fixed with paint jars and strips of plastic card to the absolutely
horizontal position of the Ju 88.
Over to
the engines which had the lower side cowlings modified with plastic card
and putty.
This was
almost ten years ago and I had not heard of Milliput or epoxy putty yet,
so the cowling modification got some really large sink marks (this was
after painting the airplane black the first time!).
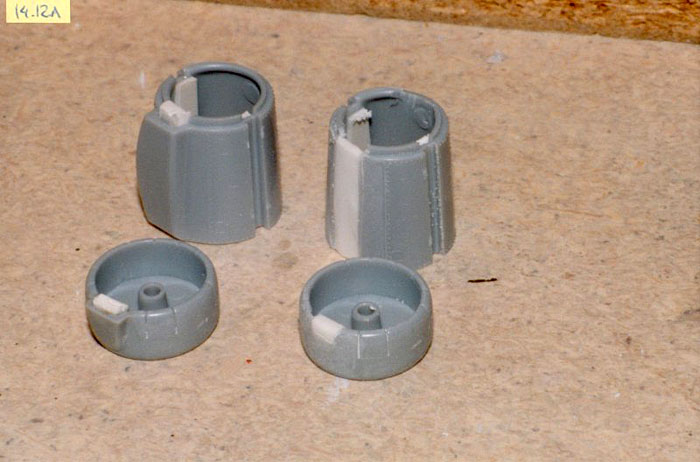
The
Italeri wheel wells are not so good, I think they don’t look like the
real Ju 88 does, and the fit between the engine and the wheel well is
not good. There are other drawbacks in this area which I will mention
later. The well interiors were painted slightly darker than RLM02 as I
wanted the contrast to the black exterior not be too significant.
The
propeller hubs were drilled out and piano rods of 1/16” was glued in
position. On the front annular radiator a piece of suitable sized brass
tube was inserted and fixed with CA glue. This can be done before or
after the engine is in place, but it’s easier before as the tube needs a
support on the back side of the engine. By doing this I get a strong
propeller shaft, it is centered (if done correctly) and still
detachable.
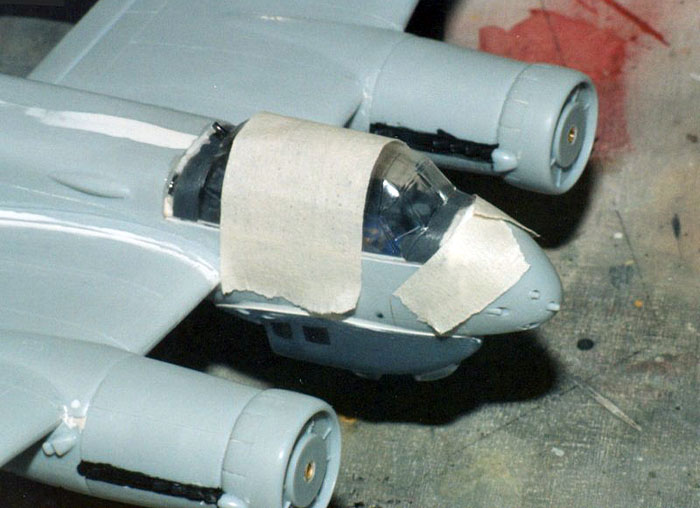
With
engines and exhausts in place, now it was time to fix the canopy with
epoxy glue, after a thorough polish on the inside, using tape to secure
it while the epoxy is hardening.
Click the
thumbnails below to view images full-sized:
The canopy
was masked with ordinary masking tape and liquid Microscale Micro Mask.
I prefer
the gloss enamels, as they give a hard, glossy surface for the decals,
usually Xtracolor as they are easier to paint and have a very prolific
range of hues. The only drawback is drying time, which forces me to wait
at least overnight before applying decals or the next masking tape. I
have an old double action spray gun and spray 2-4 thin layers, I use
ordinary cellulose thinners and mix roughly 60/40% paint/thinner. For
masking I prefer Tamiya tape as it is thin and does not leave any
residue of adhesive, but sometimes ordinary masking tape is used. Larger
areas I cover with paper or plastic film from the kitchen!
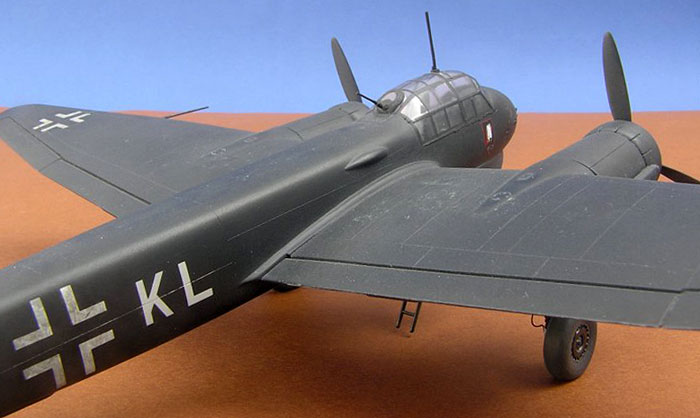
For this
Ju 88 I mixed the black with 10 % white to get a more realistic color.
The decals
from PD Models went on without problems and as mentioned they were thin
and of a very high quality, the wing crosses were from mixed Superscale
sets. All crosses have a fine wash of black to tone the white color
down, and the white fuselage band is completely over painted except on
the top, all of this like the real aircraft.
The canopy
frames were cut from black painted decal film and looks convincing to
me.
To get the
final touch I use Future in thin layers on the whole aircraft, and
sanding each layer with wet paper on the decals. I repeat the procedure
with painting and sanding until all traces of decal film is gone.
Now it’s
time for a wash of white spirit and oil color. I use a mix of black,
brown and umber and depending on the color of the aircraft I mix the
wash darker or lighter. The wash is applied generously with a brush and
is wiped off with a dry cloth after a while just like the flowing air
would dry oil stains, i.e. from the nose to the tail. It can even be
almost completely cleaned from the aircraft with a moist cloth, but
don’t rub too hard or some paint will come off too! The wash can be done
over and over until you are satisfied.
The wash
is sealed with more Future, this time mixed with Tamiya Flat Base to get
a matte surface for the dry pastels. With a coarse sand paper I produce
a pastel dust that can be applied where dirt is needed, e.g. along panel
lines or where rain water is running vertically on parked aircraft. A
fine brush is used and the dust adheres well to the matte Future. With
an eraser it can be removed and done over again!
It’s very
important to remember that dirt is not spread uniformly on an aircraft;
there is much more on the underside where oil and dirty water is
collecting, along panels edges that are often removed and where the
surface is exposed to exhausts.
When
everything is as I like, I use Future and Flat Base to seal the pastels.
This time I mix Flat Base to get the right shine, and after that I
remove the cockpit canopy masking and cross my fingers the canopy was
thoroughly masked!
The
landing gear was painted light gray and a thin wash was applied with a
sharp brush. With the right amount of white spirit the wash creeps into
every corner and one small drop is enough. Fuse wire was used for the
hydraulic tube.
The main
gear and struts were glued with liquid cement, and care was taken to get
the main gear at the right angle. I succeeded, but when I glued the
wheel well doors in place with cyano acrylate, the too small gondola
became obvious! The main landing gear looked far too long, even though
it wasn’t when I measured it! I think the gondolas are 1,5 mm too low in
profile, and the wheel well doors are 1 mm too narrow, and in this scale
it’s obvious! Below is an image of the already finished main gear leg
before shortening.
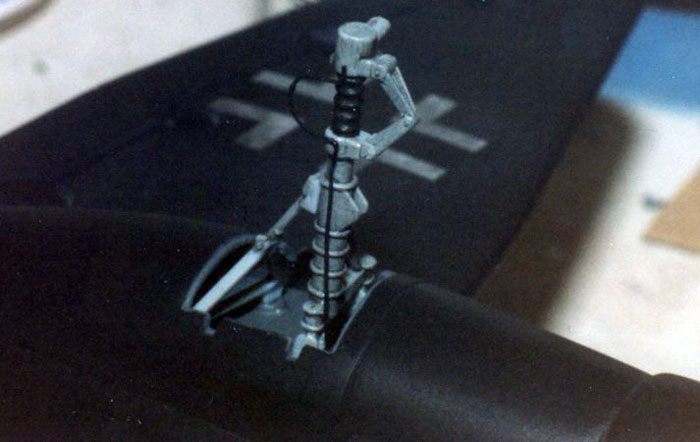
What to
do? Some surgical work was necessary, the main gear was cut just below
where the strut connects and 2 mm was cut off each gear. A 0,8 mm drill
was used to make small holes in the main gear upper and lower parts and
two piano wire pieces were cut and with patience and CA and probably
some luck the operation was successful!

Even
though my C-4 sits too low it looks much better than before!
The
propeller blades were painted black green RLM70 and the spinner black as
the airframe.
I did one
mistake in providing the ventral gondola hatch in the rear with a
machine gun like the A-model usually carried, but as the C-4 variant had
two forward firing 20 mm MG FF in the gondola there was probably no room
for the person who should fire this weapon!
This C-4
had one rear firing MG15 of 7,92 mm in the cockpit, for this I used a
thin brass tube. The main forward armament was the fixed trio of MG 15
and one MG FF in the nose.
Even though the Italeri is the model I prefer, this does not mean it is
perfect. On the contrary, it took a lot of putty in the fuselage and the
wing-body joint to make them decent, and maybe the under wing wheel well
gondolas should be replaced. Fortunately, now Czech Six have resin parts
for this.
I must say black paint makes a model almost invisible! Details are
difficult to see, the wash is only noticeable in some angles and I
really don’t see all the hours I put into this model!
References
The Squadron/signal Ju 88 in action part 2 covers
most of the important aspects of the Ju 88 night fighter versions, but
for purists there are lots of heavier literature.
I have three Japanese books with an immense
amount of information, not easily read though!
Click the
thumbnails below to view images full-sized.
Click the "Back" arrow on your browser to return to this page.
German Night Fighter Aces
of World War 2
Aircraft of the Aces 20 |
|
|
|
|
Author: Jerry Scutts
Illustrator: John Weal
US Price: $19.95
UK Price: £12.99
Publisher:
Osprey Publishing
Publish Date:
June 5, 1998
Details: 96 pages; ISBN: 1855327147 |
|
|
 Home
| What's New |
Features |
Gallery |
Reviews |
Reference |
Forum |
Search
Home
| What's New |
Features |
Gallery |
Reviews |
Reference |
Forum |
Search