|
Italeri & AMT 1/72 scale
Junkers Ju 88D-2
& T-1
by
Rolf Blattner
|
 |
|
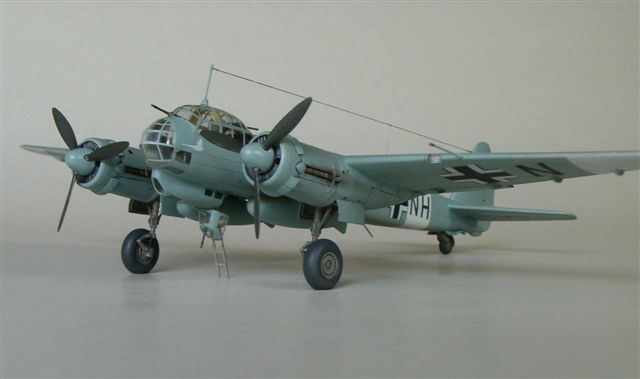
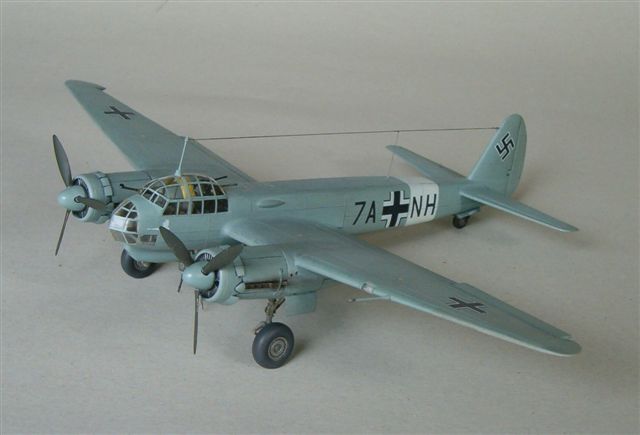
Junkers Ju 88D-2 |

AMT's
1/72 scale Junkers Ju 88S-/T-1 is available online from Squadron.com
Anybody interested in Luftwaffe topics most certainly has some
Italeri and/or AMT Amtech Ju 88 kits stashed away – probably from both
manufacturers.
Are these kits redundant after Hasegawa’s announcement of a new tool
Ju 88 A-4?
It will be for you to decide but those old-timers might be worth a
second look – especially if you pick the best of both, ie. use the
Italeri kit as a basis with engines from AMT.
Admittedly, Italeri and AMT both have their faults and are a little bit
long in the tooth. The Italeri kits however are good representations in
all variants kitted. AMT kits seem to be somewhat “undernourished” but
do have other assets.
Several variants are possible with some “crosskitting” and you will
be able to use the Squadron/Falcon canopies whittled away - or is it
just me who happens to be buy more than he builds…..
I am not going to lecture on the history of this “multi role combat
aircraft” of the forthies and I am by no means a Ju 88 expert. I just
got bitten again by the luftwaffe bug after an interlude of more than 20
years building RAF & USAF subjects.
Nowadays there is a heap of available info and data on the 88 –
Squadron/Signal, Schiffer, Kagero, Trojca, WarPaint, Bernhard&Graefe,
Motorbuch - to name just a few and better still – decals, resin &
PE-sets galore.
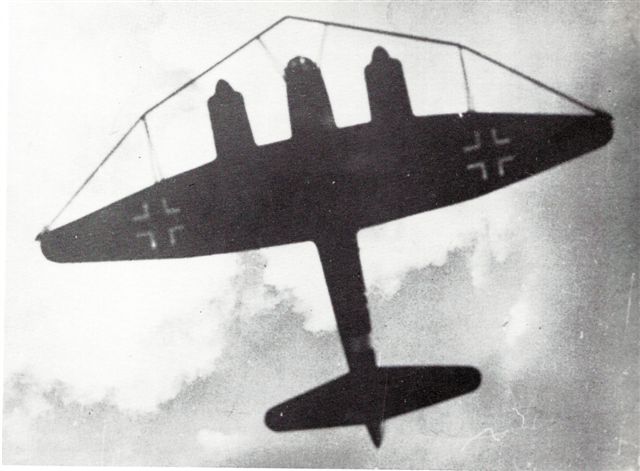
Pic “Ju 88 Aufsicht” culled from “Die Ju 88 und
ihre Folgemuster“, Nowarra, Motorbuch-Verlag.
There are even complete replacement resin engines and conversions
available from several manufacturers. The best representation of early
and late Jumo 211’s, Jumo 213 and BMW 801’s however will be at your
fingertips in those AMT 88 C/R and G boxes !
AMT obviously have not fallen for those overly conical
representations of Jumos like other manufacturers. The almost perfect
plan view from below shown here is culled from Motorbuch “Die Ju 88…” to
illustrate the point.
And the AMT 88 R & S/T yield fine cowlings for a BMW 801 with just a
little help.
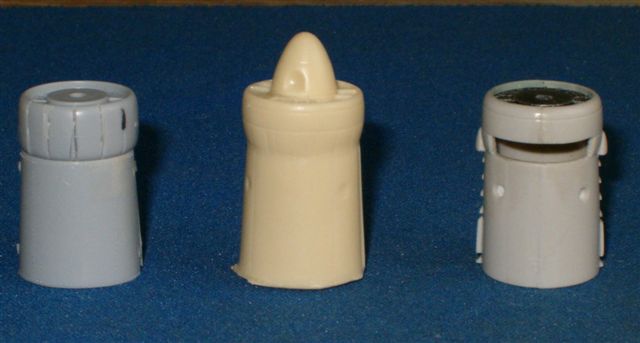
Italeri, AIMS, AMT engines
Italeri kits are fine, fuselage section may be a little bit too
square and the cockpit section a little bit short. Wings are okay except
for location of aileron and flap hinge lines especially on the
underside. Attachments for ailerons and flaps are just poor simulations
better replaced with accessories or replaced – see original pics and
plans.
Flaps and ailerons are better represented in the AMT kit but the wing
is simply too thin.
Undercarriage and gear bays
Both manufacturer’s kits have slender wheel bays with too little
depth and volume. There are resin replacement bays available from AIMS –
the investment in money and time may be good for fans of authenticy and
the modification entails additional effort.
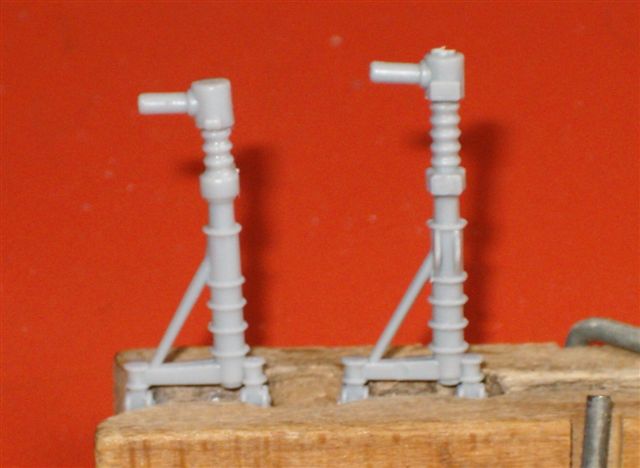
Undercarriage legs are too long on both kits. Shorten the telescopic
part 2 – 2.5 millimeters and cut off the lugs from the base plate in the
gear bay, or fit the base plate higher up in the gear bay. If your model
sits 3 to 4 millimeter lower on the main gear it will improve the stance
and look vastly.
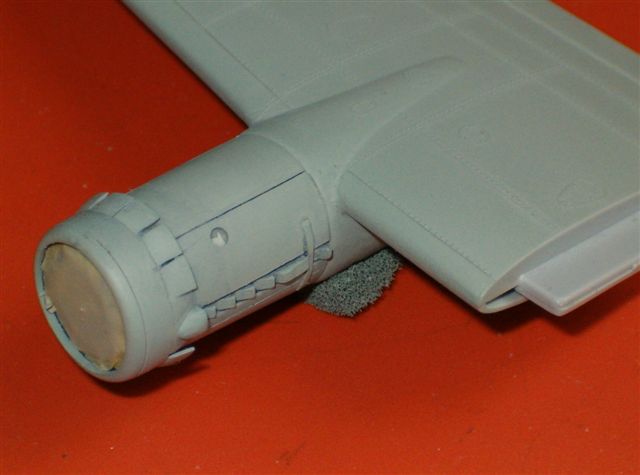
Engines
As already mentioned – in my opinion the AMT kits are simply
“undernourished”.
The fuselage seems very slender and the wings just not thick enough. The
finished kit will somehow look like a race horse and not like the
“German work horse” you try to portray.
The Jumo engines of the C/R and G however are real gems. The lower oil
cooler is a separate unit. You may use them for early 211’s without the
cooler unit and late 211 H & J’s with the cooler.
Watch the detail of the frontal radiator ring, the intake openings, the
exhaust detail and the hot air vents. Depending on the variant there are
noticable differences.
The complete Jumo engine can be fitted directly to the firewall of
the Italeri kit with just some blending in of the gear bay front.
For more detail you might want to open the cowl gills (3 pairs of 2
upper , 5 on the lower part)
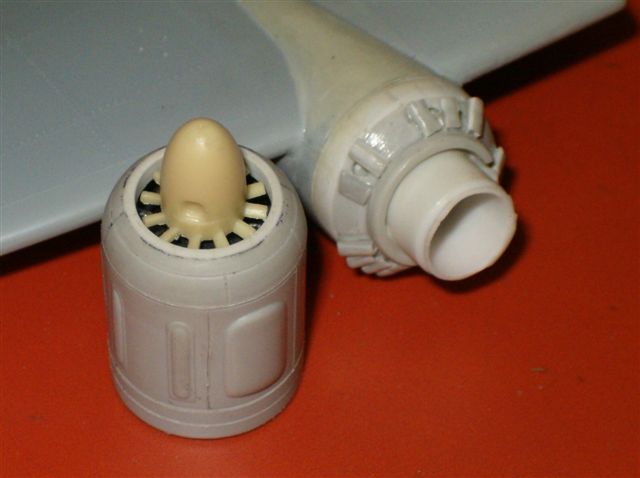
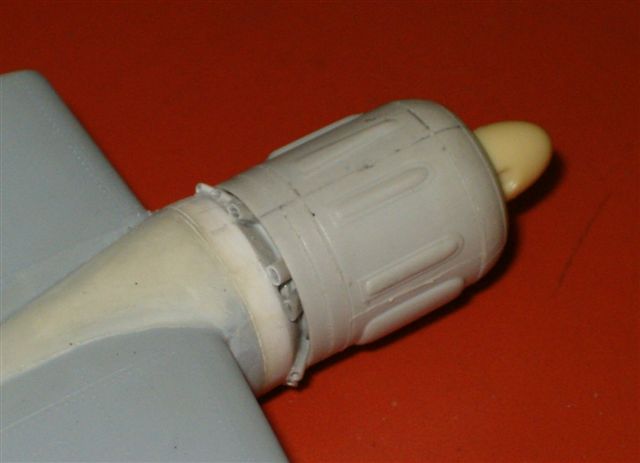
AMT BMW 801’s are missing the fan and the intake diameter is too big.
Reduce the diameter to 10.5 mm and use a fan from another source such as
Italeri’s Do 217 or better yet – procure a resin spinner, fan and prop
blades from AIMS. Props and spinners from the kits are uf no use for VDM
prop units with aluminum blades anyhow.
Using the AMT 801 on the Italeri kit requires a shim of 2.5 mm thickness
between gear bay and heat shield of the AMT kit part. The rudimentary
exhaust pipes are better filed away and the heat shield shoulder filed
to a bigger radius. Bevel the rear of the cowling inside, add exhaust
pipes from small tubing squezed to an oval section, protruding slightly
from the resulting circular venting ring. Watch number and position of
exhausts stubs – there are 13, two pipes on the upper side feeding one
endtube and the upper exhausts are spaced, obviously depending on the
engine variant !
Click the
thumbnails below to view images full-sized.
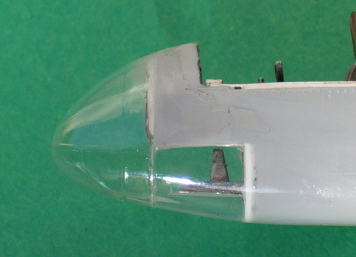
Cockpit
The lower gondola needs a partition added behind the angled bomb
aiming window.
See
www.chechsixpublikations.com AIMS > tips for more detail info.
Superdetailers drill a hole for the bomb sight in the floor and add
some detail in the rear of the gondola.
The entry hatch in the cockpit floor will have to be lengthened 5 mm to
the front. Detailing in the cockpit with the help of Aires or to your
own taste. Watch style of seat, later models had an armoured pilot seat,
also available from AIMS.
If using Falcon clear parts you might want to use the transparent lower
nose part from the kit, moving it forward 1 millimeter and adding a
number 1 rib of 1 mm above.
This will improve the otherwise short impression of the nose and help
adapting the upper decking in front of the windscreen and the lower
“flats” to the Falcon transparent nose item.
For variants without lower gondola a longer crew entry door for the
lengthened hatch needs to be fashioned from scratch.
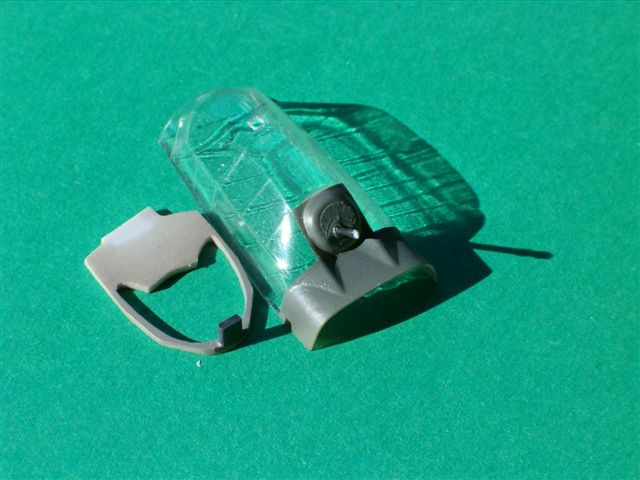
The rear part of the upper canopy and the rear defence station (B-Stand)
was jettisonable ( watch design & gun posts according to variant) and
there was a prominent rib with overhead panels between the front and
rear (jettisonable) part.
If you fashion this rib together with some overhead structure from
plastic card and glue it to the canopy from the inside with Future you
will have a reliable attachment point for the prominent antenna mast.
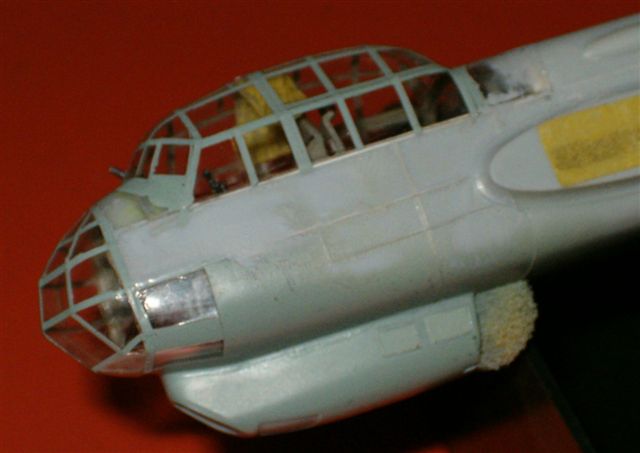
Characteristic detail of the 88 ( and many other “greenhouse cockpits”)
are sunshades ! Rolled up, stored or partly drawn, they are more or less
visible, can be fashioned from tinted Parafilm or thin tissue and may
even be used to hide missing or wrong detail !
Click the
thumbnails below to view images full-sized.
General remarks
Early 88’s (A-1) had short wings without wingtips extending beyond
the ailerons. AIMS offers a conversion but any discerning modeller will
be able to alter the tips and ailerons accordingly after plans and pics.
Fin and rudder: straight hinge line on early variants, stepped hinge
line with aerodynamic balance on later variants - check your pics and
plans closely.
This detail alone is no definitive help to determine the variant however
as repairs, rebuilds and series-variations were the order of the day.
Hasegawa announces an 88 A-4 for 2006 and judging from their He-111 it
might be the definitive kit in 1/72nd but all other interesting variants
remain to be kitted or converted. No reason to chuck away your
investment in loft insulation exept maybe the old Revell Nightfighter
version, and even this one can provide parts for conversions.
Internet and Webzines yield more info, features and reviews – also some
to be digested with the proverbial grain of salt. Best references as
always are pictures of the original in the print media. To be
recommended is a visit at John McIllmurray’s AIMS on
http://www.chechsixpublikations.com and his tipps on Ju 88
modelling, or the search for Ju 88 articles from Jan Forsgren on
http://www.Hyperscale.com or
http://www.ipmsstockholm.org
The examples presented here have been realised before the news of the
imminent Hasegawa release.
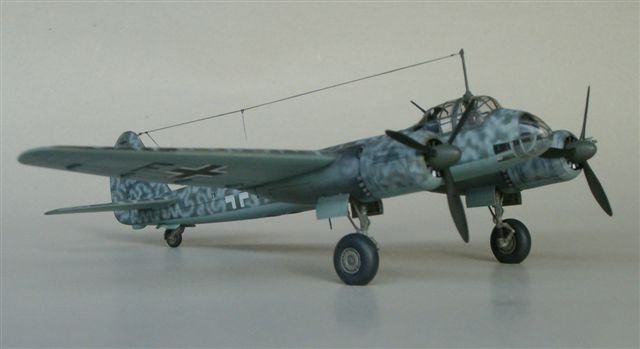
The Ju 88 D-2 is a recce a/c of 1.(F)121 in the Mediterranean about
1941, decals from AIMS 72001 “early Ju 88’s”. Camo in RLM 65 overall is
somewhat of an exception for the Luftwaffe and was probably applied to
just a few a/c in that theatre of ops – confirmation coming from a
colour pic on the dust jacket of Manfred Griehl’s “Ju 88 – Star of the
Luftwaffe” from Arms & Armor.
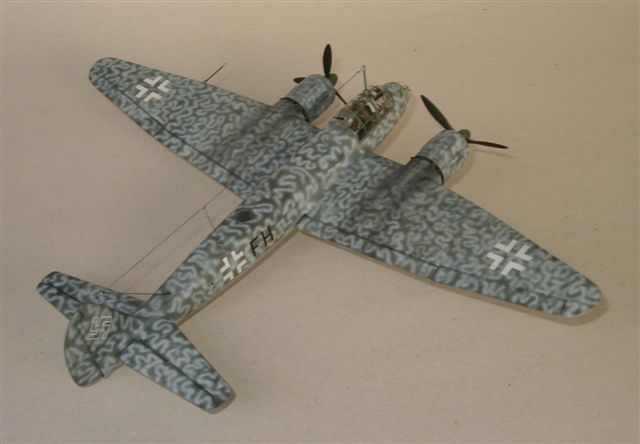
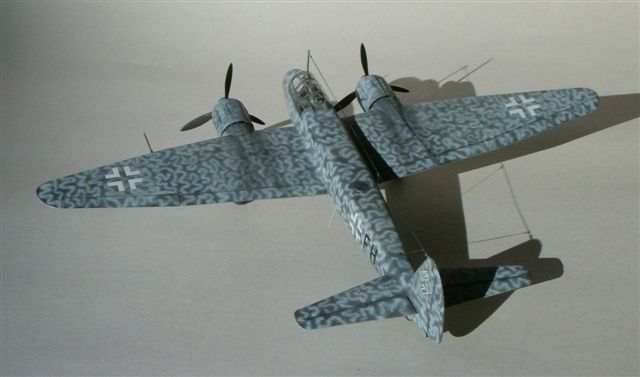
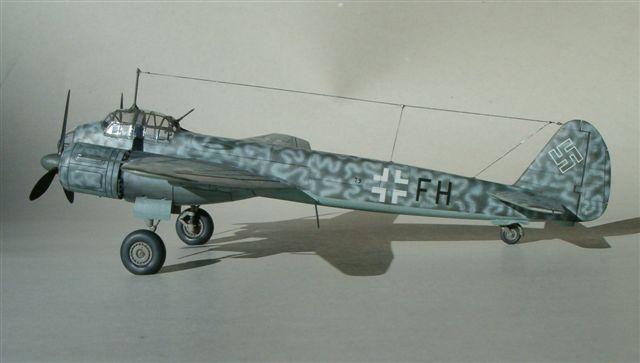
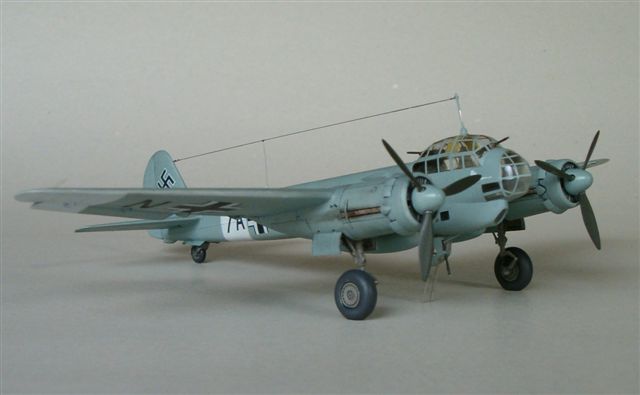
The Ju 88 T-1 is from long range reconnaissance unit 1./Versuchsverband
OKL, about spring 1944, Tolouse-Francasal / Korsica with decals from
Tally-Ho 7215.
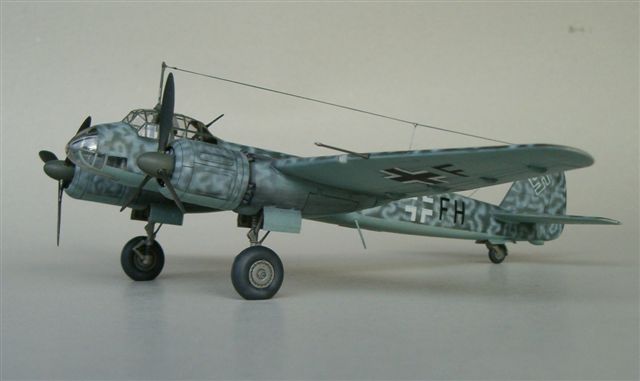
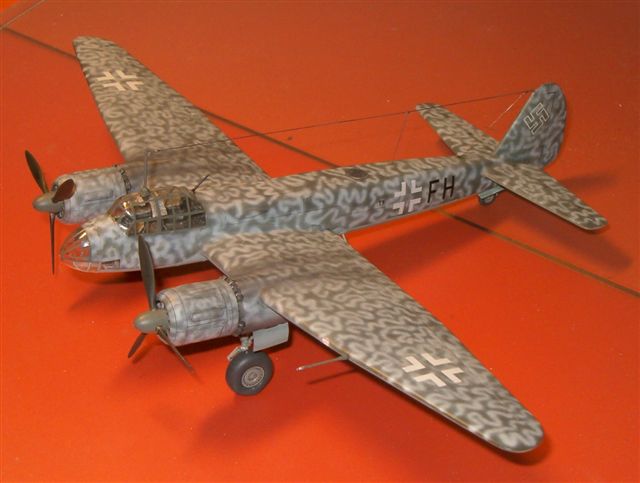
The wave camo pattern is my own interpretation from one b/w pic of
the nose of Sommer’s a/c and the instructions on the Tally-Ho sheet. It
consists of RLM 76 over 70/71/65 and is most probably not fine and
patchy enough.
There are other – possibly better interpretations: one from Simon
Schatz in Classic publications “On special missions” and on the web at
Ronnie Olsthoorn’s
http://www.skyraider3d.com but until better photographic proof
surfaces – who knows.
Click the
thumbnails below to view images full-sized.
Click the "Back" arrow on your browser to return to this page.
German Night Fighter Aces
of World War 2
Aircraft of the Aces 20 |
|
|
|
|
Author: Jerry Scutts
Illustrator: John Weal
US Price: $19.95
UK Price: £12.99
Publisher:
Osprey Publishing
Publish Date:
June 5, 1998
Details: 96 pages; ISBN: 1855327147 |
|
|
Model, Images and Text Copyright ©
2006 by Rolf Blattner
Page Created 30 May, 2006
Last Updated 21 February, 2007
Back to HyperScale
Main Page
|
 Home
| What's New |
Features |
Gallery |
Reviews |
Reference |
Forum |
Search
Home
| What's New |
Features |
Gallery |
Reviews |
Reference |
Forum |
Search