|
Hasegawa's
1/32 scale
Nakajima Ki-84 Frank
by
Chuck Zellmer
|
 |
|
Nakajima Ki-84 Hayate
Frank |

Hasegawa's 1/32
scale Ki-84 is available online from
Squadron.com
Here is Hasegawa's 1/32 scale Ki-84 Hayate.
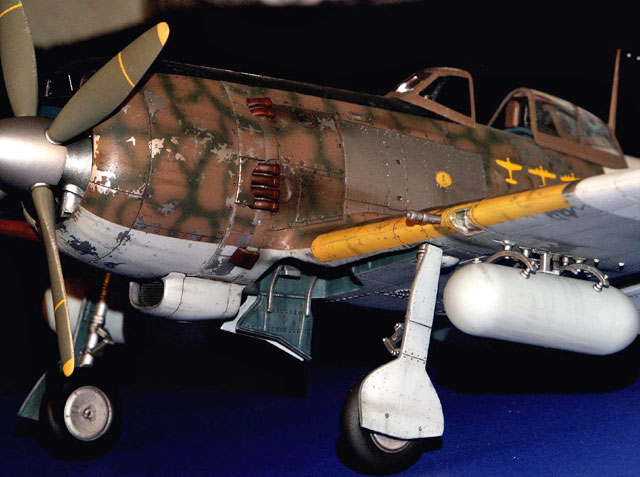
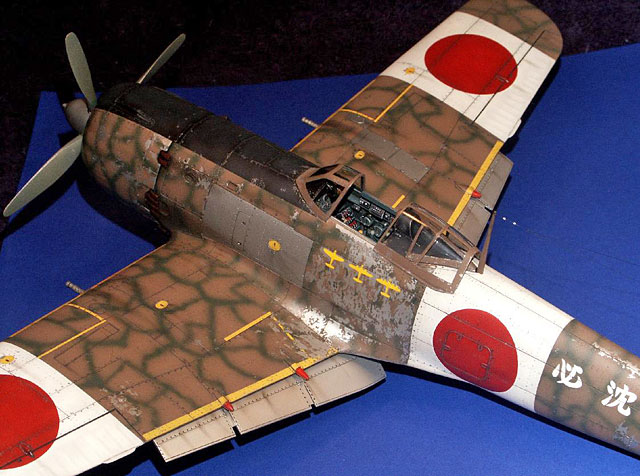
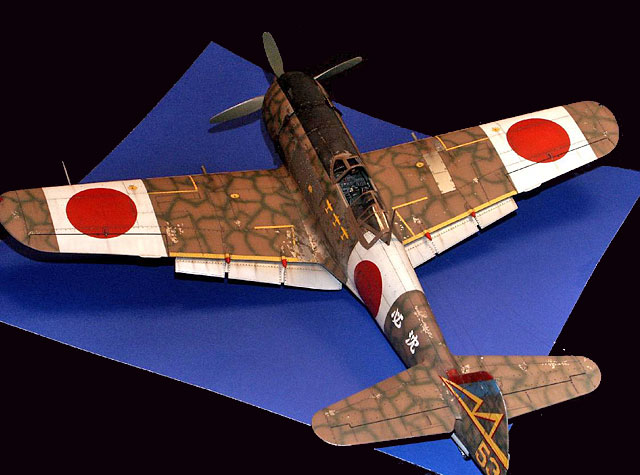
This aircraft represents a patched-up K-84 Hayate formerly from the
25th Sentai in Korea, sent back to bolster home defense units, and
integrated into the 3rd Chutai, 47th Sentai circa late Spring 1945. The
Japanese Army Aircraft deployed in China and Korea often had interesting
camouflage arrangements.
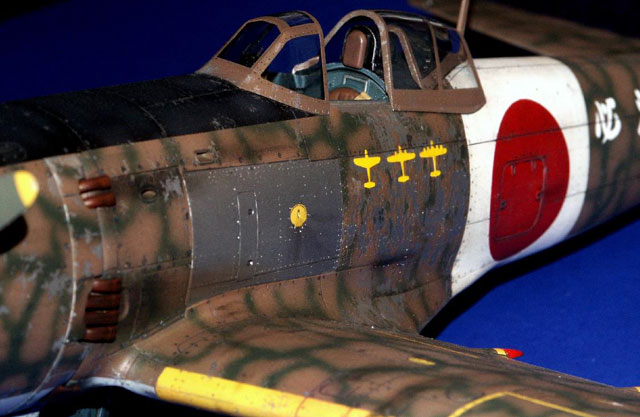
The Hasegawa 1/32nd scale kit was built straight from the box. The
only decals employed were for the kill markings. Two extra "engines"
were added to a decal from Eagle-Strike to emulate a B-29 kill.
Montex masks were used for the "Meat Balls", and for the canopy
(which was dunked in Future Floor-Wax prior to painting).
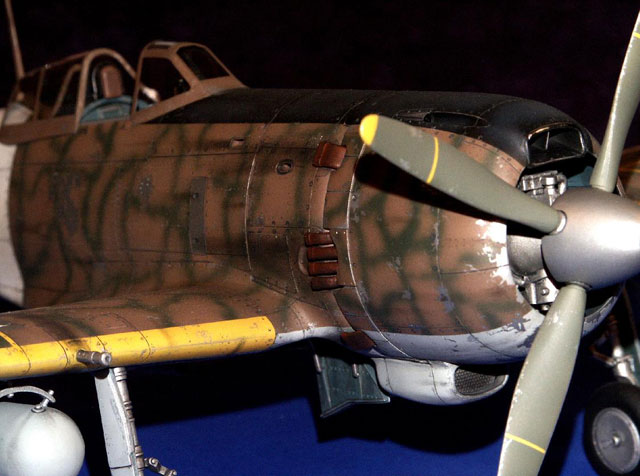
After initial construction was completed, Alclad II Aluminum was
painted on all surfaces.
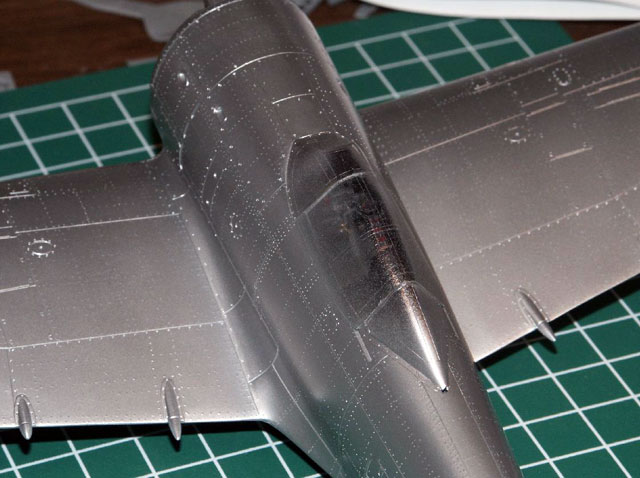
I thought long a hard about just keeping the overall Aluminum finish,
as it came out better than I had expected. But alas, I wanted to do
something different!! Liquid Magic Masker was applied with a sharpened
tooth-pick onto areas of the aircraft that I wanted to remain bare
aluminum, representing severe chipping and un-painted replaced/repaired
panels. Silver pencil was also used to emulate chipping in certain
areas.
 Model-Master
enamels were used for all exterior colors, while Tamiya Acrylics were
used for the cockpit and other interior surfaces. This is done because I
like to employ an oil wash on the interiors, and a water-based wash on
the exteriors. I used an IWATA HP-SB airbrush for all painting. Model-Master
enamels were used for all exterior colors, while Tamiya Acrylics were
used for the cockpit and other interior surfaces. This is done because I
like to employ an oil wash on the interiors, and a water-based wash on
the exteriors. I used an IWATA HP-SB airbrush for all painting.
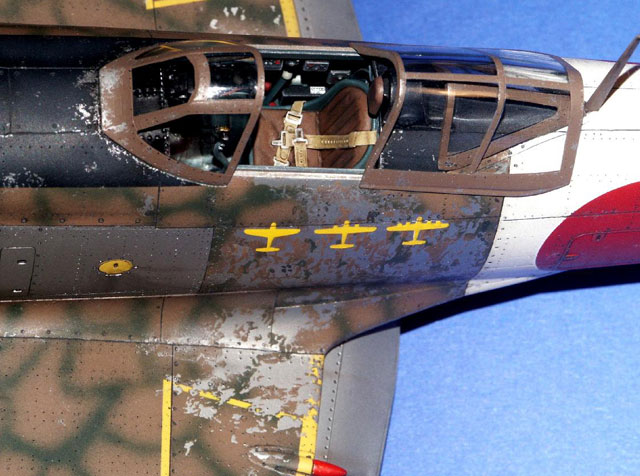
Interior surfaces were painted with a "home-brew" color representing
something close to metallic-aqua. There's a lot of controversy
surrounding Ki-84 interior colors, no doubt some will not agree with
what I've done. Bare Aluminum and Yellow-green were other options.
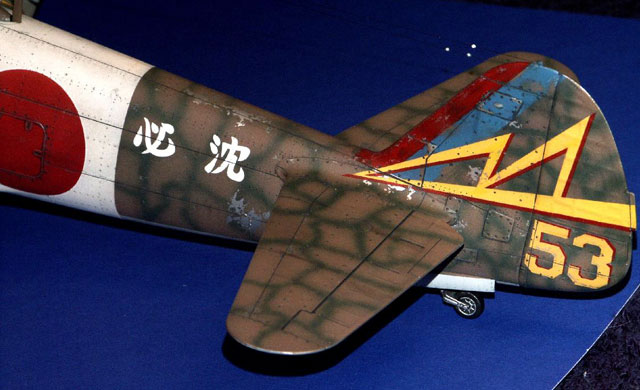
The yellow & red "47" on the tail was painted in about 10 different
stages utilizing simple scotch tape. The well-worn 25th Sentai markings
are on the forward part of the tail.
The 20mm cannon barrels and all exhausts were drilled out.
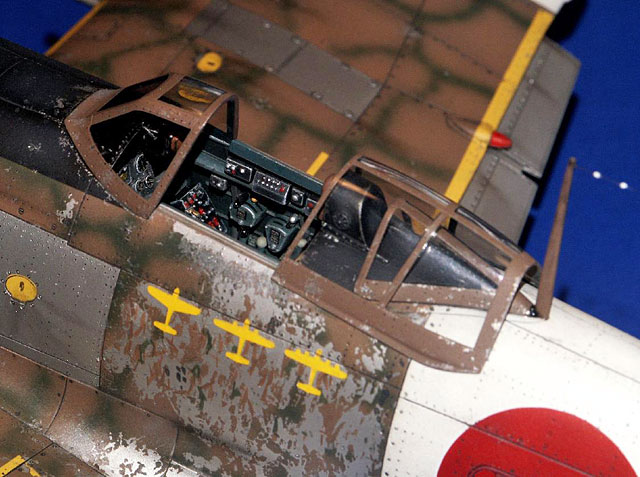
Kit decals were used for the cockpit instruments. Some decal pieces were
employed to emulate slots for knob movement etc. It was fun trying to
"dress up" the relatively basic supplied 1/32nd scale cockpit.
The most challenging part of the build were the aerials. There are 4
attachment points: to the mast, the tail, the starboard fuselage and the
starboard horizontal stabilizer. This generated an inevitable pull to
the main wire connecting the tail and the mast towards starboard. It was
tricky, with several failed attempts. The wires are all straight and
taunt. "Dai-Riki" .002" diameter fishing line was used….great stuff:
very resistant to breaking. Slow-cure Cyanoacrylate worked well for me
for the attachment points.
I hope you enjoyed it! Comments are always welcome. On to building
Tamiya's F-16 :-)
Click
the thumbnails below to view larger images:
Model, Images and Text Copyright ©
2006 by Chuck Zellmer
Page Created 24 February, 2006
Last Updated
21 February, 2007
Back to
HyperScale Main Page |
 Home
| What's New |
Features |
Gallery |
Reviews |
Reference |
Forum |
Search
Home
| What's New |
Features |
Gallery |
Reviews |
Reference |
Forum |
Search