|
Cockpit:
Despite my criticism of the cockpit, effective use
of shadowing with paint or chalk pastel can create effective illusions
of depth and detail when the fuselage is closed up. The actual color of
Ki-84 cockpit is controversial, even when one ventures to j-aircraft.com
for answers. The information I gleaned from that site suggested that,
depending on the timing of production, suitable colors for the cockpit
include aotake (bluish-green), green, or natural metal (for early, mid,
and late production aircraft, respectively). Another post indicated
that something closer to olive drab is appropriate. Because artifacts
of Ki-84s and their parts are few and far between, I opted for a
greenish home-brew based on other models I’ve seen posted on the web.

The scratch built seat was inspired by the superb
work of Jamie “Haggis” Haggo on HyperScale’s Plastic Pics. I opted to
use sheet styrene to construct the seat. The parachute added to the pan
was made from “Apoxie Sculpt”, a two part epoxy. I added etched metal
belts for the parachute harness and painted them forest green as
recommended on j-aircraft. The lap belts, also from etched metal, were
painted with Tamiya buff (XF-57).
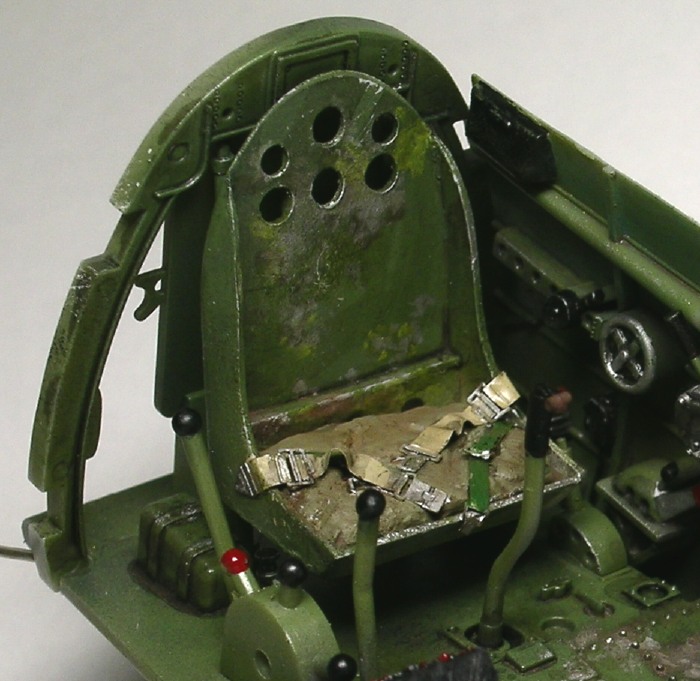
The seat was painted the cockpit color and then
treated to a smattering of dry-brushed aluminum metallizer to give it a
worn look. The cockpit floor was also treated to this process. Washes
of burnt umber/raw sienna were applied to complete the worn effect.
Flaps:
Surgery is required to display the flaps in their
proper retracted position. The first step is to remove the internal
flap detail on the lower wings sections (see below).
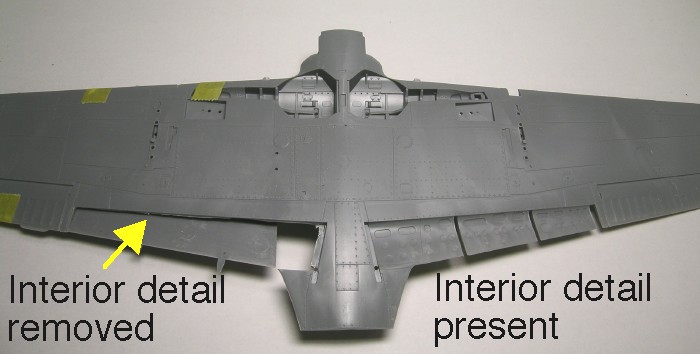
Next it is necessary to trim the attachment points
on the flaps themselves. The flaps can then be installed flush with the
lower wing surface. To my thinking this is a rather simple procedure
that increases the realism of the completed model.
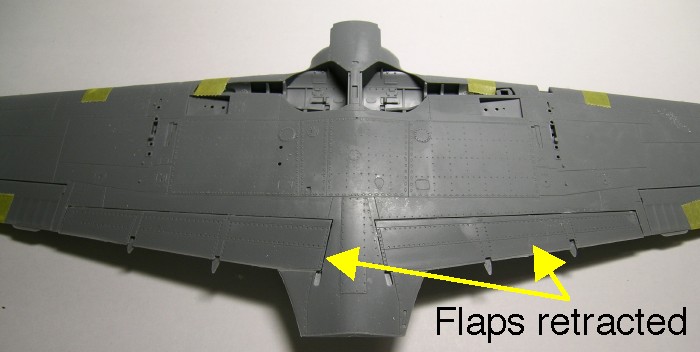
As an added detail, I added a thin strip of plastic
to the upper trailing edge of the flap so that when the flap was
installed it fit flush with the upper surface of the aircraft’s wing.
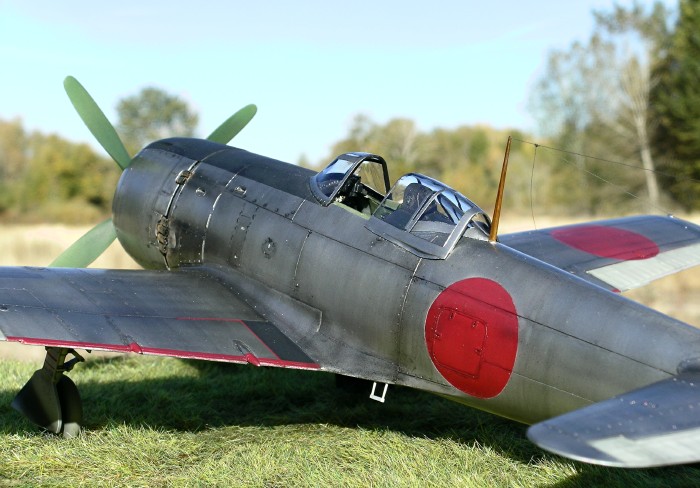
Eliminating pesky fuselage seams:
Natural metal finishes inevitably expose
imperfections on a model’s surface. One area of particular concern for
me was the long seam of the upper fuselage spine.

On more than one occasion I’ve filled a seam with
putty only to have a hint of it reappear days or weeks later. With
natural metal finishes even a hint of a seam would stand out like a sore
thumb. Therefore, with some timely advice from fellow modeler Kent
Eckhart (Boise Kent), I tried to avert the problem at the outset.
Before gluing the fuselage halves together I created a beveled edge
along both mating surfaces. This created a V-shaped trough along the
seam when the fuselage halves were connected. I then proceeded to fill
the trough with CA glue and speed the curing process with an
accelerator. Minutes later I scraped (using a #11 blade) and sanded the
hardened CA glue flush with the model’s surface. It took only a few
minutes and now I am not worried that the seam will make an unwelcome
appearance down the road.
Landing Light:
Although not a weakness per se of the model, I
found the clear part for the landing light on the port wing to be
noticeably thick. Therefore, I opted to replace the part by
stretch-forming a piece of thin clear plastic over the leading edge of
the wing and then cutting it to fit the opening for the light.
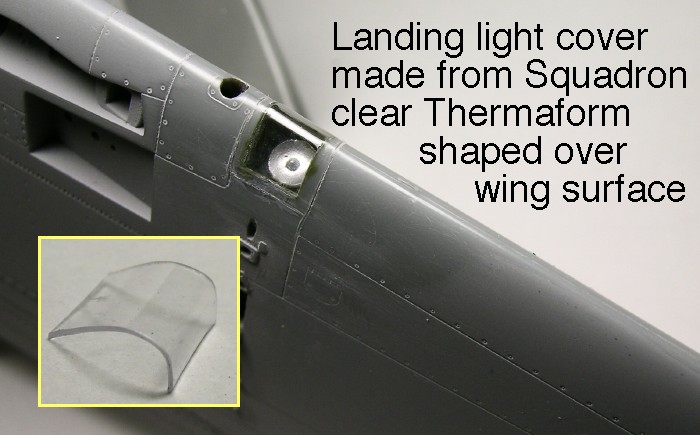
While fiddly, this modification greatly improved
the appearance of the wing light by removing the large gluing surface of
the kit’s clear part.
I have already
described the painting of the cockpit, so now I will focus on the
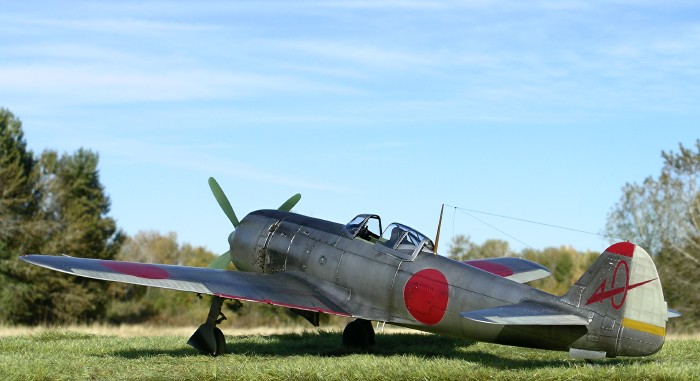
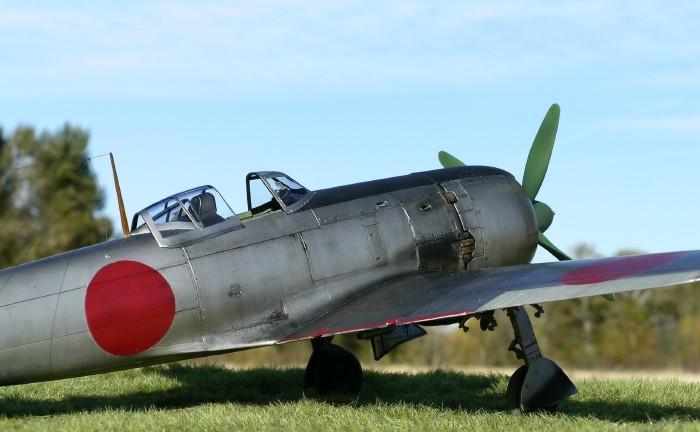
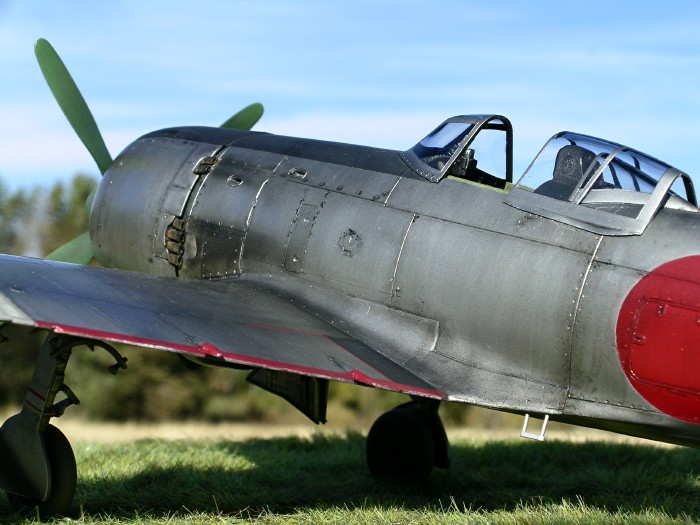
exterior. I decided early on that I wanted to build a Frank with a
weathered natural metal finish. Therefore, my first step was to prime
the model with Mr. Surfacer 1000 to ensure a smooth and protected
surface.
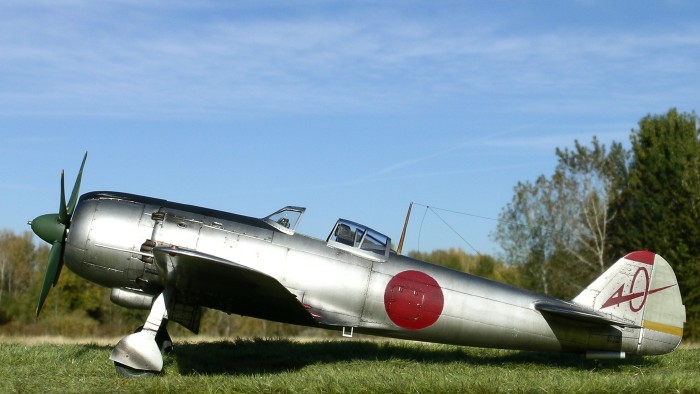
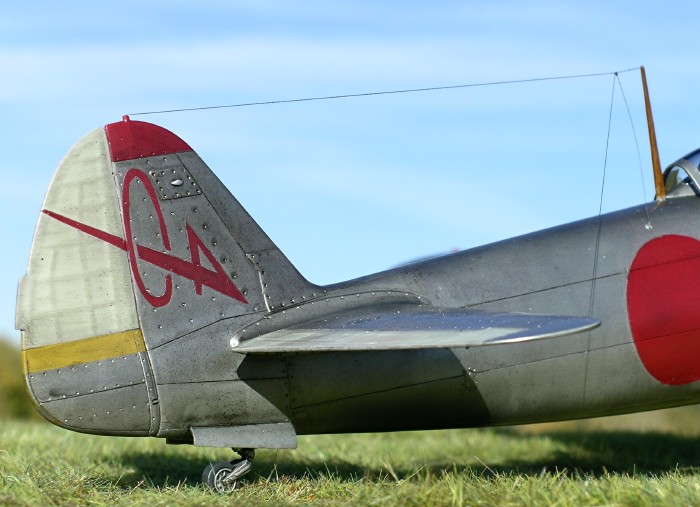
The markings I chose for this model are not
currently available as decals (Note: Aviprint sheet #32003
includes the proper tail symbol but with a white outline that I decided
would be troublesome to remove). Because I wanted the red of the tail
markings and hinomarus to match, I opted to paint and mask all red
markings on my model. A circle template was used to cut the masks for
the hinomarus from Tamiya tape. The tail mask, again from Tamiya tape,
was based on the Aviprint decal and on a photo of the actual aircraft
(pg 953, Scale Aircraft Modeller International Vol 10, issue 10).

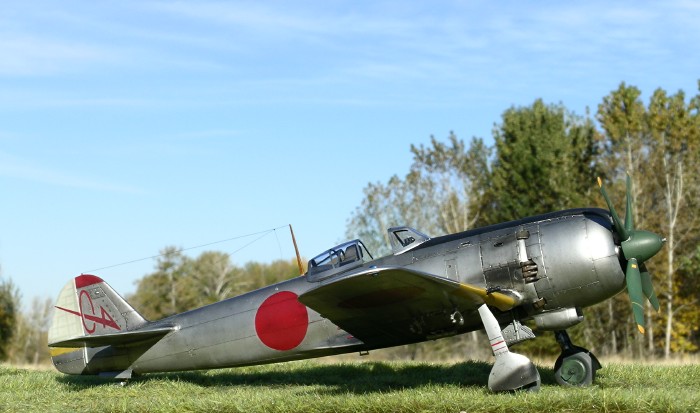
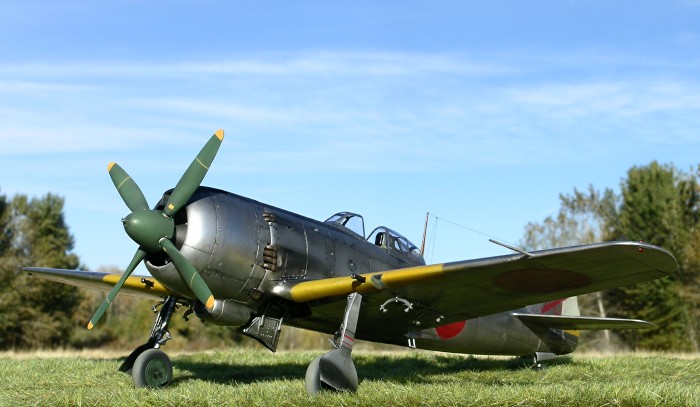
The yellow band below the rudder was also painted
and masked. The color profile of this aircraft (pg 952 in SAMI article)
shows the band in red; however, from the photograph on pg 953 the band
was clearly different in color from the red on the tail. Yellow is an
interpretation I’ve found elsewhere, and it struck me as consistent with
the photo. All fabric control surfaces were painted XF-14 (J.A. Grey)
and masked. The antenna post was painted medium brown and then with a
coat of Tamiya’s clear orange to give it a glossy wood-like appearance.
The antenna wires are stretched sprue.
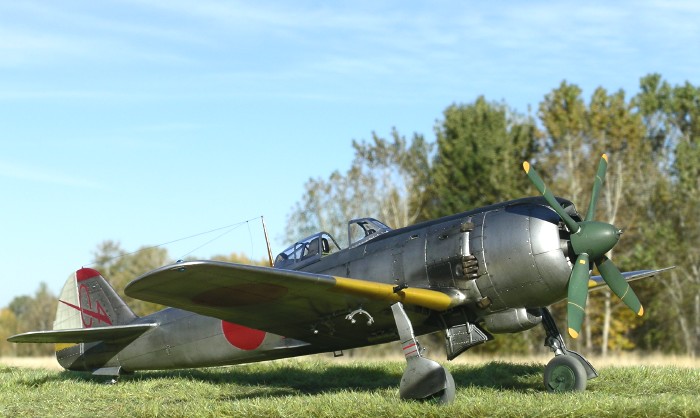
I used various shades of Alclad II metallizer for
the natural metal finish. The base coat was duraluminum, followed by
various amounts of aluminum and semi-matte aluminum. Polished aluminum
was used sparingly to enhance the metallic appearance without leaving
the model unrealistically shiny. The wheel wells were also painted
natural metal.
For the purposes of weathering I used a brush to
apply thinned black Tamiya acrylic over most surfaces on the model. On
the fuselage I ran the brush from top to bottom, whereas on the wings
and tail the wash was brushed on from front to back. I find this
weathering technique to be very effective in creating a realistic
natural metal finish. The Alclad is highly resistant to the wash, and
if the wash pools in places or is overdone it can be sanded out with a
micromesh sanding cloth. The metal finish beneath remains intact.
Additional weathering was achieved by spraying
thinned black Polly Scale acrylic with an airbrush. This technique was
used for the exhaust stains and some of the more subtle detailing around
panel lines. My reference photo was examined frequently to ensure the
weathering was not overdone.
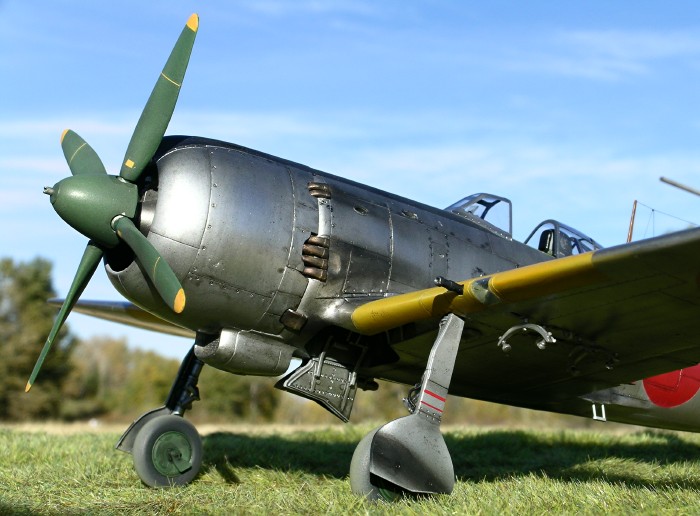
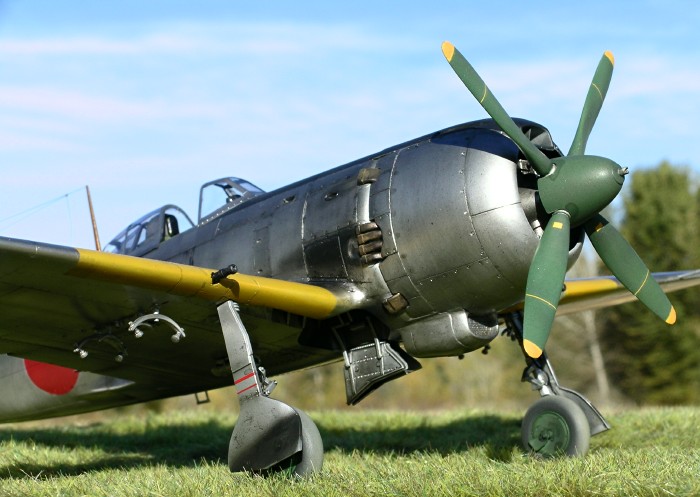
The spinner, propeller blades, and wheel hubs were
painted with Tamiya’s XF-26 (deep green) lightened with white. Decals
were used for the yellow warning marks. The only other decals used on
the model were the thin stripes on the landing gear covers.
Images of the completed model were taken outdoors
in natural light with a Nikon Coolpix 5400 digital camera. The
“unsharpen mask” tool of Adobe Photoshop was used to restore some of the
clarity and crispness lost during image compression.
Click on the thumbnails
below to view larger images:
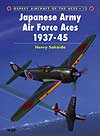
Japanese Army Air
Force Aces 1937–45
Aircraft of
the Aces 13 |
|
|
|
|
US Price: $19.95
UK Price: £12.99
Publisher:
Osprey Publishing
Publish Date:
April
15, 1997
Details: 96 pages; ISBN: 1841762865 |
|
|
Model, Images and Text Copyright ©
2005 by Ian Robertson
Page Created 14 November, 2005
Last Updated 14 November, 2005
Back to HyperScale
Main Page
|
 Home
| What's New |
Features |
Gallery |
Reviews |
Reference |
Forum |
Search
Home
| What's New |
Features |
Gallery |
Reviews |
Reference |
Forum |
Search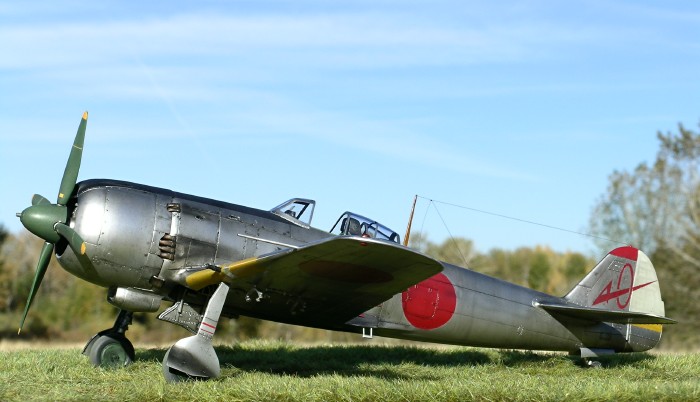


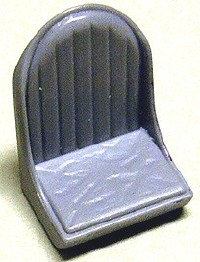 The
seat is another weak point because it is highly visible yet lacking in
detail.
The
seat is another weak point because it is highly visible yet lacking in
detail.