|
Hasegawa's
1/32 scale
Nakajima Ki-84 Frank
by Ron Cline
|
 |
|
Nakajima Ki-84 Hayate
Frank |

Hasegawa's 1/32
scale Ki-84 is available online from
Squadron.com
The Frank has always
been one of my favorite aircraft, and 1/32 my favorite scale, so when
Hasegawa released their 1/32 kit it was a ‘must have’ for me. The kit
builds up beautifully right out of the box, but I made a few changes and
additions just to dress it up a bit.
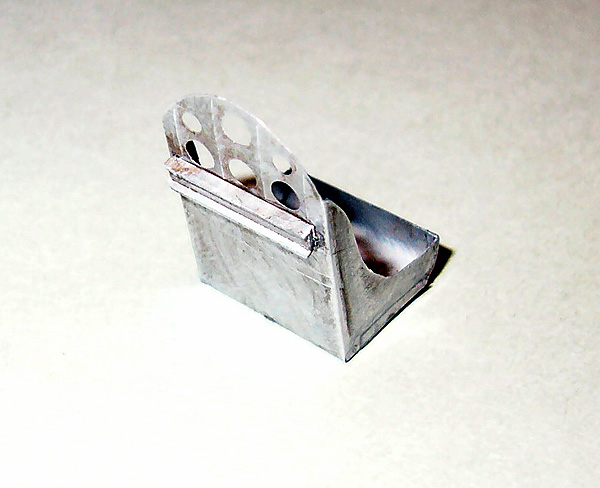
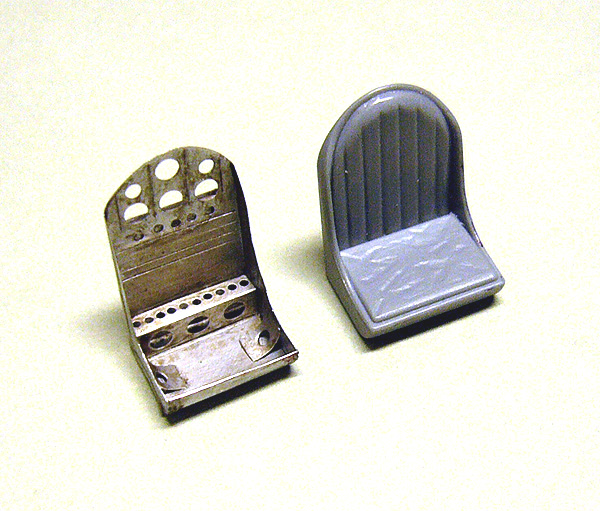
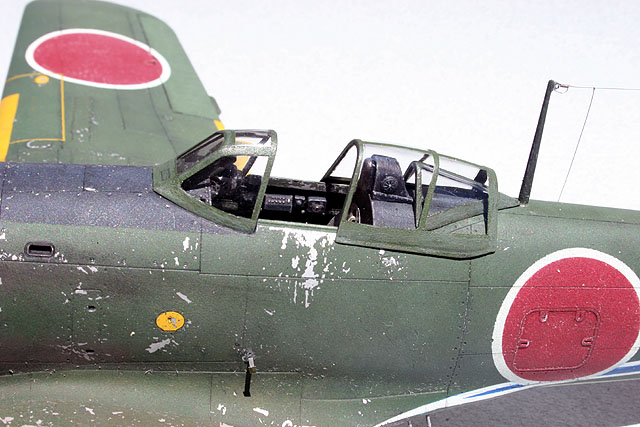
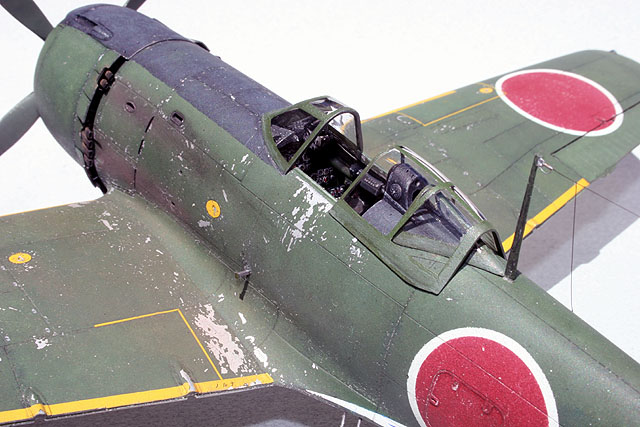
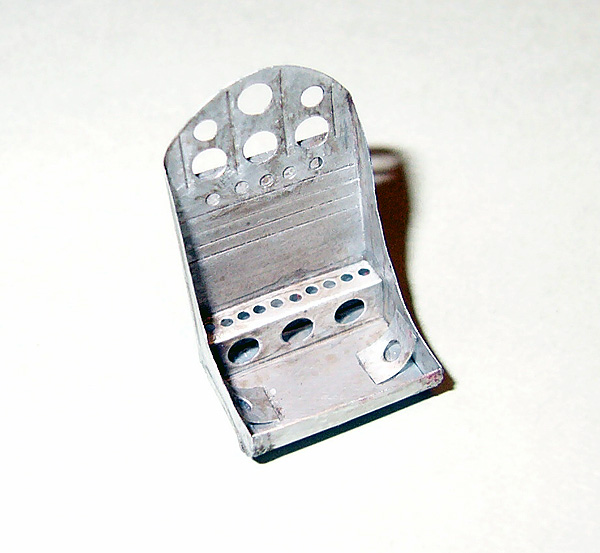
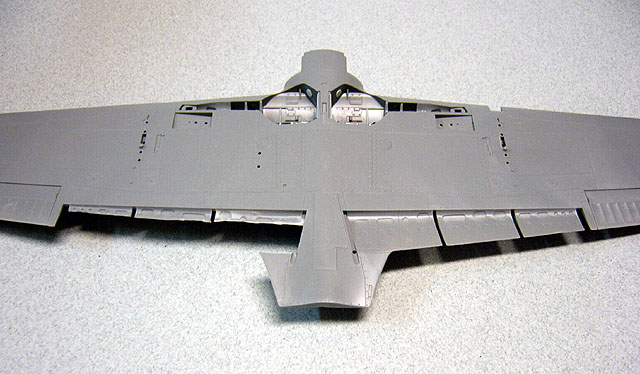
Starting in the cockpit,
I decided to replace the only part of the kit that really disappointed
me- the seat. Hasegawa has molded the seat with back and bottom
cushions, but as most of us know, the only cushions used in most WWII
fighters was the pilot’s parachute pack. Since the plot normally donned
this pack before entering the plane, the seat would be just a basic
shell. Using the kit seat would have bugged me to no end, so I made a
new one out of soda can aluminum (I learned of this medium from Scott
Murphy; he’s the first one that I’VE heard of using it, so it’s his idea
in my book).
Using the kit seat as a
pattern, I drew the seat shape on the aluminum (one piece for the back,
bottom, and sides), cut it out with scissors, and cleaned up the edges.
The lightening holes were punched out using a Waldron punch and die set
(an invaluable tool well worth the price if you do any detailing), while
the ribs were scored in with a scribe. The seat was then folded to shape
in the same manner as doing a photoetched part. The shelf in the bottom
of the pan, and the 2 curved braces were cut out, holes punched, bent to
shape, and then super-glued in place. Last up was the rear brace made
from a section of Evergreen channel stock. The only painting done on the
seat (other than the plastic rear brace) was a Burnt Umber oil wash.
Compared to the kit seat, the difference is very noticeable; in my
opinion, this is the single biggest improvement that can be made to this
kit.
Click
the thumbnails below to view larger images:
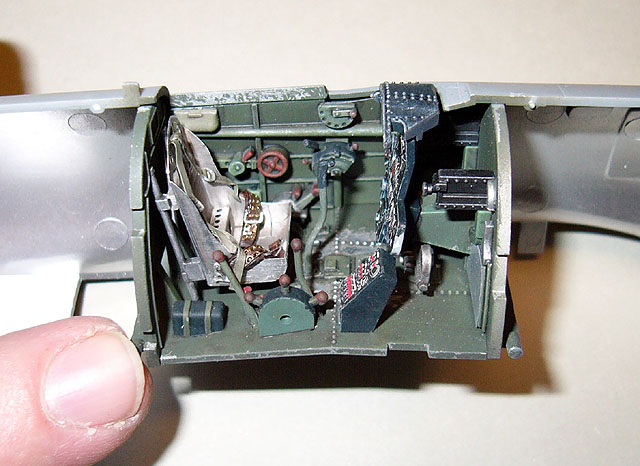
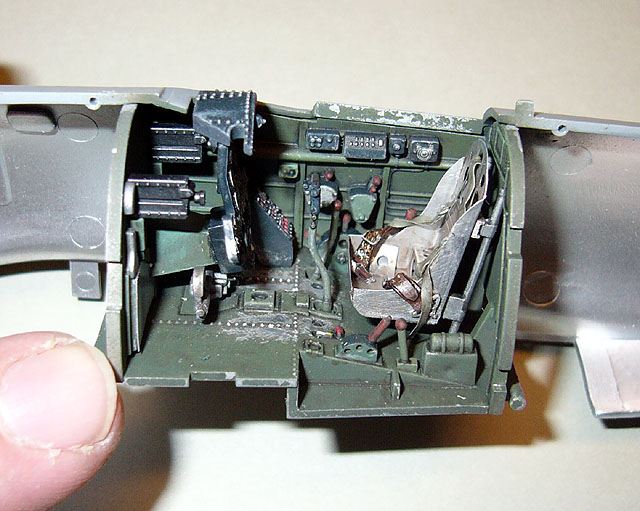
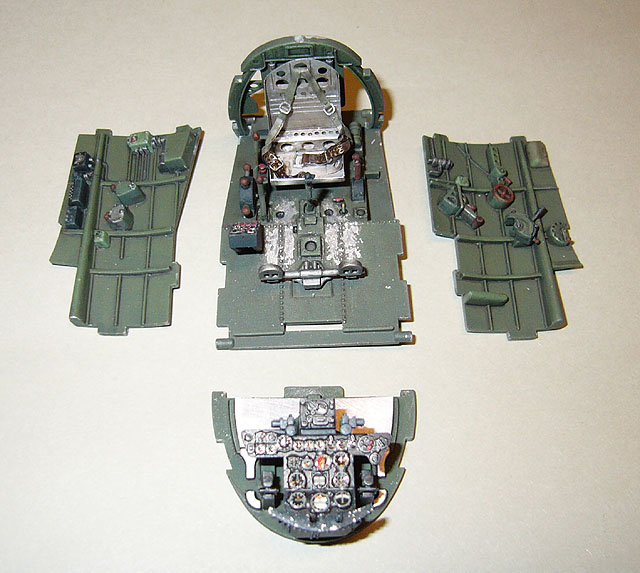
The rest of the cockpit
was built pretty much straight out of the box. Even though the side
panel detail could have been better represented by using separate parts,
versus having it all molded in one piece, once everything is painted and
closed up in the fuselage, the ‘one piece’ effect isn’t really as
noticeable as you might expect.
The main color I used
for the cockpit was Floquil Pullman Green (sprayed over a base of Tamiya
Silver Leaf), followed by a wash of Tamiya Smoke in all the recesses,
and then drybrushed with various greens. The paint chipping was done by
scratching off the green to expose the silver undercoat. The lap belts
on the seat are from Cutting Edge, while the shoulder harnesses were
made from lead foil with wire hardware. The kit decals were used for the
instrument panels.
Click
the thumbnails below to view larger images:
A couple of other changes to the cockpit area, that
don’t show up well in the photos, are the replacement of the kits
gunsight glass with thinner ones made from clear sheet, and the
lightening holes in the headrest structure being drilled out. I also
added the bulletproof glass that was installed inside of the windscreen
(Hasegawa missed this part); this was made from a piece of thick clear
plastic.
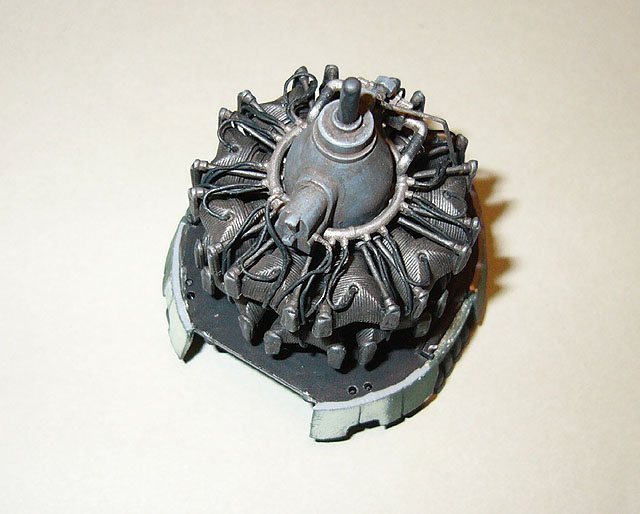
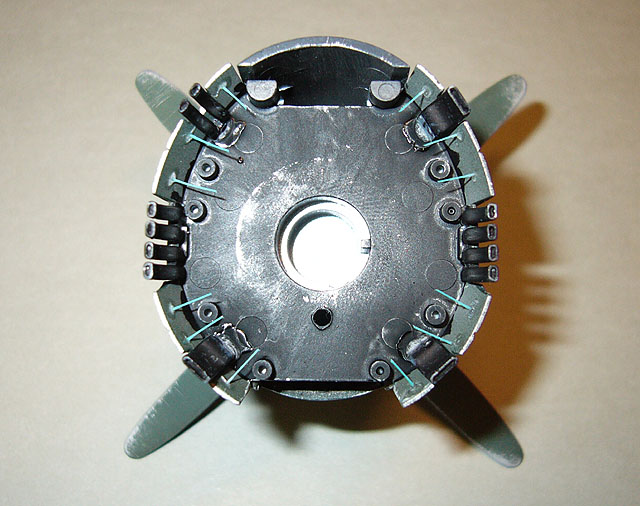
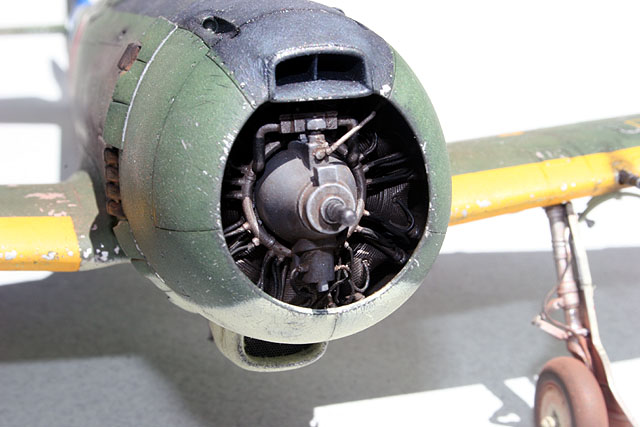
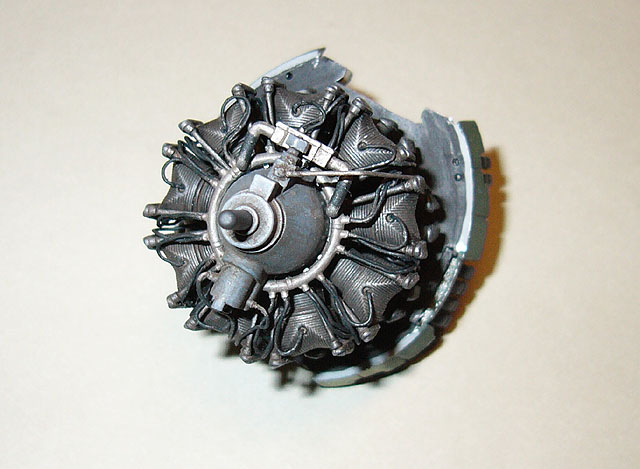
The engine received an ignition harness and oil
lines made from small diameter solder, and the prop control rod from a
section of brass rod. The cowl interior was bare, so I added some
structural detail with Evergreen strips. The interior of the cowl was
painted with Tamiya Silver Leaf, and then dirtied up with a wash of
Sepia watercolor paint. Once the engine is enclosed in the cowl and the
prop is installed, most of these details are no longer visible, but
I know they’re there!
Click
the thumbnails below to view larger images:
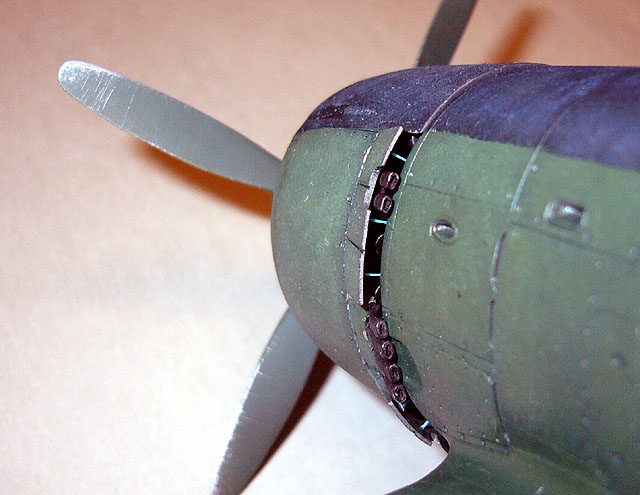
The ends of the exhaust stacks were opened up, and
cowl flap actuator rods were added from short sections of toothbrush
bristles. The exhaust were painted with Model Master Burnt Iron
metalizer, and later given a bit of rust using pastels. The face of the
oil cooler was replaced with a section of photoetched screen to give it
more definition.
Click
the thumbnails below to view larger images:
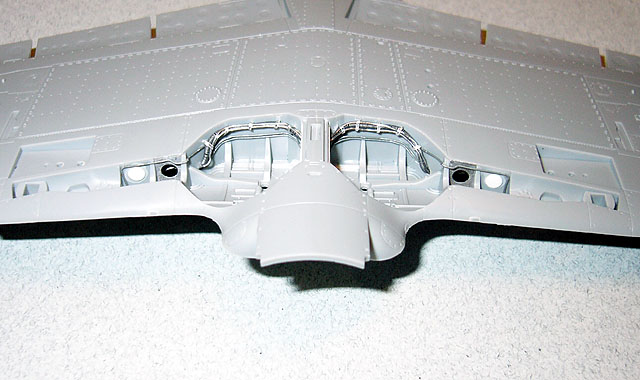
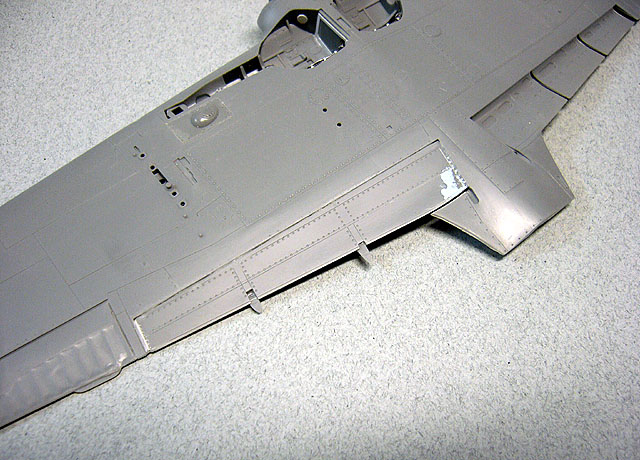
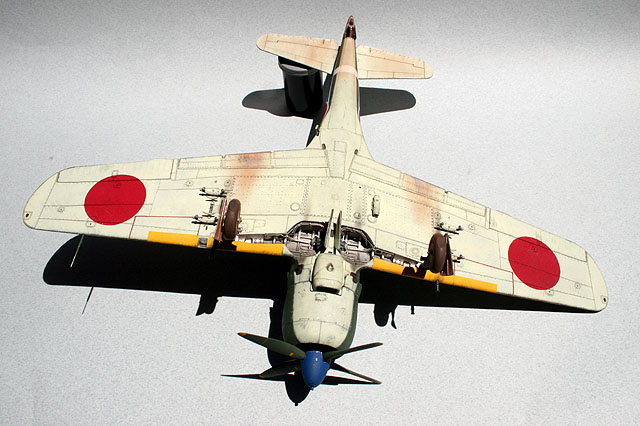
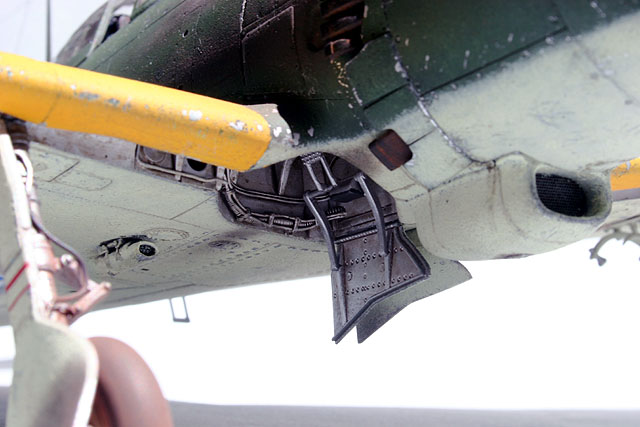
Next, I moved on to the main gear wells. I’ve
always been ‘strange’ in that I like detailed gear wells on a model. To
me, they allow you a glimpse into the interior of an airframe without
having to open up access panels, and they give the impression that
there’s more to the plane than just the exterior; it wasn’t just an
empty shell. It’s a detail that will go unnoticed most of the time, but
turning over a model to look at the underside and seeing empty wells
just leaves me wishing for more. Like I said, I’m strange…
Click
the thumbnails below to view larger images:
Hasegawa has done a pretty good job on the wells,
but since they’re molded integral with the lower wing there are some
limitations to what they could do with injection molding; this results
in the vertical walls being bare. I added a bit of structural detail to
the inner most walls with styrene and a couple of styrene discs (punched
out using the Waldron set) as access panels. In the middle of the rear
walls is an open lightening hole; I cut out this section of the wall and
replaced it with a punched piece of aluminum cut to shape; this gave me
a realistic thinness.. It’s barely visible in the photos, but there’s
some plumbing behind the holes that can be seen on the finished model if
you look hard enough. The plumbing that runs along the rear walls was
done with small diameter solder and wire, with lead foil strips for the
hold down straps.
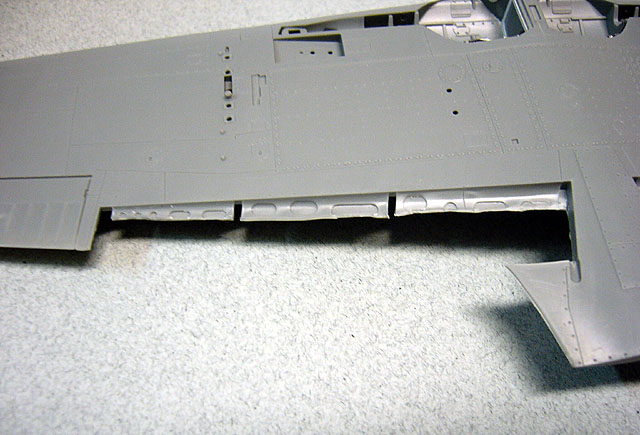
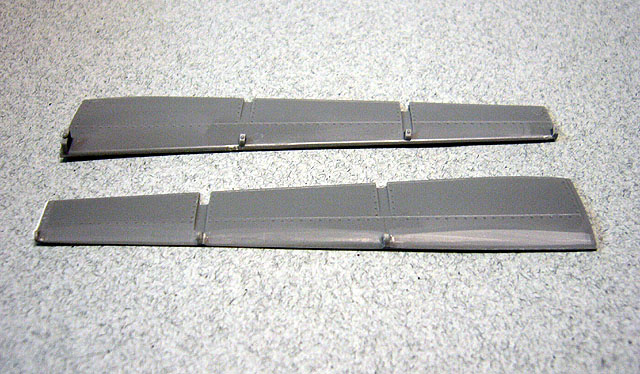
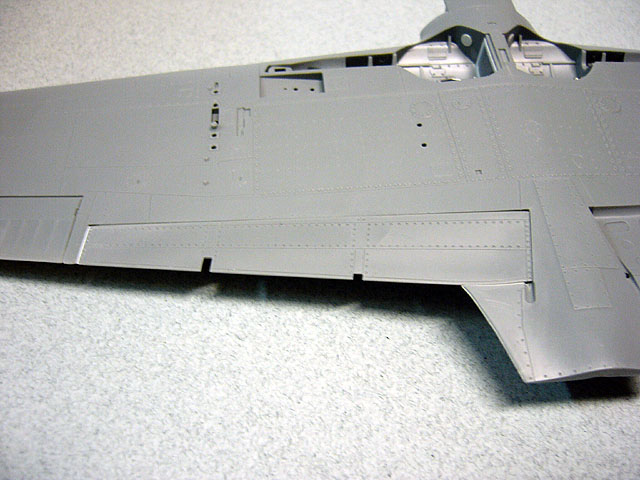
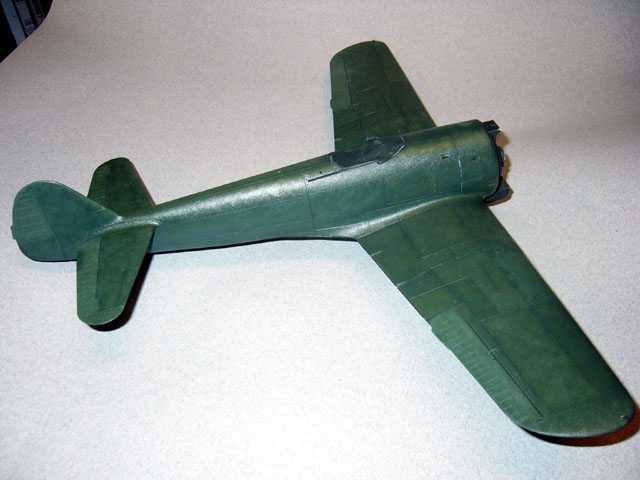
I decided to raise the flaps as it’s
extremely rare to see a Frank on the ground with the flaps extended;
this turned out to be a simple modification. On the lower wing piece,
remove approximately the rear two thirds of the flap well. Take the flap
itself and remove the inner mounting tab. Using a knife or file, shave
down the forward, upper section of the flap to get it to sit flush in
the well (it doesn’t take much trimming). Looking at the topside of the
flap, there’s a panel line running across just forward of the trailing
edge; this small strip of the flap will show through the narrow cutout
notch in the trailing edge of the upper wing. I needed to add a bit of
material to the outboard end of the flaps to close the gap on my kit.
Glue the wing together; the forward part of the flap well that was left
in place will keep the upper wing from squeezing in. Finally, glue the
flaps in place and you’re done. Simple, huh?
Click
the thumbnails below to view larger images:
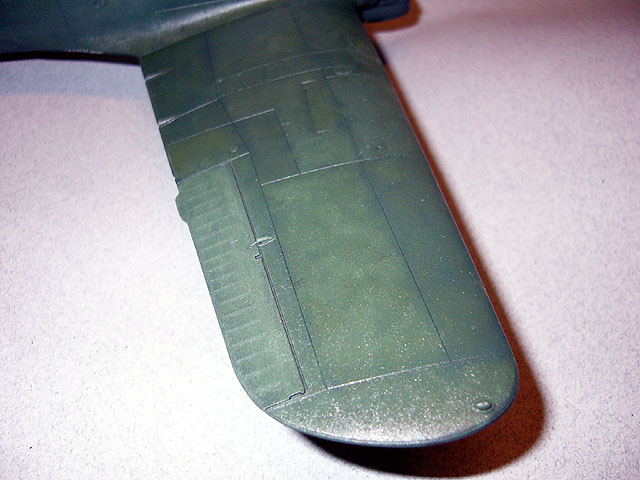
I removed the pointed ends of the flap guides since
most photos of Franks in the field showed them as missing (perhaps
people were impaling themselves on them?). A few other minor details
done at various stages were the replacement of the kit landing light
with an MV lens; drilled out cannon barrels; brake lines added to the
main gear legs with small diameter solder; flattening the bottom of the
main gear tires; some extra structural detail added to the inner, lower
sections of the main gear doors; a new pitot tube made from a section of
styrene rod with a brass rod in the end; ‘separating’ the tail wheel
from its yoke by carving a groove around the joint; adding the entry
step below the cockpit, above the wing root; and adding the aerial wire
with its spring tensioners at the ends.
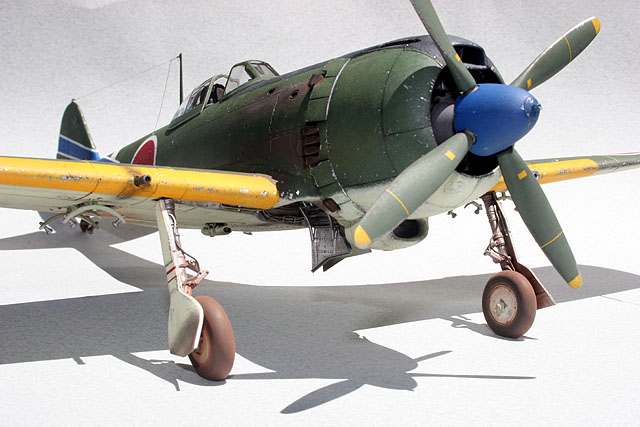
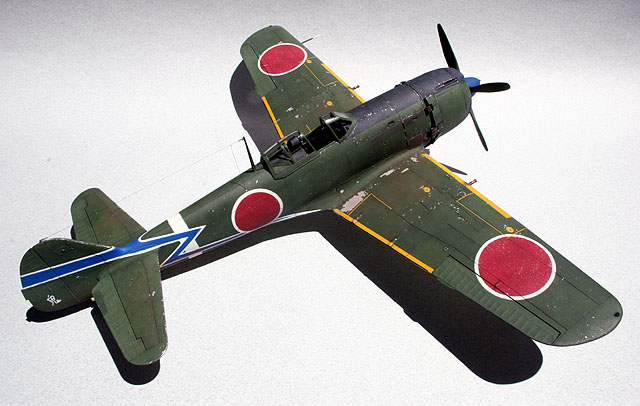
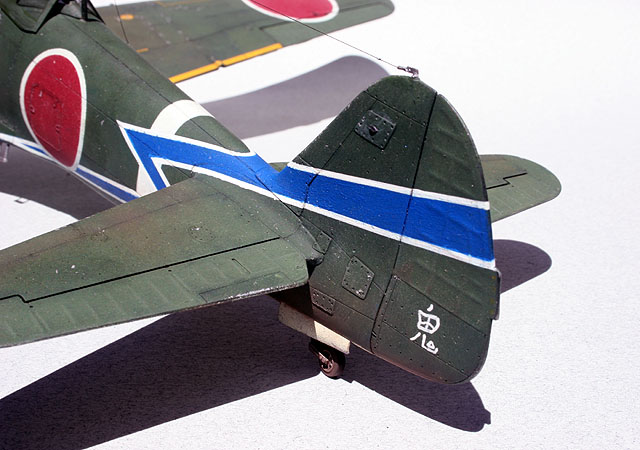
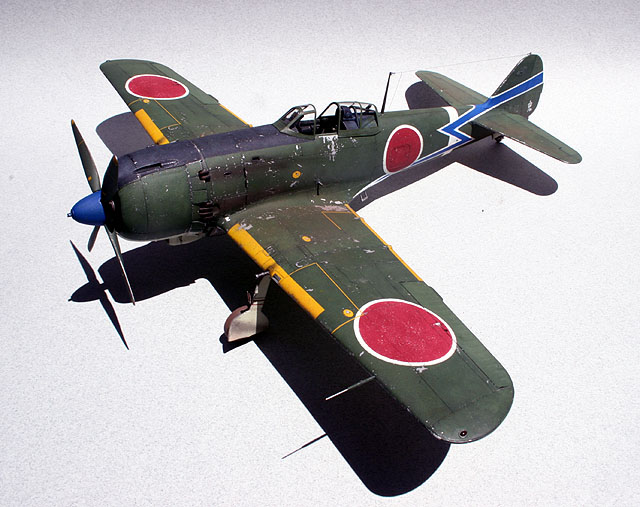
The markings represent those of Major Koki Kawamoto
from the HQ Chutai of the 50th Sentai, flying out of Phnom
Penh, Indochina in April of 1945. Kawamoto was the CO of the unit, and
was credited with 8 kills. I specifically chose this aircraft because it
was colorful, and it’s not available on any decal sheet (at least, not
yet); I like doing subjects that are different from the ‘masses’.
The camouflage, unit markings, and the Hinomarus
were hand painted with artist’s oil paints.
This is the second kit I've painted with oils; it's not hard to do, but
it is a slow, time consuming process due to the slow drying time of the
oil paint. Here’s how to do it…
I first sprayed the whole model with the Tamiya Silver Leaf; being a
synthetic lacquer, it's pretty tough when dry. Next up was an overall
undercoat of Tamiya Black Green acrylic. This served 3 purposes- it
first gave the oils something to 'grab' onto; they don't work well on a
glossy surface. Second, it acted as a 'pre-shade'. And third, being an
acrylic, it didn't 'bite' into the Silver Leaf, making it easy to
scratch later for paint chipping.
The oils I used were from Windsor & Newton. For the camouflage and
Hinomarus, I used the oils straight (no thinning), but I did thin them a
bit with turpenoid for the unit markings so that they'd be easier to
paint. The colors were mixed up by eye, using some of this color, some
of that color, etc, until I was happy with it. An important thing to
remember is to NOT mix the colors together completely; you want to have
a bit of variation in the mix. Using a brush with fairly short, stiff
bristles pick up some of the paint and then wipe most of it off in a
paper towel. It's sort of like drybrushing, but you want to leave more
paint in the brush; kind of a 'wet' drybrush. Apply the paint, one panel
at a time, using a stippling motion. By that I mean you apply it by
holding the brush perpendicular to the surface, and 'tapping' it against
the surface. Don't worry about getting the color on completely even, you
want to have some variations in it. Once you've covered all the panels
needed with that color, change the color mix a bit by adding some more
paint (it doesn't take much). Now go back and apply some of this new
color to selected panels to give the surface more variety; you can
repeat this as much as want to get the finish you're after. The oils dry
slowly, so there's no need to rush. When you're done, set the model
aside to dry (it can take several days; see what I mean by this being a
slow process?).
Click
the thumbnails below to view larger images:
Once the paint has
dried, you use the same process to paint the next camo color. You can
simulate a feathered paint edge by carefully applying the paint with the
stippling motion.
If you do any masking, use a low-tack masking material such as frisket
film as you don't want to pull up the paint when you unmask it.
The finish will dry to a semi-flat. You can gloss coat for decals if you
wish. It was at this point that I did the decals; the kit decals were
used for the wing ID bands (LOTS of Solvaset used on those!) and all of
the maintenance stenciling. Next, I applied some thinned Tamiya Smoke to
the panel lines to bring them out just a tad. The paint chipping was
achieved by carefully scratching the surface with 100 grit sandpaper to
expose the Silver Leaf undercoat. The final step is applying a flat
coat; I used Model Master clear flat shot straight out of the bottle.
Once the flat coat is applied, the finish will really 'come alive' in
that you'll be able to see the subtle variations of color across the
surface.
As I said, it's not a hard process to master, but it's definitely one
that takes patience. Working mostly on the weekends, it took me about a
month to paint this one.
The last thing done to
complete the build was to add exhaust stains, some powder stains around
the cannons, and dirt to the landing gear and undersides; this was done
with pastels.
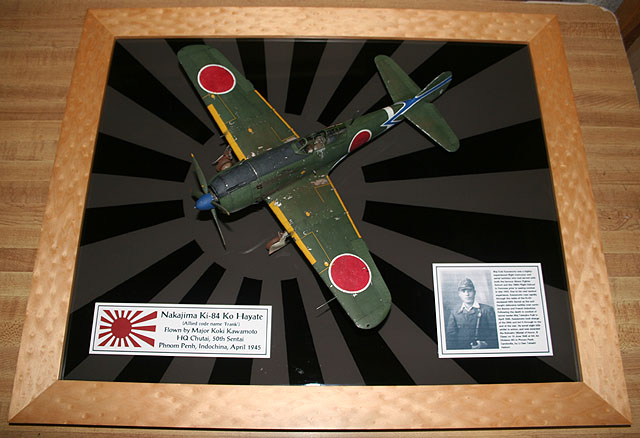
I like to show off my
work on some kind of display base; this one was made using a picture
frame. The design was laid out and masked on the backside of the glass
and spray painted. The information placards were made on the computer.
Simple, but it helps with the overall presentation.
Hasegawa has done a terrific job with this kit. The
modifications I made to mine were done just to satisfy my own whims, and
are in no way necessary to achieve a great looking model. I hope that
Hasegawa will see fit to continue with WWII Japanese subjects in this
scale; I’d LOVE to see a Ki-61 Tony and a Ki-100!
Click
the thumbnails below to view larger images:
Model, Images and Text Copyright ©
2005 by Ron Cline
Page Created 16 August, 2005
Last Updated
23 February, 2006
Back to
HyperScale Main Page |
 Home
| What's New |
Features |
Gallery |
Reviews |
Reference |
Forum |
Search
Home
| What's New |
Features |
Gallery |
Reviews |
Reference |
Forum |
Search