|
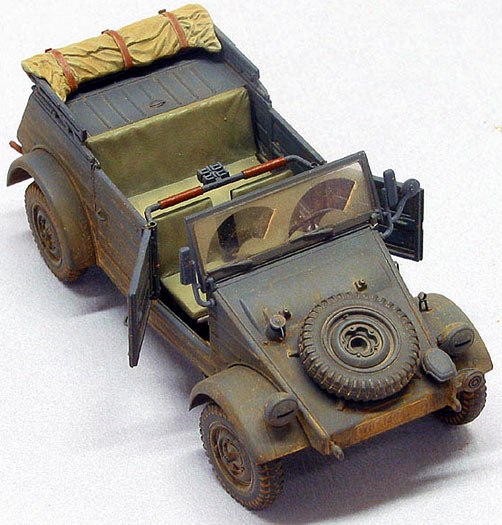
Tamiya's 1/48 scale
Kubelwagen Type 82
by Tony Bell
|
|
|
Kubelwagen |

Tamiya's
1/48 scale Kubelwagen Type 82 is available online from
Squadron
Next
to the Willys Jeep, the Kubelwagen must be one
of the most iconic utility vehicles of the Second World War.
Based
on specifications issued in early 1938, the prototype Type 62 was designed
by Porsche engineers based on the VW Type 60 'KdF-Wagen' (a.k.a. Beetle)
chassis and engine. The Type 62 prototypes underwent field trials in
November 1938, and modifications to the design resulted in the production
standard Type 82. The Type 62 had a body style reminiscent of it’s Beetle
sibling, but one of the changes demanded by the German Army was that the
appearance be “more military”, the result of which was the archetypically
Teutonic final form.
By
war’s end 50,435 Kubelwagens had been produced, plus another 14,283 Type
166 Schwimmwagens (the amphibious vehicle based on the same platform).
Although these may seem like large numbers, compared to the 647,870 Jeeps
produced by Willys, Ford and Bantam they only serve to highlight the
limitations of German production during WWII.
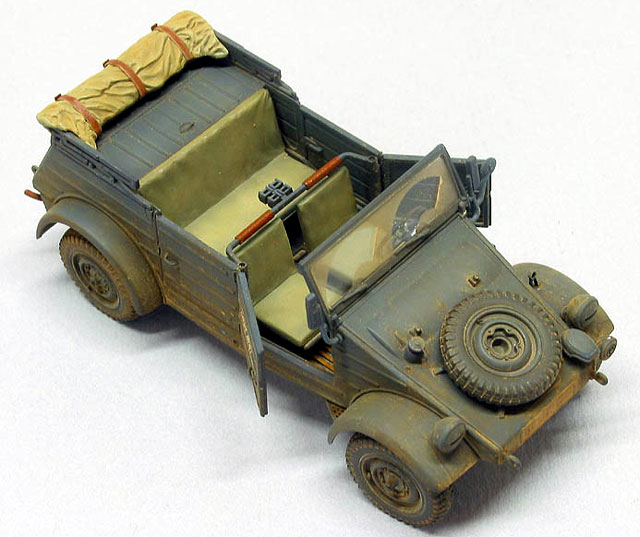
Tamiya's 1/48
scale Kubelwagen
|
Tamiya
has released Kubelwagen kits in 1:16, 1:35 (old and new tooling), and now
in 1:48 scale. The kit is typical of their
recent releases in that they combine excellent fit with thoughtful
engineering without sacrificing detail.
The
moldings are extremely sharp indeed with no flash or sink marks and only
very faint mold separation lines. Visible ejector pin marks are limited to
the inside surfaces of the separate front doors and the backs of the
seats. In both cases the marks are shallow and easily filled with
superglue or Mr. Surfacer and sanded smooth.
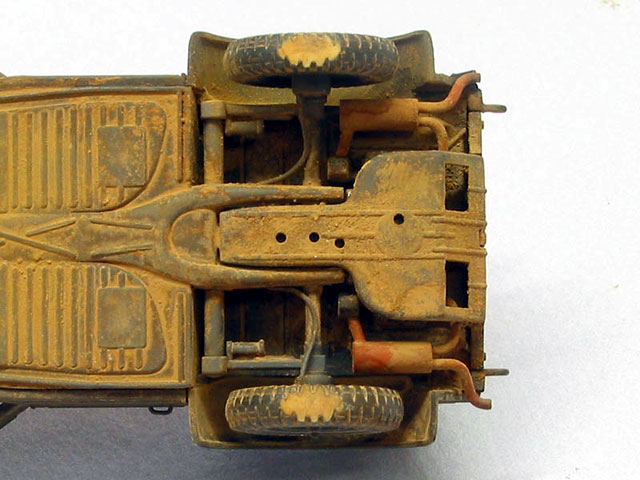
Engine
detail is limited to a representation of the sump (did the flat four
engine even have a sump?) molded into the underside. This is covered by an
underpan so not much is visible anyway.
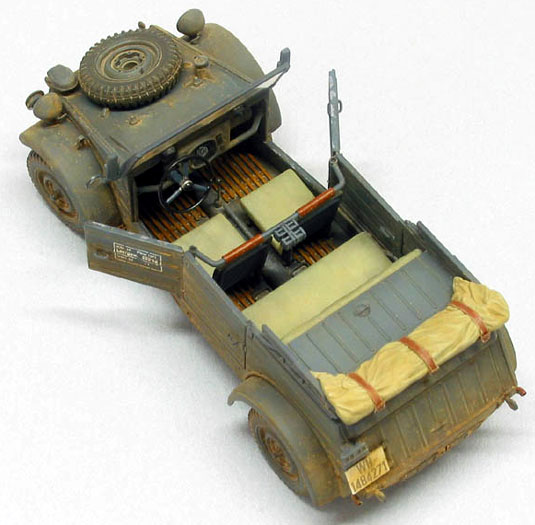
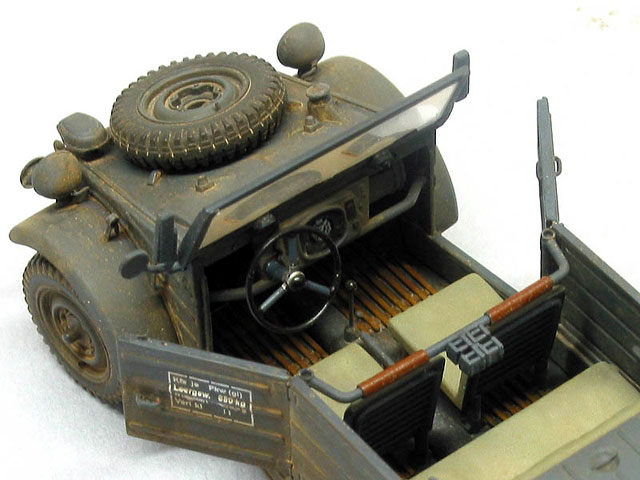
The
cabin is also nicely detailed, but missing a few details, notably the
clutch, brake and gas pedals as well as the storage box in the driver’s
foot well and the choke knob on the transmission tunnel. The steering
wheel is very delicate, with only the finest of mold seams to clean up.
The one instrument is well represented with raised detail and all of the
other dashboard details are present.
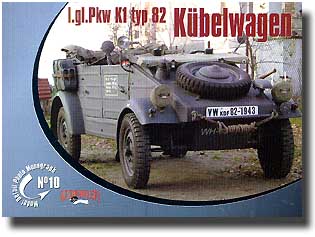 Reference
Material Reference
Material
When I
initially bought the kit I had every intention of doing it right out of
the box, but then I spotted a neat little reference on the Kubelwagen .
Rossa Graph No. 10 covers the Kubelwagen in gory detail, with captioned
colour photographs of a restored example. Obviously written with modellers
in mind, I just had to buy it.
At
this point I figured that it would be a waste of good reference material
if I didn’t take advantage of it and do at least some extra detailing.
Fortunately for my bank account there aren’t any aftermarket sets
available, otherwise I probably would have applied the same logic and
spent even more money.
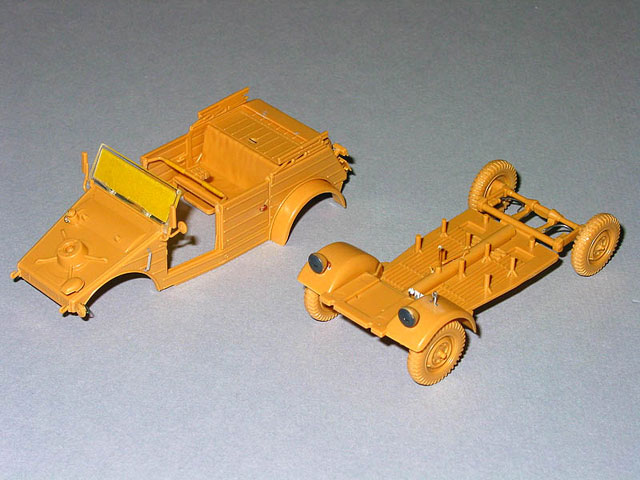
Assembly
I
decided to build the model in two major subassemblies in order to
facilitate painting the interior. Using the instructions as a general
guide, I assembled the lower frame and upper body, leaving off a few items
such as the exhausts, spare tire and under body shields.
Flat
spots were sanded on the tires so that the model would not be up on it’s
tippy-toes, and the front wheels were attached at a slight angle for a
more candid appearance.
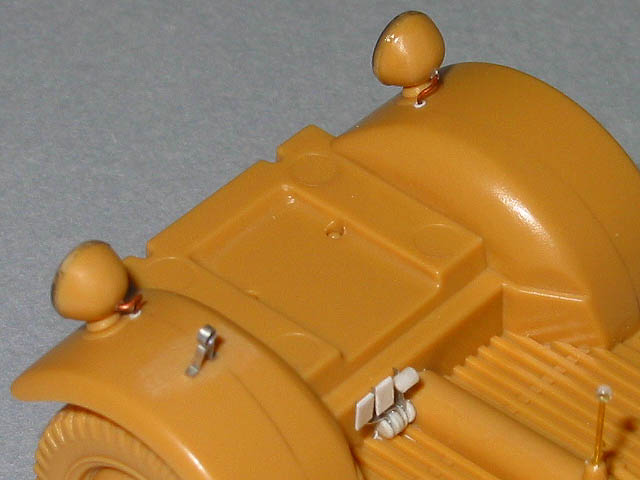
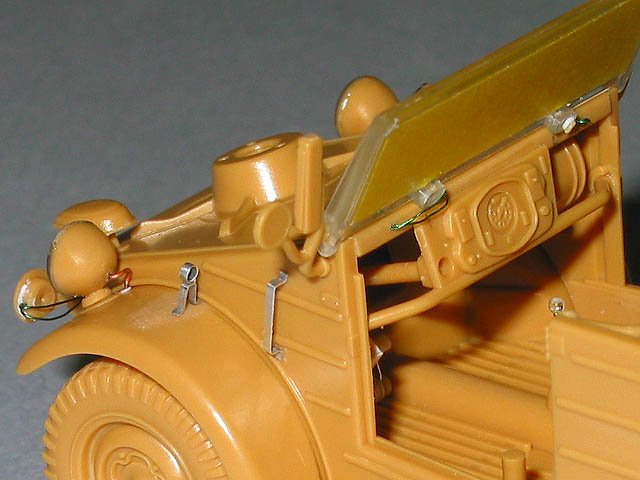
Using
the Rossa Graph as a guide, I added or replaced the following details:
-
Tire
valve stems from stretched sprue;
-
Headlight, horn and wiper motor wiring from copper wire and fine solder;
-
MV
Lens headlights;
-
Fuel
cap retaining line from wire;
-
Door
handles from copper wire;
-
Rifle support padding from masking tape;
-
Ragtop straps from masking tape with wire buckles;
-
Shovel bracket from sheet aluminum;
-
Clutch, brake and gas pedals from sheet aluminum, and styrene sheet and
rod;
-
Driver’s side storage bin from sheet styrene;
-
Gear
shift lever from brass wire with a superglue knob;
-
Choke (next to the gear lever) from stretched sprue;
-
Engine cover grab handles from copper wire

While the model was still in the
subassemblies, everything was sprayed with Tamiya XF-1 Black, followed by
several light coats of XF-63 German Grey to which was added some XF-2
White and a bit of XF-8 Blue. A lighter shade of this colour was thinned
about 90% with isopropyl alcohol and misted onto the upper surfaces. Once
this was all dry, I applied a “filter” of chrome yellow oil paint thinned
with turpentine.
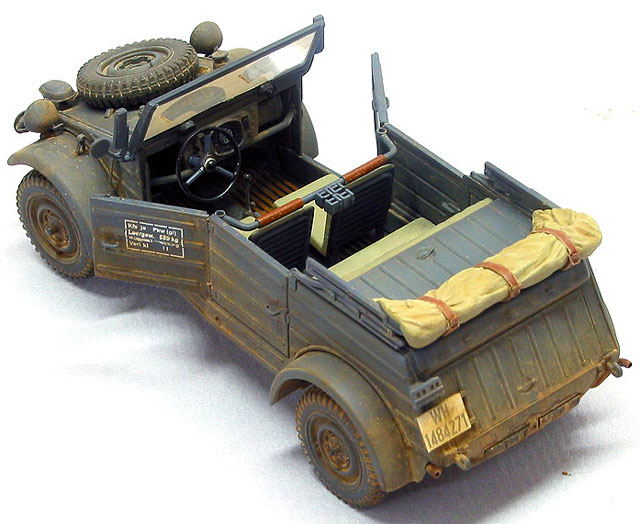
The seats and canvas top were
airbrushed with a mixture of XF-57 Buff and XF-58 olive green (which ended
up looking very much like RLM-02). These were then shaded and faded with
darker and lighter versions of the basic colour thinned 90%. The rest of
the interior was brush painted with black, white and silver. A drop of
5-minute epoxy gave the speedometer a glassy look.
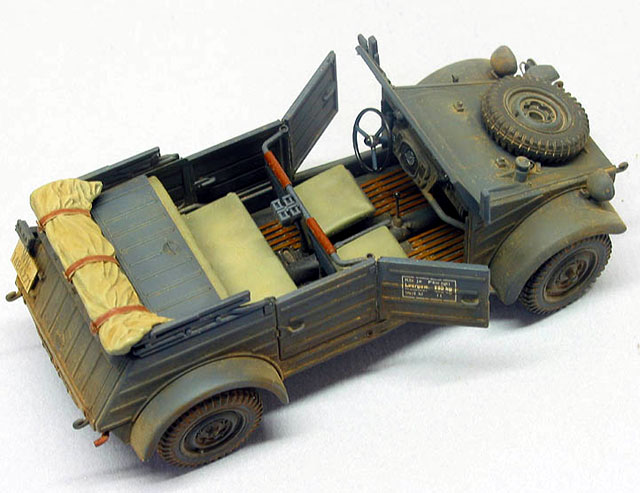
The wooden floor slats were
brush painted XF-57 Buff, followed by a thin, streaky coat of burnt sienna
artists’ oil paint. The bumper pads on the rifle support cross brace were
painted Testor’s burnt sienna, as were the straps for the canvas top.
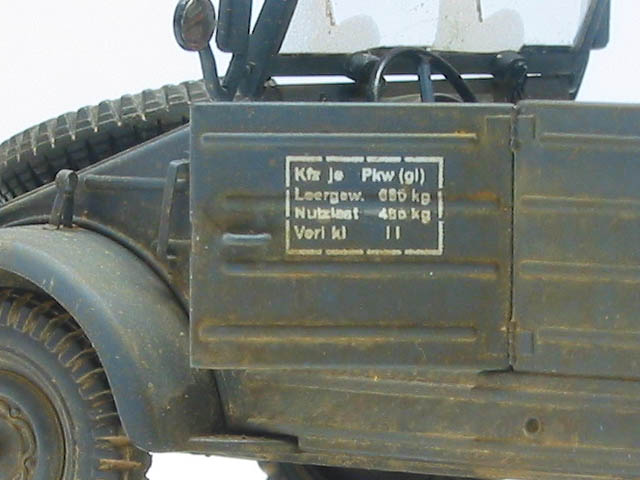
The front and rear license plate
decals were supplied with the kit and went on well with Mr. Mark Softener
decal setting solution. The kit decals only provide black door data
stencils for the tan coloured options.
Because I decided to do a panzer
grey machine I had to get custom made decals for the white stencils. Using
Photoshop, I created the graphic file for the stencil, which I then sent
off to Mike Grant. For a very reasonable price, Mike printed the decals
for me and had them delivered in little more than a week, with a spare set
thrown in just in case. These decals were very thin, with remarkable
resolution.
At this point the windshield
masking was removed, the upper and lower subassemblies were joined, and
the front doors attached in the open position.
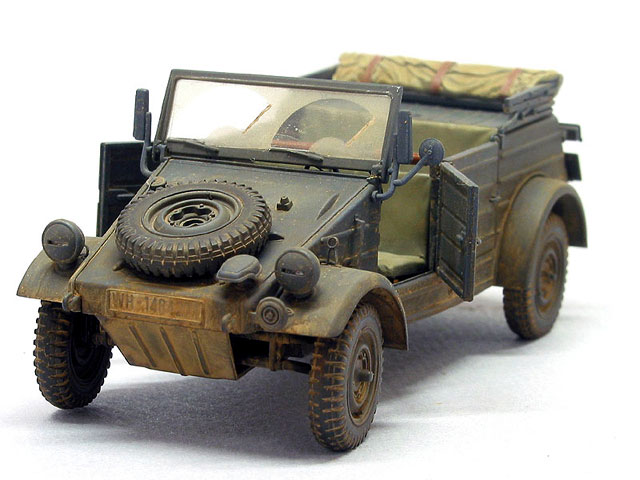
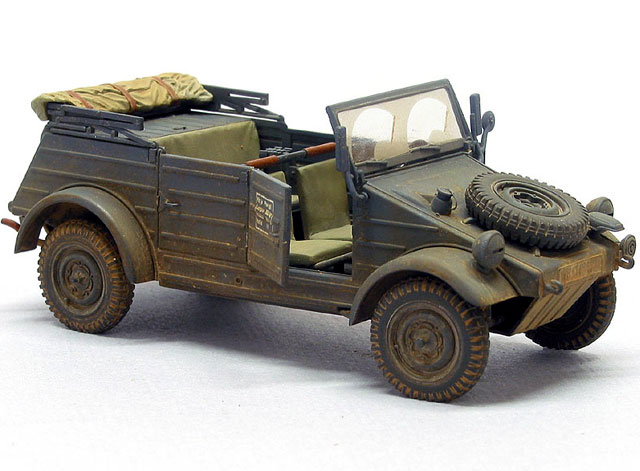
Weathering was accomplished with
MiG Pigments. European Dust was slopped liberally over the entire model,
with more being applied to the lower surfaces. Clean turpentine was then
brushed on the pigment to set it in place and wash it into the recesses.
More turpentine was used with a clean brush to move the pigment around to
get the right patterns and distribution. The underside and wheel wells
were painted to look like dried mud with a thick coat of pigment mixed
with turpentine.
The windshield wiper marks were
masked off with tape cut with a compass and a solution of MiG pigment,
water and dish soap was airbrushed lightly over the model. Before removing
the masks, a small amount of pigment and water was applied with a fine
brush to the end of the wiper blades’ travel.
Living in Toronto in the middle
of winter, I had just to look in my own driveway to see how and where
grime accumulates on a passenger vehicle!
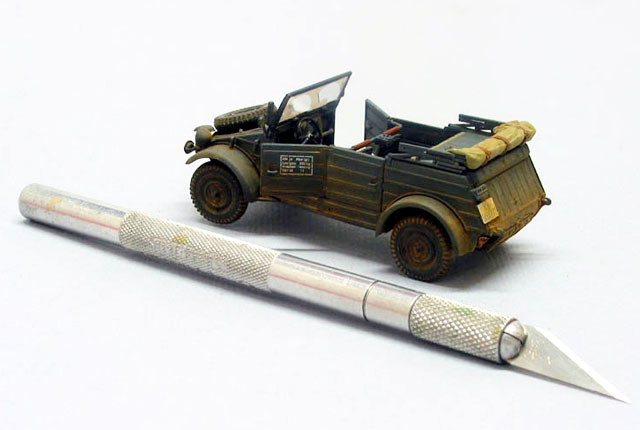
Along
with their Kettenkraftrad and Mototug, Tamiya’s 1:48 Kubelwagen is part of
a very encouraging product trend. It’s becoming a bit repetitive to keep
saying so, but this new kit from Tamiya, along with all of their other
recent releases, offers nice detail, great fit and engineering.
Now Mr
Tamiya-san, how ‘bout that Jeep?
Click on the thumbnails
below to view larger images:
Model, Images and Text
Copyright © 2004 by
Tony Bell
Page Created 11 March, 2004
Last Updated
12 March, 2004
Back to
HyperScale Main Page |
 Home
| What's New |
Features |
Gallery |
Reviews |
Reference |
Forum |
Search
Home
| What's New |
Features |
Gallery |
Reviews |
Reference |
Forum |
Search