|
Vector’s 1/48 scale resin
Lavochkin La-5
by
Ian Robertson
|
 |
|
Lavochkin La-5 |

HyperScale is proudly supported by Squadron.com
Early in the Great Patriotic War it became clear
that Russia’s LaGG-3 fighter was no match against its German
counterparts. The LaGG-3 was unforgiving, overweight, and under
powered. In an effort to improve performance, the LaGG-3’s wooden
airframe was fitted with an M-82 radial engine, giving birth to the
Lavochkin La-5 series. The La-5 weighed more than the LaGG-3, but it
was faster and had greater firepower. The La-5 entered service in mid
1942 and remained in front line service well into 1944, although by 1943
it was beginning to be replaced by other versions of the fighter, such
as the La-5F and La-5FN.
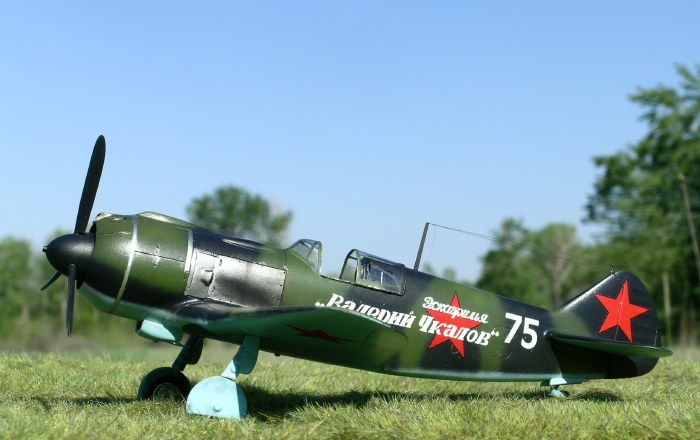
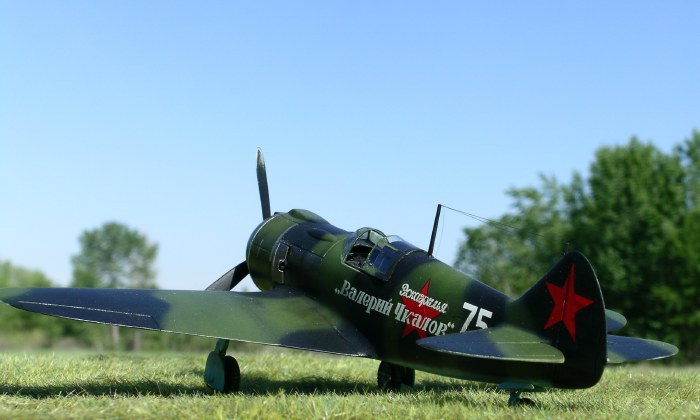
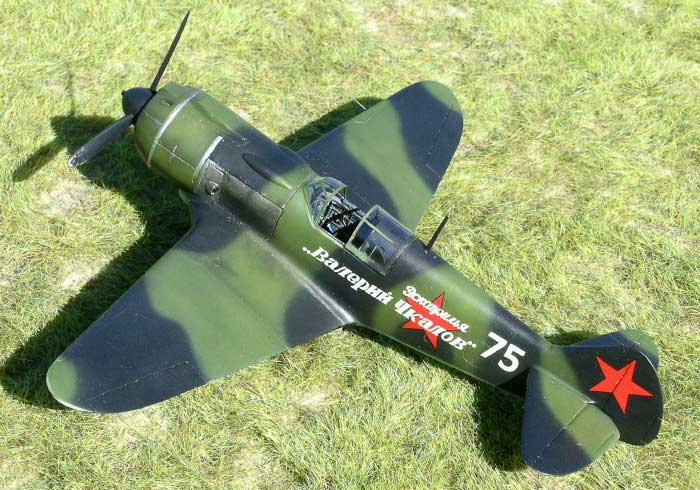
Here I present “white 75”, an La-5 piloted by Ivan
Kozhedub, 240 IAP, mid 1943. The inscription on the fuselage reads
“Valerij Chkalov Squadron”, in honor of a popular Russian test pilot who
was killed in 1938.
Vector’s 1/48 scale La-5
Vector is a Russian company known for producing
superbly detailed resin engines in various scales. The La-5 is the
first complete aircraft kit from the company, and it has since been
followed by the La-5F. A series of LaGG-3s and a Yak-9T have also been
announced. Vector products are distributed in North America by Buffie’s
Best
http://www.buffiesbest.com/
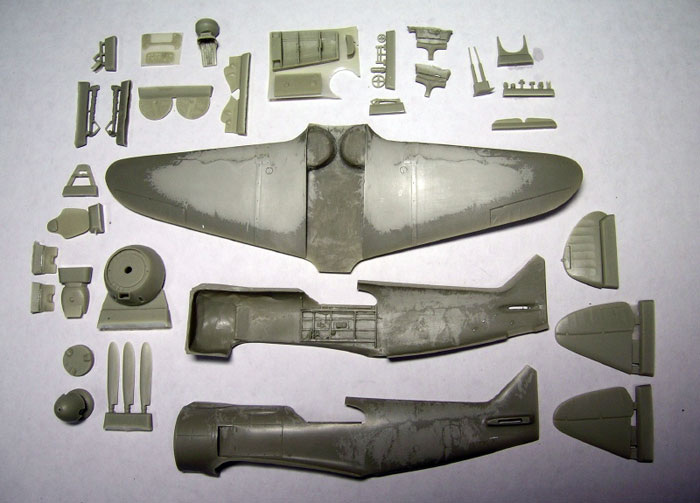
The Vector La-5 kit is molded in sand-colored resin
and features finely engraved details set in flawlessly (albeit oddly
marbled) smooth surfaces. Apart from removing molding gates and washing
the parts in warm soapy water, little cleanup and preparation was
required. There were no pits or imperfections in the surface details of
my kit, and having bought two additional Vector kits I can say that this
is true of all of them.
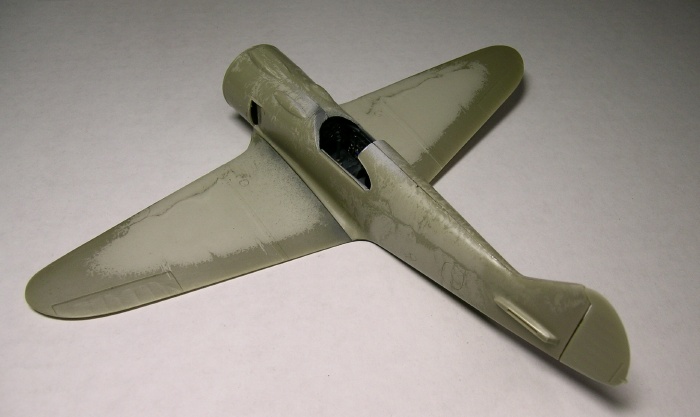
The breakdown of parts is very simple. The wing is
molded as a single solid piece, and the fuselage comes in two halves
(plus a cowl ring) with cockpit details modeled into the side walls.
The majority of parts in the kit relate to the cockpit. The main
undercarriage struts are molded in resin, but Vector had the ingenuity
and foresight to insert a wire down the center of each strut for
strength. Two vacuform canopies are included in the kit, representing
the different canopy styles of early and late La-5s. There is no room
for error unless you ignore the differences in canopy styles or you
change your choice of markings should you require the second canopy.
A surprising inclusion in the kit is rubber wheels
from a company called Avia Equipage. These wheels are not the same high
quality as the rest of the kit, but would work in a pinch. I opted to
replace the main wheels with True Details resin La-5 wheels, available
from Squadron. I used the rubber tail wheel that came with the kit.
Construction was straight forward and simple. In
fact, this was one of the easiest kits I have ever built, injection
molded or otherwise. The fit is excellent and rivals or exceeds many
injection molded kits. Even the undercarriage was a breeze to attach.
Nevertheless, it is essential to dry fit because CA glue is unforgiving
when it comes to repositioning parts.
The cockpit is well detailed yet spartan, as one
would expect in a Russian fighter of this era. I painted the cockpit
bluish grey in an effort to approximate “Wood Aerolak” as indicated in
Pilawskii’s “Soviet Air Force Fighter Colours 1941-1945” (pp 14, 64).
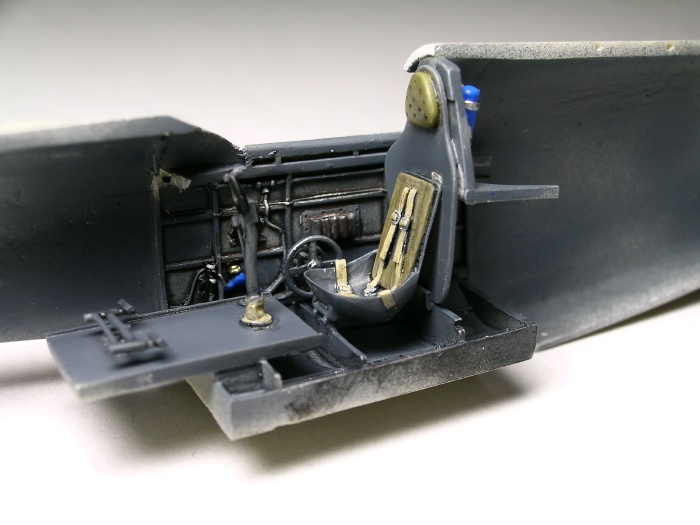
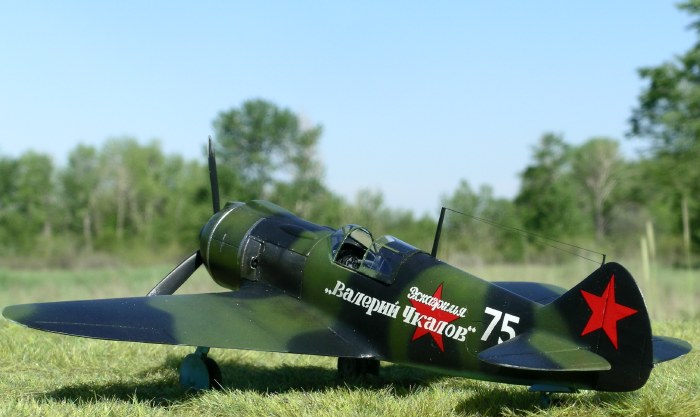
The most tricky part of construction for me was the
canopy. I chose to position the canopy open to show off the cockpit, so
it was necessary to detach the windscreen from the rear sliding
section. Fairing the windscreen to the fuselage was accomplished using
CA glue (to secure the canopy), followed by white glue and Tamiya putty
to fill gaps along the join. For the small windows behind the cockpit I
opted to make my own using clear acetate (the vacuform pieces supplied
would have been difficult to fit properly). I made a template for each
rear window by placing a piece of Tamiya tape over the opening and
cutting it out along the edges with a #11 blade.
The kit does not include a pitot tube or antenna
mast. I made a pitot tube by inserting a piece of syringe tubing into a
small plastic fairing that I then attached to the underside of the
starboard wing.
A suitable antenna mast was found in my spares
box. The antenna wires were made from stretched sprue.
 Prior
to painting the camouflage I primed the model with Tamiya fine grey
primer in a rattle can. Once the primer was dry I buffed the surfaces
lightly with a micromesh sanding cloth. Prior
to painting the camouflage I primed the model with Tamiya fine grey
primer in a rattle can. Once the primer was dry I buffed the surfaces
lightly with a micromesh sanding cloth.
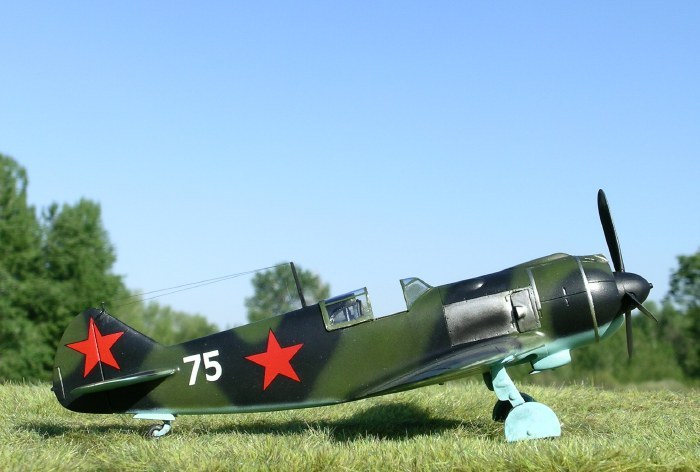
According to Pilawskii’s book, the La-5 was
camouflaged AMT4/6 (green/black) over AMT7 (blue). I mixed my own
version of AMT4 using Polly Scale RLM62, 67, and 82 (I have a lot of RLM
paints on hand). For AMT6 I used a mix of Polly Scale RLM66 and black,
and for the underside blue I used Polly Scale USSR underside blue mixed
with white.
I opted for an asymmetric fuselage pattern as
described by Pilawskii.
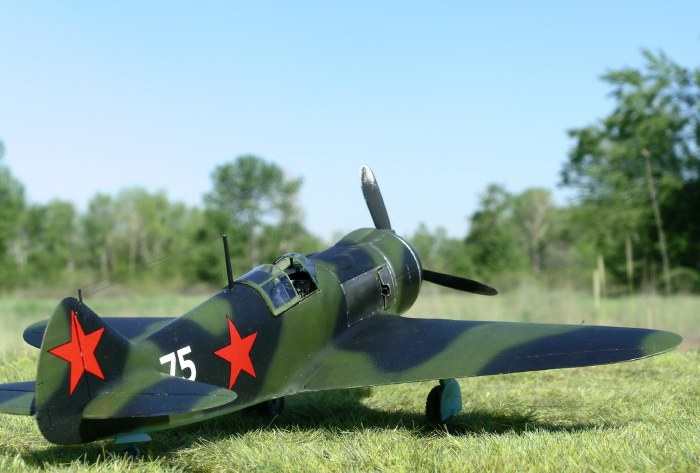
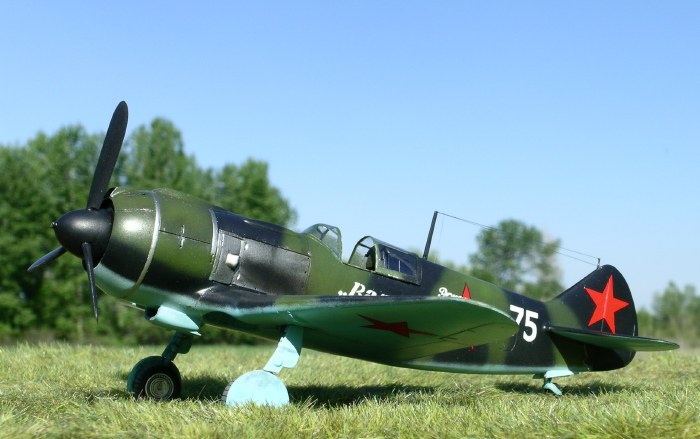
The panel behind each exhaust was painted with
Alclad II duraluminum. The exhaust stains were made by spraying highly
thinned black paint.
I used the kit decals for the slogan and number,
but opted for Aeromaster decals for the national markings. The kit
decals are fine, although I prefer the deepness of the red in the
Aeromaster decals.
I really enjoyed building this model and am
currently working on the Vector La-5F. Although construction was simple
and easy, I wouldn’t recommend this kit to modelers lacking experience
with resin.

The kit is expensive, so mistakes resulting from
inexperience would be tough to swallow. However, if you have a few
resin cockpits under your belt you should have no difficulty with this
kit.
Click on the thumbnails
below to view larger images:
Model, Images and Text Copyright ©
2006 by Ian Robertson
Page Created 15 May, 2006
Last Updated 15 May, 2006
Back to HyperScale
Main Page
|
 Home
| What's New |
Features |
Gallery |
Reviews |
Reference |
Forum |
Search
Home
| What's New |
Features |
Gallery |
Reviews |
Reference |
Forum |
Search