|
Hasegawa's 1/72 scale
Avro Lancaster
B.Mk.III
by
Christopher Wilson
|
 |
|
Lancaster B.Mk.III |

Hasegawa's 1/72 scale Lancaster B.Mk.III is available online from Squadron.com
Background
The Lancaster was a four engine heavy bomber
developed by Avro. Initially known as the Manchester it was less than
satisfactory due to its engine configuration. This was changed in 1941
when Rolls Royce Merlin engines were used instead of the RR Vultures
used on the Manchester and the rest is history.
Hasegawa's 1/72 Lancaster in the box
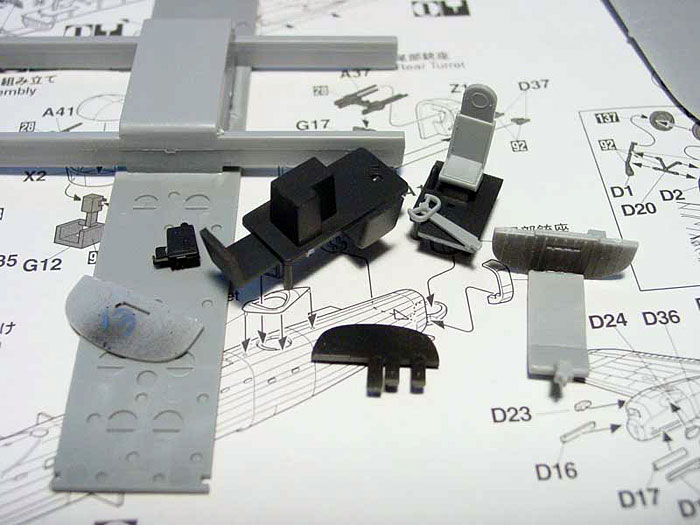
The box contains 16 sprues, comprising 249
parts in light gray plastic along with a sizeable number of nicely done
clear bits.
The instructions follow 16 steps and are
quite well done, even the color call outs for the subassemblies are for
the most part correct. The quality of the molded parts is excellent with
no flash though the fuselage does have two visible sink marks on the
upper fuselage just in front of the turret.
Decals are well done and cover 2 aircraft
from 467 Squadron. The first is the famous PO*S, the second, PO*V. My
only beef with the decals is # 17, which is the writing on the nose for
PO*S does not spell “Reich” correctly For some reason Hasegawa spell it
“EICH” leaving out the “R”.
I did not use the kit decals, which turned
out to be a big mistake for me, but more on that later.
The kit goes together, but not without a
little work. I should note that compared to a short run kit, this is a
cake walk, but there are issues that I think you should not have to deal
with on a model from a manufacturer such as Hasegawa with a price tag
like this Lancaster.
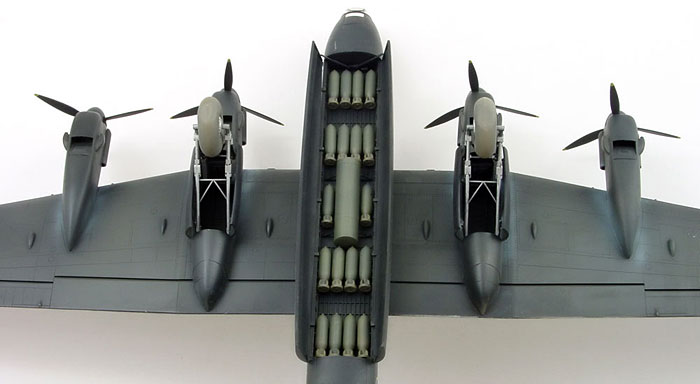
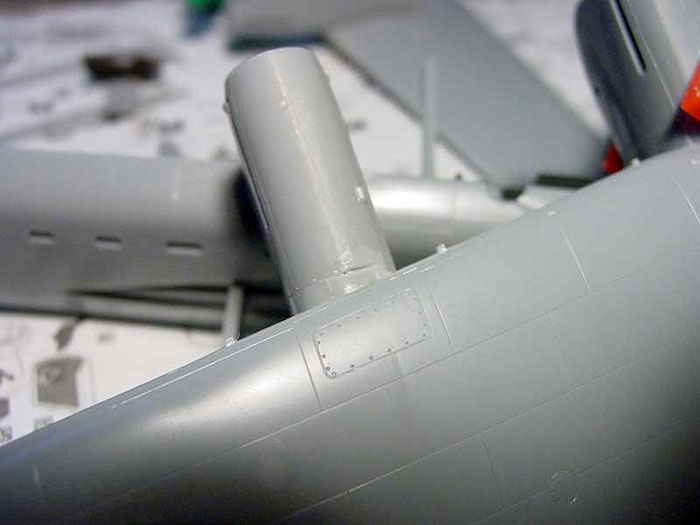
The fit on all of the engine nacelle parts could be better and the join
of the outer nacelles to the wings is really poorly done.
The next poor area of fit is the nice clear
turrets. The rear turret is fiddly at best and the fuselage plug (I1 &
I2) needs to be shaped to accept the finished turret. The dorsal turret
fairing fit is a little off and the same can be said for the front
turret fairing as well. However, with just a little modeling work all
this can be overcome quite easily, I just did not want someone to get
the idea this kit fits like a glove.
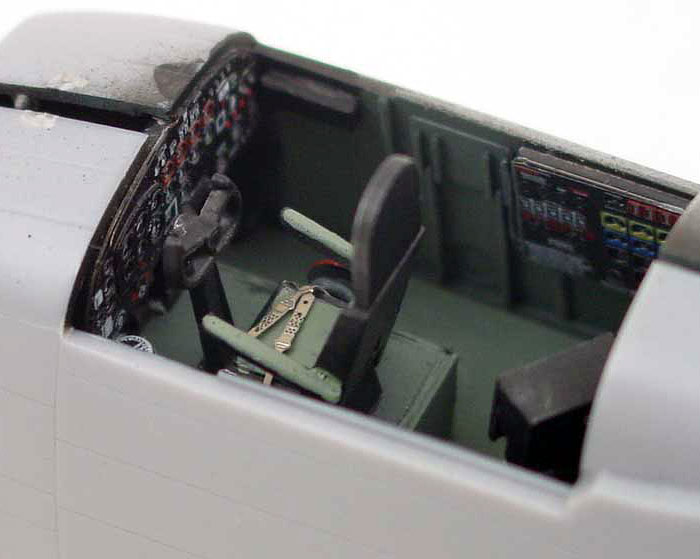
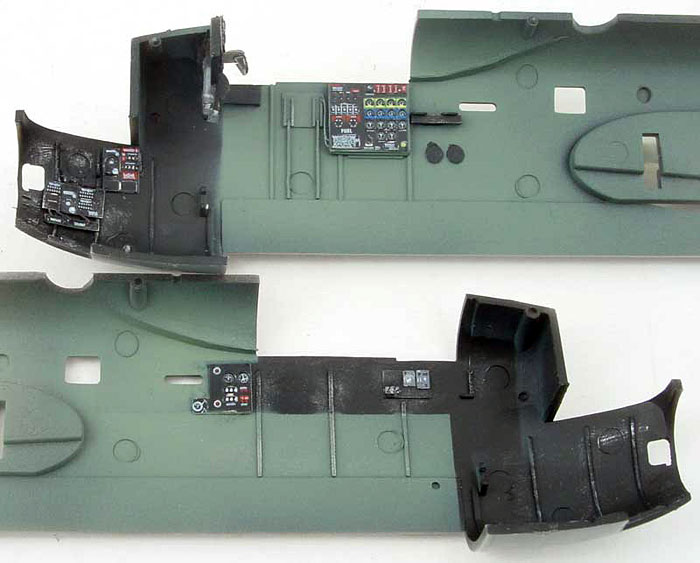
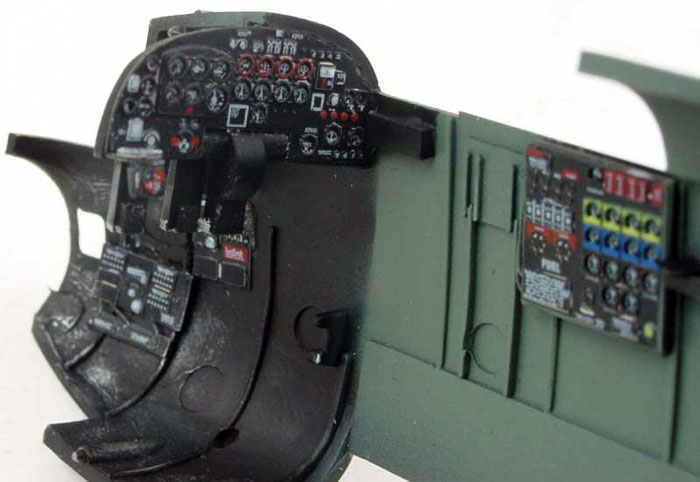
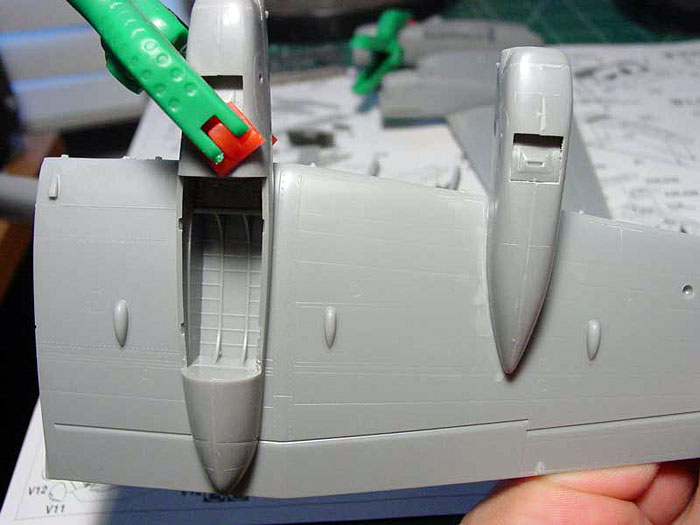
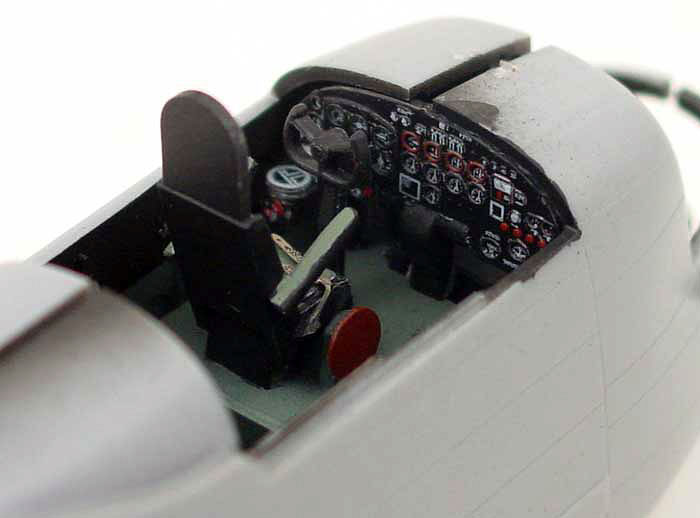
Assembly starts with the interior and I took some liberties here and
added some parts. The Hasegawa interior leaves a lot of detail out. This
is for the most part OK because very little can be seen after the canopy
is added anyway. However, a little scratch building goes a long way in
the pilot’s area specifically. Also, I used the excellent pre-painted
Eduard PE interior set. I cannot say enough good things about this set.
It fits perfectly, is easy to work with and makes the model look much
better. This would be money well spent!
Click the thumbnails below to view larger
images:
Next I assembled the engine nacelles and the
wings. As noted, the fit could be better here but a night of sanding and
Mr. Surfacer and I was back in business.
Finally, I closed up the fuselage and cleaned all seams. This again
takes a little more patience than I was used to for a Hasegawa kit, but
no worries and soon the wings were attached.
At this point it started to look like a Lancaster. Next are the dreaded
transparencies. For this I was sent the Eduard masking set. This is
basically the same stuff as Tamiya tape pre cut to fit all the windows
and the wheels. Sounds good right? In a way it was. This stuff is far
better than the old masking material Eduard used, but it is sticky and I
found that not all the windows were cut exactly right. Close, but not
dead on. Positioning is also hard because once on, the material doesn’t
really want to slide around without deforming in shape. The good part is
that for the inside of the rear turret, wheels and the bomb aimer’s
blister these masks cannot be beat. For most of the rest of the glazing
I gave up on the masks and used my own method of Bare Metal Foil. Some
people are going to love these. If you are afraid of this type model
because of the masking then set is probably something you will enjoy
having.
Gluing on all the clear parts is next and then painting begins. I first
primed the model in black and gray and while I had the paint out I
painted assembled prop assemblies, landing gear parts, and wheels
putting them aside for later.
Painting
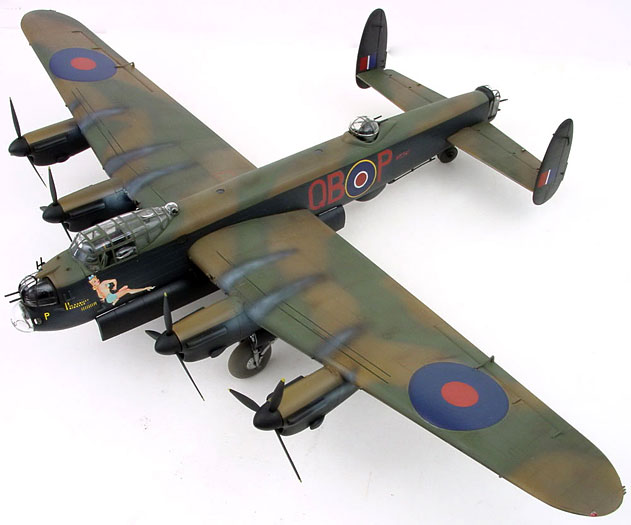
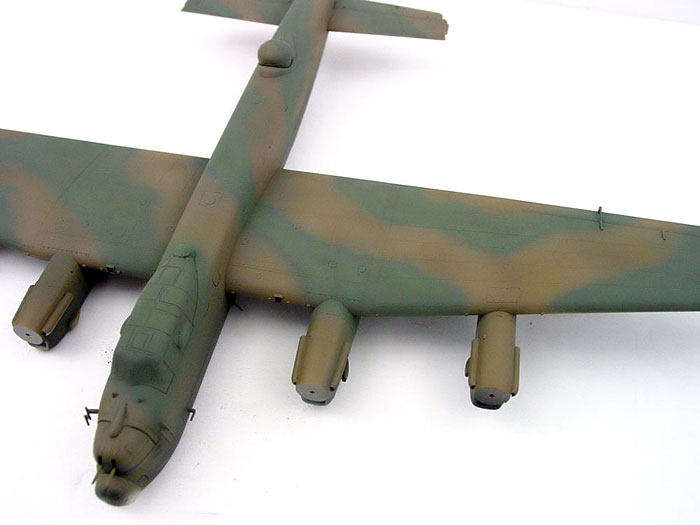
The Lancaster is big and to help break up
the monotone look I used several shades of Dark Earth and Dark Green on
the upper surfaces.
I loosely freehanded the camo and went back
with various shades of color and tightened the pattern and produced some
fading.
Once dry the top was masked and the black
was added. For this I used Polly Scale Brunswick Green as a true black
won’t look right in this scale.
Once everything was painted and dry I glossed and began working on the
upper surfaces with a filter of leather. This helped blend things
together and lightened the colors. Again the whole filter process helps
remove some of the toy like appearance.
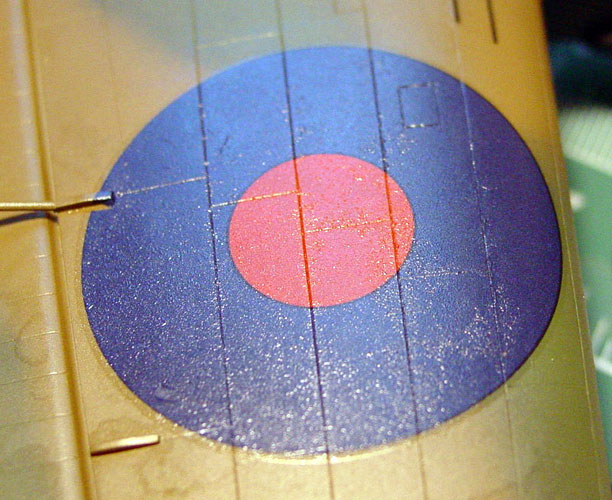
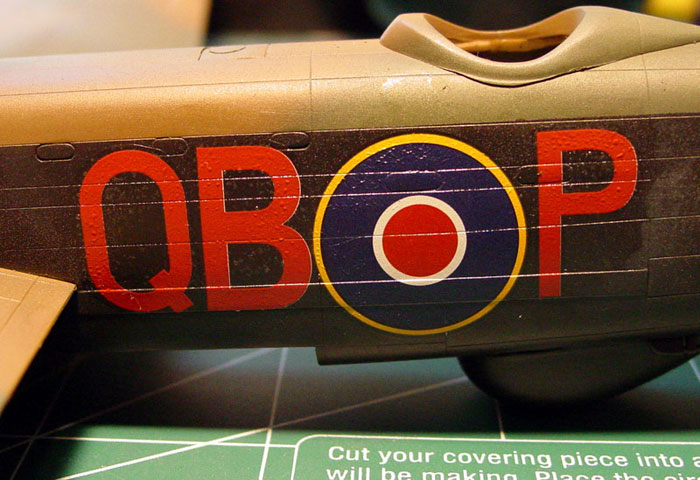
Decals
After the filter I was ready for decals and
this is where my trouble started.
I used the Zotz sheet because I wanted to
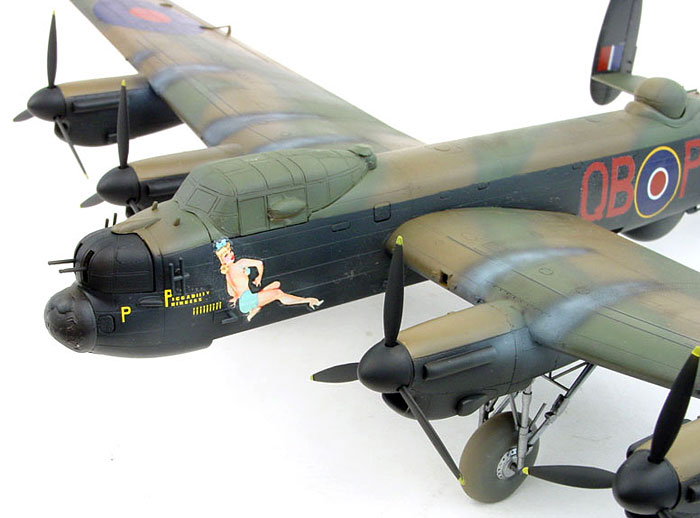
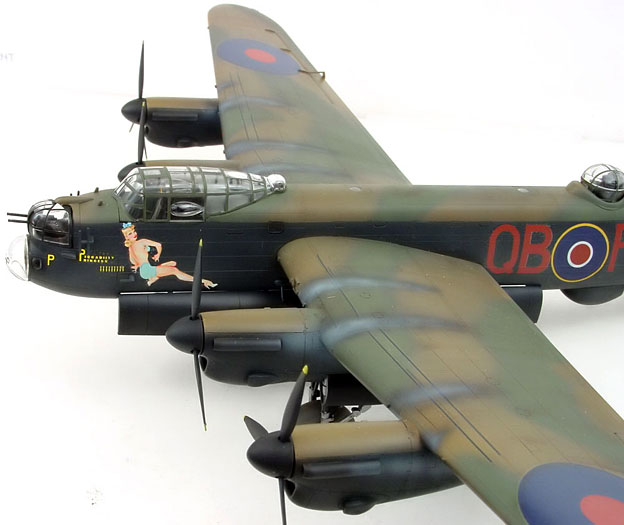
model QP*B “Piccadilly Princess” and this turned out to be a mistake. I
had never used Zotz before and so I tested some spare code letters on a
Spitfire wing prepared the same as the fuselage. I used 3 letters and
three different solutions. Solvaset, Microsol, and Microset. Microset
didn’t react well at all. Solvaset was a little too hot, but Micosol
worked fine. So I went on with the process of application to the model
on something went horribly wrong. Not only were the code letters QP*B
off register but they silvered and bubbled badly. The wing roundels were
even worse.
By this time I was really disappointed. I
applied the rest of the decals as best I could. After much cutting and
many applications of Microsol, Future, and even Lacquer Thinner I had
then looking OK from about two feet. This was a huge disappointment
after all the time invested and I will not be using Zotz decals again.
Even if somehow the application was messed up by me the off register
code letters were nothing I could help and there is nothing worse than
an off register red code letter on a black fuselage.
After I was done with the decals I made a wash using mineral spirits and
raw umber oil paint, streaking the upper wings and fuselage in the
direction of airflow.
Exhaust was applied with thinned black and
gray and the model received a final coat of clear flat with a drop of
sand mixed in the uppers and a drop of gray for the sides and bottom.
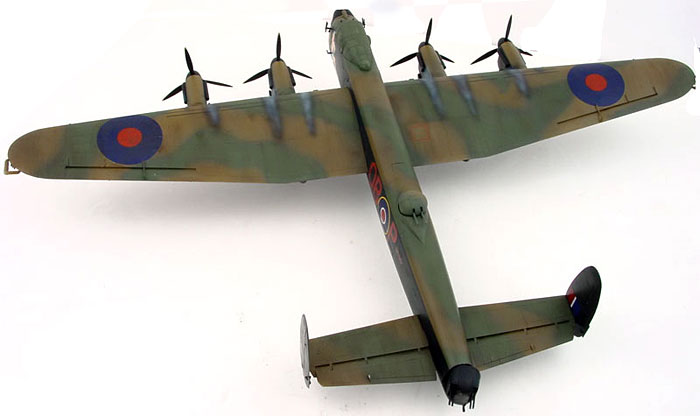
This is a huge kit and a great looking Lancaster once done. If you are
working on a collection of WWII bombers the Lancaster fills a hole and
looks great next to the B-24 and B-17. Hasegawa went out there with this
one and I think it pays off. This kit didn’t disappoint.
The decals were a let down, but if I had
used the kit marking I’d probably be a happy modeler.
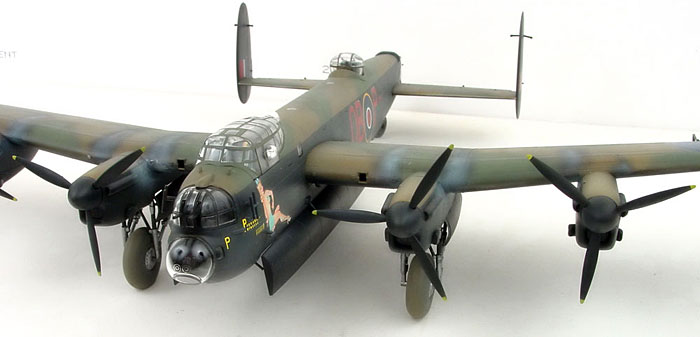
If you are looking for you first four engine
subject to tackle this one should be it.
Thanks to Dragon USA, via Saul Garcia, for the Lancaster and Eduard
Masks. Direct thanks to Eduard for the PE interior. Overall rating 8.
Click the thumbnails below to view larger
images:
Images and Text Copyright ©
2006 by Christopher Wilson
Page Created 15 August, 2006
Last Updated
21 February, 2007
Back to
HyperScale Main Page |
 Home
| What's New |
Features |
Gallery |
Reviews |
Reference |
Forum |
Search
Home
| What's New |
Features |
Gallery |
Reviews |
Reference |
Forum |
Search