|
Revell's 1/48 scale
Gates Learjet
C-21
by Marcel Meres
|
 |
|
Gates Learjet C-21 |

Revell's 1/48 scale Learjet is available online from Squadron.com
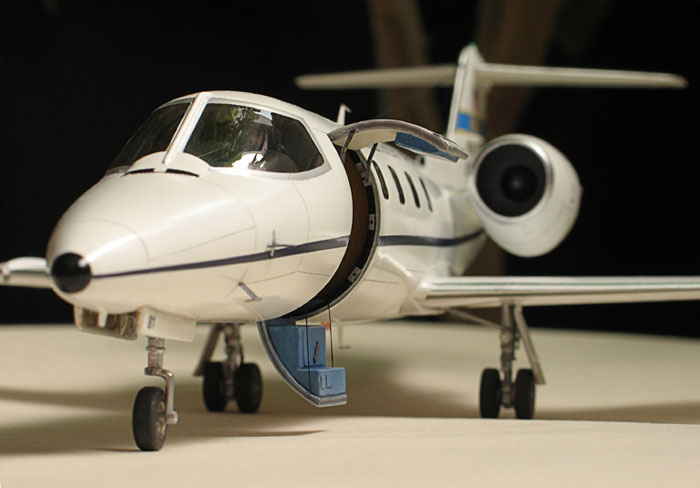
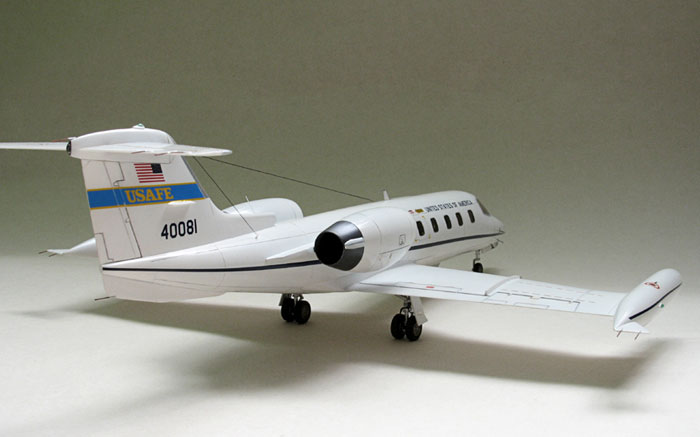
This is my 1/48 scale Gates Learjet C-21 kit released by Revell
Germany> This kit was formerly released by Hasegawa.
Starting to build this lovely plane I told myself: "build it
quickly, straight out of the box, without detailing!"
At least, that was the plan.
I wanted to build the military version of a Learjet. After a closer
look I recognized there were the engines used with the civil Learjets
inside the box. After a while I started with fixing this problem an then
– to my surprise - rebuilding this kit part after part.
Engine Corrections
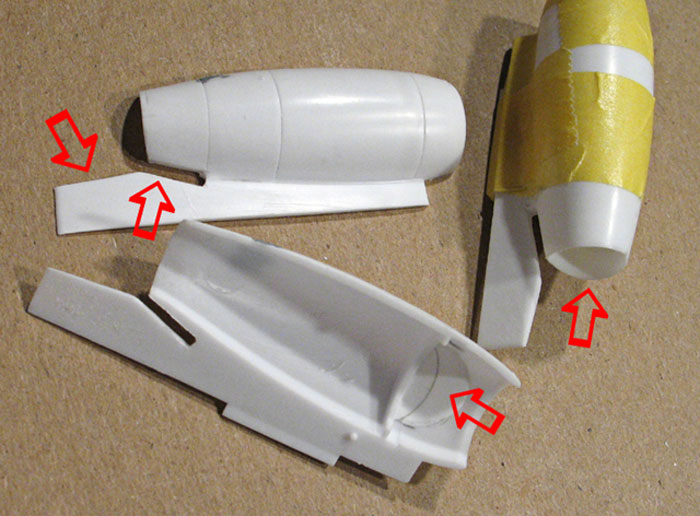
I tried to remake the shape of the rear part of engines and their
pylons at first. Then I add a styrene plates inside of the Jet intake
walls - to push them closer to the reality. I also had to scratchbuild
the covers of an outflow reversal mechanizms and slightly changed the
shape of the reversal’s edging.
Interior
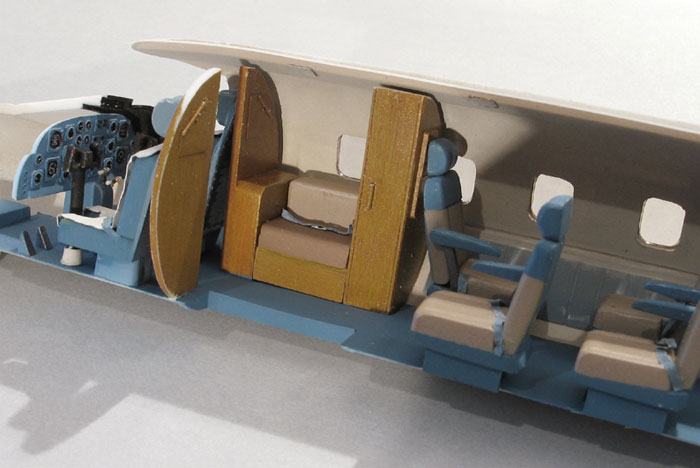
I intended to make my Lear with opened door, so some detailing inside
a plane looked like necessary to me. I started with remaking the seats
but I rather made them brand new then - according to the gained
photographs. Unsatisfied with the „holes“ in the side walls (around the
windows) I tried to fix it covering the inner walls with a 0,2mm styrene
plates.
After I had rescribed the panel lines and closed the kit, the new
surprise appeared! Watching the photographs I realized that the most of
USAF LearJets (C-21A) have more windows then civil versions (35A)! So
building this military Lear, you should add one window on the side where
the door is. The number of windows on the opposite side is correct, but
I also saw the LearJet with the 4 windows and also 5 windowed Lears but
all the windows were moved one step (the window–to–window distance)
backwards. I decided not to repair my window problems this time. The
next Lear ? May be…
Click the thumbnails below to
view larger images:
Undercarriage, Lights and other details
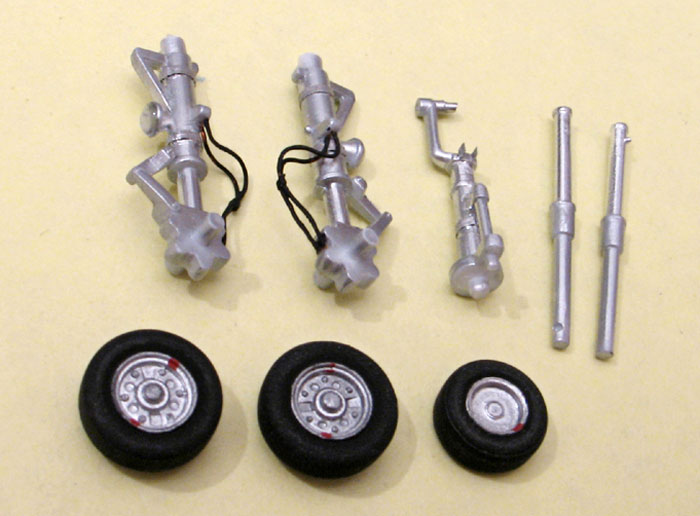
I made some minor changes to the undercarriage too. The nose wheel
was molded as one piece with the strut. After cutting the wheel away
from the strut (damaging the wheel) I had to make the new wheel (of a
styrene) and a new axle. The main undercarriage was upgraded with brake
hoses and “the epoxy drops“ onto the front and flattened surfaces made
the landing lights.
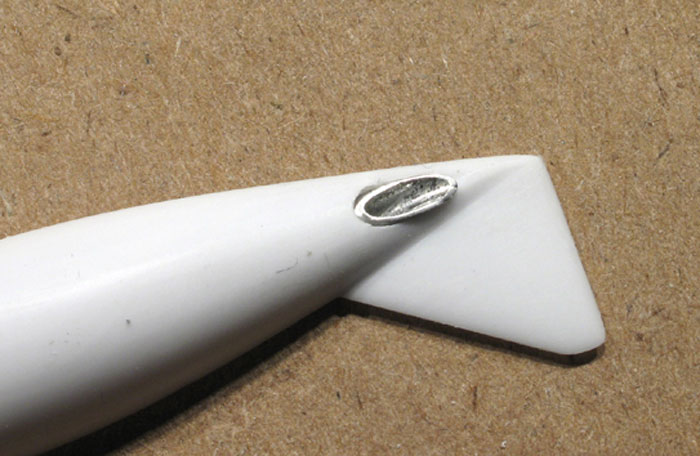
This technique was also used for the anti collision lights cover on
the tail and new drop-like shaped position lights (both wing tanks,
bottom of fuselage and tail top). The lights which are on the front of
both wing tanks (these lights have black inward halves) were made of
spare missile transparent heads (in 1/32 scale). The fuel tanks also
acquired the metal tubes at their rear bottom ends.
And some more little additions were made when finishing the kit: the
various new probes were scratchbuilded using very thin metal quilting
needles, thin styrene and metal aluminum foil. The foil was used also
for the door details. The antennae cords were made of 0,1mm silon and
heat stretched after gluing into the ending holes.
The white finish was an experiment with multiple airbrushed layers of
highly polished Mr. Base White 1000 and then covered by Mr. Color Gloss
Super Clear. The rescribed panel lines were accented using light grey
Vallejo color + dish washing soap mixed 1:1. As I made it, the lines
seemed too dark on the white surfaces, so I had to calm lines down using
the acrylic white color + soap + water.
After decalling and weathering - applying various kinds of “dirt“ I
sprayed Mr. Color Semigloss Super Clear on top (The windows have been
masked all the time of course). Shiny metal parts are ALCLAD II Polished
Alluminium, with exception of the engine exhausts, where the Model
Master Metallizer was used, polished and then oversprayed lightly using
brown color.
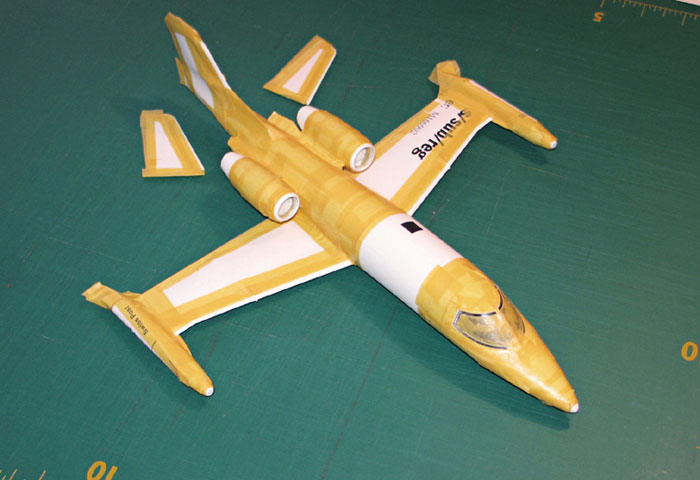
Masking
I had unpleasant feeling when masking the metal surfaces of the
engine intakes - frontal edges and especially the narrow inner parts of
them. These surfaces have curvatures in two axes, so it was not easy to
mask them… cutting very thin band of masking tape solved this problem.
I used the original Revell decals to make LearJet C-21A with a Serial
number 40081 United States of America in Europe. The decal sheet
includes the numbers in range for various USAF and USAFE serials.
So what is left to say in the end? I can say it was exciting to build
this old and inexpensive - but still very interesting - kit of a famous
plane. Do not hesitate to try it too.
Marcel
Click the
thumbnails below to view images full-sized.
Click the "Back" arrow on your browser to return to this page.
Model, Images and Text Copyright ©
2006 by Marcel Meres
Page Created 13 June, 2006
Last Updated 12 June, 2006
Back to HyperScale
Main Page
|
Home
| What's New |
Features |
Gallery |
Reviews |
Reference |
Forum |
Search