|
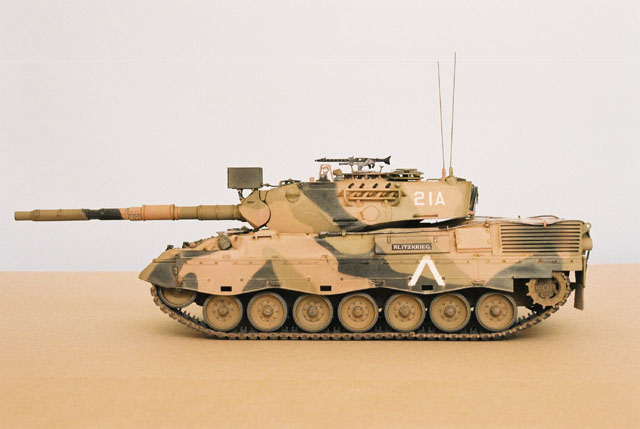
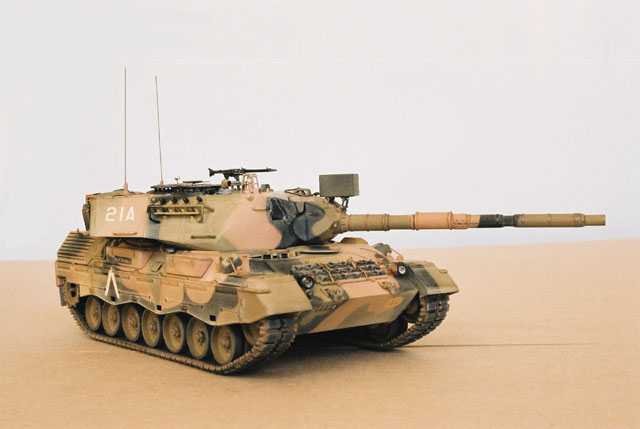
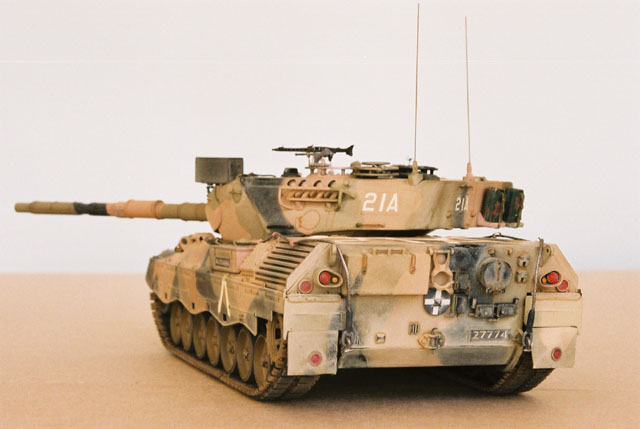
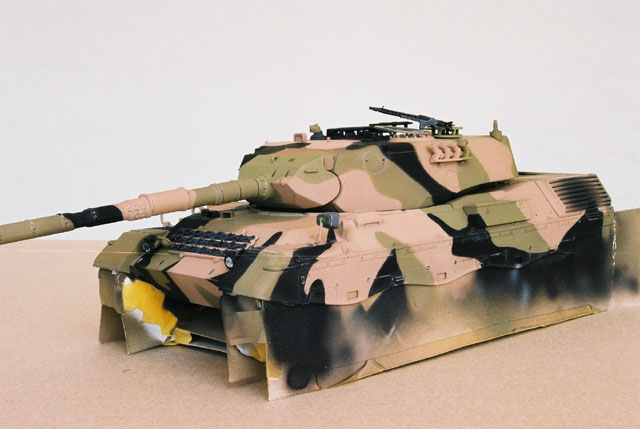
Australian Leopard AS1 MBT
|
 |
|
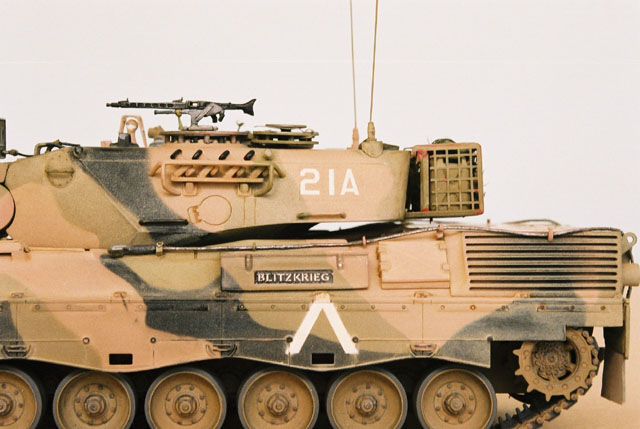
Australian Leopard AS1 MBT. B
Squadron, 1 Armoured Regiment |
by
Bruce Graham

HyperScale is proudly supported by
Squadron
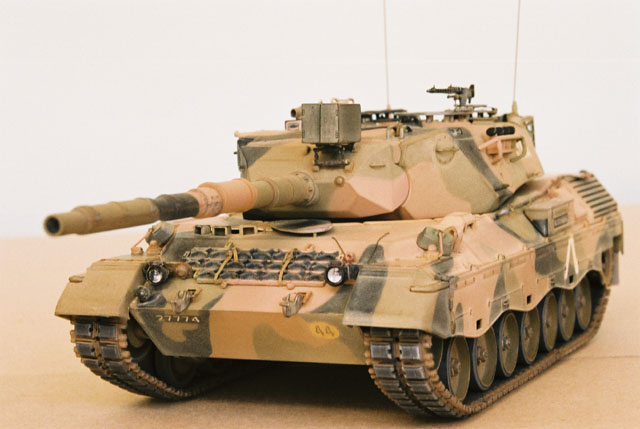
Tamiya 1/35 ‘West German Leopard A4 (A4) was the kit first obtained
as a starting point. Quite a nice kit. Armour Bits (AB) conversion kit
for the AS1 was then obtained. This consisted of resin parts with metal
etched fret. The Revell ‘Leopard 1A5’ (1A5) was obtained last to fill in
some blanks. Italeri jerry can set was also used. Any other part
required was modified from something or scratch built.
References
Anzac Steel on HyperScale
provided a wealth of vehicle detail.
The reference section of Perth Military Modelling Society and
Sentinel also provided very welcome additions of detail. Added to these
are pictures from other sites and printed matter that I could obtain.
Along the way it is always enjoyable to see the models others have
submitted to various sites.
Assembly... and
lots of modifications
|
The A4 and 1A5 are both nice kits of their respective versions of the
Leopard. The AB kit really gets the conversion going and has the added
interest of resin and etched metal parts.
After the assembly of chassis, hull and turret, the modifications began
on the detail. These mods went from end to end several times. Some mods
are described.
The A4 chassis, hull and turret were assembled before the AB kit
arrived. AB parts were worked into the A4 or simply prepared for
addition at the appropriate stage of assembly. Constantly referring to
references revealed what was missing or needed modifying – such as
cables. These came with the 1A5. Now I could compare parts supplied by
both kits that could go into the AS1.
This meant a straight out substitution of some parts awaiting assembly –
only sacrificing time and effort on any preparation – and working into
the model other parts preferred – such as removing the A4’s NBC unit and
adding the 1A5 NBC unit – these little operations really start chewing
up time.
Otherwise there was generally a merging of bits from all three sets. A
nice example are the hooks and braces supporting the searchlight. Nice
1A5 hooks cut into mantle, A4 braces and then AB hooks attached to
searchlight. Lot of fiddly stuff, but satisfying later.
Detail seen in references was added in turn and sometimes revealed some
other item that needed modification. The chains and brackets on left of
glacis sit so- and so to the track grousers. The brackets are scratch
built, the AB grouser is shortened about 1.5mm to be relative to
brackets, driving light assemblies and hull shape. Scratch build Grouser
straps and substitute nice little bolt brackets from the 1A5 grouser to
AB grouser.
The AB wind sensor is nice but is nicer if the solid top is replaced
with a clear piece. The driving lights are improved by drilling out and
making lenses. The metal etch bracket over the wind sensor is very thin
– I opted to make something rather more substantial and that could be
added last with minimum impact to paintwork. Some off-cuts of fret make
reasonable machine gun brackets, hatch detail and cable brackets.
Mud flaps and mountings are very neat, but removing the flaps and
replacing with rubber sections and adding reflectors brings some more
dimension to an otherwise out-of the-way part of the model.
The A4 supplies one set of electrical boxes on rear plate. The AS1 has
two sets. One set supplied is a welcome guide for scratch building the
second set.
I opted to scratch build the jerry holders from plastic card. Make some
straps. The Italeri cans come up quite nice.
AB supplied two carry baskets. I modified one slightly and omitted the
other to display the jerry cans.
Camouflage
I mixed green and brown to match images. In hindsight the green might
be darker to offset the effect of ‘applying dust’. Quite some time went
into the cam pattern.
The camouflage I was aiming for was that of a 1 Armoured Regiment
vehicle in the early 1980’s.
Markings
Markings had to match. These were obtained from images. The squadron
marking I am confident is B squadron.
Being unable to obtain the brass stencil set for Australian armour I
made digital markings and printed to Experts Choice Decal film. After
coating, these were applied. A mask was cut from the same sheet for
large tac number over engine grill and chevron. Smaller tactical
markings came from the decal spares box. It is very satisfying to use a
mask and spray markings on.
Click the thumbnails below
to view larger images:
Model, Images and Text
Copyright © 2004 by
Bruce Graham
Page Created 31 August, 2004
Last Updated
31 August, 2004
Back to
HyperScale Main Page |
 Home
| What's New |
Features |
Gallery |
Reviews |
Reference |
Forum |
Search
Home
| What's New |
Features |
Gallery |
Reviews |
Reference |
Forum |
Search