|
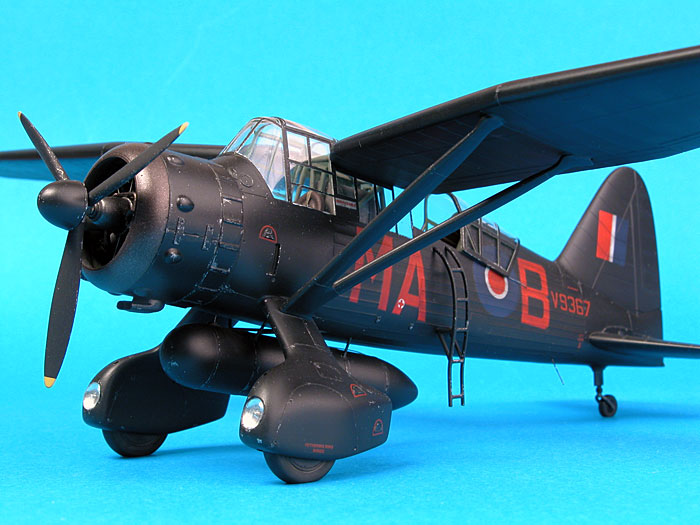
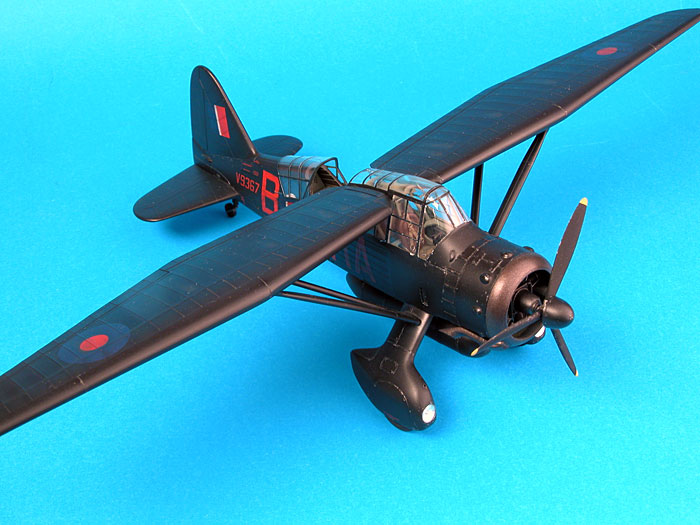
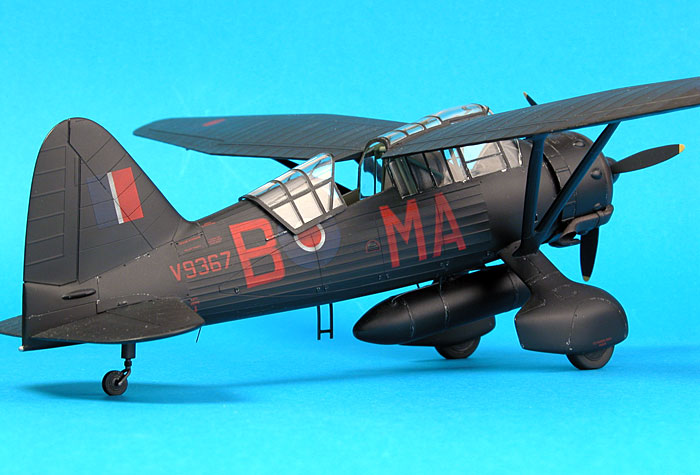
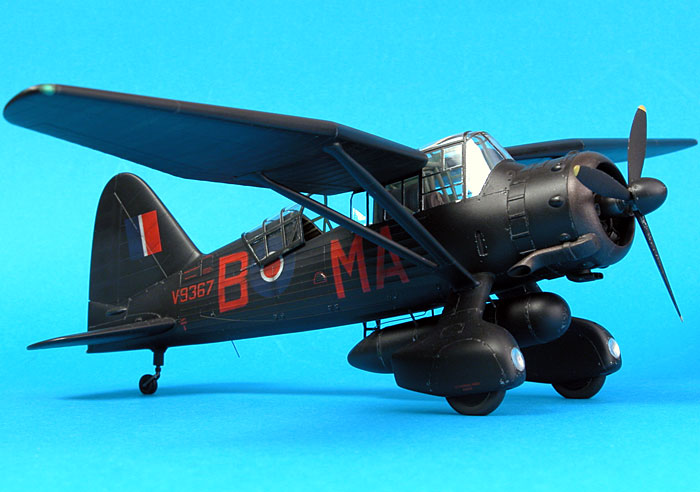
Westland Lysander
Mk.III SD "Special Duties"
by Thomas Wielecki
|
 |
|
Westland Lysander Mk.III SD
"Special Duties" |
images by Brett Green

Eduard/Gavia's 1/48 scale Lysander is available online from Squadron
After completing my first model, an Messerschmitt Bf 109G-6 from
Hasegawa, I wanted something different in every way. So what better than
a high wing, radial engined, spatted and English aircraft from a
different manufacturer. As soon as I spotted the Lysander in a hobby
shop I bought it.
As my experience in plastic is limited to say the least, I can't really
comment on the quality as compared to other makers. All I knew that like
the Hasegawa 109, it was very nice with some minor flaws. The plastic
felt somewhat different to work with. The Hasegawa styrene was a
bit more brittle and harder; while the Gavia was more like frozen
chewing gum.
The main problems were the underwing struts. If placed as per
instructions the Lysander would turn out with a fair bit of anhedral.
The underwing holes were filled with putty and new one drilled out, no
big deal. The other problem was that the cockpit was too wide for the
fuselage so the floor and top ledges had to be shaved. Again not really
a problem. Slight fit problems were encountered with the five piece
glasshouse, but nothing that a bit of sand paper wouldn't fix.
Whatever extra detailing I added was scratch built from bits of plastic,
wire and tissue paper for the harnesses. In the cockpit I only drilled
out holes that were meant to be holes and not just dimples in solid
plastic. The most prominent of those is the rear seat/stool that only
appears to have a lap belt and in a photo reference looked like a sieve.
Of course the large exhaust pipe was also hollowed out as far as
possible.
Painting,
Weathering and Markings
|
I really wanted to weather the aircraft and make it appear like it
had a bit of a life and not just a hangar queen. The most troublesome
step was the chipping. I tried with thin brushes and silver pencils and
all I got was shapeless blotches that looked like shapeless silver
blotches. I wanted chipped paint. In the end I decided to do exactly
that, chip the paint. All the canvas areas were masked off and the rest
of the airframe sprayed with buffable Testor's Metalliser; the stuff
that stays on your fingers after it's dried. I thought if it does that
then paint won't stick to it too well either and it'll be easy to chip.
I was right. The whole aircraft was the sprayed with a mix of Tamiya
black, navy blue and red brown in a ratio I care not to remember. All I
wanted was to break the black.
Chips were then scratched off with a new blade.
Following that a wash was added, then the airfarme sprayed with gloss
clear for the decals. One of the kit decal options was chosen. Delicate
streaks and a bit of shading here and there was added then overcoated
with matt.
A weird thing then happened. The decals would assume a perfect matt
finish while the painted areas became a semi gloss. I followed some
advice I saw on HyperScale and mixed some methylated spirits into the
matt clear, it worked.
For those who care, the particular aircraft modelled was based at
Tempsford in 1944. That's what Gavia paint option 3 tells me.
Model and Text Copyright © 2004 by
Thomas Wielecki
Images Copyright © 2004 by
Brett Green
Page Created 19 May, 2004
Last Updated
20 May, 2004
Back to
HyperScale Main Page
|
 Home
| What's New |
Features |
Gallery |
Reviews |
Reference |
Forum |
Search
Home
| What's New |
Features |
Gallery |
Reviews |
Reference |
Forum |
Search