|
Tamiya's 1/48 scale
M4 Sherman
by Roger Fabrocini
|
 |
|
M4 Sherman |

Tamiya's 1/48
scale M4 Sherman
is available online from
Squadron
This is Tamiya’s new 1/48 scale M4 Sherman tank. Those needing an
introduction to this new kit should see Steve Palffy’s review on
HyperScale’s review page.
Those needing an introduction to the M4 Sherman Tank just need to get
out more.
Modeling "Breaks"
I think I can speak for most modelers and say that there comes a time
when we need a break, be it from modeling in general, or just a change
of scenery. This new Tamiya M4 fit the bill for me.
Being a closet Shermaholic the subject was perfect and being a new
product line for Tamiya, in a new scale, I did not know of any resin or
photoetched sets to impede the swift completion of the M4.
Ignorance is Bliss
My ignorance of available detail sets worked to my advantage. I was
forced to exercise my scratch-building skills and avoid an accessory
induced drain on my bank account. (though not entirely, as we shall
see).
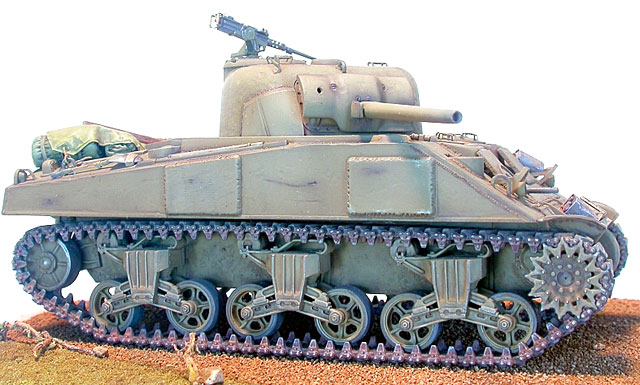
Modeling the Sherman
Welcome to the world of a Shermaholic. A world of cast or welded
hulls, various transmission covers, roller mounts, bogie wheels, tracks,
hatch covers, wet or dry storage, high or low bustle turrets and a host
of other detail ’minefields’. Luckily Tamiya’s Sherman is well detailed
and accurate, allowing me to concentrate on refining that detail.
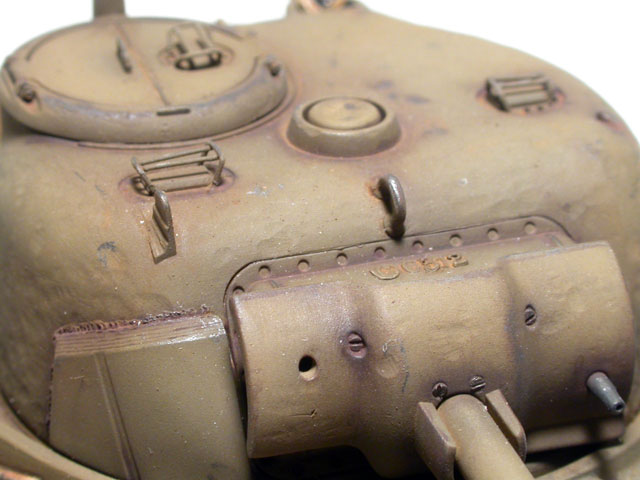
Scratchbuilding Detail
Besides the ’workout” my punch sets got adding bolts to the bogie
trucks and hull, I used plenty of .010” plastic rod for periscope guards
and grab handles. Hull welds were built up using liquid cement thinned
3M acrylic blue glazing putty. Cast texture of the hull, turret and
transmission cover was achieved using a ball cutter in my Dremel tool
(thank you Mr. Phil Stutcinskas). If I may be allowed the indulgence, I
am most proud of the mantlet detail.
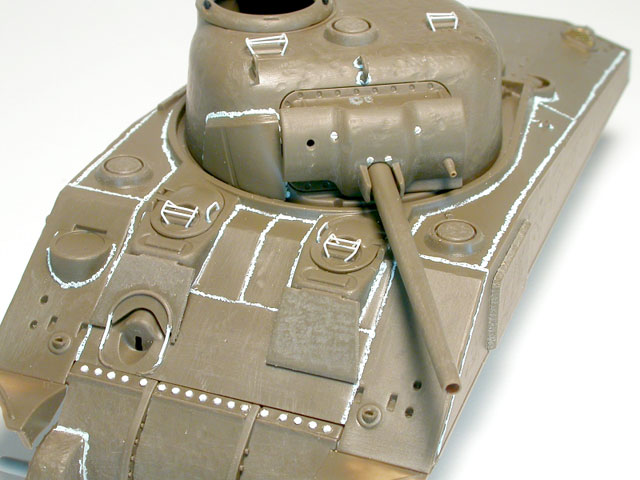
Casting numbers were sourced from a Tamiya P-51B spruce, chiseled off
with a scalpel then glued on with Tamiya liquid cement (keeping it all
in the family, so to speak) The mantlet mounting screws were made by
scribing a thin line in a piece of .010” plastic card then aligning it
with the middle of my Waldron punch. Instant screw heads.
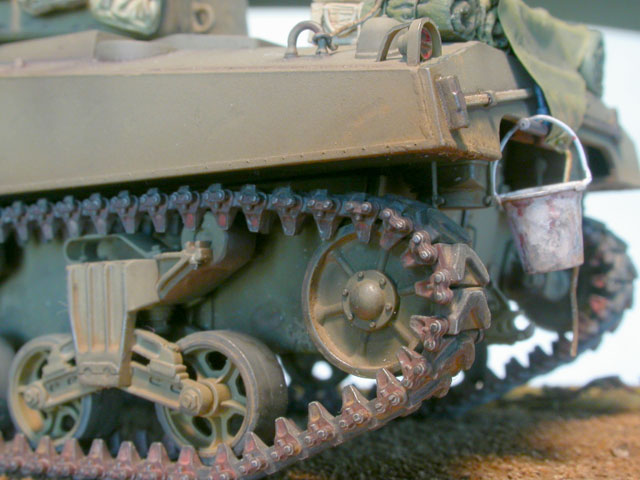
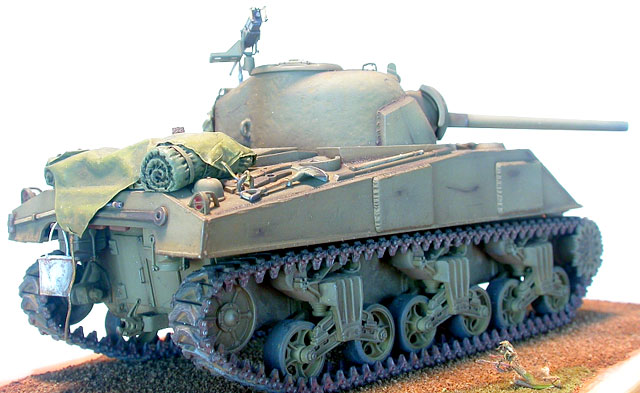
Stowage
It may be written somewhere that you can not model a Sherman tank
without external storage piled on. Mine were sourced from some 1/72
scale CMK sets I had.
After the model was done I picked up Tamiya’s new jerry can set, and
that is where the packs and bucket came from.
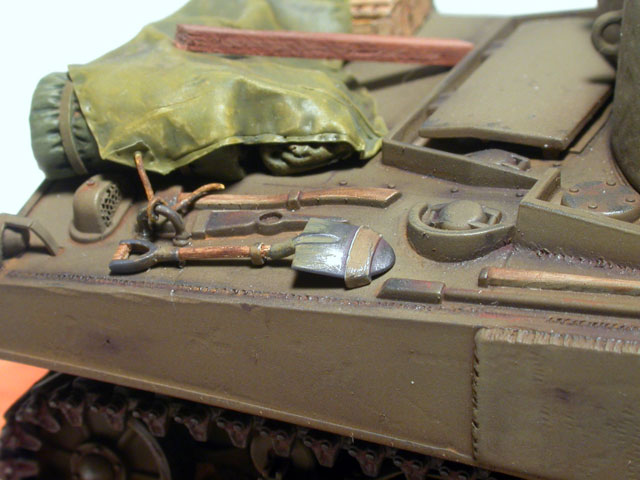
The tarp over the storage is foil from a wine bottle.
Painting
I am not being coy when I say I have no idea how I achieved
the final finish. Any paint in my possession that was in the green range
I sprayed on the Sherman. I will say I started with Mr. Color O.D. 34087
then misted on thinned layers of Aeromaster O.D faded #41 and Tamiya
Olive Drab, among others. Post shading with straight Tamiya O.D. and
red-brown/black mix was also used.
Weathering
It’s what armour modeling is all about, no? A little bit of
controlled wash was used around deep recesses and weld seams. Most
weathering was done with weathering powders. CMK Lt. earth and Dk.
earth, and a mix of CMK Lt. rust and Black smut were applied both dry
and wet. Mig Productions Lt. rust and standard rust were used on the
track links. Worn areas were replicated using various grades of lead
pencils.
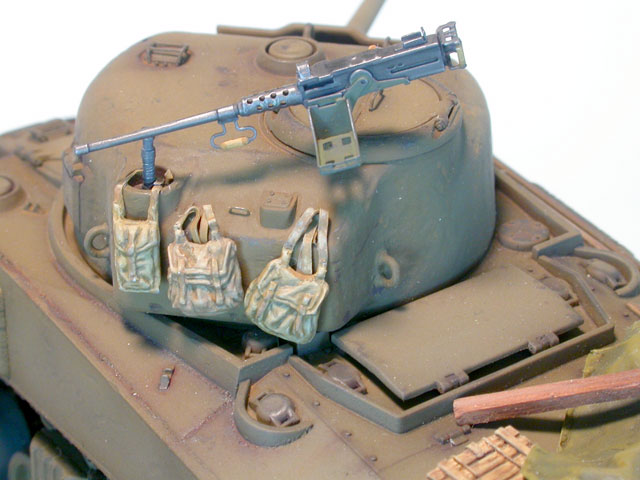
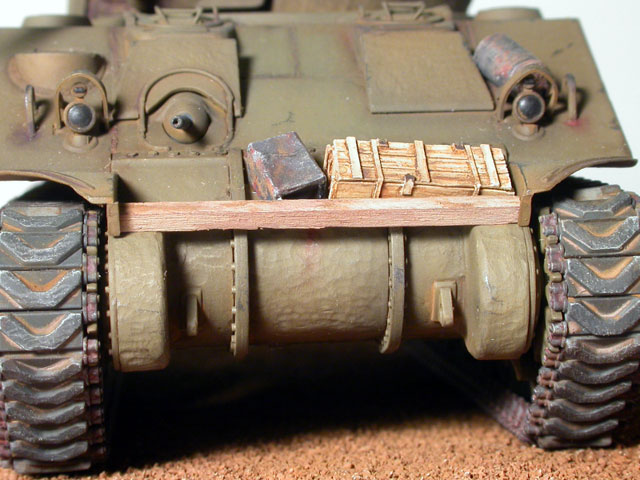
Finishing Touches
All storage , tools and equipment were painted using Vallejo
acrylics.
Half way through the build I became aware of Track 48, a Canadian
website created by Garfield Ingram, devoted to 1/48 scale armour (who
knew?) My obsessive-compulsive tendencies got the best of me and I broke
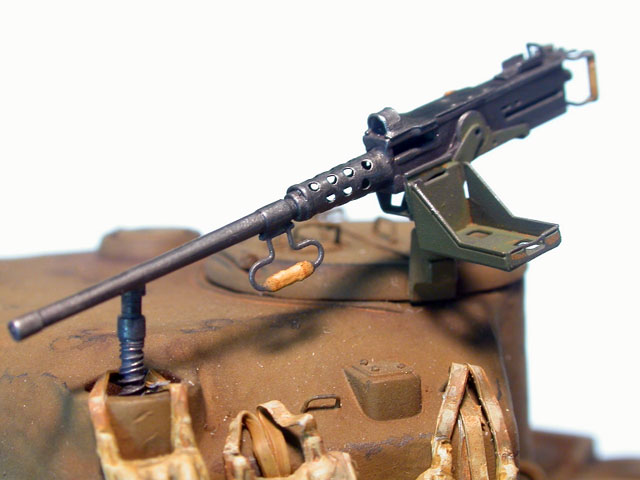
down and acquired a Hauler photo etched set for the turret .50 cal. A
nice addition and a fine set.
My little foray into the world of armour modeling gave my a chance to
hone some scratch building and weathering skills that I had neglected or
forgotten. though I’d rather see Tamiya put their mold machines to use
producing plastic wings, I wish them good luck with this product line. A
nice diversion for this “flyboy”.
Click the
thumbnails below to view larger images:
Model, Images and Text Copyright © 2005
by Roger Fabrocini
Page Created 19 May, 2005
Last Updated
18 May, 2005
Back to
HyperScale Main Page |
 Home
| What's New |
Features |
Gallery |
Reviews |
Reference |
Forum |
Search
Home
| What's New |
Features |
Gallery |
Reviews |
Reference |
Forum |
Search