|
Extratech's 1/72 scale
M4 Sherman
by Glen Porter
|
 |
|
M4 Sherman |

Extratech's 1/72 scale M4 Sherman is available online from Squadron.com for
USD$6.46
images by Brett Green
Until Extratech got in on the act, there were only
about five 1/72 Shermans on the market. Some were good and some were
not. The only M4 was by Hatt and was quite accurate but being aimed at
War-gamers, was not very detailed.
Extratech's 1/72 scale M4 in the box
On opening the Extratech box,
[kit No EXM72035] I was impressed with the amount of detail in it,
including “link and length tracks”, but some of the sprues are straight
from the M10/achilles kit, which means there are a lot of parts not
used.
On closer inspection, you will
find that the detail is a little bit soft though still quite good and
most of the parts need some clean up. For-instance, the road wheels have
a prominent seam around the centre, which will need to be filed off.
There appears to be a problem with the kit instructions, as there is a
note in the box, which says to ignore the numbers and work off the
diagrams only. Unfortunately some of the diagrams are a bit vague on the
placement of some parts, so be warned.
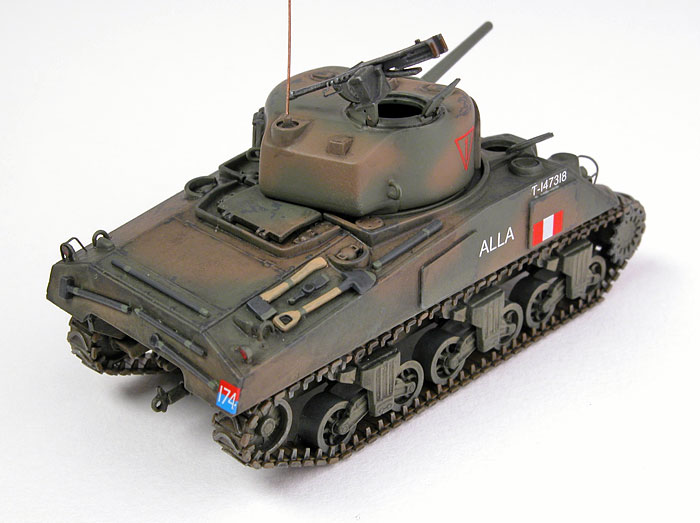
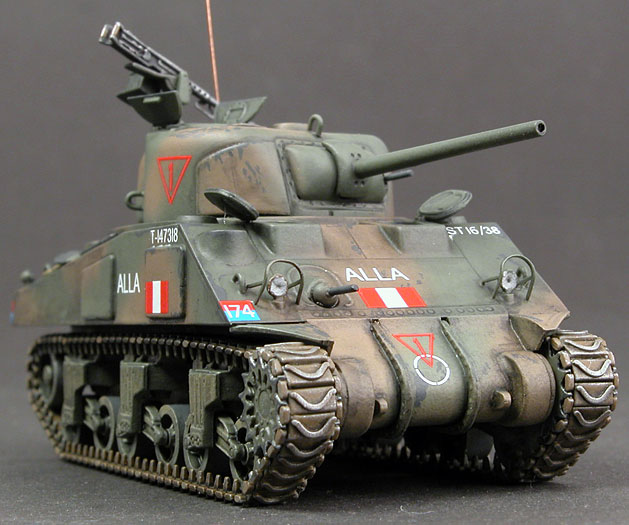
The decals, as usual for Eduard/Extratech, look very nice and offer four
alternatives - two British, one US and one Canadian. However, one of the
British vehicles, “Shaggy Dog” is not an M4 but an M4A2. Right hull,
wrong engine deck. The Canadian offering may also be an M4A2 but I don’t
have a photo and if they got one wrong they may have got two wrong.
However, I like the Canadian scheme the most so, right or wrong, that’s
the one I was going to do.
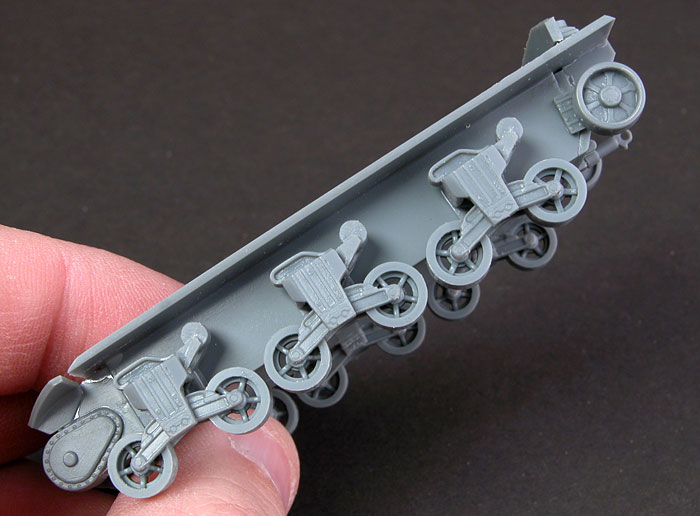
The first job is to assemble the
six bogies, including the road wheels, which are made up from eight
parts each so there’s a lot of cleaning up to be done right at the
start. Caution!. Make sure all of the road wheels are aligned when you
glue the bogies on to the lower hull; otherwise the tracks won’t fit
properly. You get a choice of three transmission covers [nose pieces]
and the instructions tell you to use the three-piece one. The other two
are for later models. This is made up from five parts, the main section,
two bolt flanges and the two bulges that go on the outer edges. Again,
the instructions are a bit vague about which way round these four small
parts go on. I would advise fitting the main part to the lower hull
first, then work out the others. Next, the lower hull rear is fitted.
Leave the exhausts, air-filters and tow coupling till later.
A major problem arises now. There is no positive position for the drive
wheel and return wheel mounts. I would advice again, if you can’t work
it out your self, ask some one or look at a similar model. To get it
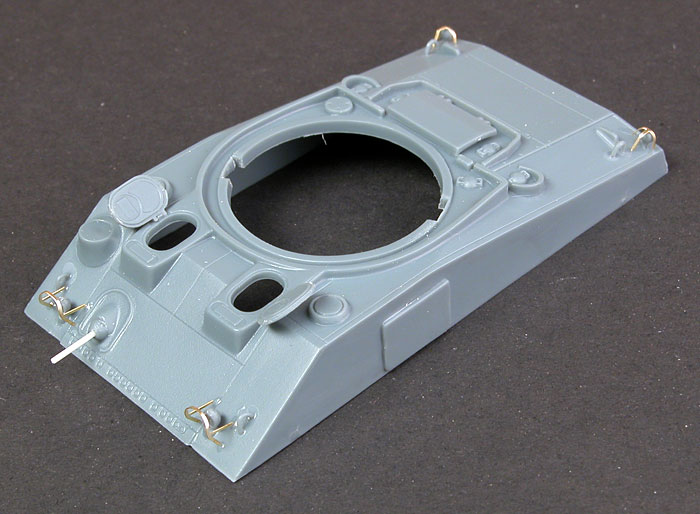
wrong will cause problems later when you fit the tracks. At this point I
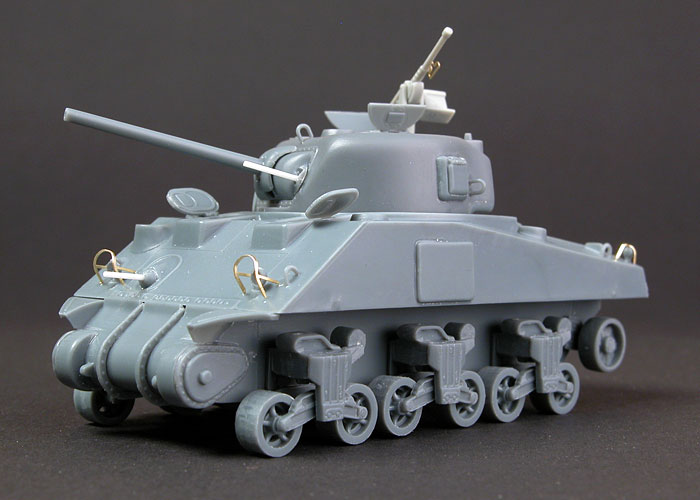
test fitted the upper hull and found that it did not want to go on to
well but a bit of filing around the inside of the glacis plate and it
fitted fine. I didn’t glue it on though as I want put figures in it
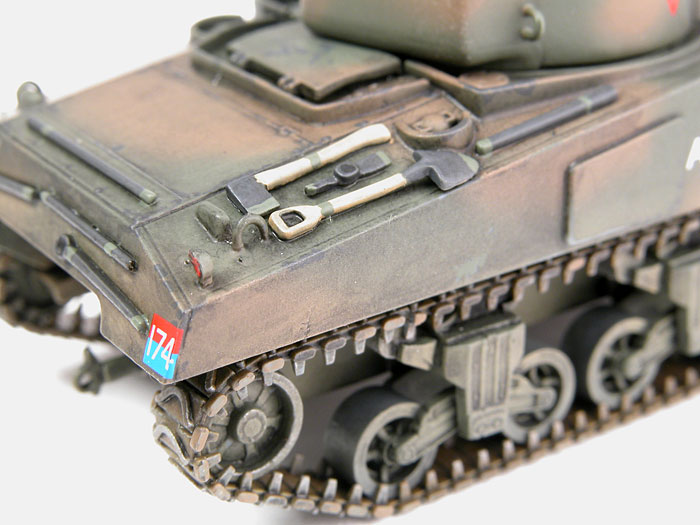
later. Everything that goes on the upper hull is small and fiddly and
can be hard to clean up, such as head lights, tail lights, lifting rings
and the like, but persistence and a good magnifier help. I’m told that
most M4s in Italy had the extra armour so I fitted that along with the
driver hatches and engine intake cover.
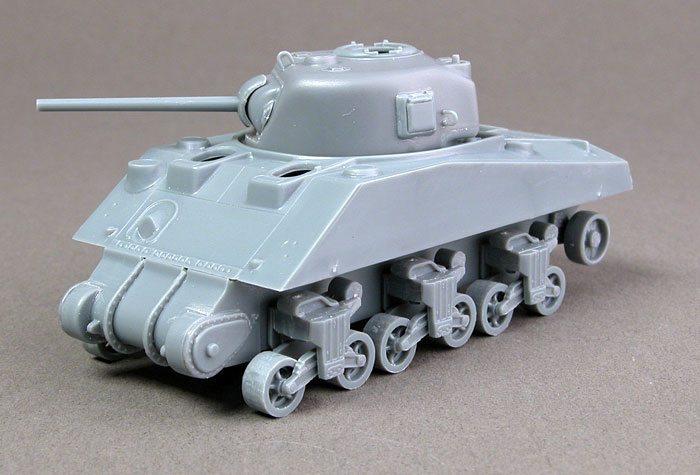
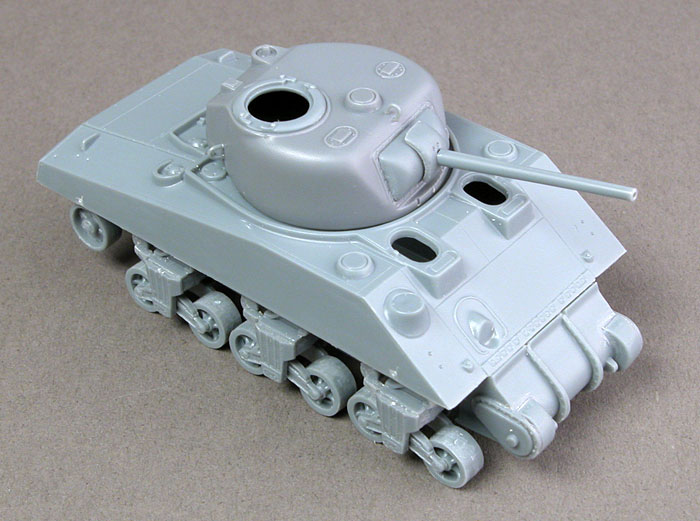
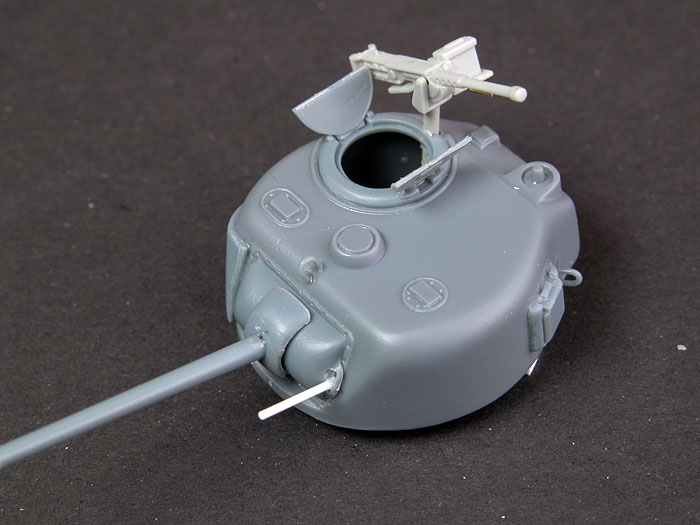
The next item of concern is the two-piece turret. The problem is, it
doesn’t have anything to hold it on to the upper hull. This means you
glue it on or it drops off every time you invert the model. After
assembling the turret, including the gun mount, I scratch built a device
to hold it on to the hull while allowing it to rotate. With the turret
upside-down I glued two pieces of shallow channel to the turret roof
vertically, and to the inside of the turret ring on opposite sides,
extending about two millimetres above the ring. Then another piece of
the same channel was glued across the first two with a length of about
two to three millimetres longer than the inside diameter of the aperture
in the upper hull. Then two small slots were cut in the lower hull
turret ring to allow this horizontal channel to pass through when the
turret was placed on top. By turning the turret left or right it would
not drop off.
Extratech does not supply a coaxial machine gun for the turret. As far
as I know, all Sherman’s had them. A slot was cut in the fixed mantlet,
a hole drilled in it and a piece of plastic rod was glued in as a gun
barrel.
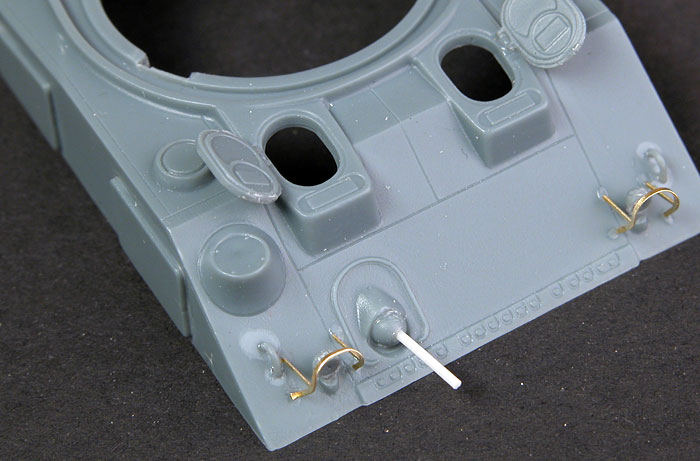
Next, all the small bits were
glued on the three sub-assemblies including the PE light guards. A few
small problems here: the exhaust outlets don’t look anything like the
drawings on the instructions and I would suggest you use the numbers to
identify the correct part. The hull machine gun barrel was too short so
after the ball mount was glued on and dried the barrel was cut off and
replaced with plastic rod.
Click the thumbnails below to view larger
images:
The return wheels, when dry
fitted to the model, were too close to the side of the hull and didn’t
align with the other wheels. The existing axle was cut off, a hole
drilled and a short length of rod glued in which stepped the wheels out
a bit. The drive wheels were not fitted yet but I assembled them. Make
sure the teeth on either side line up or other wise you will again have
trouble when fitting the tracks. More on this later.
Everything was now ready for
painting. The fun part!
I had recently bought the first
four British Army colours from WEM. One of the colours was a bit of a
mystery as I could find no reference for Khaki Drab [ARB 03] but I
assumed that it was British Olive Drab, As the instructions for the
Canadian Sherman specified Olive Drab and Dark Earth, I decided to use
the Khaki Drab. I’ve since noticed that WEM have replaced Khaki Drab
with British Olive Drab so I may have got it right.
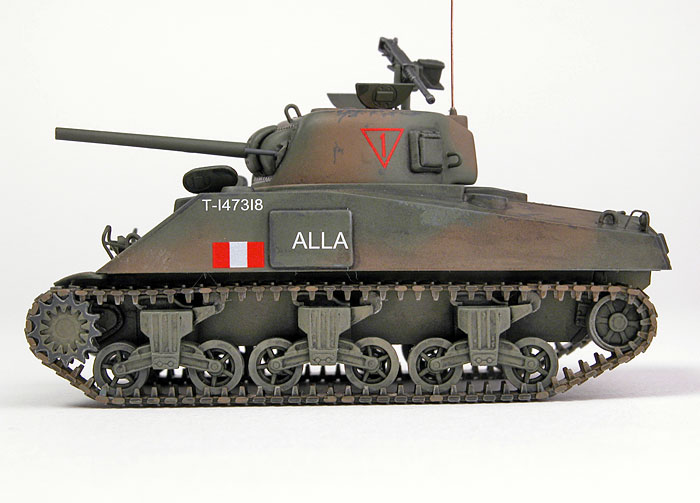
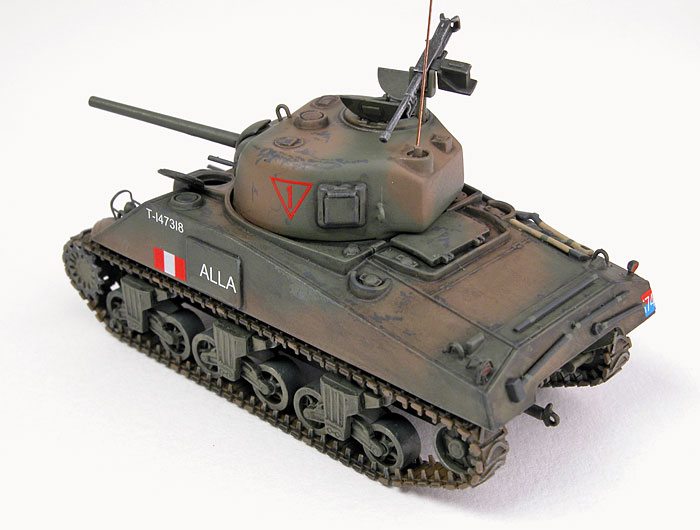
All three sub-assemblies were given a base coat of Khaki Drab and left
to dry. Then, using the painting instructions as a guide, I carefully
airbrushed the Dark Earth disruptive pattern. I now think this was
wrong, as I have since heard that British Army Instructions specified a
hard-edged pattern. Ho Hum! On previous Armour kits I have dirtied up
the lower hull after everything else was done. The problem with this is
that it tended to lighten the washes and make the lower hull look a bit
flat so this time I decided to do it as part of the initial colour
coats. To show a bit of wear and tare, I added some Tamiya German Grey
with a fine brush in the appropriate places on the turret and upper
hull.
Another problem is that the road wheels don’t have a demarcation between
the rim and tyre. This makes it hard to paint the tyre dark grey. I
didn’t worry too much as the whole area was to be coated in dirt anyway.
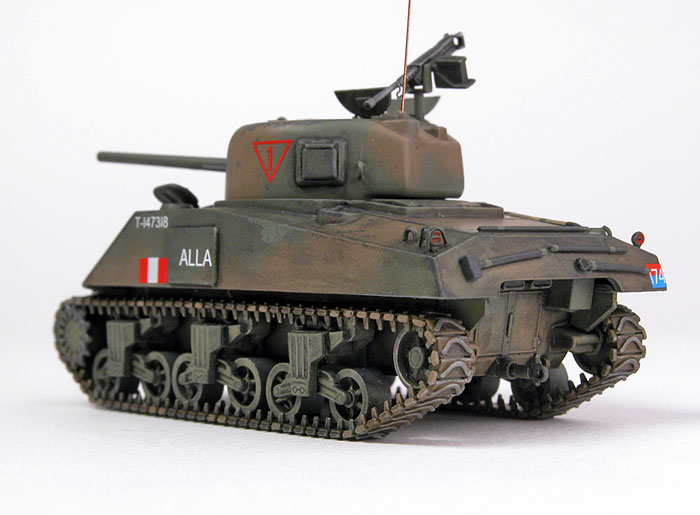
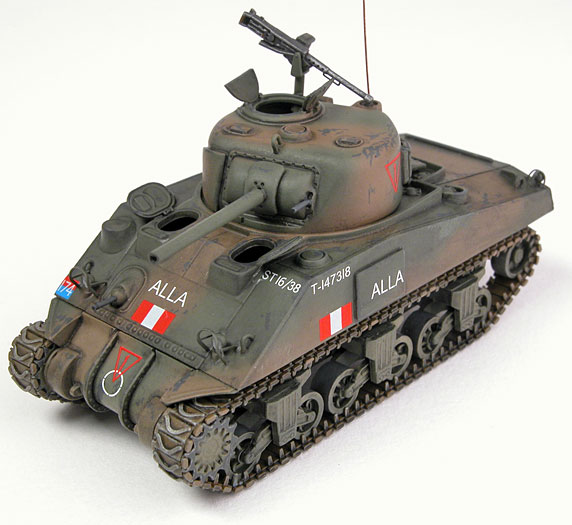
Weathering
All three sub-assemblies were
now given an all-over black wash.
After drying, the excess was
removed using clean methylated spirits. The fine details were now hand
painted in appropriate colours and attention turned to the tracks.
Tracks used on this particular Sherman were the steal chevron type and
were painted on the sprue. The base colour was RAF Dark Earth followed
by the black wash and then dry-brushed with Flat Aluminium. Gluing six
single track-links to each previously painted and weathered drive wheel
begins assembly. The glue used is Tamiya liquid glue thickened with
clear sprue. Next is the first length of track to the first road wheel.
When this is dry, mount the
drive wheel on the lower hull and rotate till that first length touches
the road wheel. If everything checks out, do the same again only this
time glue the drive wheel on. Continue on around the suspension until
you have completed the track on that side. If the join between two
lengths looks too sharp, place a single link in between to round it out,
but often this will not be necessary.
Because there is no positive
mount point for the drive and return wheels, there may be a slight
variation in the length of track on each side. There’s not much you can
do about this except be careful and use any spare track links to make up
the difference.
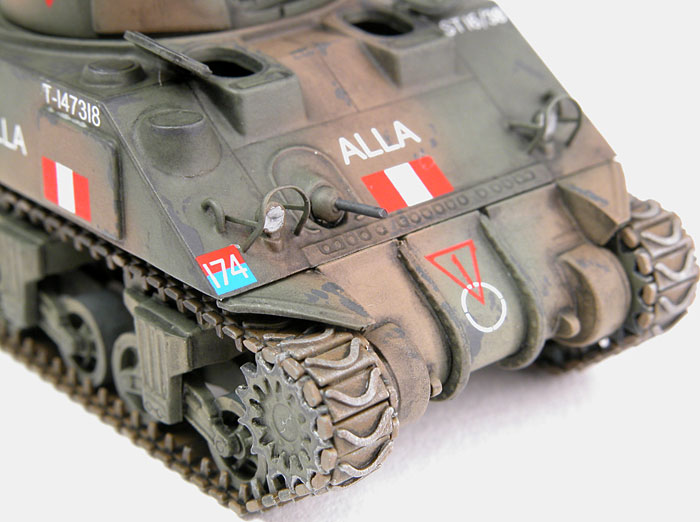
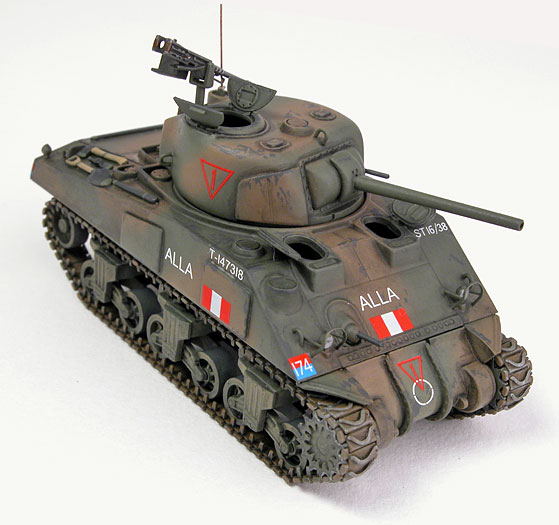
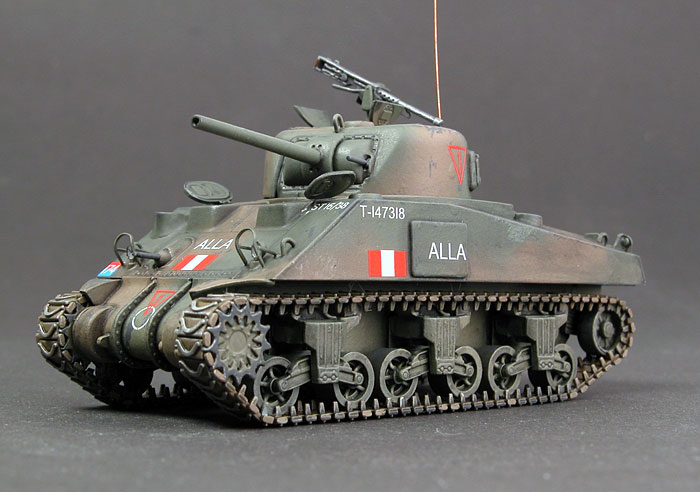
Decals
The decals in this kit are
really very good. Perfect register, very thin carrier film and opaque
colours make these among the best I’ve ever used. The whole model was
given several coats of Tamiya Acrylic Gloss until a nice sheen was
attained. The decals went on with out any problems although I will admit
there was no detail underneath to cause any trouble. A sealing coat of
gloss was then added and then left to dry for several days. Finally, the
model was coated with Model Master Dull Coat and the painting was
finished.
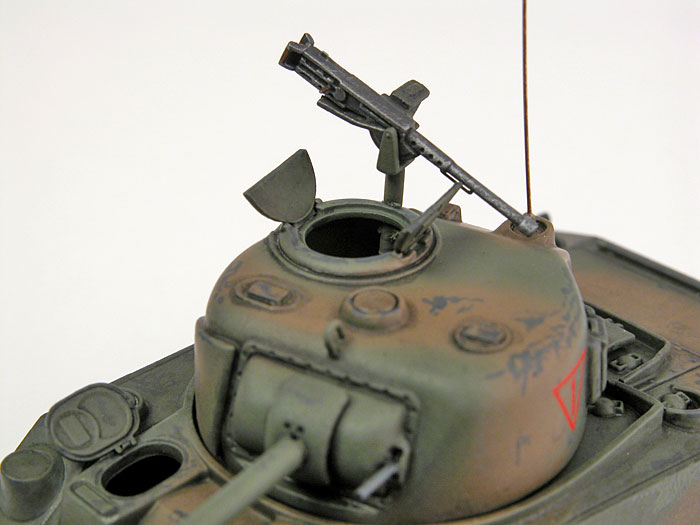
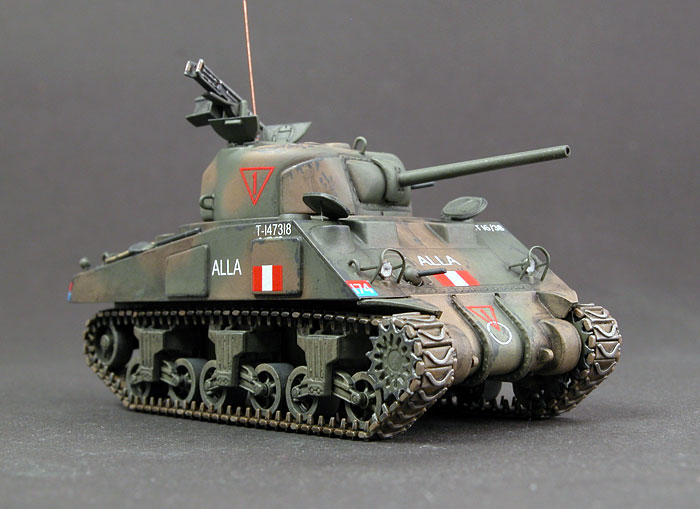
Extratech’s 50 cal was not moulded very well so I decided to look else
where for one. I didn’t want to pinch one out of the Esci Sherman kits,
as I want to build them later. I found one in the Academy Airfield
Vehicle kit, which looked very good. It’s off the Jeep and with a bit of
modification i.e. under cut handles, drilled out barrel and added
cocking lever, it came up nicely after painting with dark grey, dry
brushing with flat aluminium and brown for the wood handles.
Unfortunately it’s got the wrong mount for a Sherman. Just one of the
many inaccuracies on this model. Also, after I had finished painting I
noticed that one of the rear light guards had blown away, never to be
seen again. Oh well, no such thing as a perfect model.
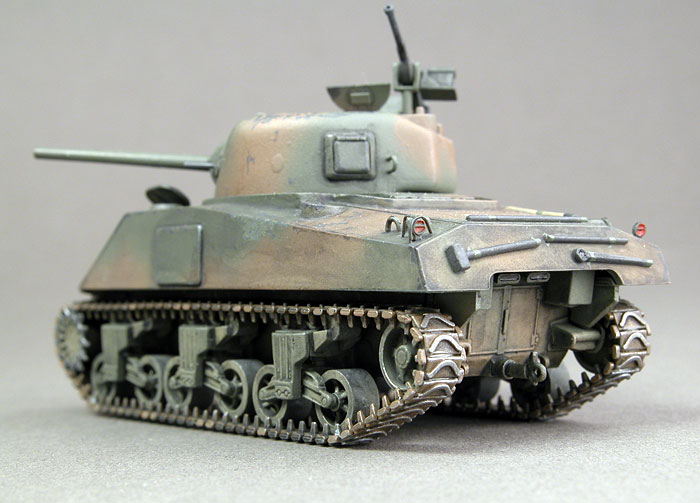
A few observations before I
finish. The model is over-all too dark. Next time I will lighten the
whole paint job before I add any washes. Also, the decals are too stark,
although this may be better if the model was lighter or perhaps I could
try weathering them.
Cheers till next time (and that won’t be long).
Click the thumbnails below to view larger
images:
Model and Text Copyright
© 2004 by Glen Porter
Images Copyright © 2004 by
Brett Green
Page Created 17 December, 2004
Last Updated
16 December, 2004
Back to
HyperScale Main Page |
 Home
| What's New |
Features |
Gallery |
Reviews |
Reference |
Forum |
Search
Home
| What's New |
Features |
Gallery |
Reviews |
Reference |
Forum |
Search