|
Pacific Coast Models'
1/32 scale
Macchi C.200
Saetta
by
Ian Robertson
|
 |
|
Macchi C.200 |

HyperScale is proudly supported by Squadron.com
Background
The C.200 Saetta was a workhorse for the
Regia Aeronautica throughout WWII, serving in every theater of the war
for Italy until its surrender. In the Mediterranean theater the
Saetta proved an effective adversary for the Hawker Hurricane, P-40,
and early Spitfires. A unique feature of the C.200 and its two well
known successors, the C.202 Folgore and C.205 Veltro, was
the unequal wing length designed to compensate for engine torque
rotation. This innovation enabled pilots to fly the aircraft without
constant control corrections for engine torque. (Aside: It’s also
amusing to show someone, lets say your wife, the unequal wing lengths
and then complain that the model you just bought is really messed up).
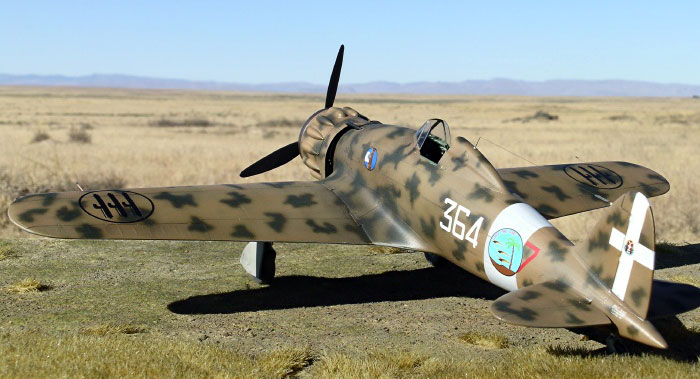
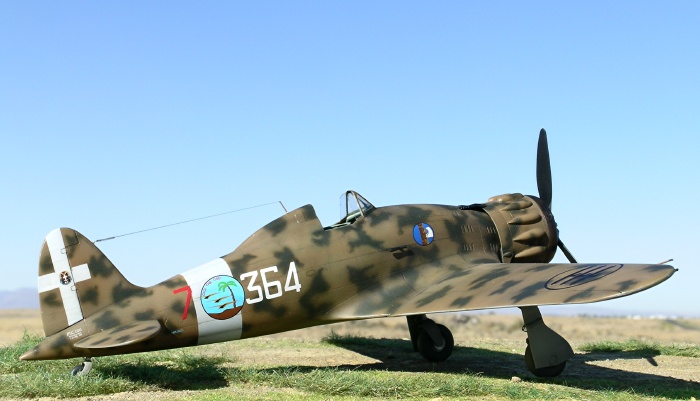
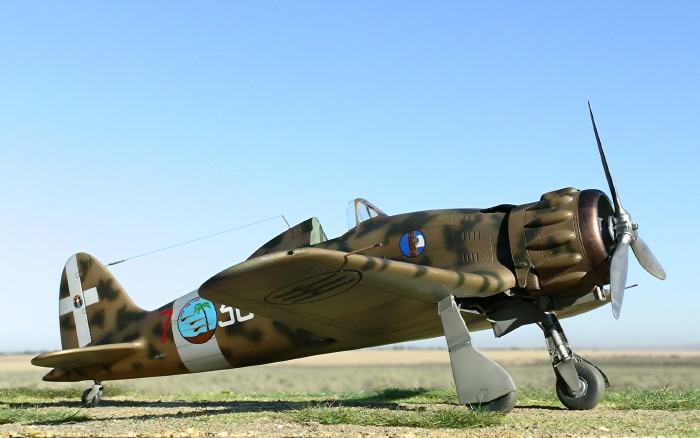
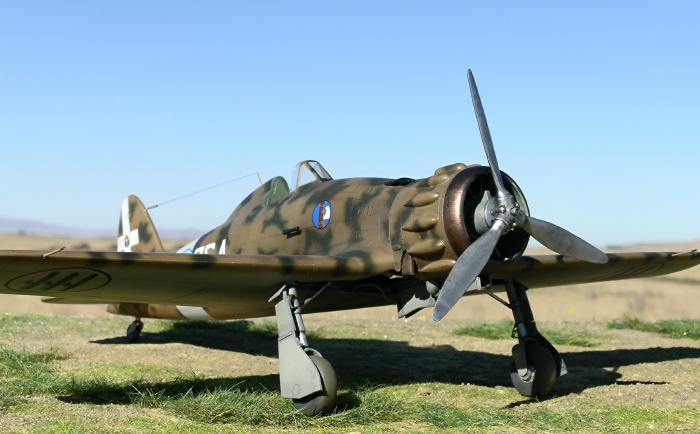
Here I present a Pacific Coast Models 1/32 C.200
Saetta in the markings of a fighter from the 364a Squadriglia, 150o
Gruppo Autonomo, 1942. A photograph of the port side of this aircraft
appears on page 42 of Osprey’s “Italian Aces of WWII”, while a photo of
the starboard side can be found on page 35 of “Regia Aeronautica Caccia
& Assalto 1940-1943, Part II” by Waldis and De Bortoli. This latter book
also features a complete color profile of the aircraft.
PCM’s kit – What’s in the Box?
The kit is an excellent example of just how far
short-run kits have come in recent years. The light grey styrene parts,
made by MPM, feature finely recessed panel lines and plenty of detail.
The plastic is a bit softer than what you get in a Tamiya or Hasegawa
kit, but it remains easy to work with. Some large ejection stubs in the
inside surfaces of the fuselage and wings require removal, but this is
not problematic.
The resin parts are excellently crafted, and include a well detailed
cockpit, straightforward engine, and a superb one-piece cowl.
In general, the photoetch parts are reserved for
those places on the model that really benefit from them. For example,
the unique seatbelt/bondage apparatus and the instrument panel. However,
I found the photoetch for the landing gear (apart from the oleo
scissors) fiddly and more than I wanted to deal with. Your mileage may
vary.
Two vacuform canopies are provided in the kit. Ironically, the
particular Saetta I chose to build (the markings were included on the
decal sheet) had an early style canopy that was not included in the kit.
A minor modification was necessary (see below).
The decals were produced by Skymodels and printed by Cartograf. Six
attractive marking options are provided, and they span a wide range of
camouflage styles for the C.200.
Let me start by emphasizing this is an excellent
kit and I thoroughly enjoyed building it. It is a great example of just
how good a limited run kit can be, and how subjects that many doubted
would ever be produced are now getting a chance to shine in 1/48 and
1/32 scale. Of course there is always room for improvement, and it’s
important to realize that this kit is not intended for beginners.
However, it is well within the reach of modelers with moderate
experience, especially those with some experience using resin and
photoetch. This model took me three weeks from start to finish.
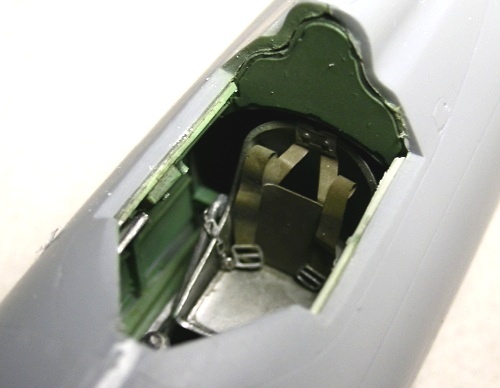
Cockpit
Construction begins with the resin cockpit. The
parts are very well detailed and fit together quite well, although the
assembly is not without a few challenges. First, I had difficulty
installing the seat properly because it bumped into a cross bar on the
rear bulkhead. After careful consideration of the instructions to see if
I was assembling the parts incorrectly (I don’t think I was), I opted to
remove the cross bar and re-install it slightly lower to accommodate the
seat. A clear diagram of the completed seat assembly would have been
welcome in the instructions.
Another area of difficulty I had with the cockpit
was determining how far down in the fuselage it should sit. It seemed
obvious at first, but when I positioned the cockpit so that the top of
the rear bulkhead met the spine of the fuselage, the control stick
extended too high. I opted to remove a small section from the middle of
the control stick to adjust its height so that it looked correct within
the cockpit. Again, it’s not quite clear to me where the error occurred.
Despite these difficulties, the cockpit tub looks great when finished
and installed in the fuselage. Unfortunately, in my haste to seal up the
fuselage I forgot to take photos of the completed cockpit.
Engine/Undercarriage Bay
The engine/undercarriage bay is an area on the
model that begs for detail in the form of wires and hoses. Following
color photographs in the Aviolibri book “Macchi MC.200 Saetta, Pt 1” by
Maurizio Di Terlizzi (who, incidentally, was responsible for verifying
this kit’s dimensions and accuracy during production), I added the
necessary plumbing to this area. The entire engine/undercarriage bay
assembly was then inserted into the fuselage. The rear bulkhead of the
undercarriage bay, which also serves as the wing spars, bowed slightly
during installation.
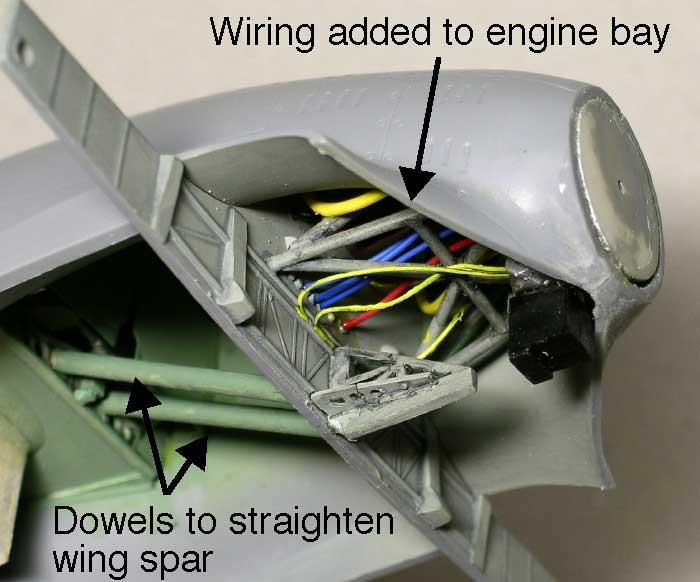
To correct this problem, and to avoid later
problems with wing alignment, I wedged two wooden dowels between the
cockpit and the bulkhead to force the bulkhead and wing spars forward
into proper position (see photo).
Wings
The lower wing section was attached to the fuselage
as shown in the instructions (panel 1 in photo). When I added the upper
sections of each wing I found the alignment to be fine, but the port
wing was about 1mm too short while the starboard wing fit perfectly. To
adjust the port wing’s length I added a strip of styrene to the edge
where it meets the wing root (panel 2 in photo).
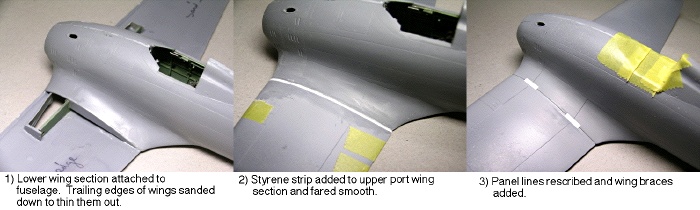
This simple fix solved the length problem and
retained continuity of all the panel lines between the upper and lower
surfaces of the wing. I also sanded off the raised reinforcement strips
on the wing roots (both wings) and replaced them with pieces of sheet
styrene (panel 3 in photo).
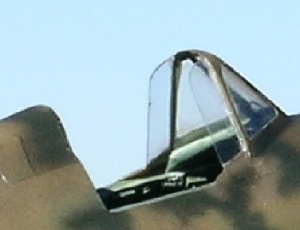 Canopy Canopy
At this point I added the vacuform canopy because I
wanted to fare it into the fuselage prior to painting. Some careful
filling and sanding was required, but this effort paid off in the final
result.
Because the aircraft I was modeling had an early
style canopy, it was necessary to add a small flap of clear plastic (not
included with kit) to the rear edge of the canopy frame on each side of
the canopy.
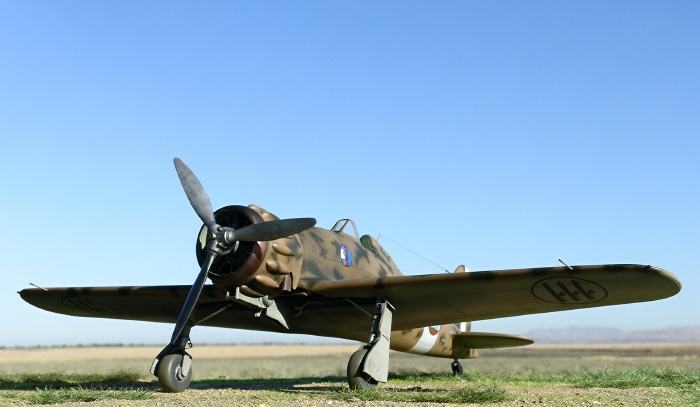
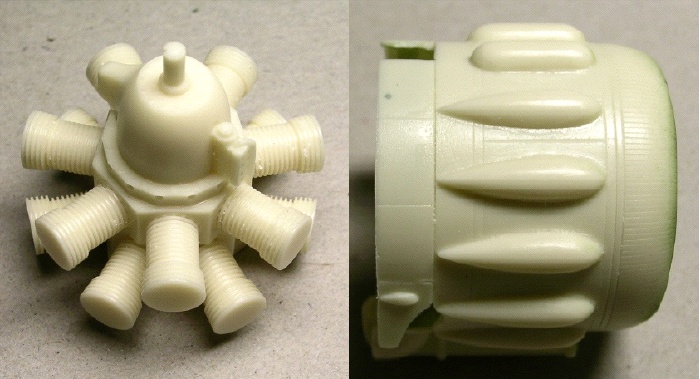
Engine and Cowling
The next major step in construction involved the
engine and its cowl. The resin engine is crisply detailed and easy to
assemble. The heads of the engine cylinders appear simpler in the kit
than in the photos I’ve seen of C.200 engines, but for me they were fine
and indeed may be accurate if different engine configurations were used
on the C.200. I added styrene rods to the front of the cylinders.
Attaching the cowl assembly to the main fuselage is a critical step in
construction because if anything defines the look of the C.200, it’s the
way the engine mounts on the fuselage. Unfortunately there are no
alignment pins to assist in the process. Proceed with caution! I first
attached the cowl to the fuselage loosely with masking tape and then
positioned and glued the machine guns in place. Once the guns were
solidly attached I removed the cowl and then reattached it with 5-minute
epoxy. The machine guns helped me orient the position of the cowl, and
the slow-setting glue allowed me to make last minute adjustments before
the bond became permanent.
It is up to the modeler’s discretion whether to attach the cowl before
or after major painting. I opted for the latter, but I’m not sure it
makes much of a difference. Adding it before painting lessens the amount
of handling afterward. Something to consider.
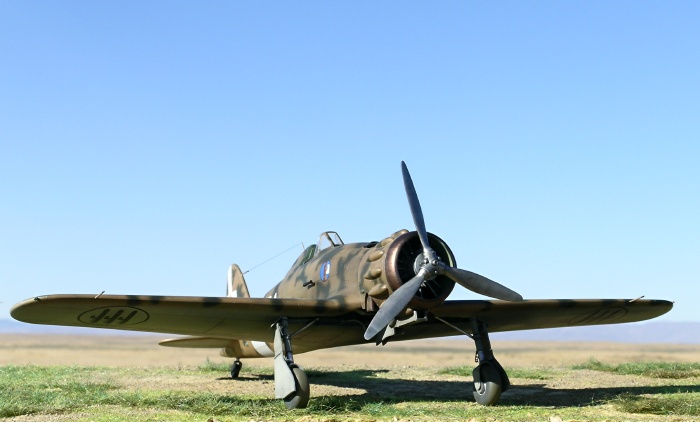
Landing Gear
The final major step in construction was the
landing gear. I found the gear covers and associated photoetch fiddly,
and the instructions were vague about the positioning of the covers.
However, with some careful test fitting the landing gear assembly goes
together reasonable well.
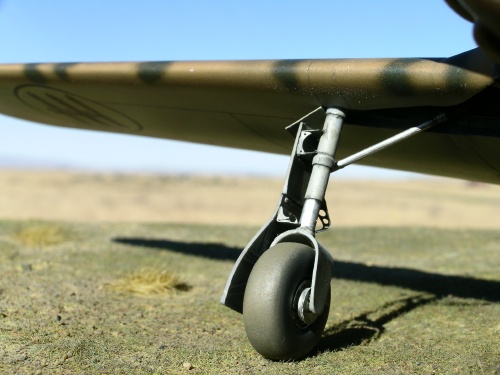
In the future I think I will replace the photoetch
for the gear with scratch-built styrene components. I find styrene
easier to work with than photoetch.
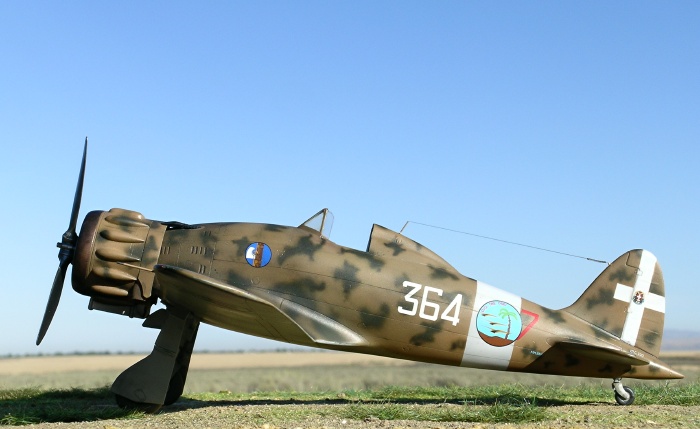
Paint
The cockpit was painted in Polly Scale RAF interior
green (a reasonable match for Italian cockpit green) and then treated
with washes and chalk pastels. The seat was painted in Alclad aluminum
and then given a black wash (Tamiya acrylic).
The exterior of the model was primed with Mr. Surfacer 1000 from a
rattle can and then polished lightly with a micromesh sanding cloth. The
fuselage band and tail cross were painted white and masked for the
remainder of the camouflage painting.
I painted the model with a variety of acrylic paints, primarily Polly
Scale acrylic and Model Master acryl. I mixed my own version of Nicciola
Chiarro (hazelnut tan) using the top of a White Ensign Models paint tin
as a color guide. I can’t provide the exact formula (it evolved during
the painting process), but I did use the following colors: Polly Scale
Hazelnut Tan, Polly Scale Israeli Khaki, and Model Master #4 Brown (a
reddish brown color). My mixture is slightly less pinkish than that
shown on the WEM paint lid, but it matched well with other Italian color
chips I have.
Once the Nicciola Chiarro mix had dried I applied the dark green mottles
freehand using Polly Scale Italian Olive darkened with a touch of black.
The underside of the model was painted Polly Scale Italian Light
Blue-grey. Various dark washes were used for weathering.
The cowl ring was painted Alclad copper with a hint of aluminum. This
was followed by a wash of burnt umber/raw sienna, and then a wash of
black. Finally, I applied Polly Scale flat clear with a brush to remove
the shine.
The propeller blades were painted Alclad aluminum of the front and flat
scale black on the back, based on my interpretation of photographs of
the aircraft.
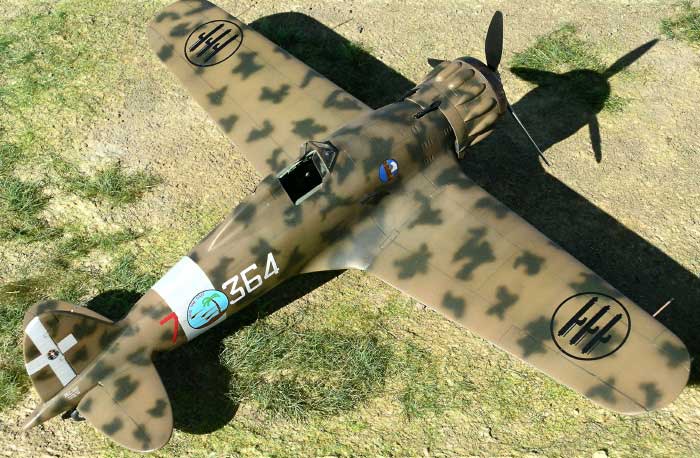
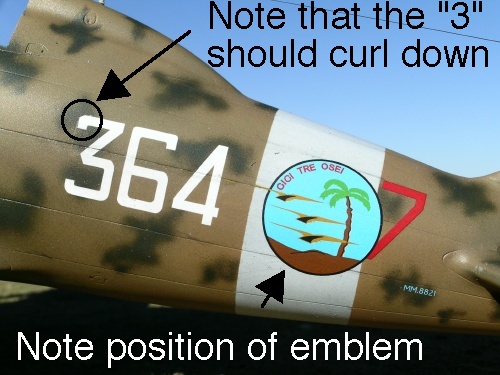
Decals
The decals for this kit worked beautifully. Be
careful with the placement of the until emblem (three birds flying over
the palm tree). Photographs reveal the placement to be slightly
different than that shown in the instructions. Also note that the number
“364” is slightly incorrect in the decals. According to photographs, the
top of the #3 should curve down, whereas on the decal it is straight. I
corrected this error with a scrap piece of white decal on each side.
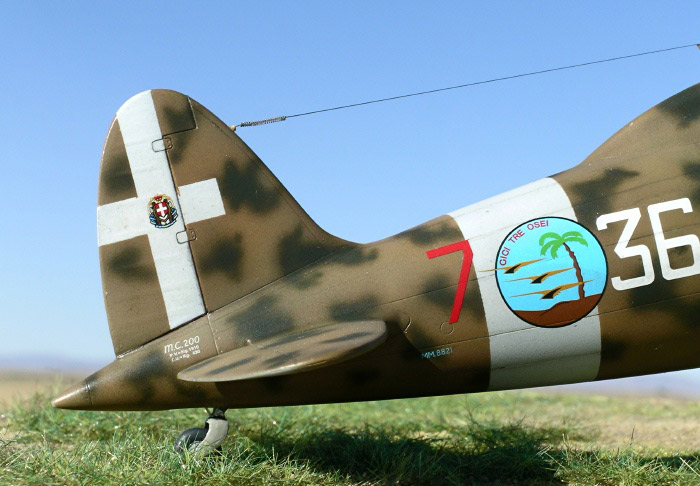
Photographs suggest that the symbol typically seen
in the center of the tail cross on Italian aircraft was absent in this
aircraft. While it is possible that in the photos the symbol was
bleached out due to overexposure, I was not convinced one way or the
other. I opted to add the symbol on my model.
The antenna wire is stretched sprue and the tension
spring is from a light bulb filament.
Photographs
Images of the completed model were taken outdoors
in natural light with a Nikon Coolpix 5400 digital camera. The “sharpen
edges” tool of Adobe Photoshop was used to restore some of the clarity
and crispness lost during image compression.
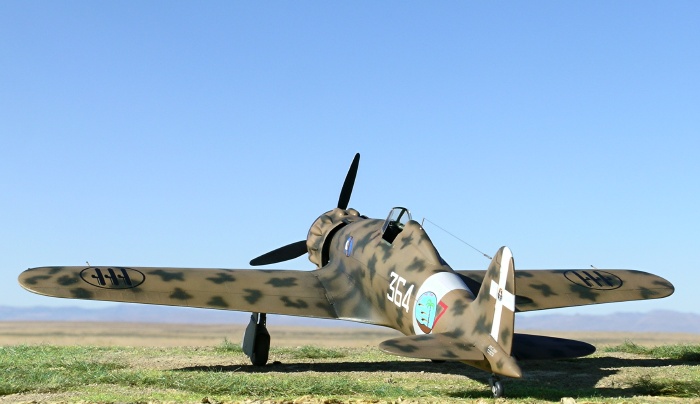
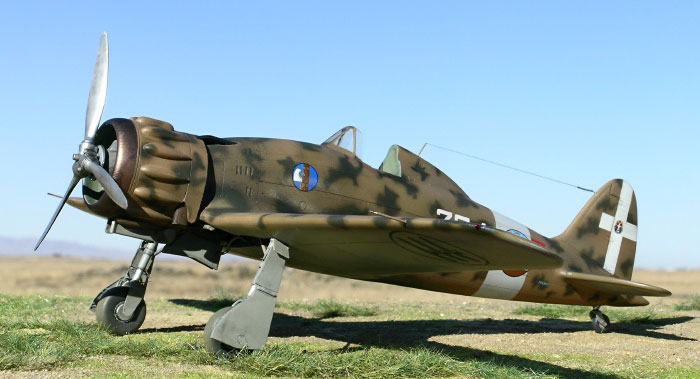
Pacific Coast Models has jumped into the fast-growing 1/32 arena with an
outstanding choice of modeling subject in the Macchi C.200 Saetta.
This clunky aircraft oozes character, and the PCM
kit captures the look very well.
For my money this kit is well worth the price given
the generally good fit, detailed resin parts, photoetch, and marking
options. This C.200 definitely won’t be my last in 1/32 scale, and I am
very much looking forward to PCM’s C.202 Folgore and C.205 Veltro down
the line!
Click on the thumbnails
below to view larger images:
Italian Aces of World War
2
Aircraft of the Aces 34 |
|
|
|
|
Author: Giorgio Apostolo
Illustrator: Richard Caruana
US Price: $19.95
UK Price: £12.99
Publisher:
Osprey Publishing
Publish Date:
November 25, 2000
Details: 96 pages; ISBN: 1841760781 |
|
|
Model, Images and Text Copyright ©
2005 by Ian Robertson
Page Created 15 September, 2005
Last Updated 15 September, 2005
Back to HyperScale
Main Page
|
 Home
| What's New |
Features |
Gallery |
Reviews |
Reference |
Forum |
Search
Home
| What's New |
Features |
Gallery |
Reviews |
Reference |
Forum |
Search