|
Fonderie
Miniature's 1/48 scale
Martin Maryland
by Mick Evans
|
 |
|
Martin Maryland |
images by Brett Green

Fonderie
Miniatures' 1/48 scale Martin Maryland is available online at
Squadron.com
The build for the Maryland involve some very
extensive cleanup of the mating surfaces of every part, except for the
resin. A lot of correspondence was received on the accuracy of the
panel lines of this kit.
By comparing the kit to the Warpaint plans that I
have the panel lines were not too bad in accuracy, but way overdone. I
filled those that were grossly inaccurate and re-scribed them to the
plans.
One thing that bewildered me is how the
manufacturer could get one wing correct and get the other totally
different.
Construction started with the sanding of the
fuselage halves until the dimensions equalled the width of the
transparencies for the nose, cockpit and lower observers window. Once
this was complete the fuselage walls were thinned down to accept the
cockpit floor and bulkheads. This process required constant thinning
and trial fitting until a snug fit is achieved.
When this was completed, the fuselage assembly was
a very easy assembly process. The wings become the next big challenge.
The wing halves need a lot of sanding to achieve
the correct thickness at the leading and trailing edges. Once this is
achieved a process of thinning the wheel well areas is required to allow
the resin wheel well tubs to fit correctly. The wings also become a
simply assembly process at this point. The same process was repeated
for the horizontal tail and rudder.
The wings, horizontal tail, and rudder were added
after some cleanup of the mating surfaces and very little filler was
required.
The next major task was the transparencies, and
this nearly cost me my sanity. Firstly all parts were dipped in
Future. The nose transparency is split horizontally and I had all sorts
of problems getting it to align. I found the best process was to tack
with super glue, wait until fully set, and then gradually align the
halves. When set the whole seam was backfilled with super glue, masked
and sanded. The masking was left on until after the kit was painted. I
spent a lot of time blowing all of the sanding dust out of the fuselage,
but on removal of the masking some dust still adhered to the inside by
the static caused by the tape removal.
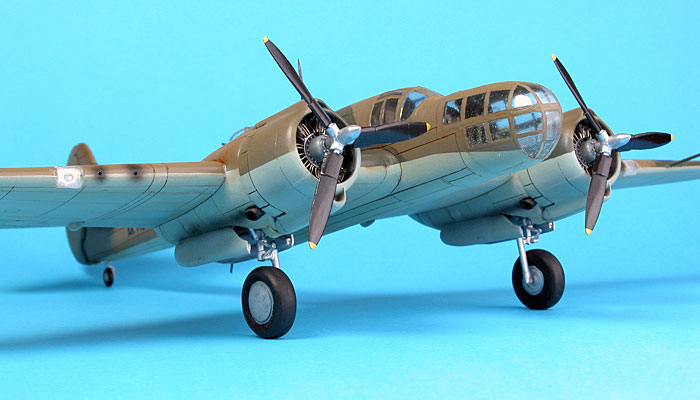
The last major project was the engines. No
instructions are given for the 19 parts that make these up, except
showing the completed units being installed on the kit.
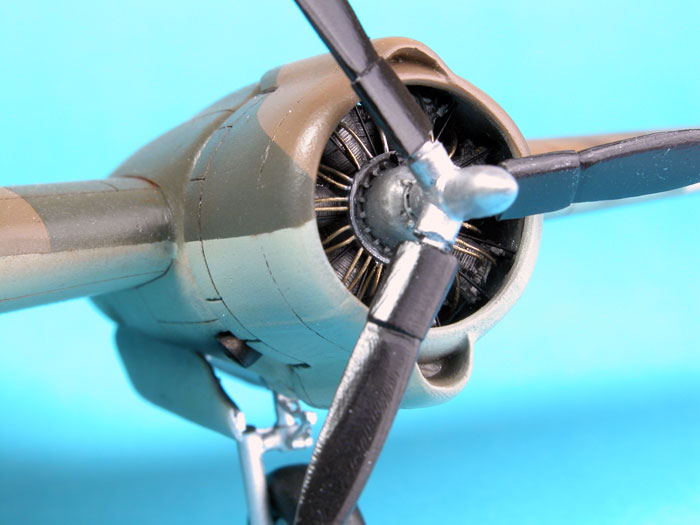
The kit has individual metal cylinders for both
rows and these fit into the resin crankcase. The crankcase has 36 holes
cast at the front and back to receive the ignition harness and
pushrods. I had to refer to the instructions for the 1/32 Technics
R2800 engine to get the detail correct, but the end result was worth
it. The ignition leads were made from fine solder while the push rods
were from stretched sprue.
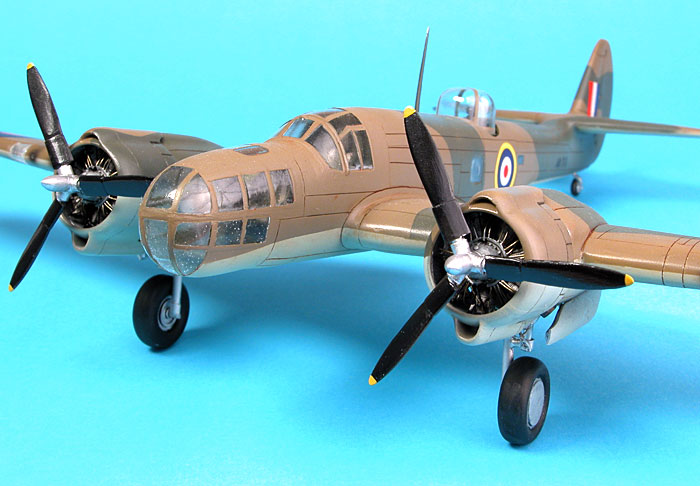
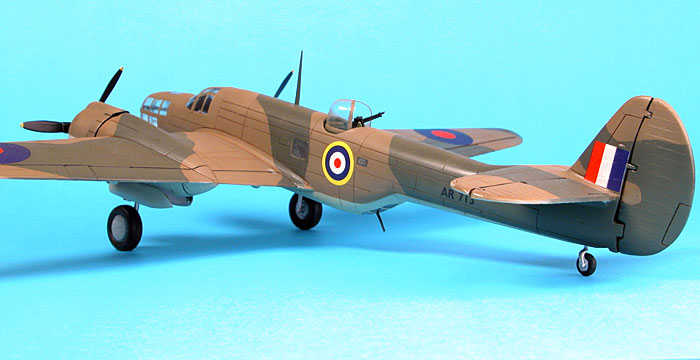
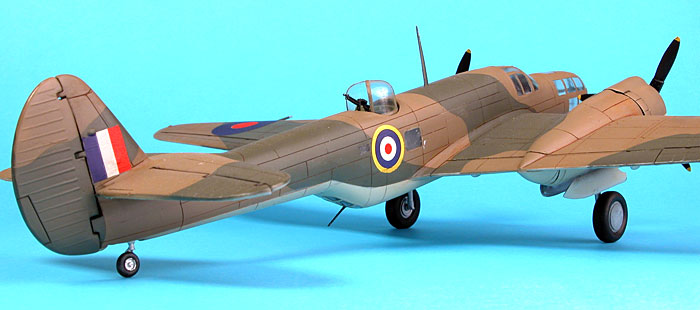
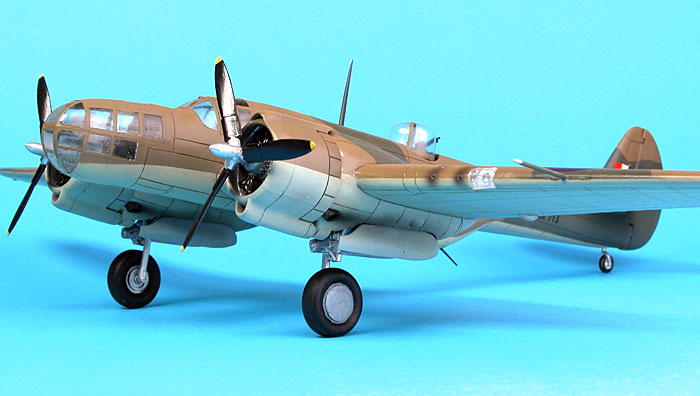
The kit was finished in Xtra Colors for the
standard Dark Earth/Dark Green/Sky for a Malta Based photoreconnaissance
aircraft.
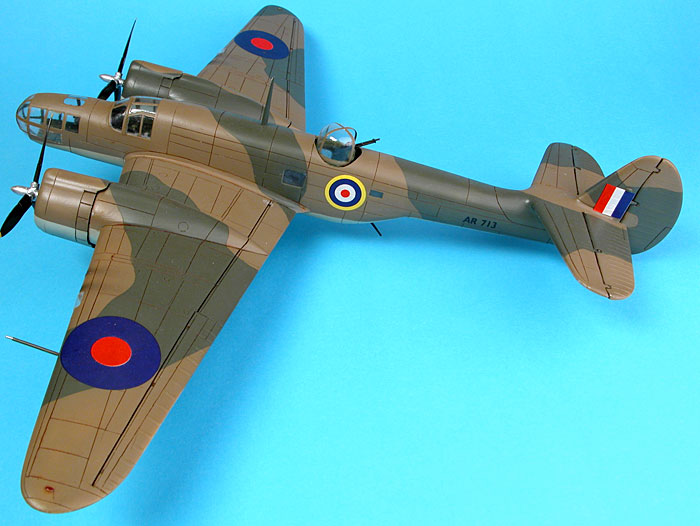
The end result was well worth the effort.
I can highly recommend this kit to experienced modellers.
Thanks to
Squadron.com for the sample.
Click the thumbnails below to view larger images:
Model and Text Copyright © 2004 by
Mick Evans
Images Copyright © 2004 by
Brett Green
Page Created 29 June, 2004
Last Updated
28 June, 2004
Back to
HyperScale Main Page
|
 Home
| What's New |
Features |
Gallery |
Reviews |
Reference |
Forum |
Search
Home
| What's New |
Features |
Gallery |
Reviews |
Reference |
Forum |
Search