|
Trumpeter's
1/32 scale
Messerschmitt Me 262A-1a
by
Jay Laverty
|
 |
|
Messerschmitt Me
262A-1a |

Trumpeter's 1/32 scale Messerschmitt Me 262A-1a is available online from Squadron.com
Good News All Round
When I heard this kit was due, I was very pleased. I have always
liked the 262 but remained reluctant as I didn't fancy the scribe job
that is involved with the Hasegawa and Revell offerings. Both kit’s
require a fair amount of work to bring them up to serious modelling
levels and to be honest I am pretty lazy and couldn't be bothered.
Besides had I actually tucked into one, This kit would have been
announced and all of my efforts would have been for nowt.
Looking into the kit when it first came, was like looking into a
treasure chest for modellers. Finely engraved detail, subtle and
accurate rivet’s and some very nicely thought out assemblies. It was
quickly apparent that the instructions were somewhat suss as they called
for interior green wheel wells, which, even with my limited knowledge of
Luftwaffe subjects, I knew to be seriously questionable.
Fairly Straightforward Build
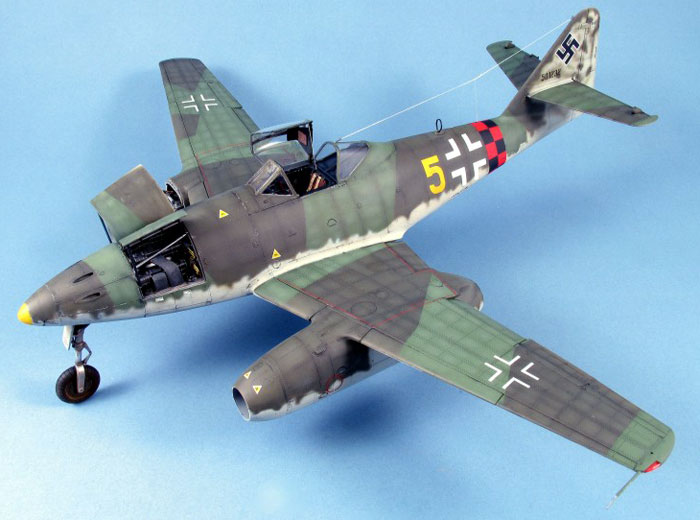
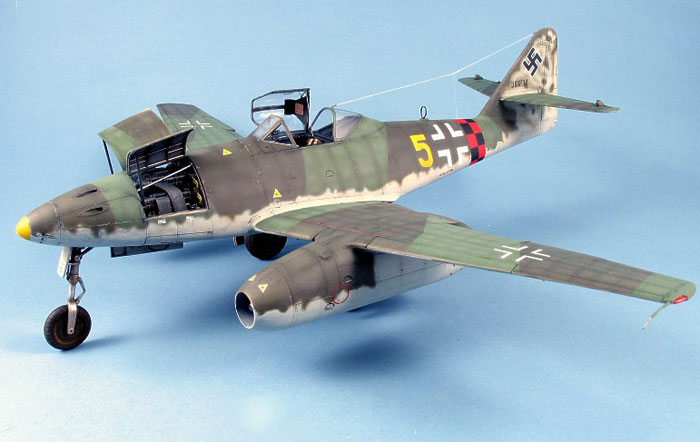
Construction has been lain out very easily in the instructions and
the fit of the kit is excellent in places and average in others. Overall
I would rate it highly but there are some low parts.
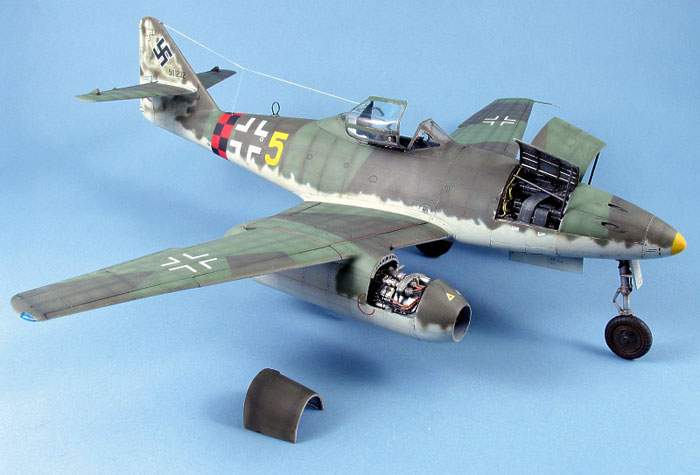
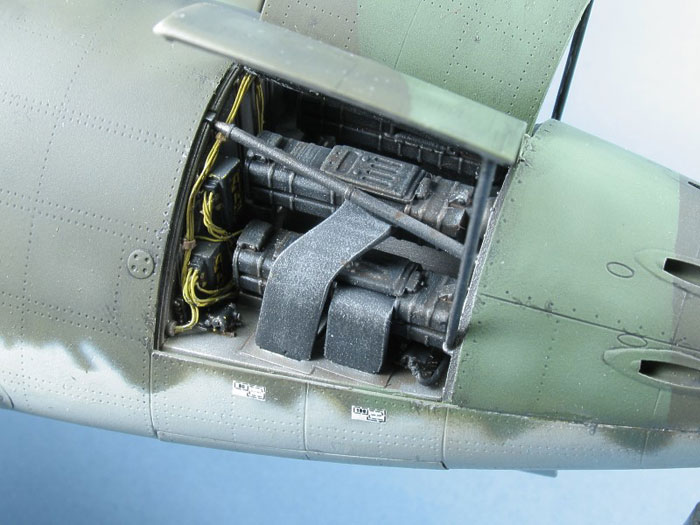
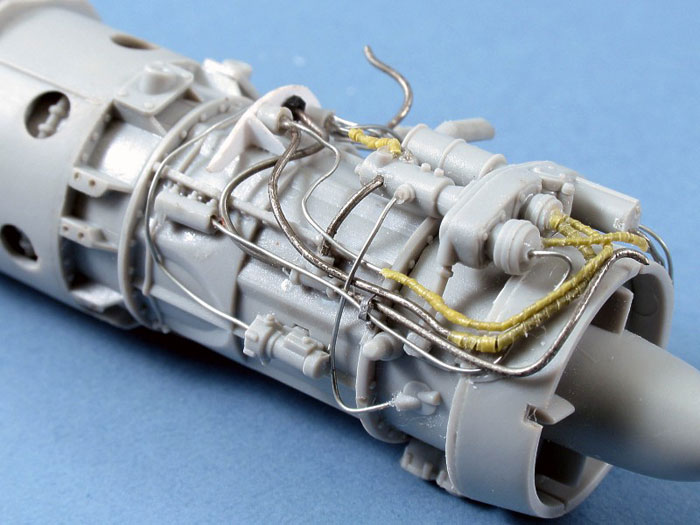
I began with the engines and got halfway through detailing the second
one before I decided that it was pointless as I planned to only open the
one.
There really isn't a lot of work that is necessary to bring this
model to show levels, however I also feel that this is an excellent
start for the “going to town” treatment. I chose to safely sit somewhere
in between as a compromise for time and effort equalling result.
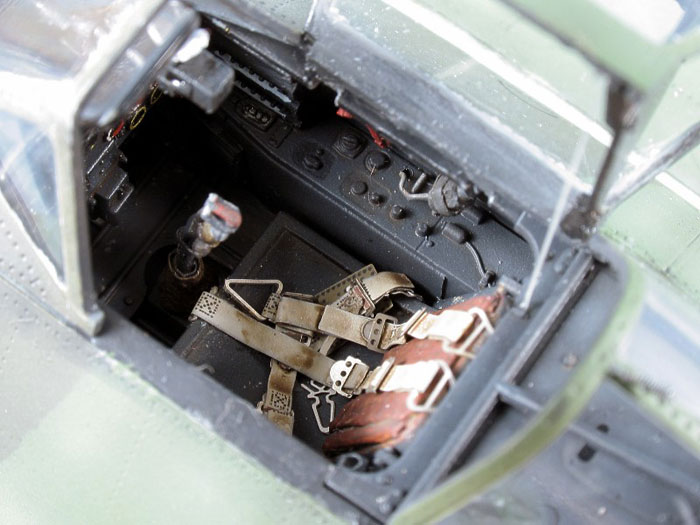
I added some details to the cockpit, namely some left over rudder pedals
from my previous He-162 project, along with swazzling up an oxygen hose,
and detailing the control column.
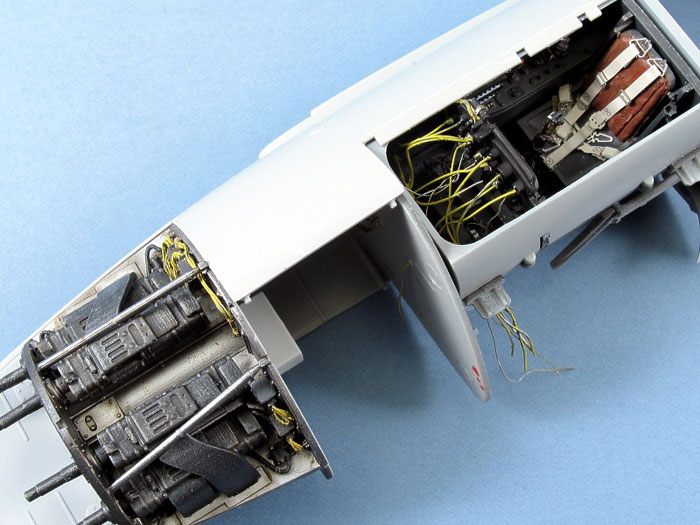
After spraying the interior surfaces (cockpit and wells ) and adding
some detail and finishing the gun bay, the fuselage was mated and wings
added. There is only one slight problem with the fit on the fuselage
although it isn't very serious and can easily be dealt with in the usual
manner.
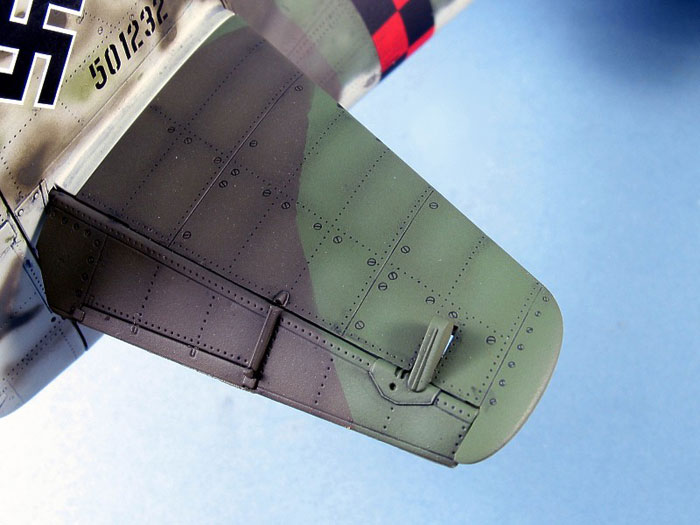
Fun Painting
I am far from one of those who feel it is worthwhile to fret over how
close the shade of green is for RLM 83 is and I just put my faith in
Xtracolor and spray on. I use Xtracolor’s quick drying thinners to thin
with and also add some Rustins Terebene to the mix and I find this gives
me a few hours drying time, more than enough for me. I generally leave
it overnight to dry, however if I need to rush, I simply spray a coat of
gloss varnish on, leave it for half an hour, then carry on.
As you will find out in a minute, this practice came in very handy
later on...
I spray at about 1 Bar on the compressor and use a mixture of about 65%
paint and 35% thinner, although that isn't exact as neither am I. I have
no problem with spending about 3 hours spraying one of the colours on a
model, and if you do then I recommend using acrylics. It is also
imperative to use primer on a model ( to be honest I find it amazing
when I hear that some people still don't ).
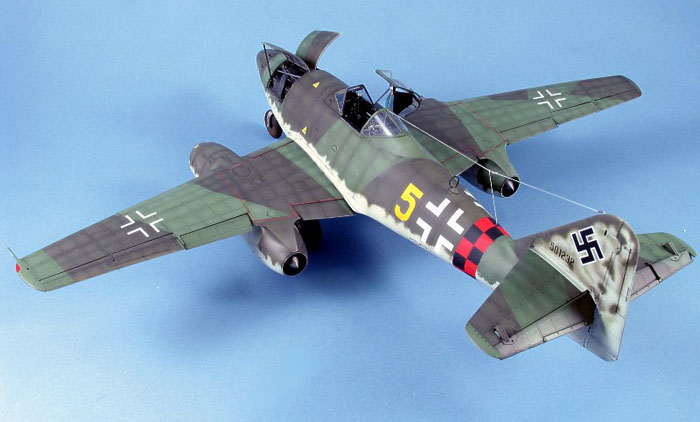
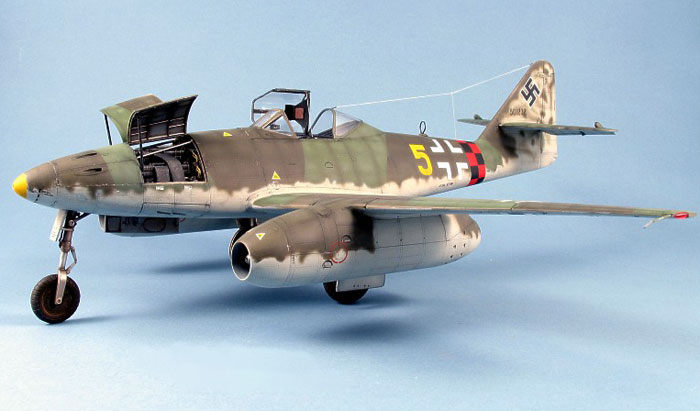
Markings
I decided I was going to use the Eagle Cal sheet for this model, the
moment that they were announced as Yellow 5 caught my eye. However I
wanted to get this model done for MAI and therefore couldn't wait any
longer so I used an older Eagle Strike sheet. What a mistake.
One the Eagle Strike Sheet is an elaborate mottling scheme on the tail,
which I spent hours spraying on only to find a completely different
pattern on the actual picture in the Eagle Editions “Stormbird colours”
(coincidentally authored by HyperScale’s esteemed editor himself).
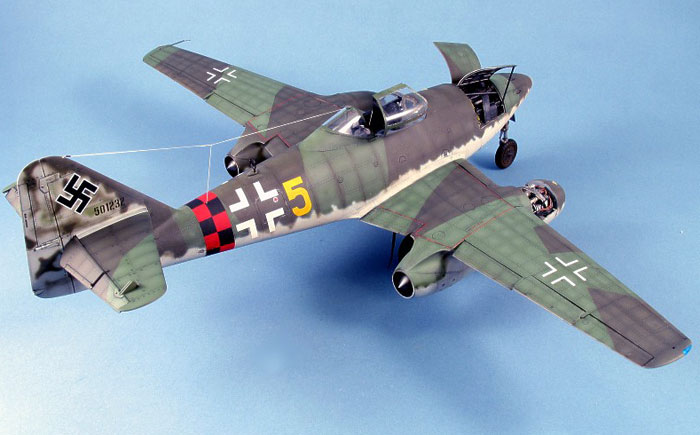
I spent another hour taking the mottling off with a cotton bud dipped in
thinner, as I had used gloss acrylic varnish to cover the RLM 76.
The 5 is the wrong shape, and the serial is laid out incorrectly, so I
strongly recommend waiting for the Eagle Editions sheet to arrive, as
they will be impeccably researched as usual.
Wild Weathering
I am constantly trying to tidy up my weathering to make my models
look dirtier without being messy. Basically I am always looking for ways
to improve.
I experimented with this model by adding Paynes Grey to the Raw Umber
from Winsor and Newton's I usually use, and as the mixture came out
considerably thicker the result was quite good. I “polished” off the
excess with a dry cotton bud as opposed to removing it with thinner and
the results speak for themselves.
Good Fun All Round
I can highly recommend this kit as a model for any level of modeller,
and while some of the rookie mistakes I made will be very obvious to the
more discerning eye, I was very pleased with the final result. For a
more in-depth look at some of the techniques I have used on this model,
it will be in one of the upcoming issues of Model Airplane International
as advertised to the right.
Click
the thumbnails below to view larger images:
Model, Images and Text Copyright ©
2005 by Jay Laverty
Page Created 18 October, 2005
Last Updated
18 October, 2005
Back to
HyperScale Main Page |
 Home
| What's New |
Features |
Gallery |
Reviews |
Reference |
Forum |
Search
Home
| What's New |
Features |
Gallery |
Reviews |
Reference |
Forum |
Search