|
Xtrakit's 1/72 scale
Gloster Meteor
F.Mk.8
by Brett Green
|
 |
|
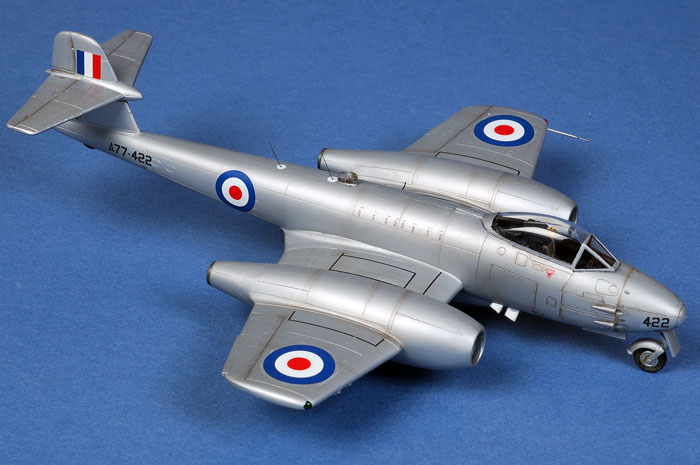
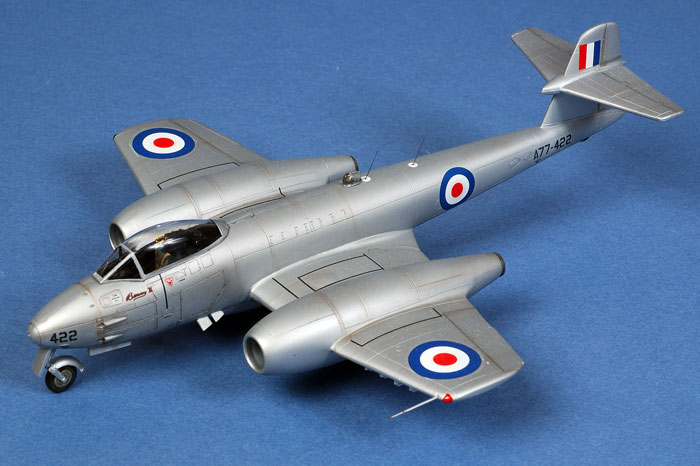
Gloster Meteor F.Mk.8
A77-422, 77 Sqn RAAF, Kimpo, Korea, 1951 |

HyperScale is proudly supported by
Squadron
77 Squadron RAAF joined the Korean War direct from occupation duties
in post-war Japan. At the time they were equipped with Mustangs. These
aircraft were adequate for the Squadron's former policing role, but they were totally outclassed by the new generation of jet
fighters in Korea.
93 Meteor F.8 replacements were delivered directly to 77 Squadron in Korea from April
1951. The unit happily converted to the new jet on the front lines.
However, the "Meatbox" was hardly a match for the scourge of the Korean
skies, the MiG 15.
The MiG 15 was designed as a modern jet fighter from inception. Its
swept wings and stubby fuselage built around its powerful single Klimov
engine (ironically, a copy of the Rolls-Royce Nene) was the most
advanced design of its time.
The "Meatbox" looked old-fashioned by comparison. Its straight wings,
conventional fuselage, and twin nacelle-mounted engines betrayed its
World War Two design origins. The nimble MiG could out-climb, out-turn,
out-run and, with its 37mm cannon, out-gun the Meteor. Nevertheless,
pilots from 77 Squadron managed three victories over MiG 15s.
The real forte of the "Meatbox", however, lay in its ground attack
capabilities. The Meteor's solid design offered a stable platform for
bombs and up to 16 rockets. The nose mounted 20mm cannon were also well
suited to strafing attacks.
The heavy cost of this deadly dangerous job was the loss of thirty-eight
Meteor aircrew and a further seven imprisoned during the Korean War.
Considering the historic role played by the Gloster Meteor, it is
surprising that the recent flood of new kit releases has not generated a
state-of-the-art Meatbox in 1/72 scale. Indeed, it is more than three
decades since we saw the last mainstream small scale, single-seater
Meteor offering.
Xtrakit has filled this gap with their debut release, a 1/72 scale
Gloster Meteor F.Mk.8.
Follow
this link to see a detailed examination of the box contents.
This is a well-detailed and straightforward model that will deliver an
impressive result straight from the box. I only made a few modifications
to the basic kit.
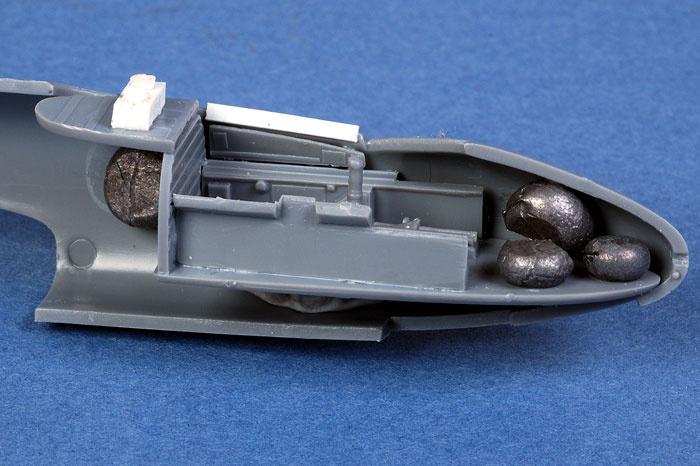
First, I replaced the kit seat with a white-metal Martin Baker Mk.2 seat
from Aeroclub. The kit seat is very bare, while the Aeroclub seat is
nicely equipped with cushions, harness straps and small details on the
seat frame and headrest. It also has the added advantage of providing
some extra weight in the front of the model.
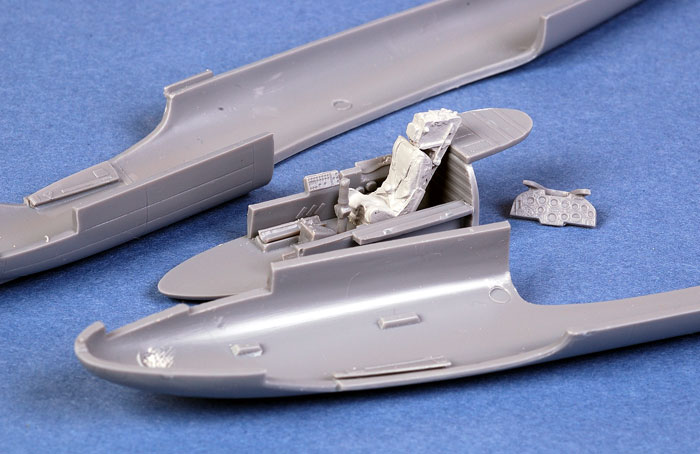
The kit needs more weight than the white metal seat
alone to keep its nose gear on the ground. Fortunately there is plenty
of room. I added small lead sinkers inside the extreme tip of the nose
and on both sides of the fuselage behind the cockpit. This was
more than enough to prevent tail-sitting.
You can see in the photograph below that I squashed the
sinkers with a pair of flat nose pliers to fit more weight in these
cramped quarters.
I also thought that the shelf behind the pilot looked a
little bare. Reference photos suggested that there was something
there, but the exact shape was difficult to make out. I therefore
settled on a generic plastic box topped with plastic disks, all cut from
scrap stryene.
The only other addition to the cockpit was strip plastic
above the sidewalls to represent the raised canopy rails. These also
provide a useful securing point when gluing the canopy to the fuselage.
The cockpit was painted basic black. Spots of Krystal
Kleer were carefully applied to the instrument lenses to offer some
contrast but, apart from the seat, very little is visible inside the dim
front office of real Meteors so I did not spend too much time on this
area.
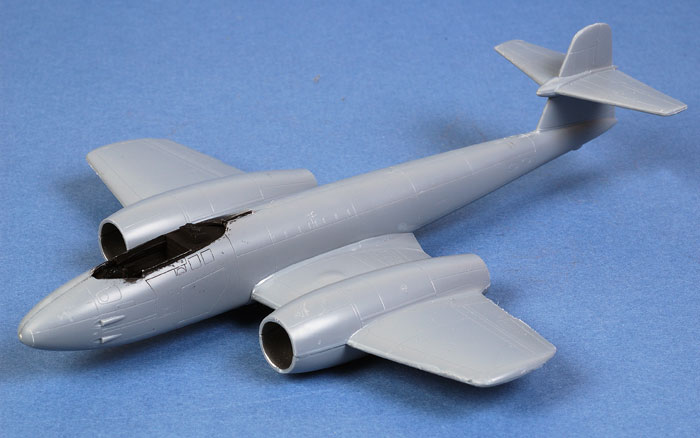
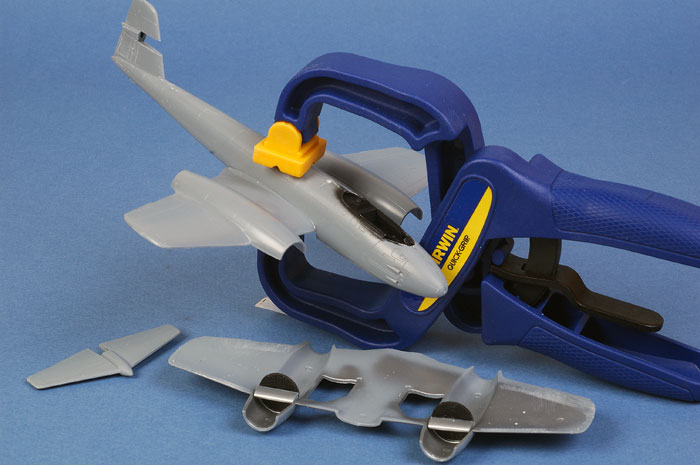
With the cockpit installed and the fuselage halves
joined, I deviated from the instructions by clamping the one-piece upper
wing half to the saddle moulded in the bottom of the fuselage. Using
this method, I could apply enough pressure to ensure a totally gap-free
bond at the wing root. With the clamp holding the wing in the correct
position, Tamiya Extra Thin Liquid Cement was flowed into the join line
at the wing root.
Once this assembly had thoroughly dried, the model was
released from the clamp and the bottom wing and tailplanes were attached
conventionally.
Click the thumbnails below to view larger images:
|
|
|
|
The top half of the wing was clamped and glued to the fuselage before the bottom of the wing was attached
|
|
|
|
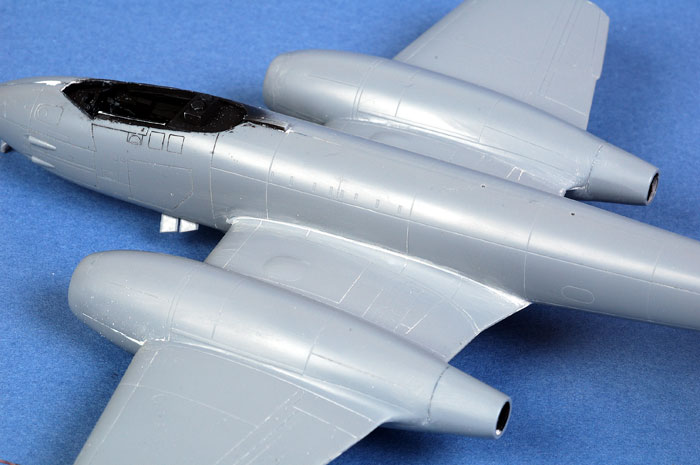
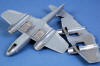
This resulted in an almost perfect fit at the wing root.
|
|

|
|
Fit elsewhere was generally very good
|
|
|
|
|
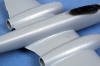
A little filler was used on each side of the engine nacelles and on the nose.
|
|
|
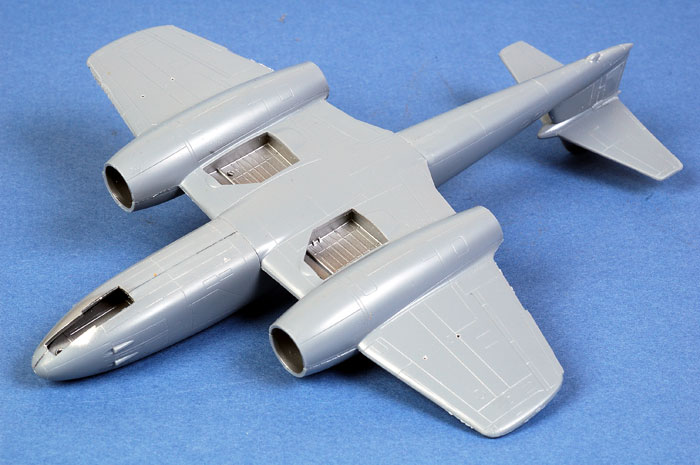
The fit of the main components was very good indeed.
The only areas needing filler were small steps where
the wing join to the bottom fuselage (front and rear - although the
front step is largely covered by the centreline drop tank), gaps at
each side of both engine nacelles, and a few misaligned areas on the
fuselage seam around the nose. These were all filled with Milliput,
a white two-part epoxy putty.
While I had the Milliput out I also filled the sink
marks in the main undercarriage legs.
Once the Milliput was set and sanded smooth, I
installed the gear legs. My model was destined to wear an overall
High Speed Silver finish, so the undercarriage and wheel wells could
be painted with the same colour as the fuselage.
The intake rings and rear cones were now glued onto
the nacelles. There were a few steps around the intakes, but these
were eliminated with some vigorous sanding and subsequent polishing.
Rockets were fitted to RAAF Meteors in Korea, and I
was sure that mine would look naked without at least eight rails
under the wings. I raided an old 1/72 scale Airfix Mosquito kit,
cutting off the tops of the rocket rail mounts and gluing them onto
the bottom of my Meteor's wings. Plastic strip was used for the
short rails. I have heard that Red Roo Models will be releasing a
set of 1/72 scale rockets and rails for the Meteor, so you won't
have to cannibalise any kits in your collection.
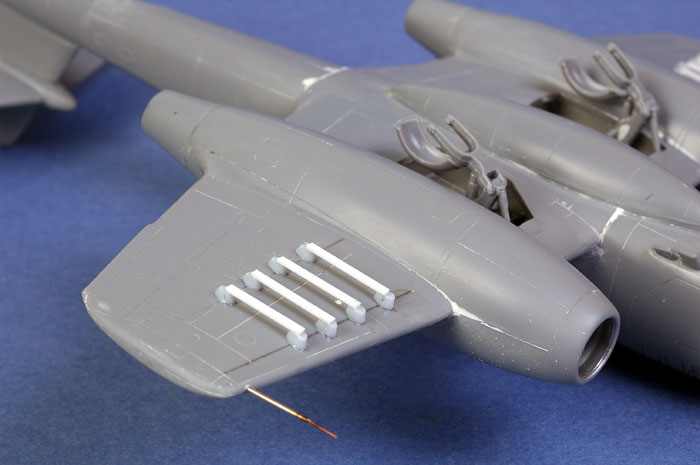
The fragile plastic pitot tube was ignored and replaced
with the filament from an industrial light, mounted deep inside the
starboard wing tip.
The model was sanded and polished once more before
painting.
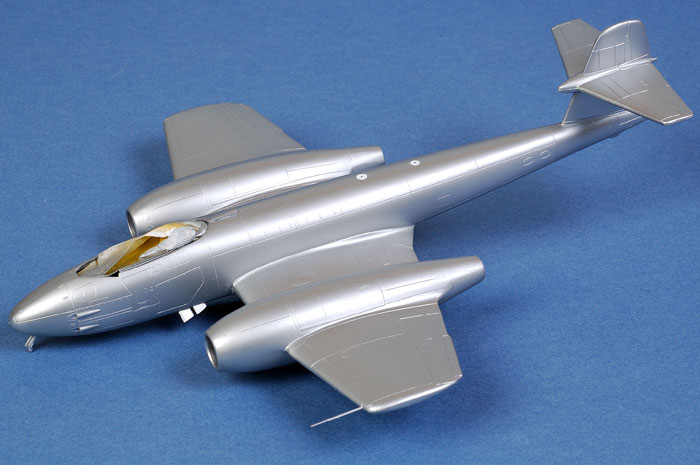
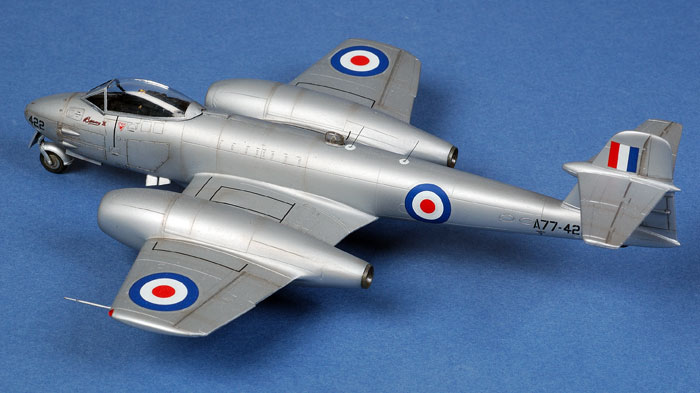
 RAAF
Meteors were finished in overall High Speed Silver. This was a painted
finish, so it was somewhat dull and more uniform than natural metal. RAAF
Meteors were finished in overall High Speed Silver. This was a painted
finish, so it was somewhat dull and more uniform than natural metal.
I like to use Tamiya's AS-12 Airframe Silver for this colour. It has an
impressively fine grain, effectively invisible even in this small scale,
and is very durable once applied to the model. The only problem is that
it can leave a pebbly finish if used from the spray can.
I therefore decanted some paint into my trusty Testor Aztek A470
airbrush by spraying into a disposable plastic container, then tipping
the resulting cold liquid into my airbrush paint cup.
From there, it is a simple matter of spraying a few light coats directly
over the plastic. Coverage is so good that a primer coat is not
required.
Click the thumbnails below to view larger images:
|
|
|
|
The model received an overall coat of Tamiya AS-12 Airframe Silver.
|
|
|
|
Subtlety is the key to weathering this aircraft. Fine lines of a thin black-brown mix were selectively sprayed.
|
|
|
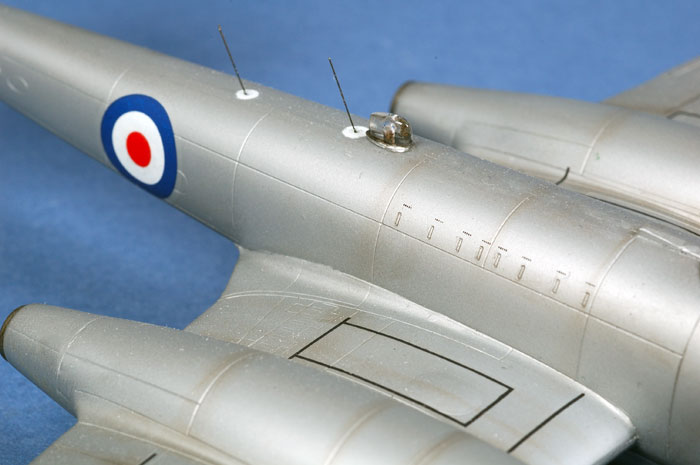
Next, I drilled out small holes in the fuselage
spine for the whip aerials, and masked small white circles
representing isolators (at least I assume that they are
ceramic isolators - they are certainly visible in photos).
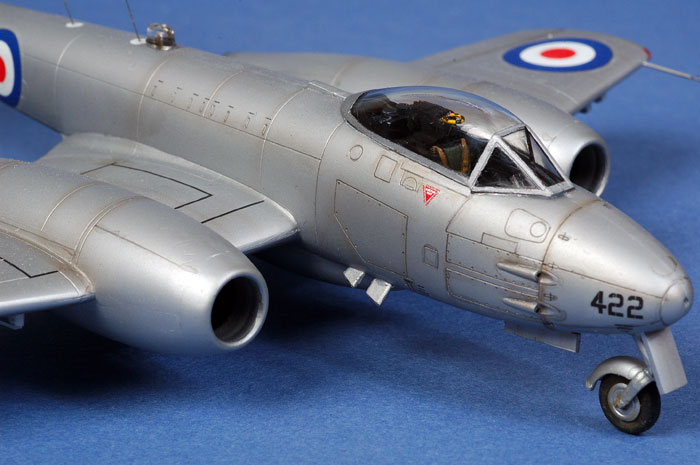
Meteors "in action" displayed a subtle but fairly
consistent pattern of weathering. Gun dust accumulated around the
nose panels and cannon ports, with grime also evident around the
access panels on the fuselage spine. It is important not to overdo
this effect, so I was very careful to slowly build up the lines of
thinly mixed black and red brown. The same mix was also used to
slightly highlight control surface hinge lines, a few engine nacelle
panels and some random chord-wise streaks on the wings and
tailplanes.
Tamiya Semi-Gloss Black acrylic paint was then mixed
with water, and this thin mix was flowed into the previously
highlighted panel and hinge lines.
The entire model was now coated with Polly Scale
Gloss acrylic in preparation for decals.
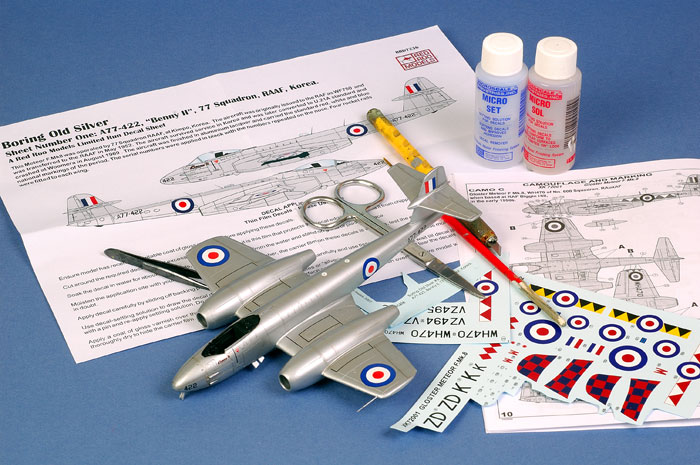
Markings were sourced from Red Roo Models' limited
edition "Boring Old Silver" decal sheet number RRD7236.
These were thin and responded well to Micro Set and
Micro Sol.
I used the stencil markings from the excellent decal
sheet supplied in the kit. Some of these are tiny in 1/72 scale, but
they are worth the effort. My only problem was installing the
inboard wing walks on the wrong wings. Check the kit and decals
carefully before installing yours - I think that the instructions
have the decal numbers reversed.
An overall coat of Polly Scale Flat acrylic sealed
the paint and decals, and delivered exactly the slightly dull
painted sheen that I was hoping for.
Before gluing the canopy in place, I added an
ejector handle from fuse wire to the top of the seat, painted black
and yellow.
The jet exhausts were painted with Testor's Metalizer Jet Exhaust and
glued in place.
Xtrakit includes the RAAF DF fairing on the clear sprue even though it
is not mentioned in the instructions. The shape is pretty good, so I
drilled into the bottom of the part and painted the recess gold to
represent the ADF transmitter.
Whip aerials were cut from ultra fine brass wire and painted with
Testor's Metalizer Gunmetal.
Wing tip navigation lights were painted clear red and clear green over a
spot of white.
Wheels and tyres were painted, with final weathering from Tamiya pastel
chalks. The wheels and gear doors were glued to the airframe to complete
this attractive little model.
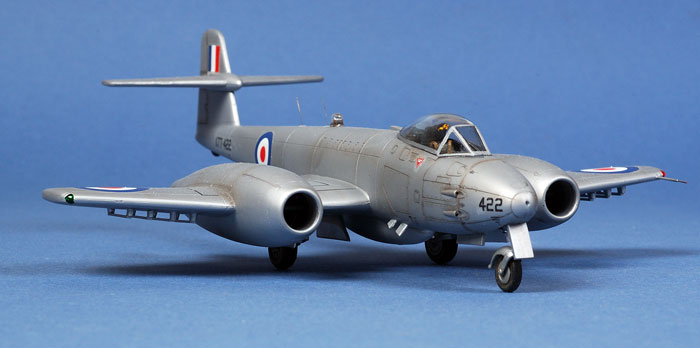
Xtrakit's Meteor F.Mk.8 fills an
important gap in the 1/72 scale model lineup. It is a really nice little
kit, well detailed, appears to be accurate and is quite easy to build
too, thanks to sensible parts breakdown and the absence of multi-media
parts.
I do hope that Xtrakits works through
the Meteor family. It would be nice to see some state-of-the-art
night-fighter and trainer Meatboxes in 1/72 scale too.
Thanks to Hannants for the sample
kit.
Click the thumbnails below to view larger images:
Model,
Images & Text Copyright © 2006 by
Brett Green
Page Created 18 December, 2006
Last Updated
21 February, 2007
Back to
HyperScale Main Page |
 Home
| What's New |
Features |
Gallery |
Reviews |
Reference |
Forum |
Search
Home
| What's New |
Features |
Gallery |
Reviews |
Reference |
Forum |
Search