|
1/32 scale Short Nose
Conversion
MiG-3
by Brian Geiger
|
 |
|
MiG-3 |

Trumpeter's 1/32 scale MiG-3 is available online from
Squadron.com
Background
The MiG-3 occupies an interesting place in war time
aviation design. It bridges the gap between the stubby I-153 & I-16 and
the sleeker Yak & Lavochkin designs. It was designed to attack high
altitude bombers. Experienced pilots such as Aleksandr Pokryskin
developed tactics to exploit the MiG's strengths with success. However,
it’s legacy may more iconic than legendary. Despite shortcomings, such
as poor take off & landing visibility and a proclivity for tail spins,
it soldiered on throughout the war. Later it was used mainly in support
rolls.
Planning
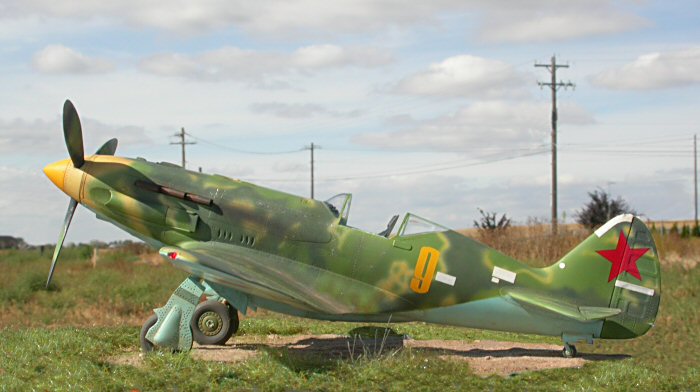
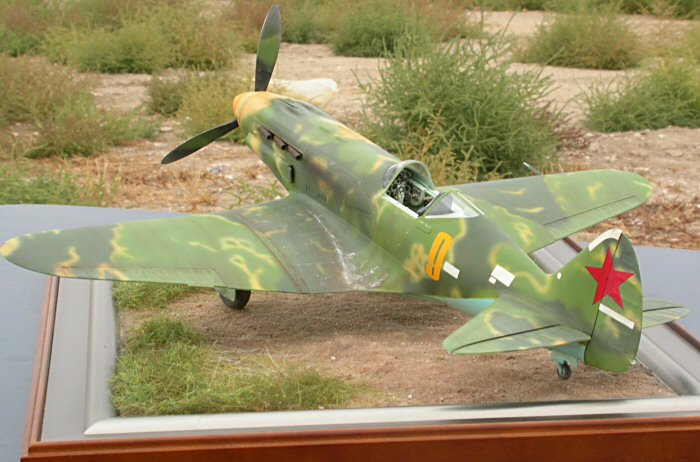
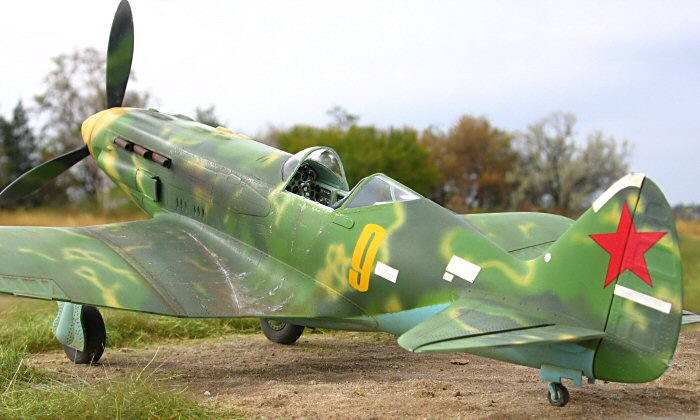
My model represents an early MiG-3 serving with the
38 PAE (Air Recognition Regiment) from PVO (Home Air Defence) of Moscow
in 1941.
It’s always a boost to stumble onto new reference info on the web. I
relied heavily on Massimo Tessitori’s VVS research web pages
http://www.sovietwarplanes.com
. I wish every plane had such a dedicated source, designed specifically
for modelers. Big thumbs up! Another “must see” site for Soviet aircraft
is Matt Bittner and Erik Pilawskii’s VVS pages
http://vvs.hobbyvista.com .
Soviet camo schemes are a bit more standard and subdued compared to the
the wide array of German schemes used during WWII. However, among the
cornucopia of MiG-3 profiles available on Massimo’s pages are a section
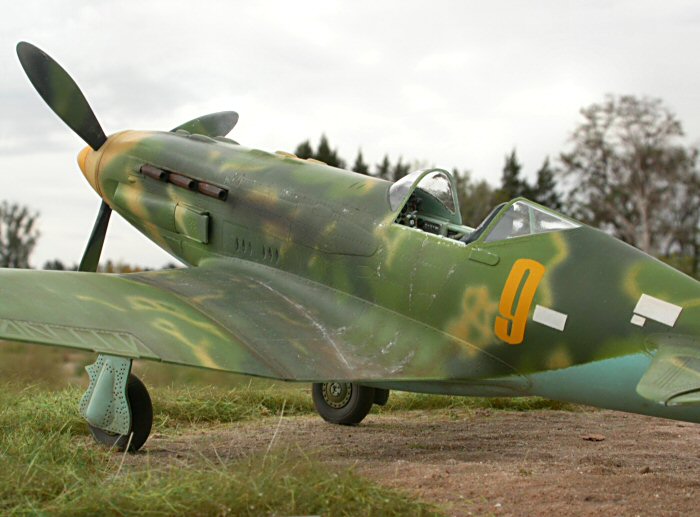
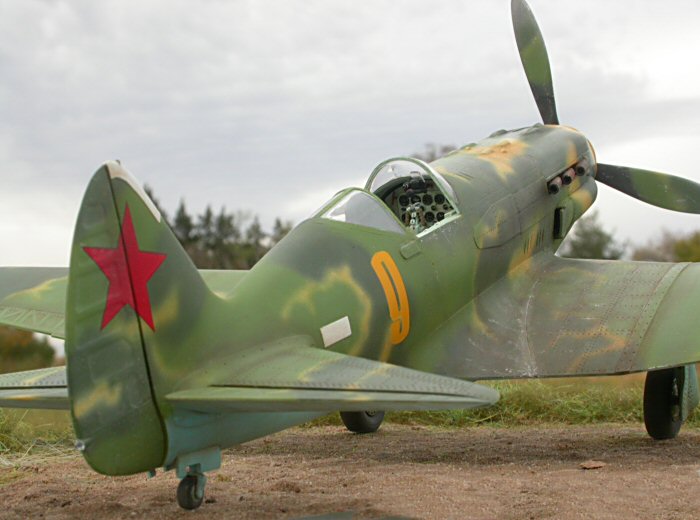
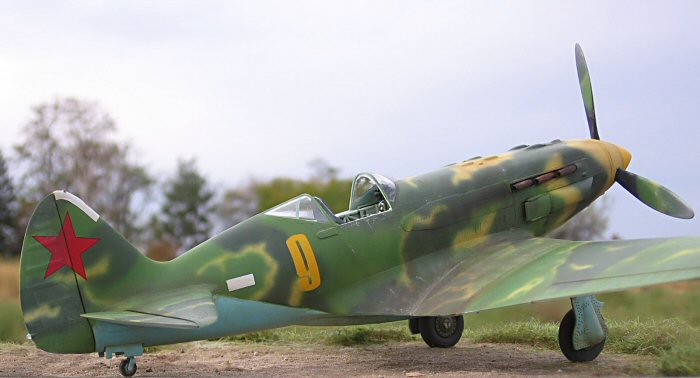
of MiG-3 repaintings and non-standard temperate schemes. Yellow 9, in
warm colors, immediately caught my eye. Midway through my build, Massimo
published an alternate color interpretation, reasoning that many
countries prefer cooler blue & gray colors for reconnaissance aircraft.
My mind was already made up so I stayed the course.
The main obstacle for this choice of aircraft was that it was an early
short-nose version. The 1/32 Trumpeter kit is the later long-nose
version. Once again, Massimo came to my rescue with a detailed
explaination of the short-nose / long-nose differences
http://www.sovietwarplanes.com/mig3/mig3/latemig-3.html . It
looked doable so I decided to go for it.
Construction
and Modifications
|
Trumpeter’s MiG-3 kit is a fine example of the new
generation of 1/32 kits that make modelers continue to pile on more
kits, even though they’ve already got more than a lifetime of unbuilt
models. Some have scoffed at the deep rivet hole details and the moving
control surfaces with fidely metal hardware. Some light sanding will
subdue the rivets and I simply chose to omit the metal parts and glue
the control surfaces. The kit looks very good, even built straight out
of the box.
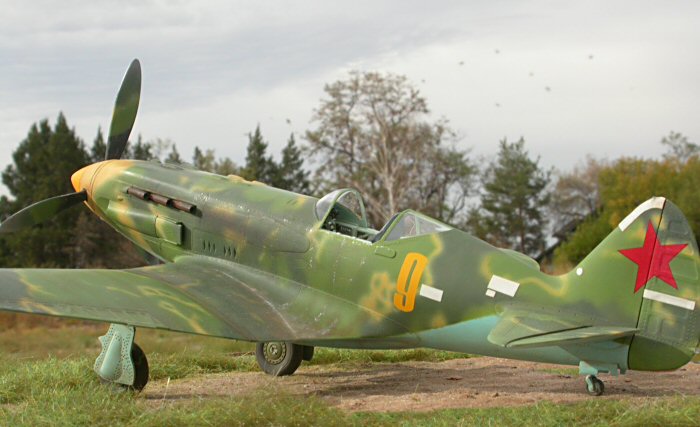
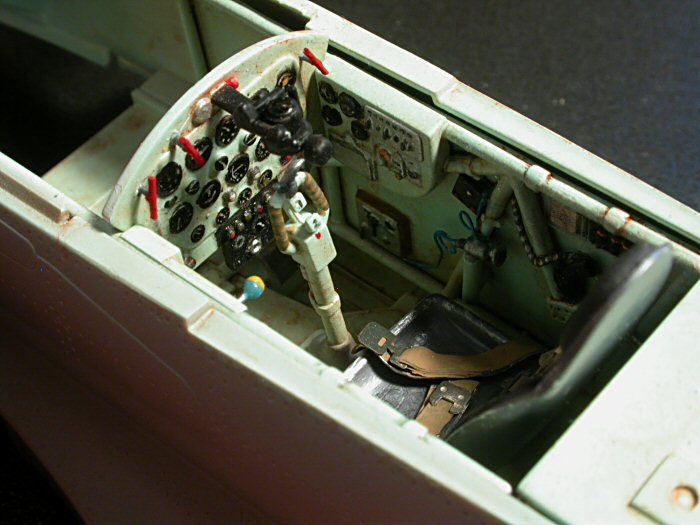
Peter Vill’s workbench article
http://vvs.hobbyvista.com/Modeling/MiG/MiG-3/Trumpeter/Vill/index.php
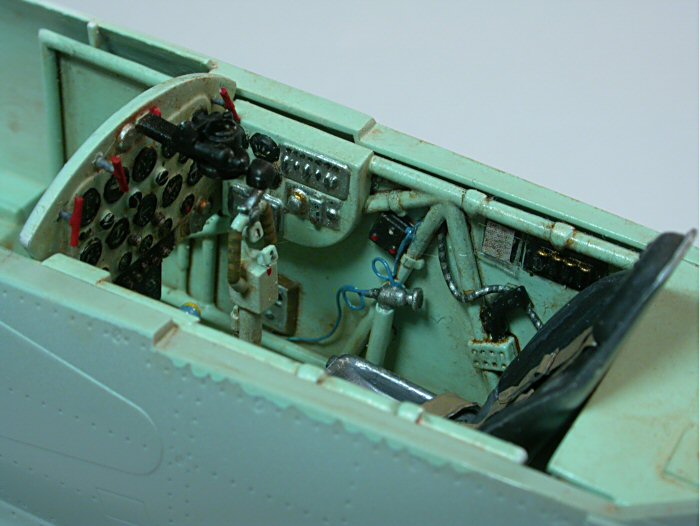
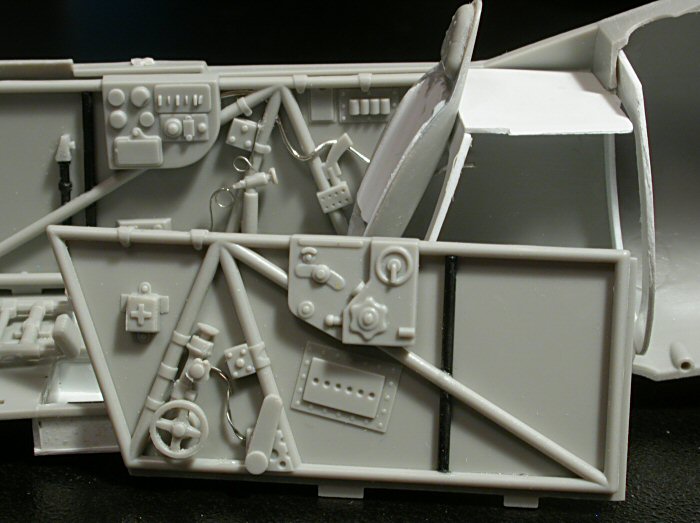
, detailed many of the modifications that I copied for the interior. I
added a few more wires & hoses on the side walls, cut out and deepened
the floor wells using Evergreen styrene. I also added some framing
behind the seat.
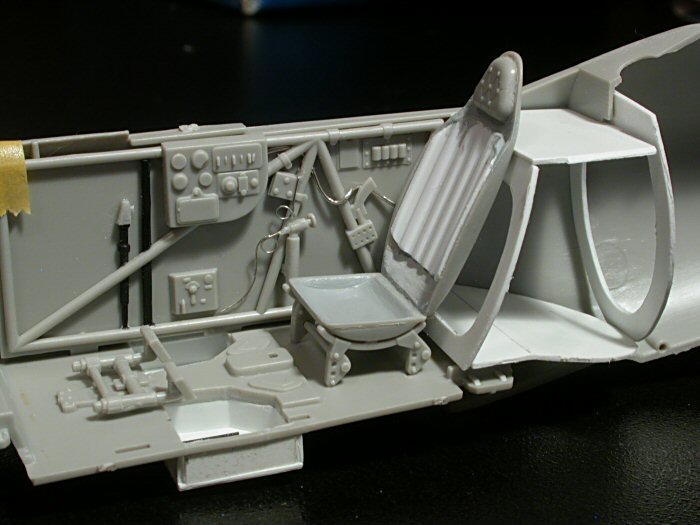
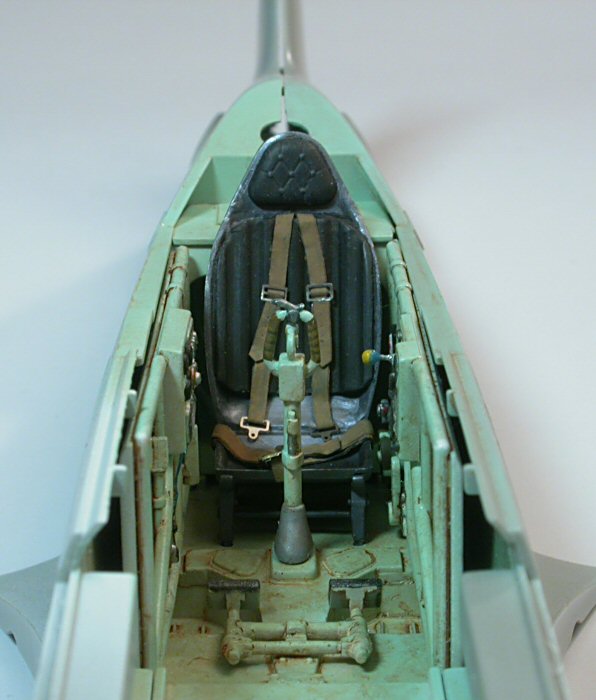
The seat pan was thinned down and reshaped. I
created padding for the back rest using corrugated styrene. The
seatbelts are lead foil with spare PE buckle parts from Eduard. The T
handles on the instrument panel, which should really be D handles, were
made from stretched sprue. A small square of Verlinden printed map was
attached to the map case. Another great reference for cockpit detail is
Ubisoft’s PC flight sim, IL-2 Sturmovik. That’s a real tribute the the
attention to detail in a video game. It’s also easy to lose precious
modeling time fighting air battles on the computer.
Few MiG-3’s were equipped with radios so I chose to
leave mine out. Since the kit radio was molded to the rear deck, I
replaced the whole deck and fashioned a couple of mounting plates. I
also liked the “sports car” look of omitting the sliding middle section
of the windscreen. That would have been very likely for a recce aircraft
in the summer.
Click the thumbnails below
to view larger images:
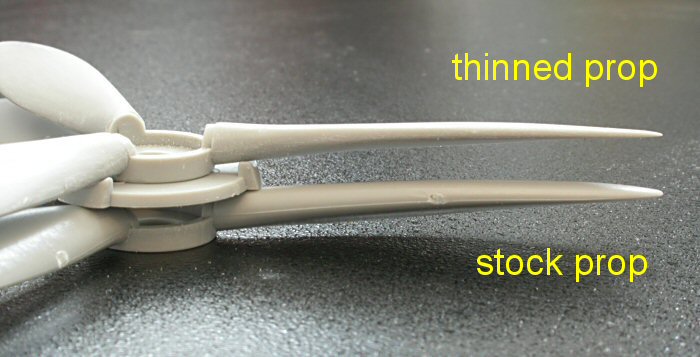
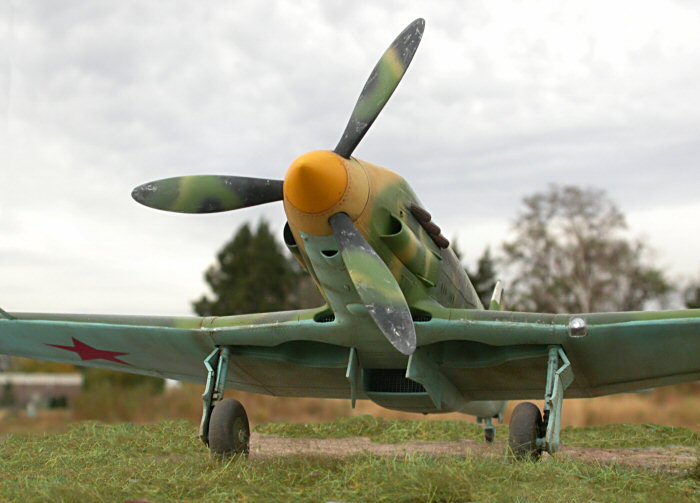
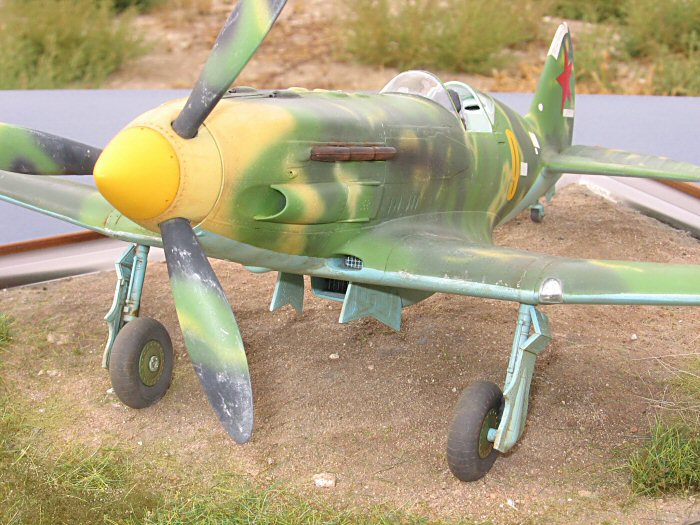
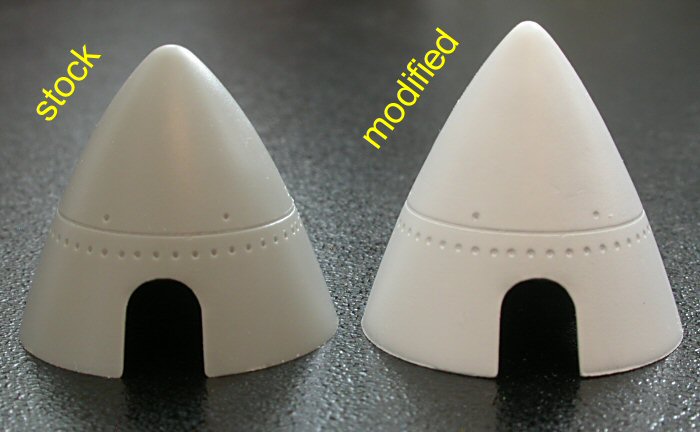
The kit propeller blades are very fat so I shaped
them down with a Dremel tool and sanded them smooth. The prop spinner
should also be more pointy. I built up layers of Mr. Surfacer, then
chucked the spinner in the Dremel and shaped it with a file. Current
research seems to indicate that there were no vertical frame members on
the front wind screen. I shaved the raised frame rails off with an Xacto
blade and polished the screen clear again with micro mesh cloths. After
a bath of Future Floor Polish it looked as good as new.
Click the thumbnails below
to view larger images:
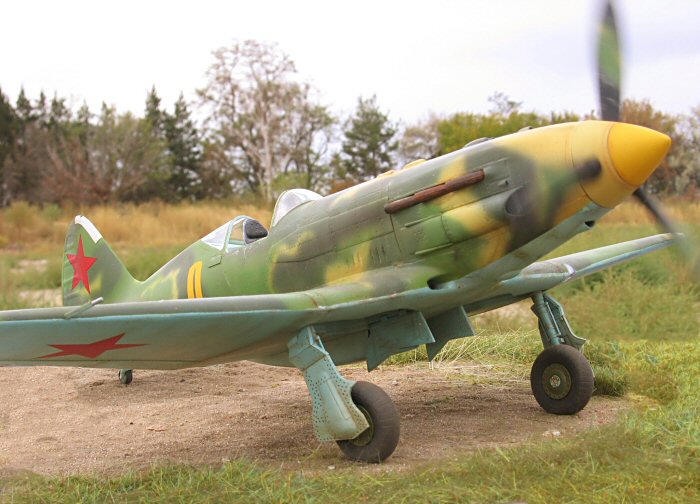
To paraphrase Massimo, short nose vs. long nose
versions is a bit of a misnomer. Both types of aircraft have the same
overall length. A later cowl was designed for ease of service access.
The difference lies primarily in the location of certain panel lines on
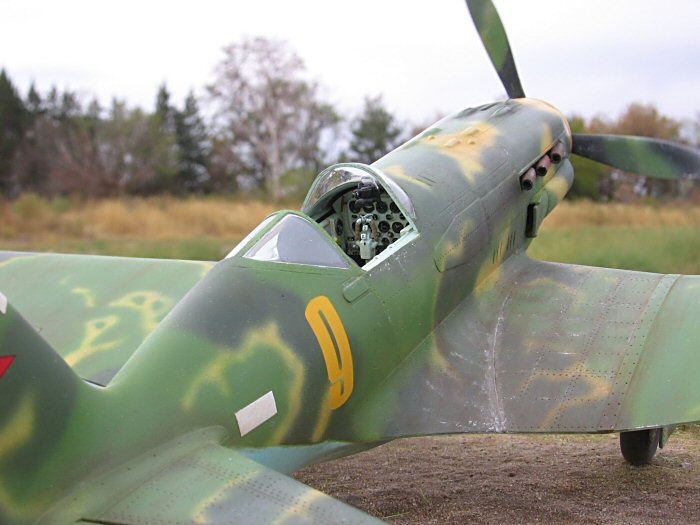
the engine cowling. I cut and reshaped the gun farings and replaced the
leading exhaust shrouds with very thin styrene to approximate the early
style. The same thin styrene was used to fill the gaps behind the
exhaust stacks and make the thin lip between the engine cowling and prop
spinner, used to prevent the access of snow. I rescribed panel lines
where I could and sculpted six vents on each side of the fuselage with a
Dremel. The addition of stretched sprue weld beads on the exhaust stacks
finished off the nose.
The remaining modifications included fairing over the leading edge slats
with Mr. Surfacer, repositioning the pitot tube on the leading edge, and
replacing the bulged tail wheel doors with scratch bulit doors with a
slot for the wheel. I wanted to replicate the early grille on the
supercharger intakes but the closest thing I could find was a square
grid pattern.
Lastly, I cut front sections off of the main gear doors to replicate a
field modification made to reduce the accumulation of snow and mud.
Painting,
Decals and Weathering
|
I used the kit decals. The tilted star on the tail
was unique to this plane. To make the yellow 9’s, I followed Ian
Robertson’s tip. The numbers were enlarged on a computer and printed to
scale. Next, I lightly tacked Tamiya masking tape over the printed image
and cut the outline. The resulting masks were peeled off the paper and
stuck onto the model.
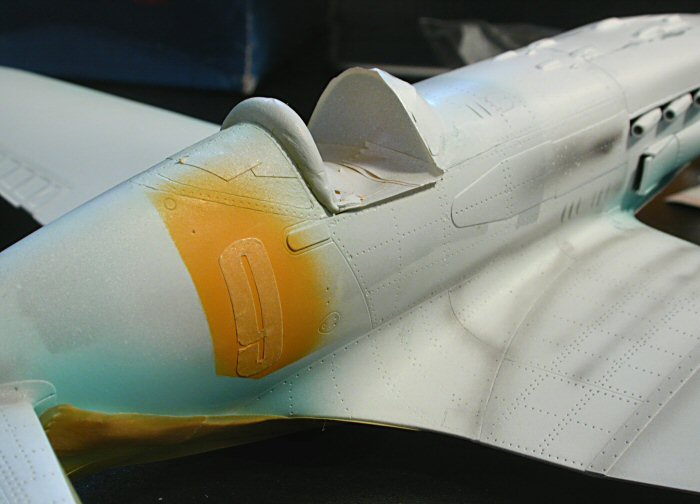
The model was primed with Mr. Base White 1000.
After reading glowing reviews of the new White Ensign Models VVS color
line, I was excited to give them a try.
http://www.whiteensignmodels.com/
Let me say right off that I was very pleased with the actual colors.
Here’s what I used:
-
IMUP Blue-Grey
Metal Primer (WEM AC S 06) cockpit interior
-
AII Blue (WEM AC S
01) underside blue
-
AII Green (WEM AC S
03) upper 3-tone camo
-
AMT-4 Olive Green (WEM
AC S 08) upper 3-tone camo
-
AII Light Brown (WEM
AC S 15) upper 3-tone camo
As with anything new, there is often a learning
curve involved. I was told that they behave similarly to Xtracolor. I
wanted them to dry a little faster so I tried thinning them with Mr.
Color thinner. The cockpit color seemed more like a toothpaste green but
it may very well be correct. When I painted the blue undersides, I
noticed that the paint was going on very thick and gooey. It took a
couple days to dry completely but it looked fine. The problems started
when I launched into the three-tone camo scheme. I used a Badger Sotar
20/20 airbrush but was unable to get the right consistency needed for
fine lines. I added about 75% thinner to 25% paint but the results
seemed to alternate from too thick to too runny. After two initial
colors, the paint was building up to a sticky mess! I panicked and
grabbed a rag soaked with lacquer thinner and started wiping it off.
When I tried cleaning out the panel lines with a toothbrush the solvent
started to etch brush strokes into the plastic. Aaaaahhh!! It was time
to stop, step back, let it dry, and try again later.

As I attempted to clean up my disaster with lacquer
thinner, it occured to me that the lacquer thinner might do a better job
of thinning the paint. I did a quick test and found that was the case.
It went on thinner, a bit duller, and dried much faster. After the icky
paint had dried, I sanded and smoothed the upper surfaces with a set of
micro mesh clothes. The next paint session was still a bit of a
challenge but went much better. I printed off several screen shot views
from IL-2 Sturmovik to use as a guide for my freehand scheme. I darkened
the olive green a bit with Humbrol OD for a little more contrast. I also
shaded down the colors that were painted on the wood surfaces of the
rear fuselage and wings and lightened colors on metal and fabric
surfaces.

The white patches on the rear fuselage most likely are cloth field
repairs. I painted Tamiya masking tape white and feathered them in with
Future floor wax.
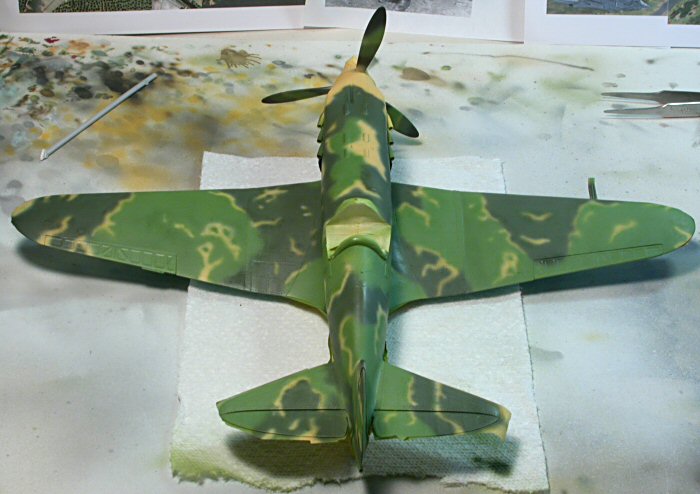
The weathering consists of a wash of Sienna artist
oil paint. I mixed a few different shades of Burnt Sienna, Raw Sienna
and white for variation. Then I airbrushed some post shading streaks
with a highly thinned black brown mixture of enamels. The exhaust stacks
were washed with RUSTALL. A semi-gloss sheen was achieved with an
overall coat of Humbrol Matt Cote mixed with Gloss Cote. Finally, I gave
it the chipped paint treatment with a Crayola silver pencil and dusted
areas with Doc O’Brien’s weathering powders.
I’m usually more of an “out of the box” modeler.
The wealth of research info available on the web gave me the confidence
to try something different. I’ll build the next one as a long nose
version to contrast the differences. Big thanks to all those who have
shared their information.
VVS paint schemes don’t have to be plain green. This colorful scheme and
sporty size makes the MiG-3 a handsome addition to any WWII collection.
Trumpeter’s kit is a winner. What are you waiting for?!
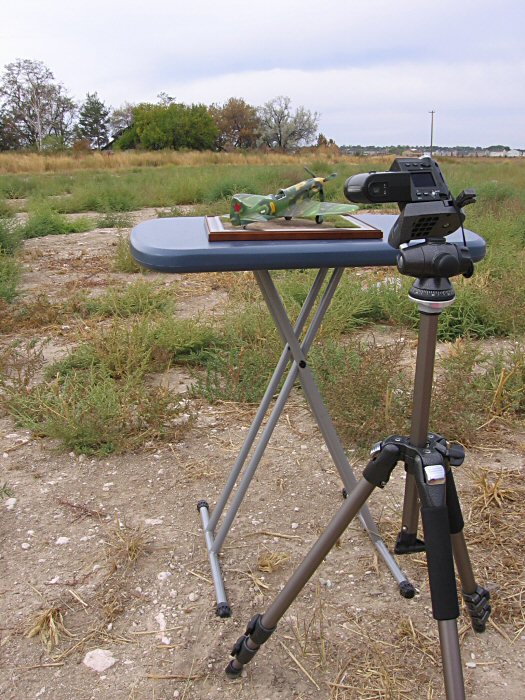
The majority of these photos were taken with a
Nikon Coolpix 4500 set at aperture priority for maximum depth of field.
I also used a Canon PowerShot A510 for a few of the outdoor pictures.
The Canon’s “foliage” scene mode saturated the colors a bit but it looks
pretty. With slow shutter speeds, I like to use a tripod and the self
timer to eliminate any motion while depressing the shutter.
I used Paint Shop Pro 8 to crop, resize, and sharpen. I couldn’t resist
using the clone brush here and there to eliminate the borders of the
display base.
http://www.sovietwarplanes.com
http://vvs.hobbyvista.com
http://www.il2sturmovik.com Ubisoft
Richard Caruana's article “Red Star of Moscow” Vol.
4(7) Scale Aviation Modeller International
Steve A. Evan’s article “Big MiG” Vol. 10(11) Scale
Aviation Modeller International
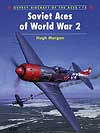
Soviet Aces of World War 2, Osprey Aircraft of the
Aces 15
Click the thumbnails below
to view larger images:
Soviet Aces of World War 2
Aircraft of the Aces 15 |
|
|
|
|
Author: Hugh Morgan
Illustrator: John Weal
US Price: $17.95
UK Price: £12.99
Publisher:
Osprey Publishing
Publish Date:
October 15, 1997
Details: 96 pages; ISBN: 1855326329 |
|
|
Model, Images and Text Copyright © 2005
by Brian Geiger
Page Created 27 October, 2005
Last Updated
27 October, 2005
Back to
HyperScale Main Page |
 Home
| What's New |
Features |
Gallery |
Reviews |
Reference |
Forum |
Search
Home
| What's New |
Features |
Gallery |
Reviews |
Reference |
Forum |
Search