|
Eduard + Heller + Red Roo
GAF Mirage IIID
by
Mike Prince
|
 |
|
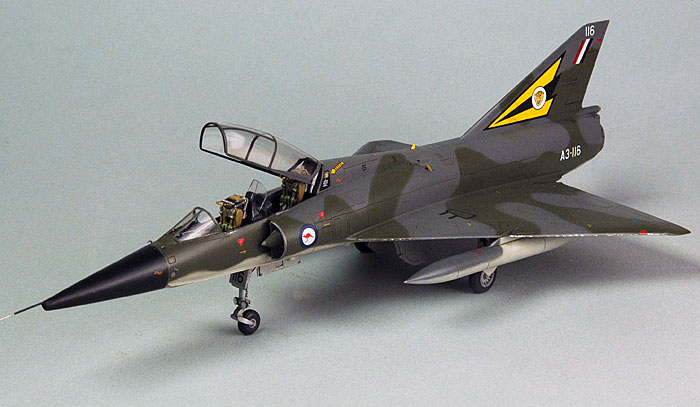
GAF Mirage IIID |

Eduard's
1/48 scale Mirage IIIC is
available online from Squadron.com
Source kit
Eduard Mirage IIICJ, heavily converted.
Conversion kit
Heller Mirage IIIB/C, Red Roo Models Mirage IIID, Cutting Edge seats.
Background
The Royal Australian Air Force took delivery of the first of 100
single seat Mirage IIIO aircraft in 1964 with the first of an eventual
16 Mirage IIID dual seat trainers received in 1966. A3-116 was part of a
second order for the trainer variant made in November 1970 and as such
was the last Mirage of any variant to be ordered by the RAAF.
It was delivered in January 1974 and spent the majority of its time
in service with 2 Operational Conversion Unit. It was reduced to spares
in March 1986 as part of the transition to the F/A-18 Hornet.
Conversion
Ultimately, I wanted a good 1/48 scale RAAF Mirage. The panel lines
had to be engraved, with the kit up to modern standards of detail.
However, noting that Eduard advised their intention some time ago to
eventually produce a IIIE and that this would form a good basis for a
IIIO, I thought it better to tackle the two seater while waiting (still
waiting). To do this I used an Eduard Mirage IIIC kit as the basis for
the conversion, with the two-seat cockpit from the Heller Mirage IIIB/C
grafted on, and with a replacement resin nose, tail cone and ventral
fuel tank from Red Roo Models. While the Red Roo tail cone (originally
intended for the Heller kit) was a little narrower but deeper,
necessitating a bit of work to fair it in, the remaining parts fitted
well despite their varied origins.
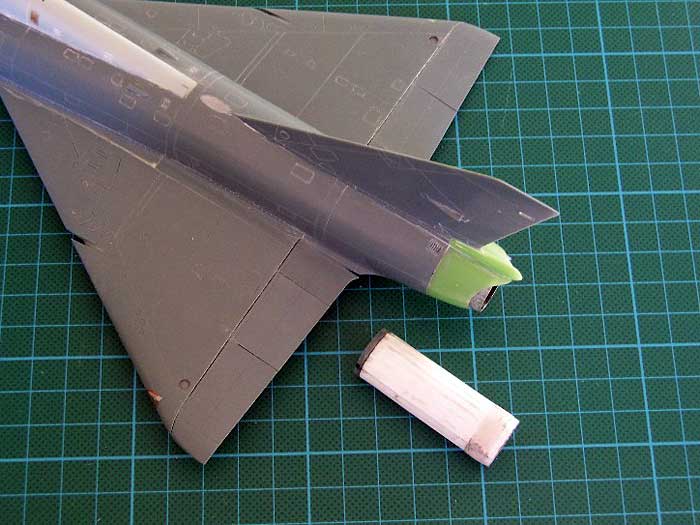
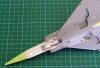
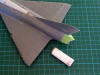
To start the conversion, the nose of the Eduard fuselage was cut off 8mm
forward of the join between the fuselage and the air intakes. This join
is shown by a dotted line in two of the conversion photos, with the
nearby arrow showing where the cut was made. Two small tabs were left to
overlap the Heller nose, these later being hidden by the intakes. The
ramps between the fuselage sides and the intake splitter plates needed
to be widened slightly to match the Eduard kit. This was done with
plastic sheet. The Heller nose was built at the same time, though I left
fitting out of the cockpit until later.

Heller forward fuselage and spine spliced
onto Eduard fuselage. Dotted line shows join between main fuselage and
intakes; Eduard nose was removed 8mm forward of this point (arrowed).
Red Roo resin nose and additional cockpit detail shown.
Click the thumbnails below to view larger
images:
|
|
|
|
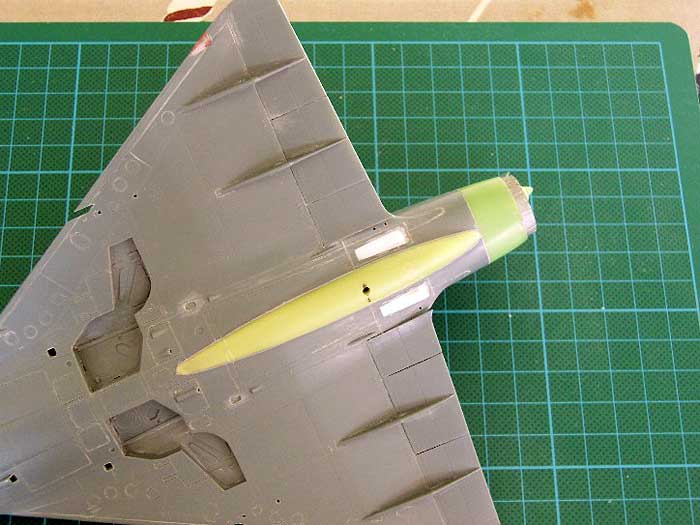
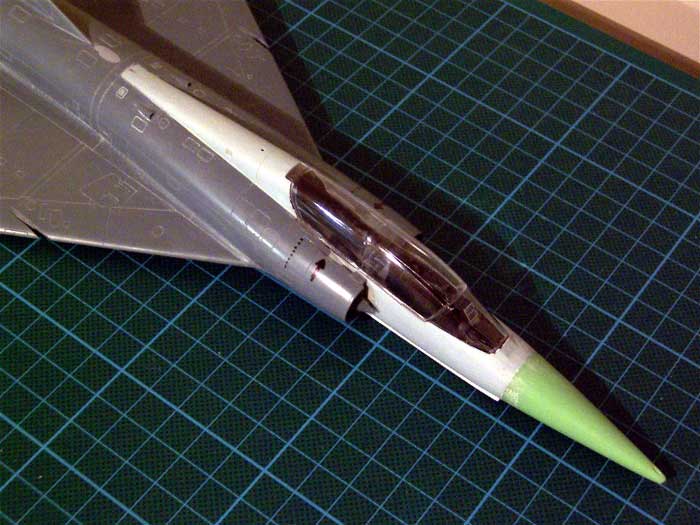
Eduard nose wheel opening for Mirage IIIC is correct position for IIID, though Heller wheel well must be used. Detail added within wheel well as Heller moulding has none. Vent added below nose cone. Blanking plate forward of nose-wheel well not yet added. |
|
|
|
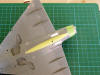
Red Roo resin tail cone in place. Jet pipe from rolled plastic sheet. Vents added to Heller spine (white) while existing incorrect vent filled (brown). Fillet at base of fin leading edge removed. |
|
|
|
Red Roo resin tail cone in place. Jet pipe from rolled plastic sheet. Vents added to Heller spine (white) while existing incorrect vent filled (brown). Fillet at base of fin leading edge removed. |
|
|
The next few steps were then undertaken in a sequence specifically
intended to ensure the fuselage retained the correct shape. The Eduard
fuselage was built as normal, though based on other articles I chose to
brace the opening in the lower fuselage to enure no gap resulted at the
wing roots. The tail cone was then removed along the rear-most vertical
panel line, along with the fillet at the base of the fin’s leading edge.
The wings were then attached and left to set. The next day the lower
part of the Heller nose was trimmed away to match the surrounds to the
nose wheel well on the Eduard kit (integral with the wing lower
surface), then the Heller nose attached. It should be noted that, unlike
the single seater, the location of the nose wheel well on the IIID is
the same as for the IIIC. It was only after the now combined Eduard /
Heller fuselage and wings were set that the upper (single seat) spine
was removed, some scrap plastic glued in to form a ledge, then the two
seat spine attached in place. Whilst adequate, the resin tail cone from
Red Roo was then drilled out so that a deeper jet pipe could be fitted
later, then both the tail cone and the ventral tank fitted and faired
in. The tail cone required a small amount of work to achieve a good fit.
With a structurally complete aircraft it was now onto detailed
conversion. The resin Red Roo nose cone was fitted and faired in (again
a good fit but air bubbles in the casting needed to be filled with CA
glue), two bulged panels and various drains added from plastic sheet and
tube beneath the rear fuselage, and the cockpit fitted out. An outlet
for the air-conditioning was cut into the lower part of the nose cone,
while two sets of three horizontal outlets were scribed on each side of
the spine (with the existing moulded vertical one filled). Sufficient
panel lines were scribed onto the Heller parts to make it consistent
with the engraved Eduard parts. Dymo labelling tape made a great guide
for doing this, with a large sewing needle used to do the engraving. The
panel forward of the forward instrument panel (beneath the windscreen)
came from the Eduard kit, with the less detailed Heller one cut away.
Further detail was then added based upon reference photos as the area is
a mass of exposed instruments and wiring. The inside of the Heller /
Eduard nose joint was visible in the rear cockpit so this was filled
before this area was also detailed, including the prominent rams on the
rear bulkhead for lifting the canopy. (These are useful to hold the
kit’s canopy open.) Despite seats being included in the Red Roo
conversion I chose to use equivalent items from Cutting Edge as it saved
the trouble of replicating the tangled mass of belts visible on the full
size versions. Other minor additions included four vanes mounted either
side of the braking parachute housing, and a small pressure sensor on
the port side of the nose. The jet pipe was made by scoring a piece of
thin plastic sheet to represent corrugations then rolling it into a tube
to fit inside the Red Roo tail cone. The rear face of the engine was
taken from the Eduard kit.
Underneath, the very bare forward wheel well (from the Heller kit, as
this area is quite different between single and two seaters) was
detailed with sheet plastic, rod and wire. Eventually, the Heller main
nose wheel strut was also used, though the single retraction arm seen on
the single seater was replaced by a scratch built “V” strut arrangement
unique to the two seaters. Twin landing lights were added to the nose
wheel leg. Brake lines were added from copper wire down the main
undercarriage legs along with a little extra detail in the wheel wells.
It was only after completing the model that I found the undercarriage
legs to be significantly too long, with almost no overlap between the
undercarriage doors and the tops of the main wheels. For me, this meant
removing and shortening them by 3mm before reattaching them. (Notably,
the Eduard undercarriage legs started off 3mm longer than the Heller
ones; in my opinion, the model looks much better with them shortened.)
The four small access doors forward and aft of the main wheel wells were
opened up as all photos of operational aircraft show these hanging open
whilst on the ground. The small doors were made from thin plastic sheet.
The gun barrels were omitted, as these seem to have been rarely fitted
to the two-seaters.
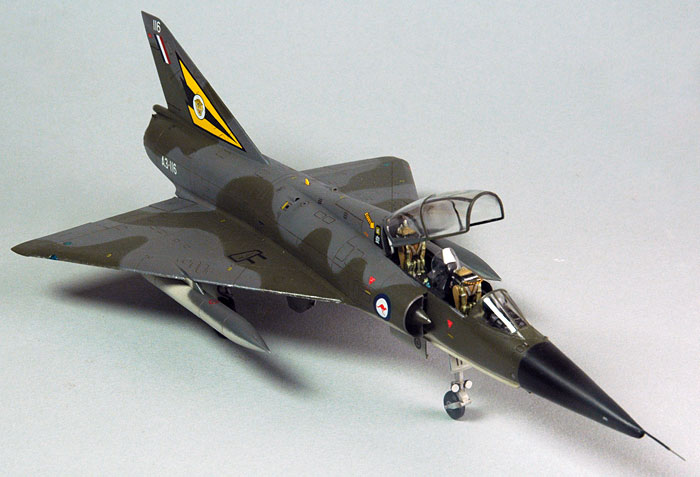
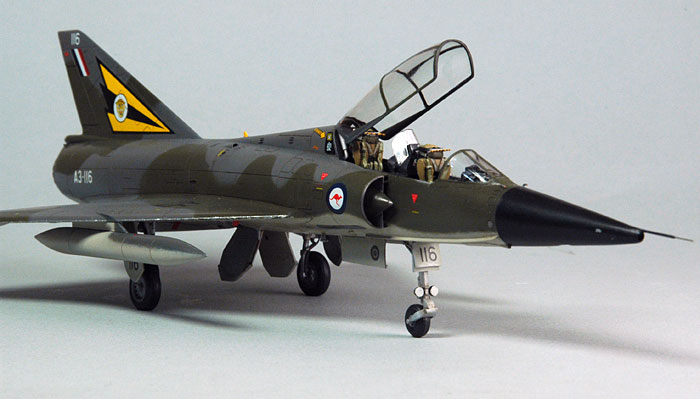
Ultimately, I wanted an aircraft that was unique in some way, yet at
the same time representative of the type in RAAF service. I also tried
to avoid aircraft already modelled by others. A3-116, the last Mirage
III delivered to the RAAF therefore filled the bill nicely.
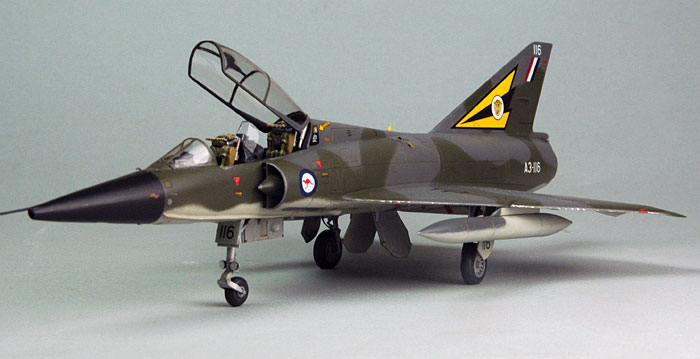
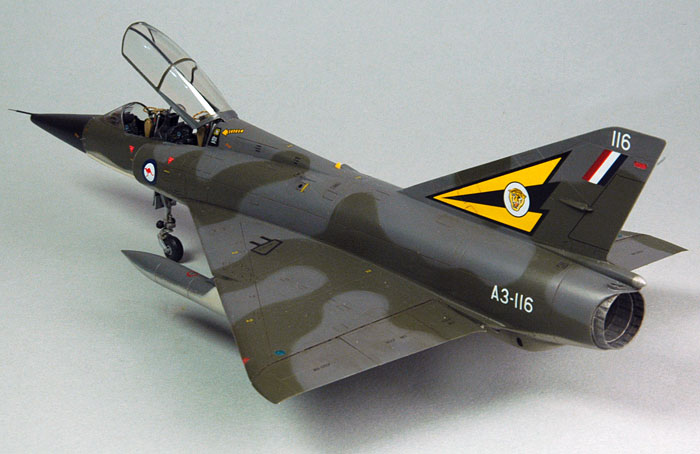
The aircraft was delivered in the later three tone green and grey
scheme and spent most of its life assigned to 2 OCU. It was delivered
with Martin Baker Mk 4 seats.
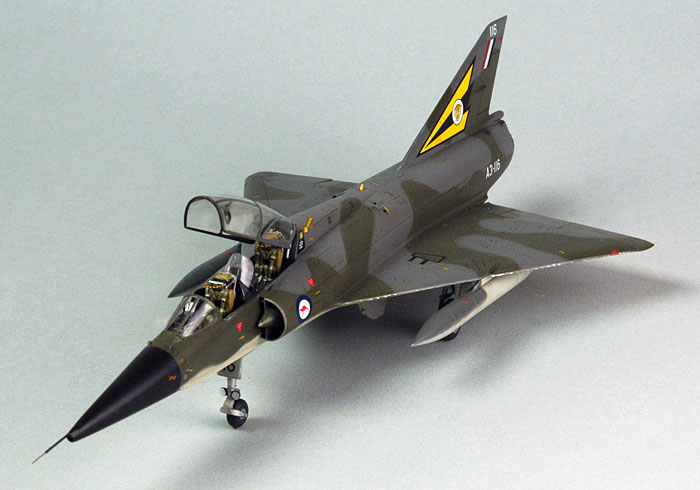
All uniquely Australian markings came from the RooDecals Mirage IIIO
sheet, with serials mixed and matched to represent ‘116. The ‘Rescue’
arrows for the spine of the aircraft were too large so these were
replaced from the spares box. Stencils came from the Eduard kit and,
fortuitously, consisted of symbols rather than French writing.
The canopy release panel and instructions differed between the one
and two seaters, so the decal applicable to the single seater was cut up
and applied in two pieces to a painted black background.
The leading edges of the wings and fin were masked prior to spraying
the remainder of the kit with clear Humbrol satin; once the tape was
removed the glossy coat of Future beneath nicely replicated the glossy
leading edges of the original.
The Modeller’s Guide to the RAAF Mirage IIIO/D, Gary Byk, Red Roo
Models Publications, 1996
Mirage IIIO Colours and Markings, Paul Mason and Darren Mottram,
Mushroom Model Magazine Special No 9102, 2005
Click the thumbnails below to view larger
images:
Model and Text Copyright ©
2006 by Mike Prince
Images and Text Copyright ©
2006 by Mike Prince (construction photos) and Brett Green
Page Created 15 May, 2006
Last Updated
15 May, 2006
Back to
HyperScale Main Page |
 Home
| What's New |
Features |
Gallery |
Reviews |
Reference |
Forum |
Search
Home
| What's New |
Features |
Gallery |
Reviews |
Reference |
Forum |
Search