|
Roden's 1/48 scale
Grumman OV-1A Mohawk
by Mick Evans
|
 |
|
Grumman OV-1 A
Mohawk |
images by Brett Green

Roden's
1/48 scale OV-1A/JOV-1A Mohawk is available online from
Squadron.com
On opening the box for this kit I was surprised at
the high quality of the parts and the detail provided on them. Roden has
continued to improve the quality of their kits to a point where they are
now comparable with releases from the major kit producing companies.
Roden's 1/48 scale OV-1A/JOV-1A Mohawk comprises 18 clear plastic parts
and 186 plastic parts crisply moulded in a light grey styrene.
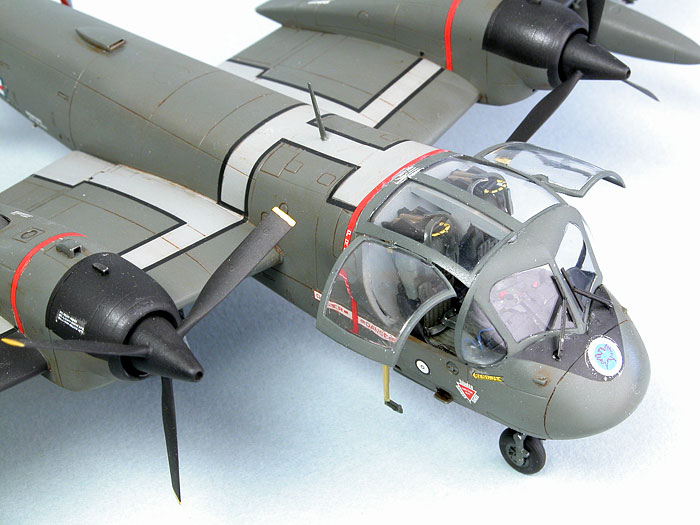
The cockpit detail is excellent with no less than
38 detail parts provided. The main instrument panel is moulded in clear
plastic with a decal to be placed at the rear. The decal is printed in
reverse to allow the markings to show through the clear panel. Each
ejection seat is a sub assembly in itself with 8 parts provided for each
seat.
The transparencies are nice and clear and the areas
to be painted are frosted for good paint adhesion. The undercarriage
wells and legs have great detail. One problem spot is a rather large
ejector pin mark right through the center of the rib detail in each main
wheel bay. The ejector pin marks in the nose wheel bay should be easy to
repair, as it is a smooth flat surface with no detail near them.

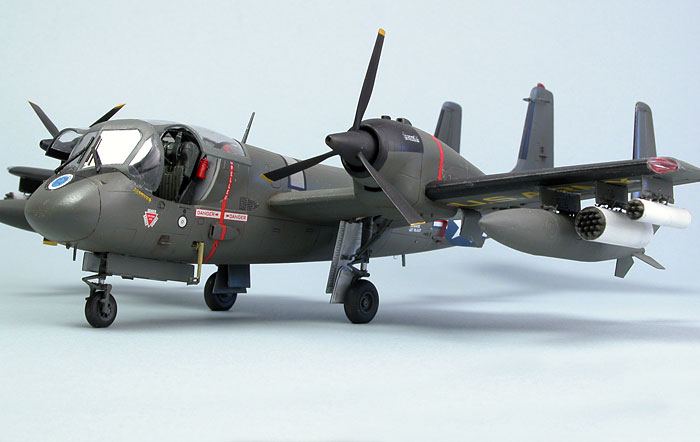
A good load of drop tanks, rocket, and gun pods is
provided. For those who wish for more choices will have to dig into
Hasegawa weapons sets for alternatives.
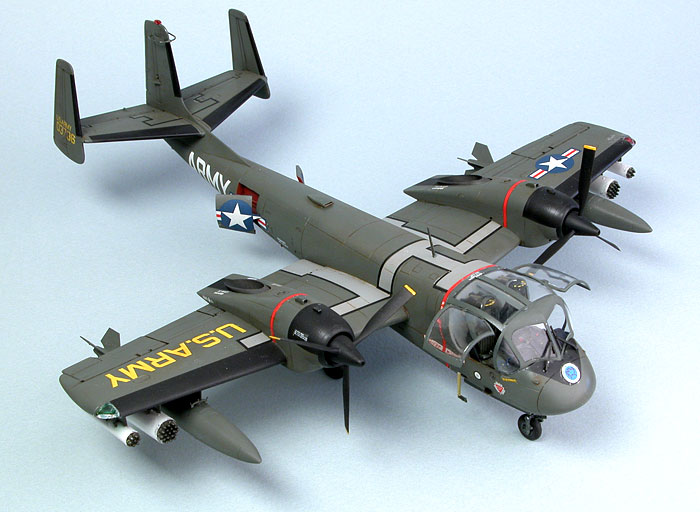
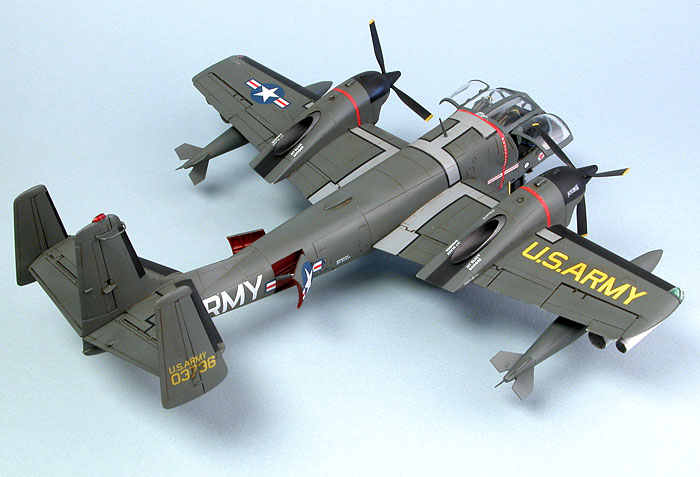
Markings are supplied for 4 US Army aircraft
operating in Vietnam, 2 in high visibility markings in a dark olive drab
scheme, and 2 in low visibility markings in a lighter faded olive drab
scheme.
Building Roden's Mohawk was quite easy with only a few fit problems.
Construction started with the some light cleanup of flash and some
filling of a few sink areas around the speed brake area. The cockpit is
nicely detailed except for the rear bulkhead. Photographs of this area
show it to be quite a busy area and, this was overlooked by the
manufacturer.
Once the cockpit is complete, the fuselage assembly is a very easy
assembly process. The wings then become the next big challenge. The
wheel wells have a rather large injector mark through the support
ribbing and this takes some work to remove. I removed the 3 effected
ribs and replaced them with plastic rod and under a coat of paint you
cannot tell the difference. Also another raised injector mark near the
main undercarriage mounts requires removing.
The wings are a simple assembly. The wingtips are a major fit problem
and require some trial fitting and filling. The wings, horizontal tail,
and fins were added after some cleanup of the mating surfaces and very
little filler was required. The nose requires some trial fitting and
careful gluing to achieve a good fit.
The kit is a tail sitter, so remember to fit a heap of weight in the
nose, behind the cockpit and in the engine nacelles. Leave the engine
exhausts off until the model is complete, just in case you have to add
more weight. The next major task was the transparencies, and this nearly
cost me my sanity. The overhead console is best left off until the
windscreen is in place, as it needs to be trimmed up to fit.
Trial fit the upper transparency before the overhead console sets to
ensure that it will sit down correctly. One point to remember when
fitting the propeller blades is that as with most turbo props the blades
are feathered before the engines are shut down.
The kit was then painted fully in Xtracolor Olive Drab before masking
up the walkways and anti glare panels. The decals were fiddly for the
walkway edges and, really tests the patience.
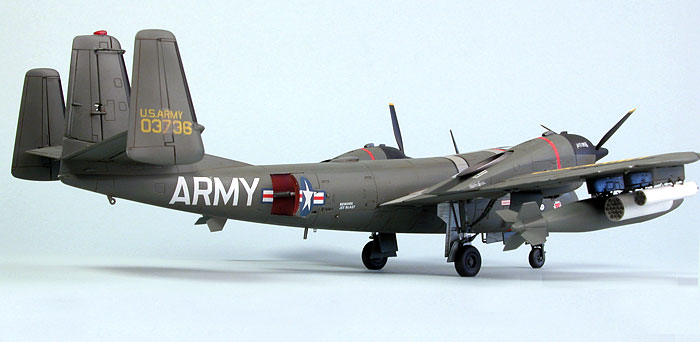
Roden's 1/48 scale Mohawk really looks the part when complete!
Thanks to
Squadron.com for the sample.
Model and Text Copyright © 2004 by
Mick Evans
Images (except underwing construction photo) Copyright © 2004 by
Brett Green
Page Created 19 September, 2004
Last Updated
20 September, 2004
Back to
HyperScale Main Page
|
 Home
| What's New |
Features |
Gallery |
Reviews |
Reference |
Forum |
Search
Home
| What's New |
Features |
Gallery |
Reviews |
Reference |
Forum |
Search