|
1/48 scale
Roden conversion
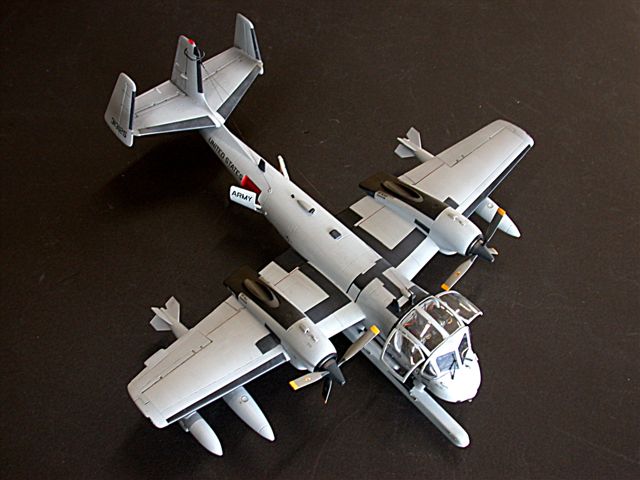
OV-1D Mohawk
by "Bondo" Phil Brandt
|
 |
|
OV-1D Mohawk |

Roden's
1/48 scale OV-1A/JOV-1A Mohawk is available online from
Squadron.com
As so often happens when
the staff of Bondo Industries Difficult Kit Division goofs off for
extended periods on its backlog of Collect-Aire kits, an injected kit is
released, instantly sending another expensive, unbuilt Collect-Aire
acquisition into the Obsolete, For-Collectors-Only pile. Well,
it's happened again; this time with the release of the IMO very nice
Roden A-model Mohawk of Southeast Asia vintage.
As y'all may know, this
curmudgeon usually prefers the definitive version of any weapons system.
I was intrigued by a colorful OV-1D article in Smithsonian Air & Space,
especially in the overall gray color with tacusan--"lots of" to you who
have never travelled to the land of the Rising Sun--black walkways and
heat shielding; nice contrast. Yeah, yeah, I know; Roden announced a D
model sequel, but with no firm release date, as far as I know.
Since we older folks don't
have as much time on earth, three months ago I decided to jump the gun
and take my chances with a home-brew D.
This project wasn't
exactly rocket science, and the work was greatly helped by extra,
unannounced D parts on the Roden A model sprues - ya just hafta know
which is which! Each Roden A wing was extended three feet at the
wingtip, a beeg SLAR pod was cloned from the C-A kit and hung from the
right side, there were changes to the instrument panel to accommodate
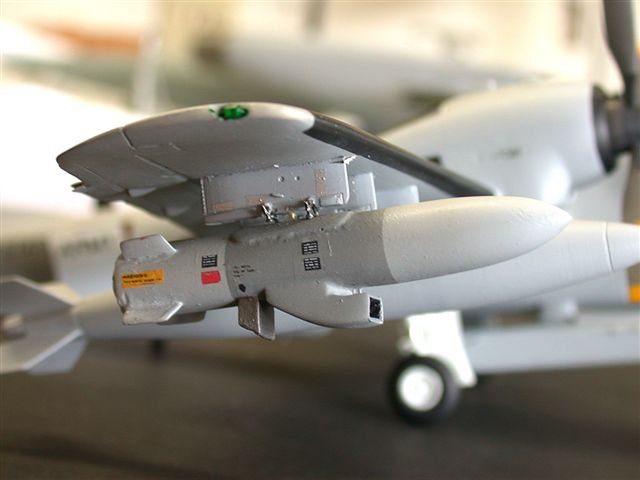
the new sensor suite, and under the right wing is carried a "Hot Brick"
IR jammer pod (for countering missiles such as the Soviet-built SA-7 "Strella")
such as I saw in the flesh circa 1990 at the annual Bergstrom AFB
Airshow. Rather than countering IR, we TAC Vark pukes always believed in
the "Speed Saves" credo--we did carry exotic radar deception jammers
such as the ALQ-94, as well as chaff and flares, but the ol' Mohawk's
simply not capable of a whole lot of smash.
A slight "Speed Saves" digression: Circa 1972 at Takhli AB, Thailand,
initial homedrome of the F-111A SEA force, the wing commander held a
confidence demo for the Linebacker II troops who hadn't yet gone "North"into
what then were the heaviest anti-aircraft defenses of all time. He told
all the crewdogs to be out on the ramp after darkness fell. The wing
king would fly over them lowlevel, and they were to later tell him from
which direction he had come and what his egress track was. Guys who
witnessed this event described to me that there was literally an
explosion of sound as the boss came by at 540K+ with the TFR clearance
plane set at 200 AGL, roughly the weapon delivery parameters they would
use when attacking the Hanoi area. And, nobody could tell the square
root of Fox Alpha about his track!
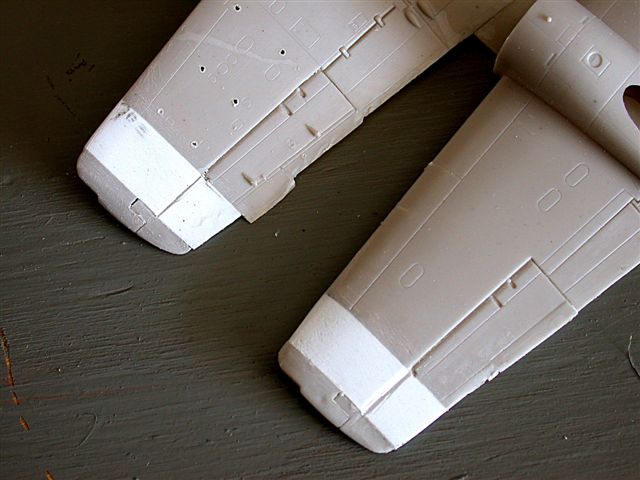
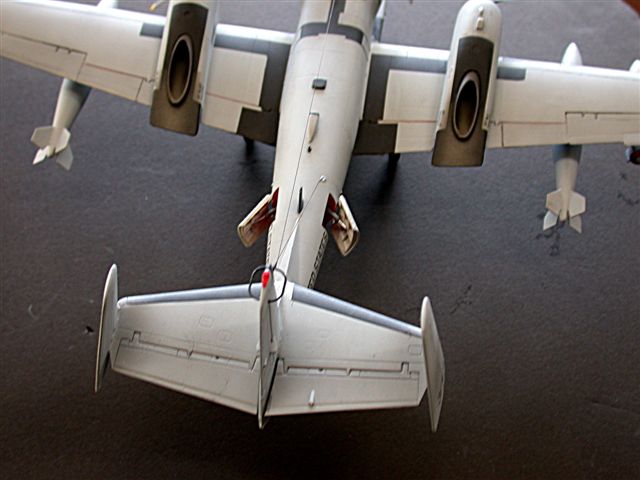
Roden includes both early
and late model wingtips, so the trick is to add approximately 3/4" wide
strips of Evergreen sheet to the A wing,minus its tips, of course. Then
the obligatory applications of Blue Acryl and block sanding followed by
the ol' reliable auto gray lacquer primer and rescribing the now longer
ailerons.
The distinctive SLAR pod
was cloned in resin from the Collect-Aire item; handgrips and an exhaust
air fairing on top of the pod were scratchbuilt.
The "D" has some differently sized airscoops compared with the "A", plus
a teardrop-shaped lowpan camera fairing mounted ventrally on the
empennage. I cannonballed all these items from the C-A kit.
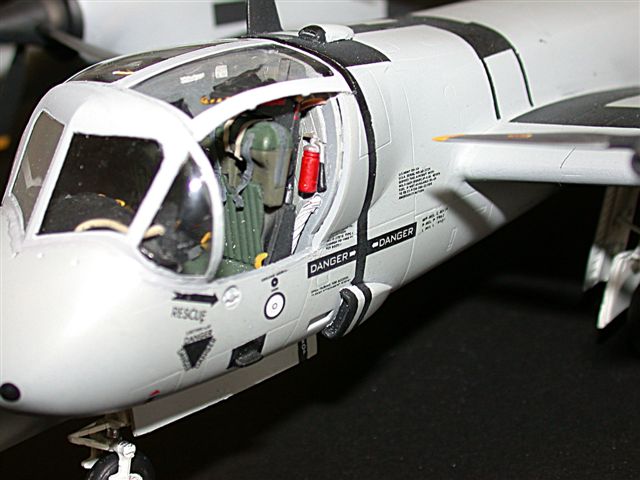
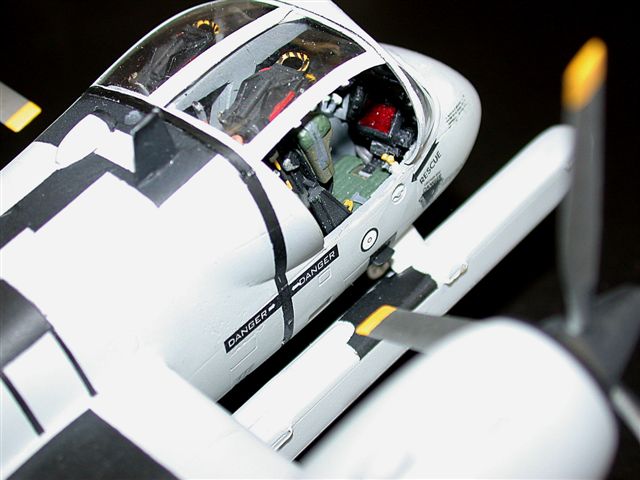
The instrument panel uses the A main panel with additional scratchbuilt
changes and additions: the large, square SLAR scope, various piping and
wiring and a couple of black boxes on the left side of the pilot's
glareshield.) The seats were done OOB, but with aftermarket PE
belts/harnesses. The color pix I downloaded from the Mohawk website
provided an excellent painting guide.
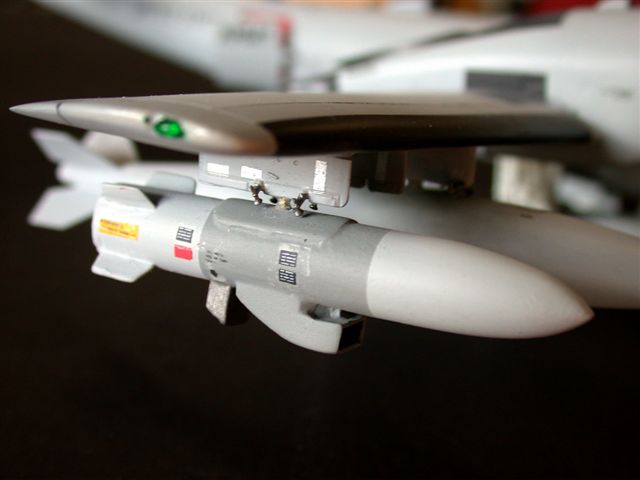
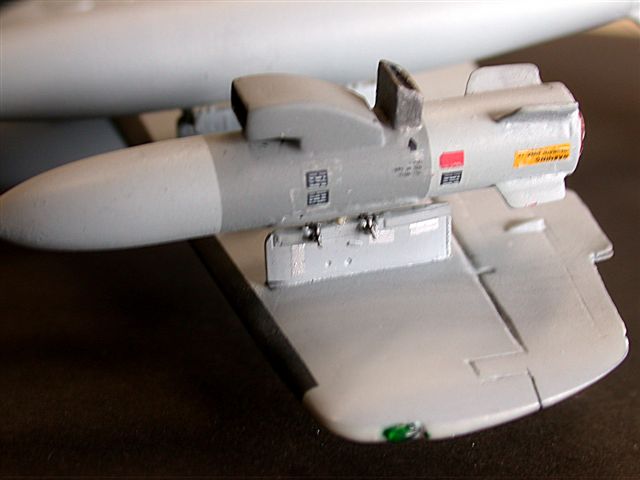
The "Hot Brick" pod was scratchbuilt from personal pix, using a bomb
casing and tubing. I simulated the multicolored orange-red, pie-shaped
emitting surfaces at the back of the pod with a basecoat of aluminum,
topped with custom-mixed Gunze clear colors.
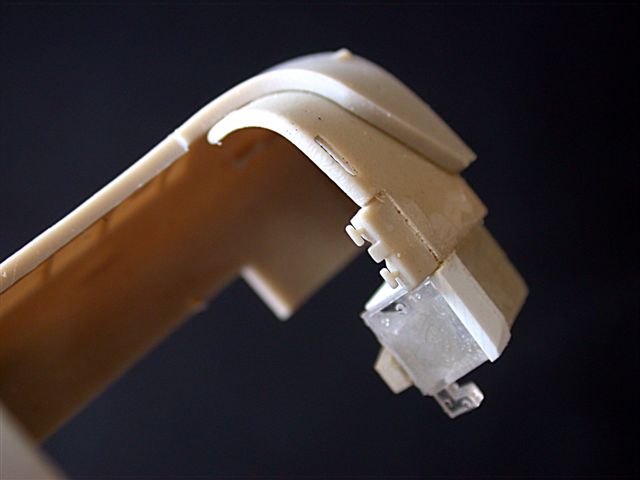
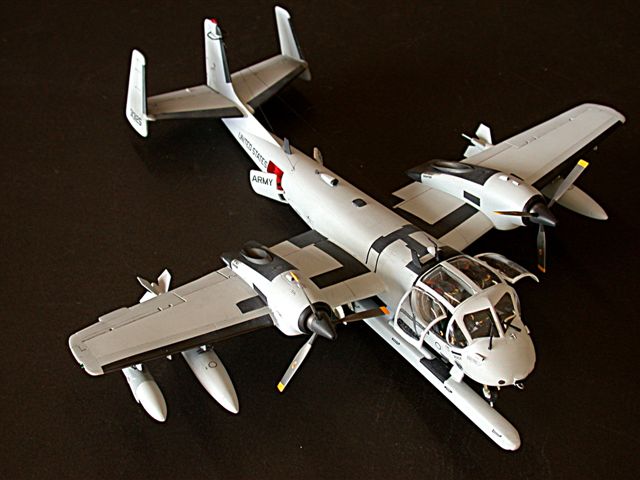
Difficulties
This, after all, is the
Difficult Kit Division of the corporation, and employee skills were
urgently needed to fit all the clear components of the bug-eyed Mohawk
office. Part of the problem was an ill-fitting "bridge" structure that
divides the A/C's canopy from that of the sensor operator. The arched
part was incorrectly profiled and didn't match the clear panels; after a
day of gently filing, your correspondent is still not 100% satisfied. I
chose to configure the cockpit door panels open which gets around many
modeling sins. Another add-on detail which woulda been helpful were
scratchbuilt positionable sunshades over each crew member's head.
Thought I had it made, tinted clear plastic sheet and all, but I faked
myself out. Turns out the canopy breakers on the top of the seats
seriously interfered with the installation of the top canopy panel. I
simply couldn't sand down the seat bottoms enough to look right and
still clear said canopy. Another touchy area is the wealth of VERY small
plastic parts on the sprue. I'd suggest working on a dark towel, just as
many modelers do when working with PE. Then, you won't be down on your
hands and knees looking for tiny components in the carpet or, in my
case, the paint-stained garage floor!
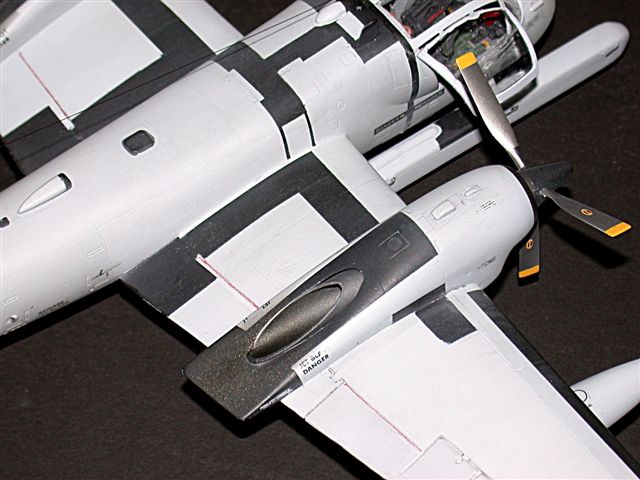
Props were assembled in feathered configuration, since that's the
setting the OV-1's blades automatically assume upon engine shutdown.
Protects against destructive windmilling in high ground winds.
Roden exhaust tubes were two-piece which, of course, creates two
interior seams. I got around this by cutting one-piece exhausts from
thinwall plastic tube and then pre-spraying with Alclad Jet Exhaust
shade. This whole tube assembly was then masked for the remainder of the
finishing.
Painting
 I
chose to leave all canopy components, including the windscreen, off
while painting the basic coats. I
chose to leave all canopy components, including the windscreen, off
while painting the basic coats.
Rescribing, primer and
wetsanding up through 8000 gives a glossy base upon which to lay coats
of PollyScale Light Ghost Gray.
Masking for the plethora
of black walkways and engine exhaust areas used up at least one roll of
that primo yellow Tamiya tape. After using this stuff a couple of years
ago, I'm totally sold and rarely use any other brand, including 3M.
The props were done in
Alclad II Steel shade, with some metal shade variation on the spinners.
The windscreen bottom edge was a very poor fit with the fuselage, and I
had to carefully daub industrial strength coats of Mr. Surfacer 500 to
fill the gap.
Decals
Roden's decal sheet is not
too shabby IMO; lots of stencils and D Model specific markings. Luckily
the gray D model Mohawks had no national insignia, just some medium
"United States Army" strips at the speedbrake area, which I BTW elected
to pose deployed;"busys up" the presentation, don'cha know!
I laid down a couple of
coats of Testors acrylic gloss to properly (I thought) prepare the decal
surface. Sadly, I experienced slight to moderate silvering even with
large applications of my favorite decal aid, Solvaset and pricking with
the tip of an XACTO blade.
Presentation
The model's weight and
balance just didn't work out, and, although I wedged in a group of sheet
lead in the nose, she's still a tailsitter. Guess I could've packed some
additional lead into the nose section of the wing tanks, but the overall
model weight may have adversely affected the spindly gear struts.I
simply drill a small hole in the nosegear tire, and glue in a short
piece of .030" plastic rod. This rod anchors itself into a hole drilled,
in turn, into whatever display base is chosen.
Okay, troops, who's gonna
drop the dime to Roden (it's a VERY long distance call!) to tell 'em
Bondo's "D" is done, and it's now OK to ship thousands of those suckers
to Uncle Jerry up at Carrolton (MMD)?
Click on the thumbnails
below to view larger images:
Model, Images and Text Copyright ©
2005 by Phil Brandt
Page Created 04 January, 2005
Last Updated
04 January, 2005
Back to
HyperScale Main Page
|
 Home
| What's New |
Features |
Gallery |
Reviews |
Reference |
Forum |
Search
Home
| What's New |
Features |
Gallery |
Reviews |
Reference |
Forum |
Search