|
Eduard's 1/48 scale
Bell P-39N Airacobra
by
Dušan
Machan
|
 |
|
Bell P-39N Airacobra |

HyperScale is proudly supported by
Squadron
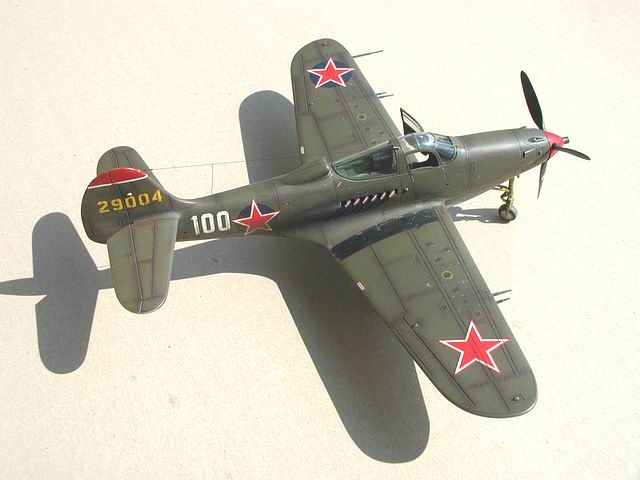
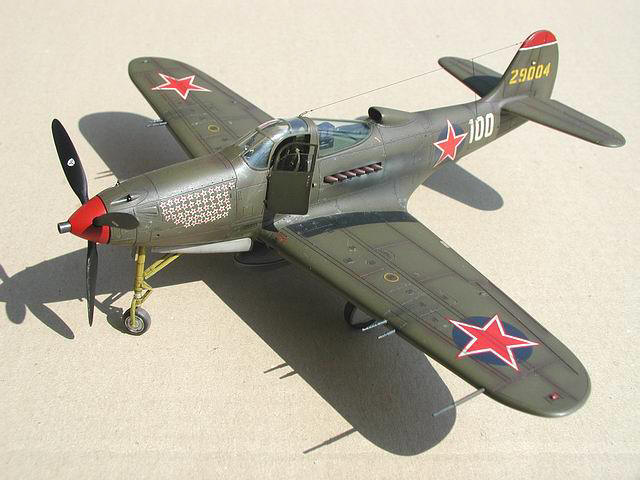
Here is Eduard´s 1/48 scale P-39N Airacobra
finished in the marking of Col. A.I. Pokryshkin, Commander of the 9th
GIAD, VVS.
The Eduard kit itself has already been described by
many expert modellers however I would like to add several comments based
on my encounters while building the model which have not been mentioned
before. Or perhaps I failed to find and read the right articles!
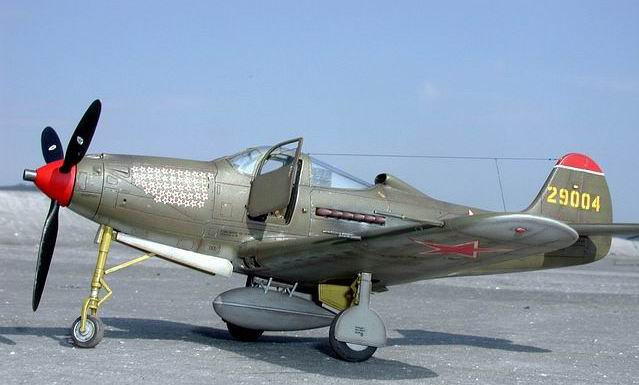
Open Doors
The automobile type door are very nice when opened
but from the point of my view not both sides at once. The Airacobra in
such case looks like a jet with airbrakes in action. This is a case of
numerous images of/and Airacobra models I have seen. And that was a
reason for my opening just the left side door as commonly practised by
the VVS.
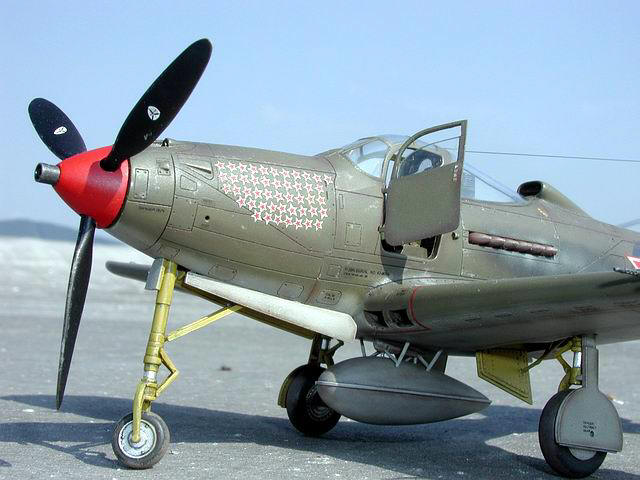
As the door did not fit to the fuselage and canopy
parts (maybe I assembled them incorrectly) I had to cut the right door
into two parts - the upper glass with frame and lower plated ones.
Subsequently I cut off the glass from the frame and both the frame and
plated part of door glued separately to the fuselage and canopy to fit
perfectly. The result of this surgerical operation, that is an open
glass of the door, can be also seen on many photographs. It seems this
field practice was greatly appreciated by pilots, especially in hot
weather conditions.
Front Wheel Doors
It took a bit of effort and labour with a file to
adjust the front wheel doors to duly match the fuselage nose.
Decals
My firm decision was to build the Airacobra in the
markings of the most famous VVS ace - Col. Pokryshkin. The Eduard 1/48th
scale kit # 8064 offers it but the victory star field is too uniform
with too thin white edges of red victory stars in comparison with
photographs of authentic plane moreover in my case with eccentric white
edges.
I decided to fix this issue by applying the star
field on a piece of white color decal sheet and cut off every star with
right width of white edge when dried and stick them piece by piece on
the fuselage nose with "authentic" irregularity. It was a bit time
consuming operation however the result satisfied me.
Apart from the abovementioned issues, building of this Eduard kit was
very smooth. I did not used any aftermarket accessories to build this
model.
Click on the thumbnails
below to view larger images:
Model, Images and Text
Copyright © 2004 by
Dušan Machan
Page Created 21 October, 2004
Last Updated
22 October, 2004
Back to
HyperScale Main Page |
 Home
| What's New |
Features |
Gallery |
Reviews |
Reference |
Forum |
Search
Home
| What's New |
Features |
Gallery |
Reviews |
Reference |
Forum |
Search