|
Hasegawa's 1/48
scale
P-40E Warhawk
by Roger Fabrocini
|
 |
|
Curtiss P-40E Warhawk |

Hasegawa's 1/48
scale P-40E Warhawk is available online from Squadron
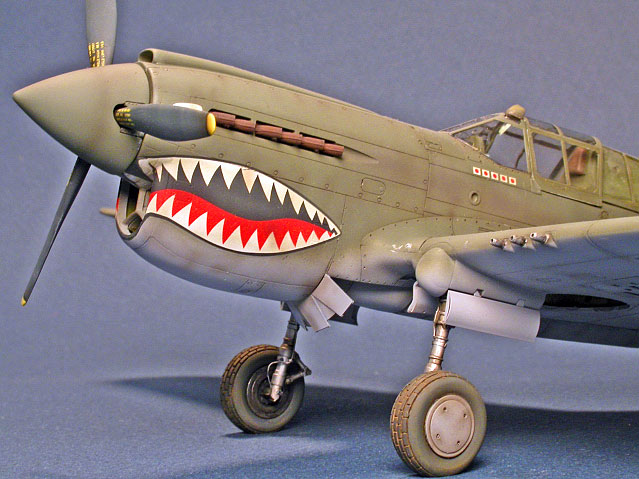
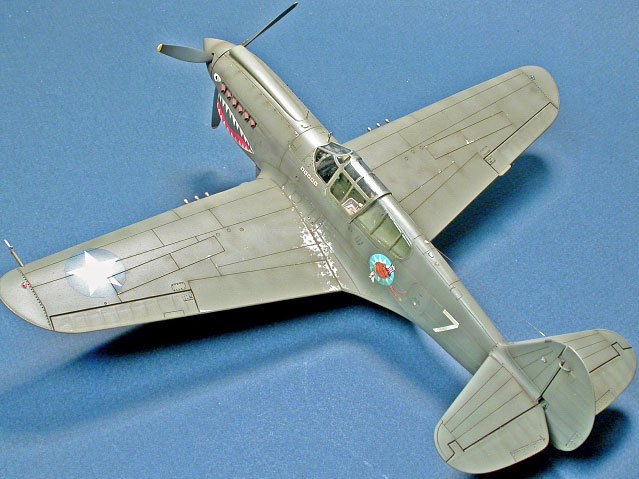
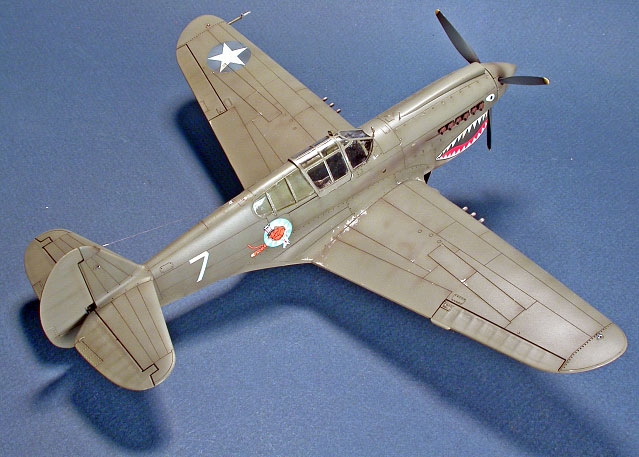
This is Hasegawa's 1/48 scale P-40E Warhawk (kit #JT86)
finished in the markings of Col. Robert L. Scott's aircraft while he
commanded the 23rd Fighter group, China, 1942.
I had always admired Robert Steinbrunn's 1/48 Otaki P-40 build of Col.
Scott's P-40e from the December 1987 issue (dating myself here) of "FineScale
Modeler". Possessing little of Mr. Steinbunn's scratchbuilding skills, I
had to wait almost 20 years for a suitable kit to start my own
interpretation.
Hasegawa's P-40 series build up into accurate replicas,
though their approach (common parts with inserts for specific variants)
makes for a more convoluted (and in my case, tirade laced) build.
Never one (well almost, the Tamiya "HAMP" was a fluke)
to build out-of-the-box I gathered up all the P.E., resin and decal sets
available. The following were used whole or in part:
Eduard P.E set #49-314
Ultracast P-40e Tubular exhaust
Ultracast P-40 wheels, Block Tread (30" x 10")
Ultracast P-40 pilot seat
CMK Resin interior set #4153
CMK undercarriage set #4155
Tally-Ho USAAF national insignia (early type), paint mask #48-012
Sky Models P-40e decal sheet #SKY48-047
SuperScale P-40e decal sheet #48-802
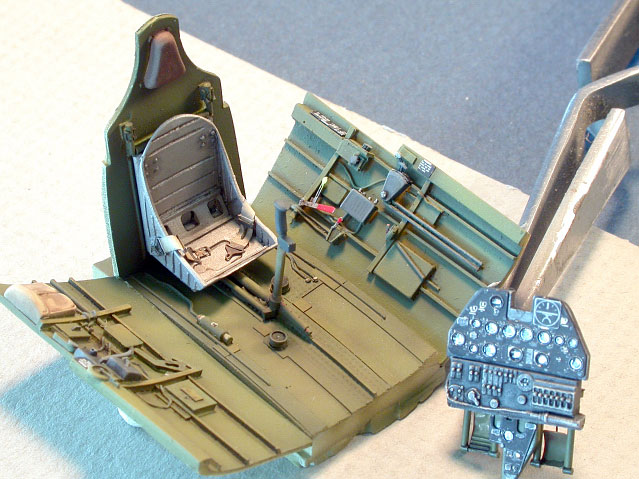
CMK's resin interior is well detail and directly
replaces the kit parts making for a painless installation (which is more
then can be said for some other resin cockpit manufacturers). The set
comes with a small P.E. set by Eduard. It includes data placards,
instrument panel and lap/ shoulder belts, all very well done. The set's
seat is cast with a padded backrest that I didn't care for. I replaced
it with the Ultracast seat, which I feel is better detailed. (no
surprise there)
CMK's undercarriage set includes wheel wells, resin gear doors, main
wheels, two different style hubs, tail wheel well canvas boot and tail
wheel strut. I decided to use the wheel wells and tail wheel boot and
strut. The main wheel hubs fit poorly and i thought Eduard's P.E. gear
door were more to scale. So that was money well spent.
The multi insert fuselage was going to test my filling and sanding
skills and the pictures do not do my ineptitude in this area justice.
(you got to love digital photography). At one point I had contemplated a
RAAF NMF scheme, but one sight down that undulating fuselage nipped that
fantasy in the bud. I followed most other's approach and assembled the
parts for the fuselage halves separately then joined them. The carb
intake insert gave me nightmares in anticipation, but proved painless in
reality.
Hasegawa supplies inserts for the wing guns which do not fall on any
panel lines so careful fitting, filling and sanding was in order. Though
not as bad is it seems, the seam areas are easily accessible, i still
managed to have a ghost of the seam visible under close scrutiny.
I made two adjustments to the kit details. I added rivet detail to the
wing/fuselage fillet. The other was to tone down the control surfaces
ribs and correct the ailerons.
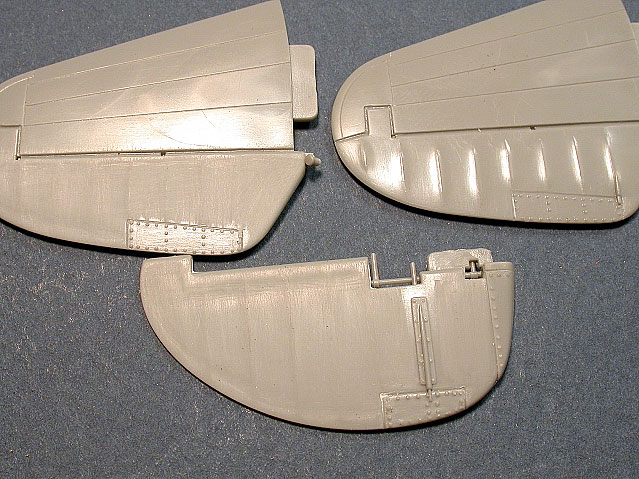
The outer aileron ribs should angle out 45%. I used a
rounded scalpel blade to modify the fabric representation of the control
surfaces. I know i'm in the minority in my option of Hasegawa's control
surfaces on their new P-39 kit. I like them and i used their
interpretation as a model for mine. I scraped hollows around the edge
and between the ribs then sanded them down leaving some scrapes that i
felt nicely represented fabric.
Painting,
Markings and Weathering
|
Everything (including my fingers) was primed with Mr.
Surfacer 1200.
For some unknown reason I forsook my usual paint of
choice, Mr. Color Lacquers and used my Gunze acrylics. The only drawback
to my choice was the dreaded pebble effect at the wing roots even after
adding flow enhancer and slow-dry to the mix. (oh well, with that
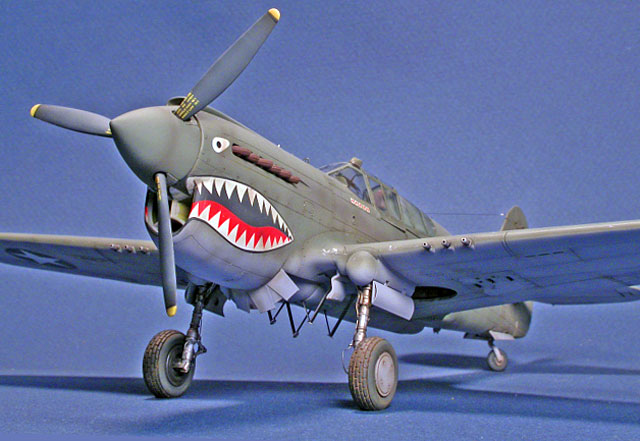
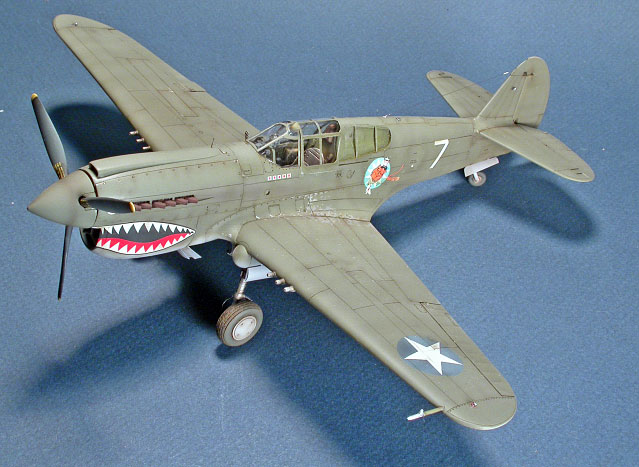
fuselage this one was never going to win any awards any way). Col.
Scott's P-40e was finished in Olive Drab 41 over Neutral Grey 43. I used
H53 Neutral Grey with Flat white and some H311 FS36622 added to create
streaks and highlights. I like to vary the hue and shade of the base
color. For the O.D. 41 I made a custom mix using H421 rlm81 brown
violet, H420 rlm80 olive green and H309 green fs34079. Again I added
flat white and various amounts of the three green-browns to create
streaks and highlights of various shades and hues.
As far as technique goes I start with the darkest shade of the color and
apply that along recesses and panel lines. As I lighten and thin the
paint I work into the flats between the panel lines. The final lightest
and thinnest mix is used to create streaks, front to back on the wings,
top to bottom on the fuselage. It is important to keep the paint very
thin. 60% thinner to start, 70-75% at the end. This is a tedious method,
but creates a subtle weathered look without demarcation lines between
shade and hue variations. Just my method of "skinning this Cat". One tip
when using this method is to keep a small amount of your original base
mix and your last. They come in handy for touch ups and weathering
decals with their overspray.
To contrast the highlights and create depth I use a post shade of very
thin Tamiya black/red-brown acrylic paint. I slowly build it up in
recesses, along panel lines, in vertical streaks along the fuselage and
in random irregular patterns at high traffic areas around the airframe.
I also overspray the markings with this mix to blend them into the
weathered scheme. Final weathering is achieved by apply an artist oils
wash to the recesses and panel lines. I do not like too stark of a
contrast. Paynes Grey on the Neutral Grey surfaces and a mix of green
earth hue and burnt umber for the O.D. A black wash was used around the
control surfaces.
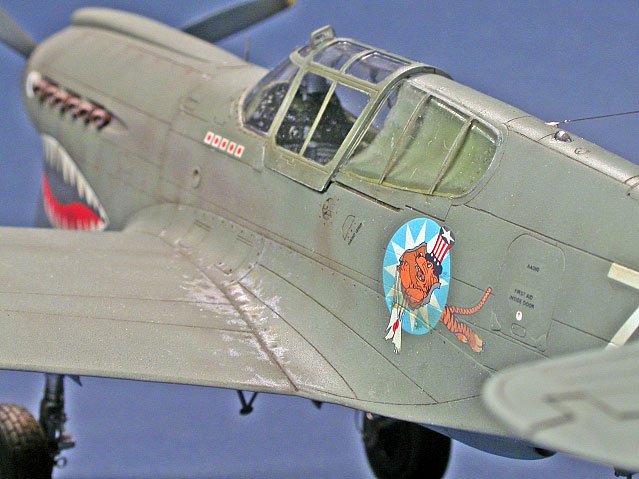
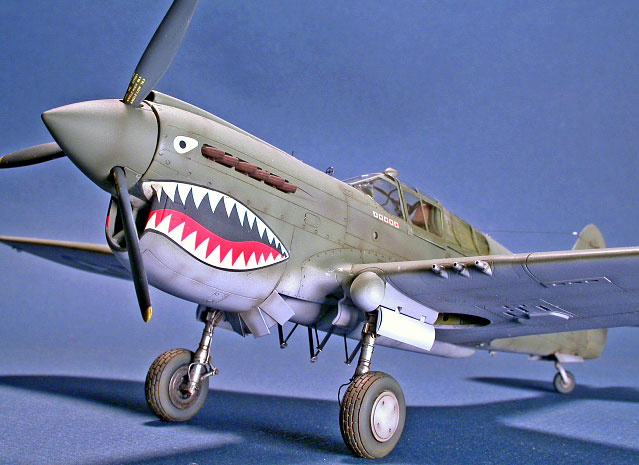
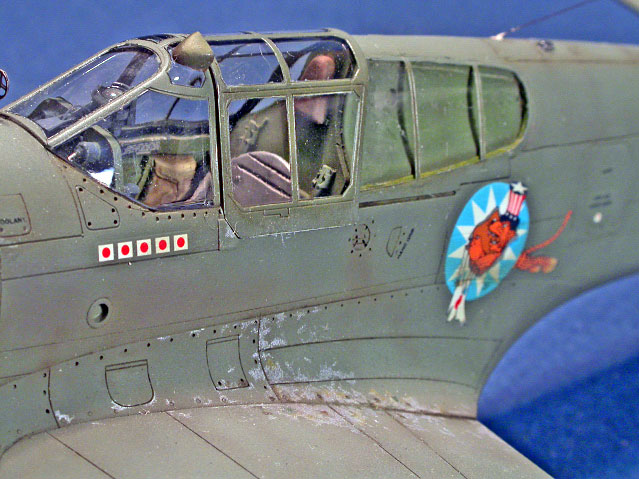
National insignias are painted on using masks from the Tally Ho set.
Sharks mouth, personal markings and numbers are from the Sky Models
sheet. Data is from the SuperScale sheet. I needed to hand paint the
front of the shark's mouth around the radiator intake. The final bit of
weathering is the chipped and worn paint which is achieved using a
PrismaColor silver pencil. I like to overspray these areas when finished
with the black/red-brown post shade to tone them down.
:
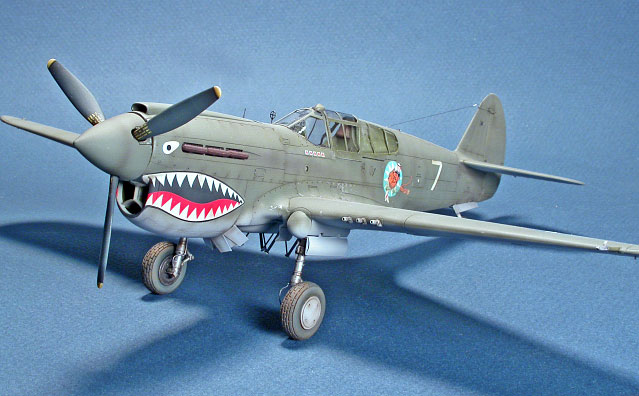
I now have my own "Old Exterminator" (Col. Scott's name
for his aircraft) in my display case. I would still like to do a natural
metal finished P-40, but I think either Mauve's or Eduard's P-40s would
be better suited for that scheme. After all my whining I must say that
it sure looks like a P-40. Thanks for the indulgence, Take care.
Click the
thumbnails below to view larger images:
Modelling the P-40
Hawk 81, Tomahawk, Warhawk and Kittyhawk
Osprey Modelling 15 |
|
|
|
|
Author: Brett Green
US Price: $17.95
UK Price: £12.99
Publisher:
Osprey Publishing
Publish Date:
January 10, 2004
Details: 80 pages; ISBN: 1841768235 |
|
|
Model,
Images & Text Copyright © 2006 by
Roger Fabrocini
Page Created 28 September, 2006
Last Updated
21 February, 2007
Back to
HyperScale Main Page |
 Home
| What's New |
Features |
Gallery |
Reviews |
Reference |
Forum |
Search
Home
| What's New |
Features |
Gallery |
Reviews |
Reference |
Forum |
Search