|
AMtech's
1/48 scale
Curtiss P-40F
Warhawk
by Fernando Rolandelli
|
 |
|
Curtiss P-40F-15-CU Warhawk
“White 116”, 1Lt Henry E. Matson, 44th Fighter Sqn., 347th FG,
Guadalcanal, June 1943. |

AMtech's
P-40F/L Long Tail Warhawk may be ordered online from Squadron.com
Background
The P-40F was the
Merlin powered version of the classic Curtiss fighter. The all round
improvement in performance was negligible, but the active service
ceiling of the aircraft was increased from about 15000 to about 20000
ft. Further attempts to improve the performance by lightening the
airframe in the L series (usually by removing some guns and armor)
proved neither popular nor successful. In the end, the meager gains
achieved were not considered worthy and P-40s reverted to the Allison
engine in the following series, the K (making allowance for short series
of Allison-engined Fs and Ls) P-40Fs were thus sent to theaters were it
was felt combat would take place at those heights (while in the Pacific
it was most often just above the treetops). Most went to the MTO, but a
handful was sent to Guadalcanal, to the 68th and 44th
FS. Almost all the Fs you will see served in the MTO, so I immediately
jumped at the opportunity of building a Pacific one, even though its
camo and markings were much duller than those.
I selected (mostly
because of the apparent lack of nose art/graffitis) “White 116”, shown
in a picture in the Osprey book. It was the mount of 1Lt Matson, an ace
with 5 victories, one of them (a Zero from 251st AG) by
ramming (he was the one rammed, but also the one to survive to put
forward the claim). Matson finished his combat tour in August, serving
as an instructor in the States for the rest of the war.
The Kit
Overshadowed by the new
Hasegawa’s, AMT/AmTech line of P-40s are basic but good kits. The resin
nose is way better than the original plastic one, and it is really worth
the whole kit (the origin of this piece is a Hi-Tech nose marketed by
Aeromaster, using the Mauve kit as the basis). A good-looking,
reasonably accurate and almost correct, albeit basic, kit can be built
straight from the box. If you are out for details, well, you’ll have to
work a lot adding many, many small thingies. The decals are first-class
but, in a show of that perverse self-destructive impulse which
characterizes some modelers, I did not use any of them.
Fuselage
Of course, the piece de
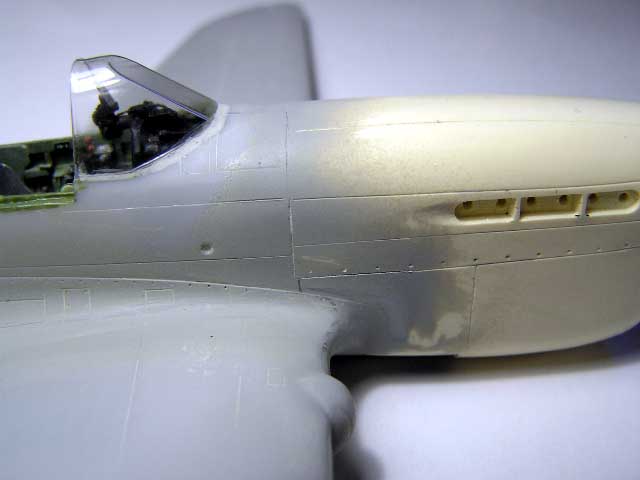
resistance of the kit is the addition of the resin nose. The cutting of
the plastic parts is easy, and the actual fit of the nose is really
good. Just take care of adding small plastic wedges where needed. Now,
regarding the cooling vents… well, the plan proposed by the instructions
is not realistic. After roaming through a lot of pictures (there are no
good line drawings, and pictures never show that area quite clearly) I
decided to build some from plastic card. 3 Sqn RAAF machines invariably
show the doors shut when parked… USAAC ones show a wide variety of
arrangements! I opted for closed doors, which hide the back of the
radiator bay. However good is the fit of the nose, it leaves a strange
“gap” in the under fuselage fairing. Again, there is no good drawings or
pictures, but looking at many of them, I got the idea that the trunking
is continuous, and should not “sink” behind the cooling louvers. So I
built up that section with Parsecs epoxy putty. I should remark that in
many construction reviews of this kit (and of the Aeromaster nose) this
problem has never been reported nor addressed in any fashion.
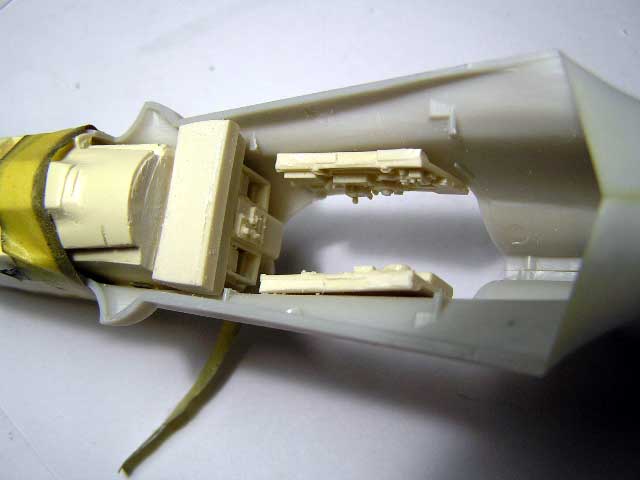
Once the fuselage was
relieved of its nose and the resin one had proved its ability to fit in
its place, I glued the resin sidewalls to each half. The ones provided
are not that bad, and certainly enough if the canopy is to be depicted
closed. Some good detailing work should also suffice otherwise, but I am
both very fond of detailed cockpits and a lazy guy as well. The True
Details set is quite good, fits well and is cheap, so it is a good deal.
You just have to rework the top or the seat’s backrest (which is square
as per the P-40N) to a round shape.
Click the thumbnails below to view larger
images:
For the instrument
panel, I opted for a PE leftover from an Eduard P-40N. P-40Es did not
have coamings behind the dashboard. Though there are no good pictures, I
guessed the Fs would have been the same, so I carved out the kit’s
coaming and devised the butts of the instruments in plastic rod, and the
cables in copper wire. The complex gunsight mount was scratch built
after the one in the Hasegawa kit, to which the TD resin gunsight was
attached.
To top all that, I used
the customary Squadron vacuformed windscreen and canopy hood (glued with
the characteristic “backwards cant”), but used the kit’s quaterlight
windows (Squadron does not provide them anyway). A simple trick to
minimize the reflecting qualities of the “slab sides” of these parts is
painting them in a dark paint before gluing. After a minimal work they
fit very well. The mirror was fashioned from a piece of styrene strip.
I drilled small round
recessions for the fuselage formation lights, after the firewall. I also
used the Hasegawa’s drop tank and mountings, which are quite better in
shape than the kit’s.
Wings
The main improvements
should be done to the wheel wells. The top of these is adequately
detailed; some characteristic L shaped pipeline should be added. The
walls need to be added/reworked. I used the leftovers from the same
Eduard P-40N (they supply fully new wells in resin). There will most
surely be uneven gaps in the upper wings-fuselage joint and diedhral is
rather flat, but it is easy to deal with these. Stabilators are rather
weak, one of mine insists in coming apart, so glue them securely. I made
the landing light by means of a drop of Kristal Klear.
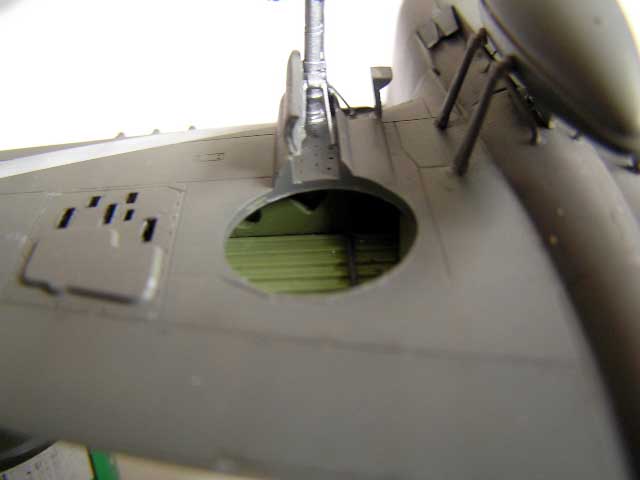
The pitot tube was
replaced by the “spear-type” in a Hasegawa kit (I had used the “cranked”
one on a RAF Kittyhawk)
The undercarriage is
not accurate; it shows only a single retraction strut. Cut it off and
replace by a twin arrangement made in plastic strut. The wheels
themselves are average at best. I made good use of the resin ones
included in the generous Eduard P-40N kit (they are correct for the F…
they are not for the N!)
Paint
Interior: everything
was painted in the now famous “Curtiss-Berry Interior Green”, an
interior green made of Yellow Zinc Chromate and Dark Grey, and so,
lighter than the more usual FS 34151-like. Details were painted as per
my references.
Exterior: well, again
the “Blue in Olive Green” traditional tune! These machines were painted
in Olive Drab nº 41/ Neutral Grey nº 43 (due to the timeframe it cannot
be ANA 613 Olive Drab) So I used “Don Archer’s Choice” of OD, Humbrol
108 “RFC Green” (I know, it is long out of production, but I got some
rusty old tinlets in a toy store at Nairobi) That color is simply
perfect; I am still looking for a second choice. In enamels, I think
Testors FS 34086 Green Drab could work, and also (strangely) WEMM’s ANA
613!! Talking acrylics… Xtracrylics ANA 613 also seems good (to really
represent ANA 613, I would mix them both with some sandy color… But it
is my personal opinion) For the Neutral Grey I used WEMM’s, which would
have made the day for old Don.
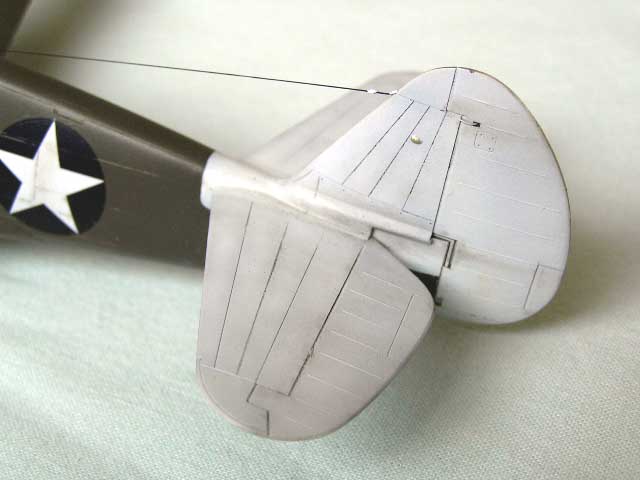
I painted the Grey in
transparent coats on a Burnt Umber preshade (yes… preshade!) over the
Light Gray primer… then in mottle fashion (like in Brett’s articles, but
without mixing the Grey to any other paint). With the OD the technique
did not work so well (Humbrol paints do not agree to be airbrushed in
transparent coats…) so I resorted to a soft mottling and some
panel-stressing in a lightened version of the color. Control surfaces
were painted consistently in this lightened shade.
All the White areas
were painted after the basic camo was there. In the real machines they
were painted in stages, first the fuselage bands, then the wings, then
the tail surfaces, as the need for more positive identification aroused.
In the tail surfaces, it allowed me to achieve some “instant
weathering”, but the idea was not so successful in the wing bands, which
came out each in its own shade of White, and getting an even result was
a chore.
Decals
Well, the WEM paints
are semi gloss, but the mottle application dulls them… the surface of
the Humbrol paint is akin to sandpaper! So many, many coats of Testors
Glosscote were needed to achieve a decal-friendly surface.
Though I did not build
any of the variants in the box, I made some interesting findings
regarding the accuracy of the provided schemes.
1) Neither “Ace of
Pearls” nor “X60” nor their pilots appear in Osprey’s book. Well, no one
has the obligation to be an ace. Both “A” and “X” were used by 79th
FG, while “Y” was used by the 324th, so they can be expected
to be correct. The same can be said of the camo scheme, which is
absolutely standard. I have my reservations about the Dark Green in
“X60” being RAF or RA. Many Fs and Ls had OD repainting after repairs,
especially in Italy, when stocks of Fs were running dry.
2) “Stud” was the
mount of LtCol Baseler, a picture can be seen in Osprey’s book. However,
according to this source, Baseler flew it in combat as “Mortimer Snerd/Stud”,
in a pretty standard Desert Scheme, while he took off two guns and armor
to try catching German high altitude recce planes (unsuccessfully). It
was afterwards taken off operations, painted in the gaudy Black scheme
and used as a hack. So you should shave off all guns, it can be presumed
to have been disarmed (or may be it kept the blast tubes?). Any way, do
not paint gunpowder residue!
3) FS490, “CV-V” from
3rd Sqn, RAAF. The internet page about 3rd Sqn
involvement in Italy shows several pictures of this machine. As
depicted, it is completely right, painted in Du Pont shades (hey, were
they not painted Desert Scheme at the factory?) and sporting the big
unit’s shield at the left nose side. If you, like me, think this shield
is too lousy, let me say that it is exactly as pictures show, but also
that several pictures show the machine without it.
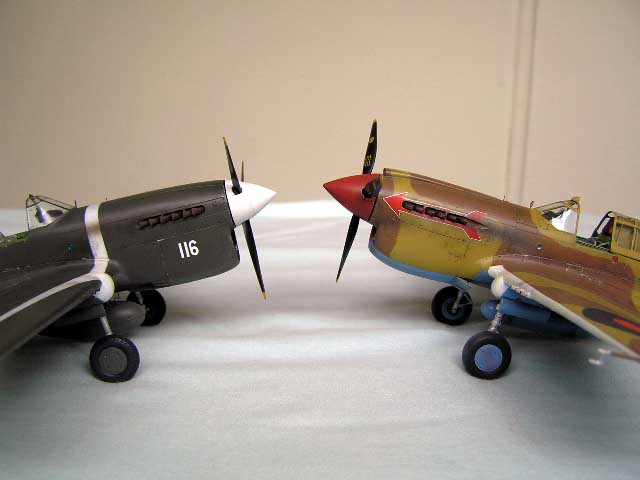
Not many decals in this
one. I used none of the kit’s, but the “stars-n-roundels” came from
AmTech P-40E. I expected them to work flawlessly, so I grew
overconfident. The overwing one soon became a mess, which I solved by
“ironing” the decal with a tissue soaked in Microsol! Some flaws are
still barely visible, if you look for them. The others went as expected.
The numbers (“White 116”) were not easy to find… something I had not
expected. In the end, they came from Sky Models 1/48 Foreign F4Us… the
French Aeronavále “16 Flotille” markings. They are “about” the correct
size and style… they look good… what I call a success.
Well, a mixed bag. The
basic kit is undeniably good, and a good model could be obtained OOB
without undue difficulty. If you want a “contest-entrier”… well, some
work has to be done, especially on the fairing underside the forward
fuselage, the cockpit, the wheel wells and a myriad of small details.
Anyway, it looks good.
Sources
- “P-40 Warhawk Aces of
the MTO”, Carl Molesworth, Osprey Publications
- “P-40 Warhawk Aces of
the Pacific”, Carl Molesworth, Osprey Publications
- “P-40 in Detail and
Scale Part II”, Bert Kinzey, D&S, Squadron Publishing.
- “Curtiss P-40”,
Vlastimil Ehrman, MBI Publications
- Website on the 3rd
Sqn. RAAF.
- “Modelling the
Curtiss P-40”, Brett Green, Osprey Publications.
Click the thumbnails below to view larger
images:
Modelling the P-40
Hawk 81, Tomahawk, Warhawk and Kittyhawk
Osprey Modelling 15 |
|
|
|
|
Author: Brett Green
US Price: $17.95
UK Price: £12.99
Publisher:
Osprey Publishing
Publish Date:
January 10, 2004
Details: 80 pages; ISBN: 1841768235 |
|
|
Model, Images and Text
Copyright © 2006 by
Fernando Rolandelli
Page Created 18 May, 2006
Last Updated
17 May, 2006
Back to
HyperScale Main Page |
Home
| What's New |
Features |
Gallery |
Reviews |
Reference |
Forum |
Search