|
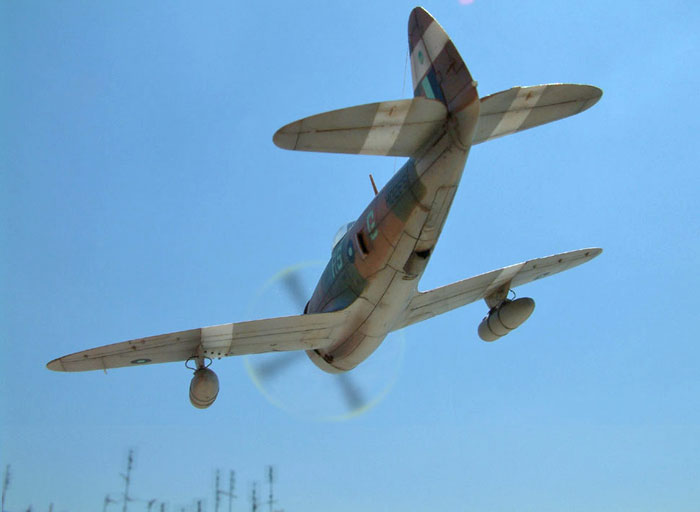
Hasegawa's 1/72 scale P-47
in flight
Thunderbolt Mk.II
by Cesidio Bonanni
|
 |
|
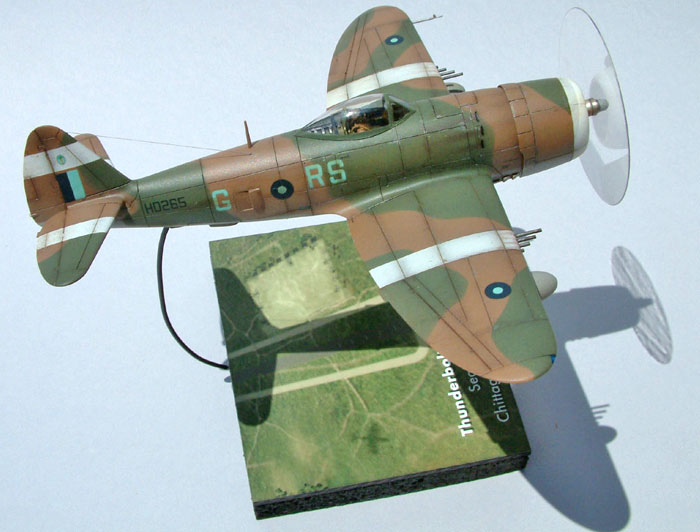
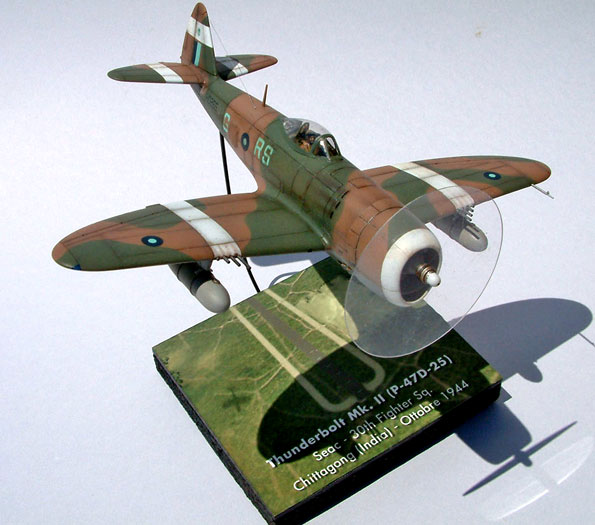
Republic P-47D-25
Thunderbolt Mk.II
SEAC - 30 Sqn RAF - Chittagong (India) - October 1944 |

Hasegawa's 1/72 scale P-47D Bubbletop is available online from Squadron
My
aircraft modeling experience was limited to 1/48 scale kits, but I
wanted to test my airbrushing skills on a 1/72 scale "test model".
In a
hobby shop I found this old Hasegawa Jug (for only 5 euro!) and decided
to build it OOB, focusing only on painting & weathering.
Surely you know this old kit, so I won’t bore you with its “goods &
bads”.
But -
you know what I mean - modeling is FUN ... and I found myself thinking
about adding details, modifying this, shorten that and so on... (but
wasn’t it an OOB project?)
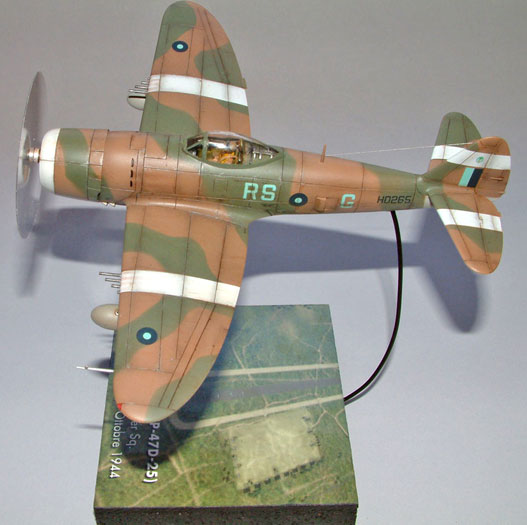
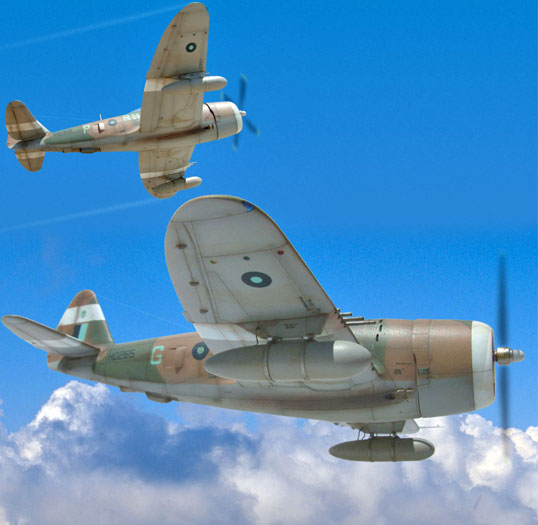
Anyway, I wanted to finish it ASAP, so I decided to show it in flight,
to save time with the landing gear and the open canopy (one piece in
Hasegawa’s kit).
The Cockpit
Even
with the canopy closed, the cockpit area was still quite visible. So, I
scratchbuilt the gunsight, a new instrument panel, the pilot’s seat
(with armor and headrest) and some other minor detail. The whole cockpit
was painted with British Interior Ireen from Vallejo Air series. Maybe
it should have been US Bronze Green, but I didn’t want to spend time on
it (wasn’t it an OOB project?)
The
canopy sliding rails were made with small plasticard strips (maybe too
big, but it’s too late now!). I painted the pilot and added the belt
harness with aluminium foil.
Closing the Gear Doors
First, I said: “Well, its’easy: just glue the gear panels over the bays
...”
Then,
I screamed: “Too long!, too short?, too narrow!!, too wide!!??
Result: I had to scratchbuild every single panel (wasn’t it an OOB
project?)
On
the lower side, I drilled the landing light under the right wing, and
the three signal lights under the left. I painted silver the holes,
tinted them with Citadel inks and made the lenses with drops of epoxy
glue. Then I cut the wing tip position lights and cyanoglued two small
bits of clear sprue to be sanded, polished and tinted later.
Wing
Pylons and Drop Tanks
The
pylons were detailed whith engraved panel lines and plastic sway braces.
The drop tanks (from the kit) were sanded and the steel ribbons were
made out of aluminium foil. Then I drilled the necessary holes and made
the fuel lines with brass rod.
Putting the
Plane to Flight
|
A
friend of mine (grazie Gian Piero) took some nice airbase snapshots from
his flight simulator game (IL-2 Sturmovik). I choose one and added the
text on Photoshop. After digital printing, I glued it on a square piece
of cork. The sides were then painted black with a black permanent
marker.
The
base was then drilled to bear the brass rod.
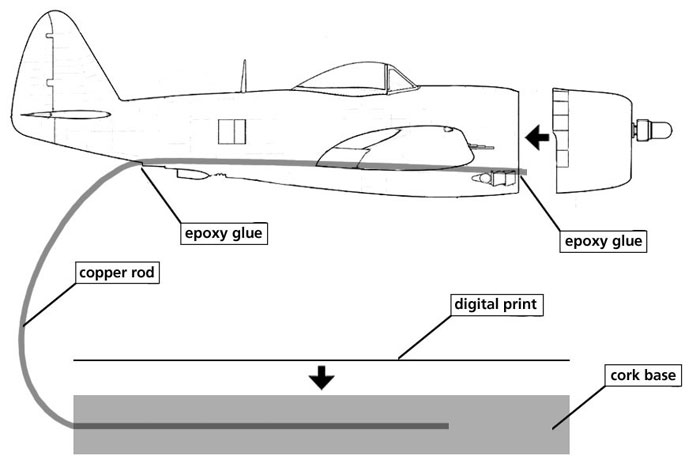
To
hold the plane steady I widened the compressor exhaust near the tail
wheel, and slipped the brass rod trough the fuselage and under the
cockpit floor until it reached a hole I drilled on the “firewall” (in
Hasegawa’s kit the NACA is molded in one piece and was glued after
fitting the engine).
I
decided to try out Vallejo Air colors: they’re great, but IMHO their
color range is too narrow.
Anyway the pigment is very fine, even and matte and they can be diluted
easily with alcohol, blue glass-washing liquid for cars (which I prefer)
or distilled water.
This
jug’s colors are typical: Dark green/Dark Earth for the upper camouflage
and Medium Grey for the rest.
With
my Aztec airbrush (with extrafine nozzle) I painted first the underside.
Then the slight blurring between camouflage colors was achieved masking
the color borders with little rolls of MicroTac putty.
The
white stripes were painted first and then masked with Tamiya tape to
avoid too much thickness.
Instead of the usual Future, I airbushed Vallejo Air Gloss finish before
decaling and weathering.
The
decals went with no problems and were applied with a drop of Gunze’s Mr.
Decal softer.
Weathering and Finishing Touches
airbushed
the panel lines with very thinned Tamiya Flat Black (1 black drop vs 20
alcohol drops ) and simulated some paint chipping with a silver pencil.
Engine & guns smoke stains were made first with Tamiya Dark Brown then
with Tamiya Panzergrau (same thinning ratio as above).
Then
the whole model was washed with Burnt Umber and Black oil colors thinned
in turpentine. At this stage I added grease and dirt stains.
The
plane was then sprayed with Vallejo Air Matte finish and the canopy was
unmasked.
As
the plane was flying, I made the “rotating” propeller with an acetate
disc.
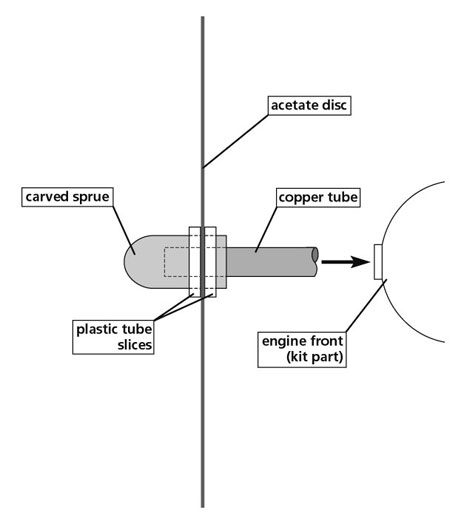
I
also scratchbuilt the propeller hub (see my drawing) as Hasegawa’s kit
doesn’t provide the type used on the british Thunderbolts (Hamilton
Standard paddleblade, I think).
Finally, I glued in place the antenna wire (extra-fine fishing nylon
thread) ... Done!
I’m
quite satisfied with the result and this little Jug was really fun to
make ...but was it really an OOB project?
Click on the thumbnails
below to view larger images:
Modelling the P-47
Thunderbolt
Osprey Modelling 11 |
|
|
|
|
Author: Brett Green
US Price: $17.95
UK Price: £12.99
Publisher:
Osprey Publishing
Publish Date:
July 25, 2004
Details: 80 pages; ISBN: 1841767956 |
|
|
Model, Images and Text Copyright © 2004
by Cesidio Bonanni
Page Created 23 November, 2004
Last Updated
23 November, 2004
Back to
HyperScale Main Page |
 Home
| What's New |
Features |
Gallery |
Reviews |
Reference |
Forum |
Search
Home
| What's New |
Features |
Gallery |
Reviews |
Reference |
Forum |
Search