|
Tamiya's 1/72
scale P-47 Razorback
Student Driver Jug
by Valentin E.
Bueno
|
 |
|
Republic P-47D Thunderbolt
Razorback |

Tamiya's 1/72 scale P-47D Razorback
is available online from
Squadron
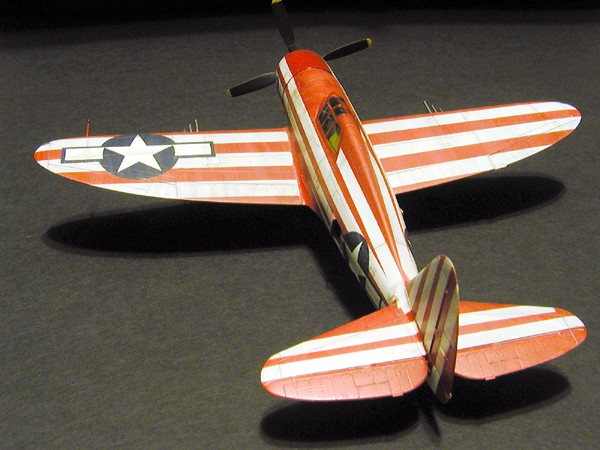
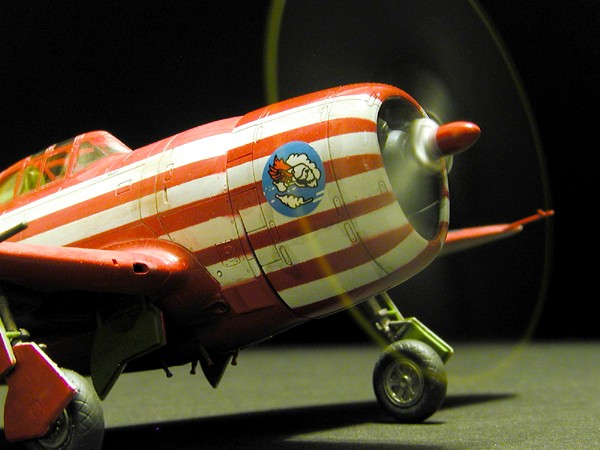
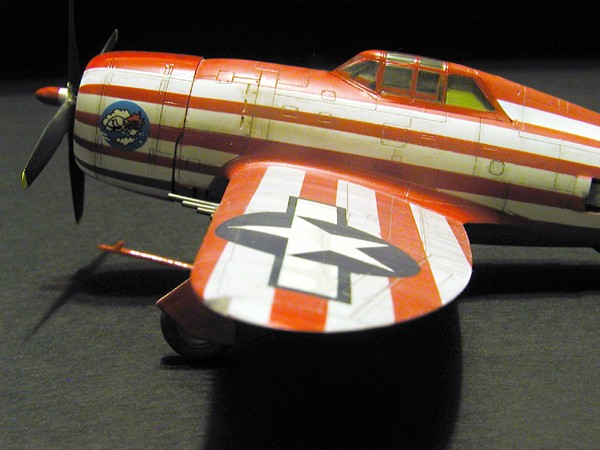
You have got to be kidding me! A P-47 painted in red and white
stripes!? It looks like a fighter plane wearing a circus tent!
As usual, I tend to find the weird paint schemes for my models. When
I built Tamiya’s 1/72 scale Mosquito, I painted it in an overall
aluminum dope finish and Tamiya’s Bf-109E was painted in red and white
Swiss markings. Thus to uphold my convention of unconventional paint
schemes, I knew I had to do Tamiya’s new 1/72-scale P-47 Razorback in
something spectacular. Lucky for me I have the Aero Detail book on the
P-47 and it contained a B/W drawing of a P-47 painted in a red and white
striped scheme that was used for training pilots how to taxi these great
big beasts. Famous Aircraft of the World Volume #37 on the P-47 had a
color rendition of those drawings and this got my dander up. I also
found a picture in Squadron’s P-47 Walkaround where a worn out P-47C
that was relegated to taxi training. The cowl, rudder, and wingtips were
painted with alternating dark and light strips with the words “This
airplane for taxiing instruction only” handwritten on the sides.
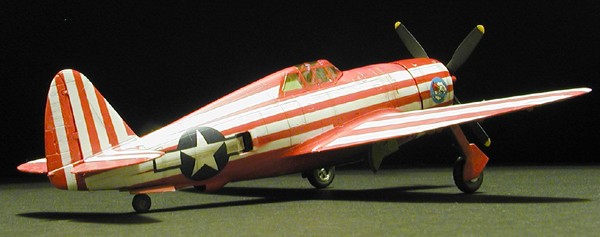
I liked the all over striped aircraft better so I felt had to do that
version!
So I did.
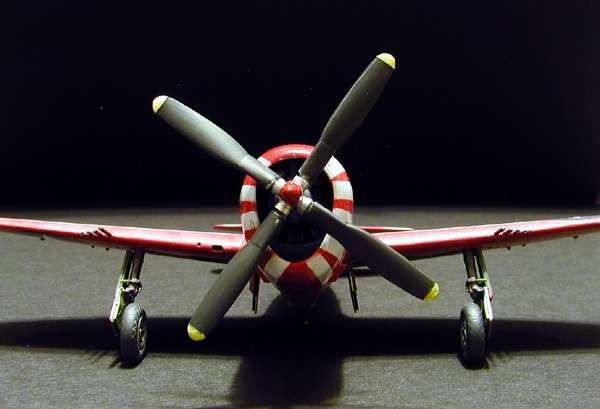
The model was built straight out of the box.
The shrouds ahead of the exhaust outlets near the cowl were molded to
follow the draft of the molds, thus they are not aligned perpendicular
to the fuselage. I considered that a minor gaff and ignored it.
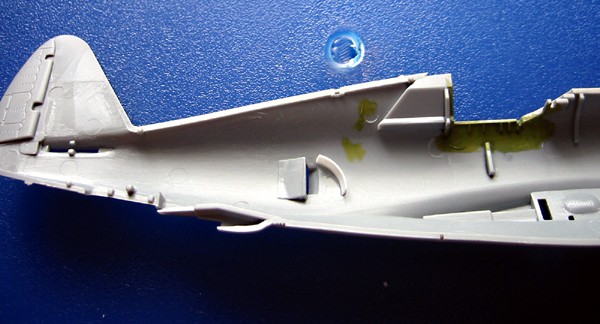
The misalignment of the ribbing detail in the wheel wells was
likewise ignored. I did add a strip of plastic strip to prevent a see
through effect through the intercooler exhausts on the rear fuselage.
After getting the entire airframe assembled, I sprayed the model with
Tamiya Gloss white in a patchy sort of way allowing some areas to be
darker than others.
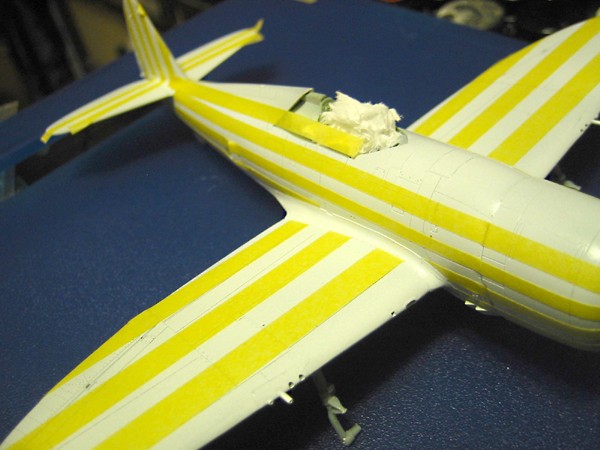
After allowing this to dry hard for a week, I brushed off all the
dust and started masking off the areas to remain white. I ended up
cutting Tamiya’s thinnest width tape in half and used this to mask off
the white areas. The upper wings received large stripes while the
undersides were solid red. Tamiya Acrylic Red was misted on in several
thin coats.
After removing the tape and other masking, I had in my hands a red
and white bird. Cool. I lightly sanded down the paint ridges resulting
from the masking. This allowed a little red “sanding dust” to make its
way into the recessed panel lines accenting them nicely.
Welcome to Decal Hell...
After allowing this to set for a week (actually I was to busy at work
to do any model building for a week), I added some Superscale Stars and
Bars. The red and stripes showed through the large insignia decals on
the upper wing so I added a second decal on top of the fully dry first
decal. This made the underlying strips less visible. The fuselage decals
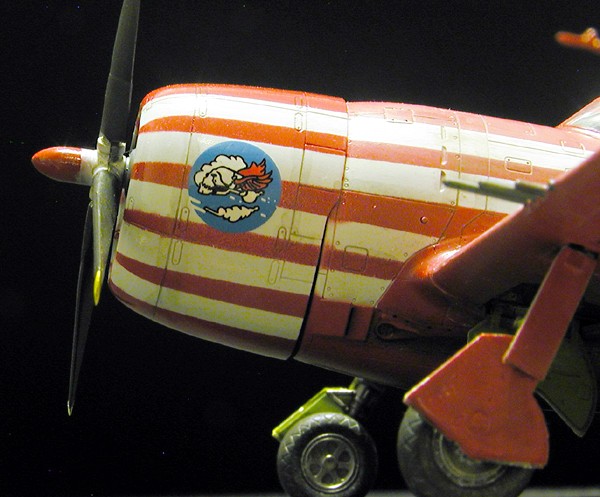
are only one decal thick. I ran out of insignia of that particular size.
I swiped the nose art from a Wingmasters P-40B decal sheet (free with
subscription). I just felt like adding some color to the model…..okay, I
wanted to add a different color to the model. A coat of future was
brushed on to seal all the decals and to protect the paint from my
grubby paws. A sludge wash from a bottle of filthy thinner was applied
to all the panel lines to darken them. A final filter of Windsor &
Newton white oil paint thinned with Duro brand Durotine was added to
dull the color down a bit and make the paint look sun faded. For some
inexplicable reason, I wanted the cowl to remain bright and un-faded, so
no white wash was added to the cowl. It makes for a very interesting
comparison.
Finishing with Flying Colors...
After all the painting was finished, the last tidbits were added to
the model.
The canopy was installed in the closed position after adding the
seat, control column, gun sight and armored glass into the cockpit. The
canopy frames were touched with red paint free hand (that’s why they are
so crooked) and that was that. I had always wanted to do an Fw 190D-9
with the white and red undersides but never got around to it. Now this
model has satisfied that urge and allowed me to do it with a new kit
from Tamiya.
Now what to paint the Tamiya’s 1/72nd scale P-47D Bubble top when it
arrives on my doorstep?
Hmmmmmm….
Click the thumbnails below to view larger images:
Modelling the P-47
Thunderbolt
Osprey Modelling 11 |
|
|
|
|
Author: Brett Green
US Price: $17.95
UK Price: £12.99
Publisher:
Osprey Publishing
Publish Date:
July 25, 2004
Details: 80 pages; ISBN: 1841767956 |
|
|
Model, Images and Text Copyright © 2004
by Valentin E. Bueno
Page Created 02 October, 2004
Last Updated
03 October, 2004
Back to
HyperScale Main Page
|
 Home
| What's New |
Features |
Gallery |
Reviews |
Reference |
Forum |
Search
Home
| What's New |
Features |
Gallery |
Reviews |
Reference |
Forum |
Search