|
Foil Wrapped
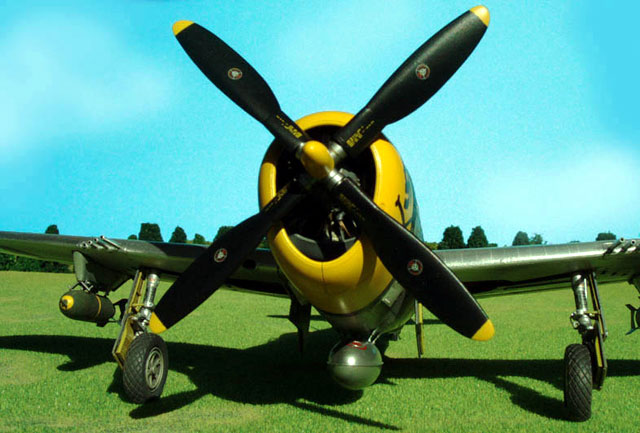
Republic P-47D-30
Thunderbolt "Bubbletop"
by Bucky Sheftall
|
 |
|
Republic P-47D
Thunderbolt "Bubbletop"
Glenn Eagleston’s P-47 D-30 s/n 420473 |

Tamiya's
1/48 scale P-47D Bubbletop is available online from Squadron
Fine bomber escort and
fighter sweep service with Gabreski, Schilling & Co. notwithstanding, the
Bubbletop Jug seems to my sensibilities to be most in its element down and
dirty, breaking the back of the German Army in France with the other
tactical mud movers of the Ninth Air Force – a unit whose vast
contribution to Allied victory in Western Europe, unfortunately, tends to
be overlooked in the history books in favor of the exploits of the more
“glamorous” Mighty Eighth.
VERDICT: Gotta
build a mud mover, it’s gotta be NMF, and for those of you familiar with
my insistence on being able to combine my modeling and baking needs, you
know that means there’s some foiling in our future (incidentally, there’s
also some Future on our foil, but that’s for later).
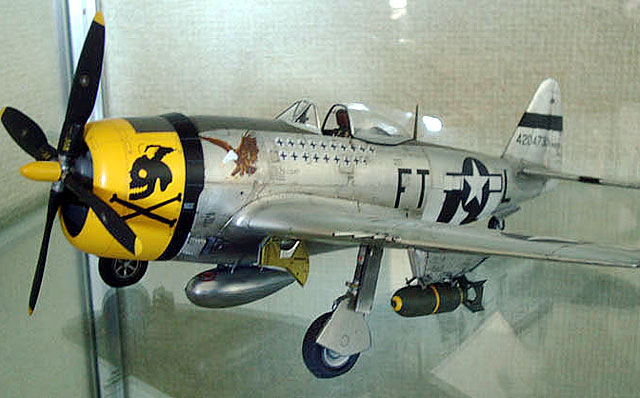
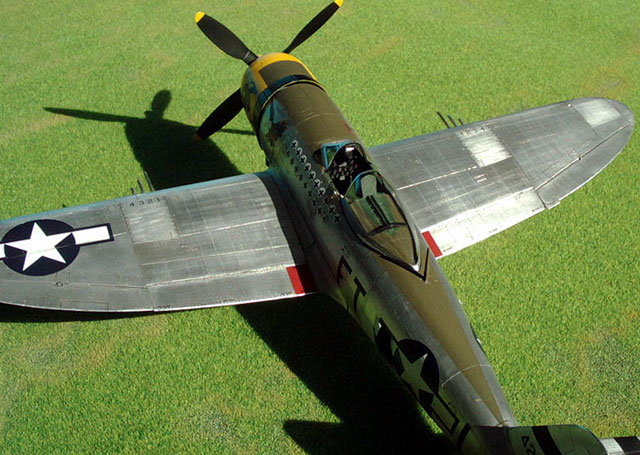
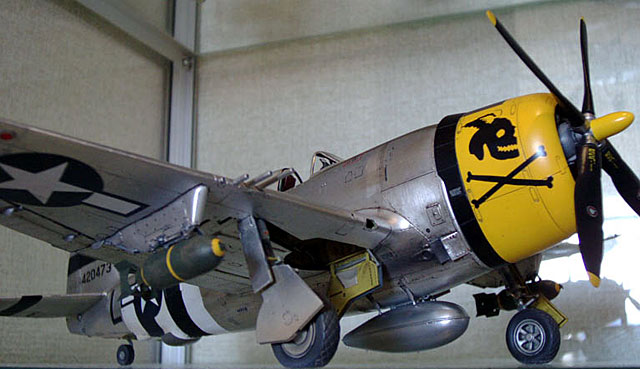
So, now that we know we’re
going 9AF, which mud mover to model? Personally, I think there are few 9AF
Thunderbolt schemes as impressive as the 353FS/354FG skull and crossbones
motif of MAJ Glenn Eagleston’s P-47 D-30 s/n 420473, which also carries
the same Eagle Rampant and black cross-on-white ball score mark familiar
to millions of fans of this officer’s even better-known P-51 mount. While
I don’t know if I’d go so far as to echo Tamiya Modeling Magazine’s
youthfully exuberant kudos of “coolest plane of all time” (I think that
honor must go to Pussy Galore’s nerve gas Beechcraft in “Goldfinger”,
actually), you must admit, this really is one ba-a-a-ad mother of a plane
– even if MAJ Eagleston didn’t score any of his kills in it. In any case,
you can be sure it was the last thing many a hapless 20mm Flak gunner or
Sdfz.251 driver ever saw…
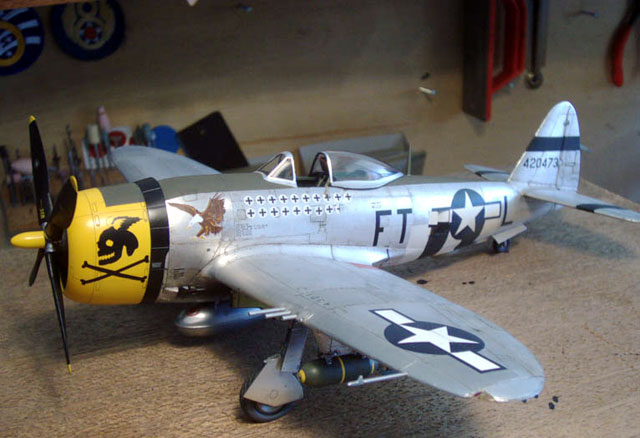
I built this model pretty
much OOB, with the exception of pre-painted Eduard lap belts, True Details
bulged wheels, and replacing the funhouse mirror/shotglass rear canopy
with the far superior item available in the older Hasegawa Jug (I tried
the beautiful Squadron clear vac, but it was way too big, created as it
was for the old Monogram kit, I suppose). The engine was spiced up with
some fine solder wire for ignition lines, and the blast tubes were
replaced with real aluminum tubes I found at the local hobby shop that
just happen to be a perfect match – both inside and outer diameter – to
the kit parts. Leftover photoetched 500lb bomb fins from an old Monogram
Jug re-issue were also put to use.
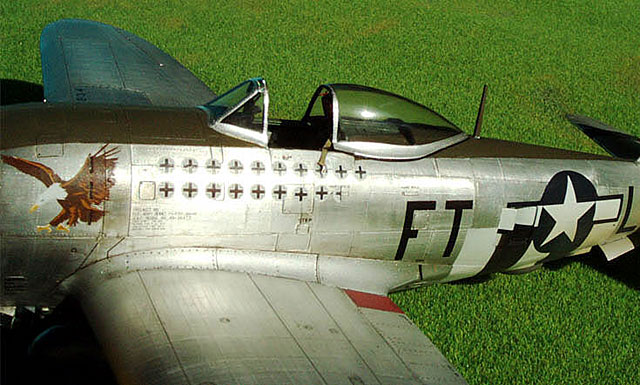
The Tamiya kit itself, I
assume, needs no introduction by this point. It fits together so well that
I was able to indulge myself in something that makes foiling far, far
easier a task than it might have been on a less well-fitting kit – i.e., I
was able to foil the wings, fuselage and horizontal stabs as separate
“prefabricated” units. If you have ever tried foiling an airplane model,
the advantages of this will be immediately obvious – i.e., no unwieldy
joints to deal with. This really pays off in an area like wing fillets,
which on the Thunderbolt are big, involved compound curves. Not having to
worry about how to pull the foil down to meet the main wing surfaces AFTER
negotiating these dangerous curves was an ENORMOUS help.
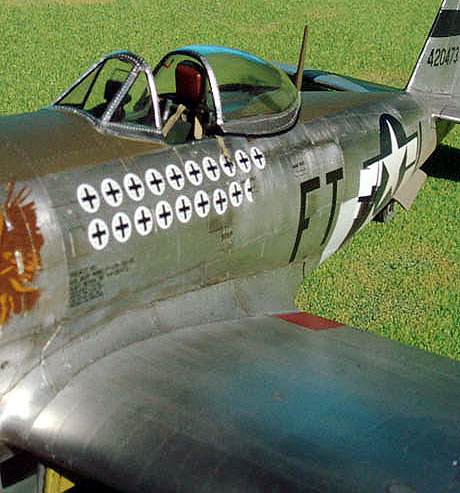 Cockpit
was done in the de rigeur Dull Dark Green (a color of which, I
admit, I had no knowledge until a few months ago! Oh, how much we can
learn on HyperScale!). Tamiya’s detailing is good enough straight from the
box to forgo the need for anything fancier than adding a couple of solder
wires behind the instrument panel, as this area is fairly conspicuous
through the windscreen “glass.” Cockpit
was done in the de rigeur Dull Dark Green (a color of which, I
admit, I had no knowledge until a few months ago! Oh, how much we can
learn on HyperScale!). Tamiya’s detailing is good enough straight from the
box to forgo the need for anything fancier than adding a couple of solder
wires behind the instrument panel, as this area is fairly conspicuous
through the windscreen “glass.”
Anti-glare OD and D-Day
striping were sprayed right on top of the Future-coated foil. Make sure
you give the Future plenty of time to cure before attempting ANY masking
over foil. The foil is basically “tape” itself, so remember the old rule
that “what’s underneath had better be stickier than what you mask with”.
The foil was flatted down considerably with homemade Future/Tamiya Flat
Base/Tamiya Neutral Gray overspray.
For reasons of convenience (and sanity), I chose to go the Alclad route
with the rear canopy frame and the 75-gallon belly tank.
Areas of the model close
to the “ground” were given a final overspray of heavily thinned Tamiya
Flat Earth (Tamiya folks never heard of Columbus, evidently – ha-ha-ha).
Some Musings on “Patchwork” Panel Tone Differences in NMF
Until recently, I have
been an adherent to the (apparently) commonly held belief among modelers
that the “patchwork” effect evident in the appearance of actual NMF
warbirds is due to differences in alloys – and thus metal colors – in
different airframe panels. This is undoubtedly true for NMF jet aircraft,
in the case where special heat-resistant alloys are necessary near areas
such as engine, etc., but I do not believe this was necessarily true for
WW2 birds, where I tend to believe that Duralmin was Duralmin, and not a
whole lot of metallurgical tinkering was going on within the construction
of a single airframe. Recently, I have begun to wonder if perhaps the
patchwork effect is actually due to some optical illusion, perhaps in the
stressing or different directions of the “grain” of adjacent panels
reflecting sunlight differently.
Doing the foil work on my
Jug, I decided to try an experiment to test this hypothesis: instead of my
usual technique of staining panels with varying oil paint shades, etc.,
after laying the foil, I instead masked off panels (always keeping
symmetry between port and starboard sides of airframe) with artist’s clear
plastic masking material and scratched the surface of the panels in
different directions with steel wool. Removing the masking and holding the
results up to daylight – voila! – something that looks like it just rolled
off the line at Evansville!
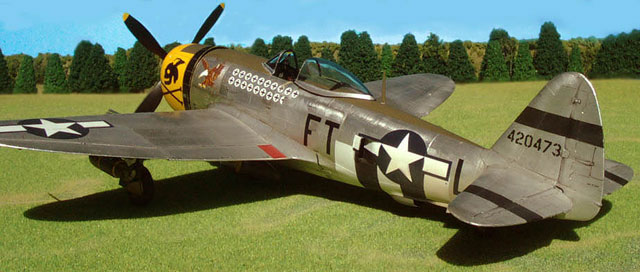
Photography for this
project was done with a fairly cheapo (about $200US) Casio QV-2100 digital
camera, shooting the model on what I call my “Wauchop base” – a
meter-square plywood board covered with model railroad grass “carpeting”
and bordered on the far end with little OO scale railroad trees.
“Distance” fading of the treeline/horizon was done with the Blur tool from
Photoshop, and this software was also used on occasion to fill in sky
where the light blue cardboard backdrop I use couldn’t cover all of the
background. Lighting was done with good old low angle February sunlight
streaming through my workshop window.
-
Republic's P-47
Thunderbolt/From Seversky to Victory by Warren M. Bodie
-
Fighter Command by
Jeffrey L. Ethell and Robert T. Sand
-
Detail and Scale Vol. 54
P-47 Thunderbolt by Bert Kinzey
-
Squadron Walk Around #11
P-47 Thunderbolt
-
Thunderbolt Republic P-47
by Dan Patterson and Paul Perkins
-
Aero Detail 14 Republic
P-47 Thunderbolt by Shigeru Nohara (English text by Scott T. Hards)
-
P-47 Thunderbolt Aces of
the Ninth and Fifteenth Air Forces by Jerry Scutts (Osprey Aircraft of
the Aces 30)
-
Bunrin Famous Airplanes
of the World No. 37
Modelling the P-47
Thunderbolt
Osprey Modelling 11 |
|
|
|
|
Author: Brett Green
US Price: $17.95
UK Price: £12.99
Publisher:
Osprey Publishing
Publish Date:
July 25, 2004
Details: 80 pages; ISBN: 1841767956 |
|
|
Click the thumbnails below to view larger
images:
Model, Images and Text
Copyright © 2004 by
Bucky Sheftall
Page Created 10 March, 2004
Last Updated
03 October, 2004
Back to
HyperScale Main Page |
 Home
| What's New |
Features |
Gallery |
Reviews |
Reference |
Forum |
Search
Home
| What's New |
Features |
Gallery |
Reviews |
Reference |
Forum |
Search